
Knowledgebase (2370)
Children categories
PDF format has now become a standard for sharing and preserving documents. When working with PDF files, you may sometimes need to copy specific pages in the PDF to extract valuable content, create summaries, or simply share relevant sections without distributing the entire document. In this article, you will learn how to copy pages in PDF in Python using Spire.PDF for Python.
Install Spire.PDF for Python
This scenario requires Spire.PDF for Python. It can be easily installed in your Windows through the following pip command.
pip install Spire.PDF
If you are unsure how to install, please refer to this tutorial: How to Install Spire.PDF for Python on Windows
Copy Pages within the Same PDF in Python
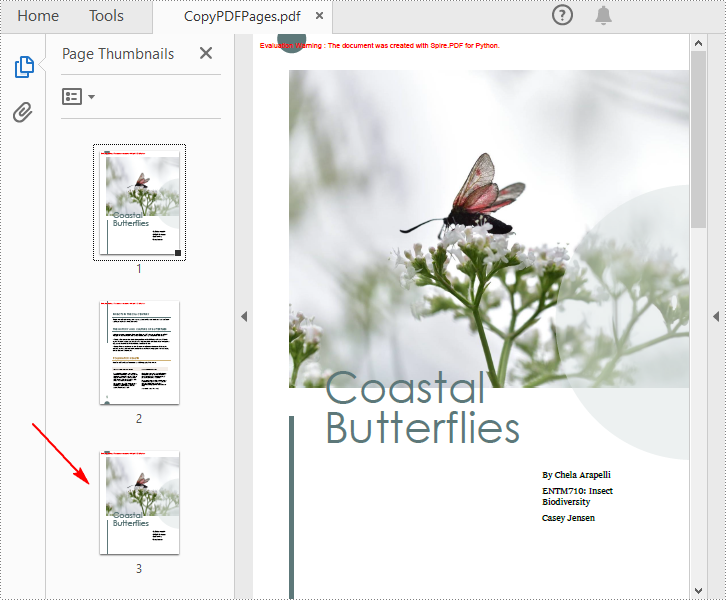
To duplicate PDF pages, you can first create template based on a specified page in PDF, and then draw the template on a newly added page through the PdfPageBase.Canvas.DrawTemplate() method. The following are the detailed steps.
- Create a PdfDocument instance.
- Load a PDF file using PdfDocument.LoadFromFile() method.
- Get a specified page using PdfDocument.Pages[] property.
- Get the size of the page using PdfPageBase.Size property.
- Create a template based on the page using PdfPageBase.CreateTemplate() method.
- Add a new page of the same size at the end using PdfDocument.Pages.Add(size: SizeF, margins: PdfMargins) method. Or you can insert a new page of the same size at a specified location using PdfDocument.Pages.Insert(index: int, size: SizeF, margins: PdfMargins) method.
- Draw template on the newly added page using PdfPageBase.Canvas.DrawTemplate(template: PdfTemplate, location: PointF) method.
- Save the result file using PdfDocument.SaveToFile() method.
- Python
from spire.pdf.common import *
from spire.pdf import *

# Create a PdfDocument object
pdf = PdfDocument()

# Load a PDF file from disk
pdf.LoadFromFile("Butterflies.pdf")

# Get the first page
page = pdf.Pages[0]

# Get the size of the page
size = page.Size

# Create a template based on the page
template = page.CreateTemplate()

# Add a new page of the same size at the end
page = pdf.Pages.Add(size, PdfMargins(0.0))
# Insert a new page at the specified location
# page = pdf.Pages.Insert(1, size, PdfMargins(0.0))

# Draw the template on the newly added page
page.Canvas.DrawTemplate(template, PointF(0.0, 0.0))

# Save the PDF file
pdf.SaveToFile("CopyPDFPages.pdf");
pdf.Close()
Copy Pages from One PDF to Another in Python
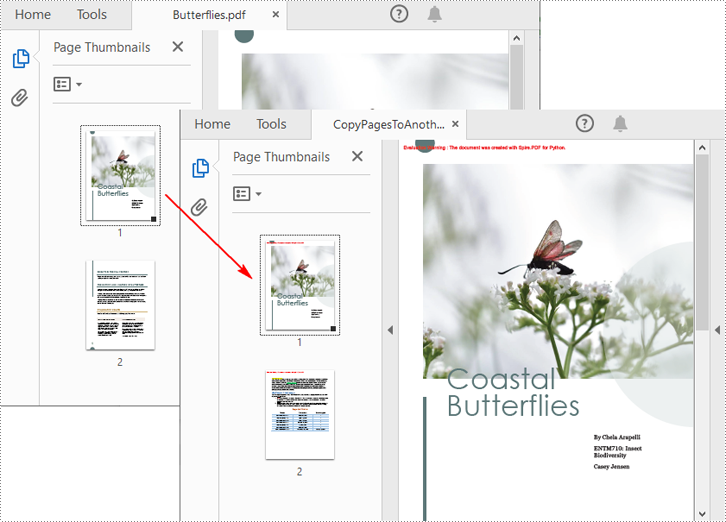
Spire.PDF for Python also allows you to load two PDF files, create templates based on the pages in one PDF file, and then draw them onto the pages in another PDF file. The following are the detailed steps.
- Create a PdfDocument instance.
- Load two PDF files using PdfDocument.LoadFromFile() method.
- Get a specified page in the first PDF using PdfDocument.Pages[] property.
- Get the size of the page using PdfPageBase.Size property.
- Create a template based on the page using PdfPageBase.CreateTemplate() method.
- Insert a new page of the same size at a specified location in the second PDF using PdfDocument.Pages.Insert(index: int, size: SizeF, margins: PdfMargins) method. Or you can add a new page of the same size at the end of the second PDF using PdfDocument.Pages.Add(size: SizeF, margins: PdfMargins) method.
- Draw template on the newly added page using PdfPageBase.Canvas.DrawTemplate(template: PdfTemplate, location: PointF) method.
- Save the result file using PdfDocument.SaveToFile() method.
- Python
from spire.pdf.common import *
from spire.pdf import *

# Load the first PDF file
pdf1 = PdfDocument()
pdf1.LoadFromFile("Butterflies.pdf")

# Load the second PDF file
pdf2 = PdfDocument()
pdf2.LoadFromFile("SamplePDF.pdf")

# Get the first page in the first PDF file
page = pdf1.Pages[0]

# Get the size of the page
size = page.Size

# Create a template based on the page
template = page.CreateTemplate()

# Insert a new page at a specified location in the second PDF file
newPage = pdf2.Pages.Insert(0, size, PdfMargins(0.0))

# Add a new page at the end of the second PDF file
# newPage = pdf2.Pages.Add(size, PdfMargins(0.0))

# Draw the template on the newly added page
newPage.Canvas.DrawTemplate(template, PointF(0.0, 0.0))

# Save the result file
pdf2.SaveToFile("CopyPagesToAnotherPDF.pdf")
pdf2.Close()
Apply for a Temporary License
If you'd like to remove the evaluation message from the generated documents, or to get rid of the function limitations, please request a 30-day trial license for yourself.
A pie chart is a circular statistical graphic that is divided into slices to illustrate numerical proportions. Each slice represents a category's contribution to the whole, making it an effective way to visualize relative sizes. In this article, you will learn how to create a standard pip chart, an exploded pip chart, and a pie of pie chart in Excel using Spire.XLS for Python.
- Create a Pie Chart in Excel
- Create an Exploded Pie Chart in Excel
- Create a Pie of Pie Chart in Excel
Install Spire.XLS for Python
This scenario requires Spire.XLS for Python and plum-dispatch v1.7.4. They can be easily installed in your Windows through the following pip command.
pip install Spire.XLS
If you are unsure how to install, please refer to this tutorial: How to Install Spire.XLS for Python on Windows
Create a Pie Chart in Excel in Python
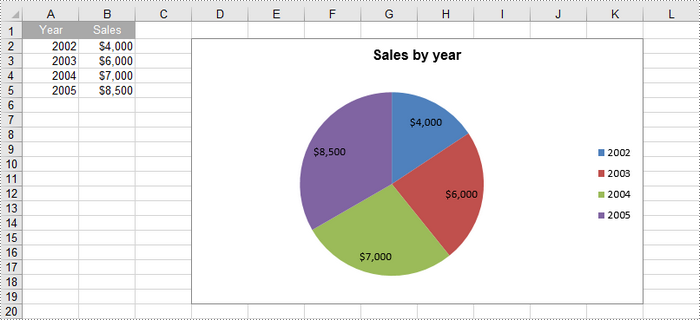
To add a pie chart to a worksheet, use the Worksheet.Charts.Add(ExcelChartType.Pie) method, which returns a Chart object. You can then set various properties, such as DataRange, ChartTitle, LeftColumn, TopRow, and Series to define the chart's data, title, position, and series formatting.
Here are the steps to create a pie chart in Excel:
- Create a Workbook object.
- Retrieve a specific worksheet from the workbook.
- Insert values into the worksheet cells that will be used as chart data.
- Add a pie chart to the worksheet using Worksheet.Charts.Add(ExcelChartType.Pie) method.
- Set the chart data using Chart.DataRange property.
- Define the chart's position and size using Chart.LeftColumn, Chart.TopRow, Chart.RightColumn, and Chart.BottomRow properties.
- Set the chart title using Chart.ChartTitle property.
- Access and format the series through Chart.Series property.
- Save the workbook as an Excel file.
- Python
from spire.xls import *
from spire.xls.common import *

# Create a workbook
workbook = Workbook()

# Get the first sheet
sheet = workbook.Worksheets[0]

# Set values of the specified cells
sheet.Range["A1"].Value = "Year"
sheet.Range["A2"].Value = "2002"
sheet.Range["A3"].Value = "2003"
sheet.Range["A4"].Value = "2004"
sheet.Range["A5"].Value = "2005"
sheet.Range["B1"].Value = "Sales"
sheet.Range["B2"].NumberValue = 4000
sheet.Range["B3"].NumberValue = 6000
sheet.Range["B4"].NumberValue = 7000
sheet.Range["B5"].NumberValue = 8500

# Format the cells
sheet.Range["A1:B1"].RowHeight = 15
sheet.Range["A1:B1"].Style.Color = Color.get_DarkGray()
sheet.Range["A1:B1"].Style.Font.Color = Color.get_White()
sheet.Range["A1:B1"].Style.VerticalAlignment = VerticalAlignType.Center
sheet.Range["A1:B1"].Style.HorizontalAlignment = HorizontalAlignType.Center
sheet.Range["B2:B5"].Style.NumberFormat = "\"$\"#,##0"

# Add a pie chart
chart = sheet.Charts.Add(ExcelChartType.Pie)

# Set region of chart data
chart.DataRange = sheet.Range["B2:B5"]
chart.SeriesDataFromRange = False

# Set position of chart
chart.LeftColumn = 4
chart.TopRow = 2
chart.RightColumn = 12
chart.BottomRow = 20

# Set chart title
chart.ChartTitle = "Sales by year"
chart.ChartTitleArea.IsBold = True
chart.ChartTitleArea.Size = 12

# Get the first series
cs = chart.Series[0]

# Set category labels for the series
cs.CategoryLabels = sheet.Range["A2:A5"]

# Set values for the series
cs.Values = sheet.Range["B2:B5"]

# Show vales in data labels
cs.DataPoints.DefaultDataPoint.DataLabels.HasValue = True

# Save the workbook to an Excel file
workbook.SaveToFile("output/PieChart.xlsx", ExcelVersion.Version2016)

# Dispose resources
workbook.Dispose()
Create an Exploded Pie Chart in Excel in Python
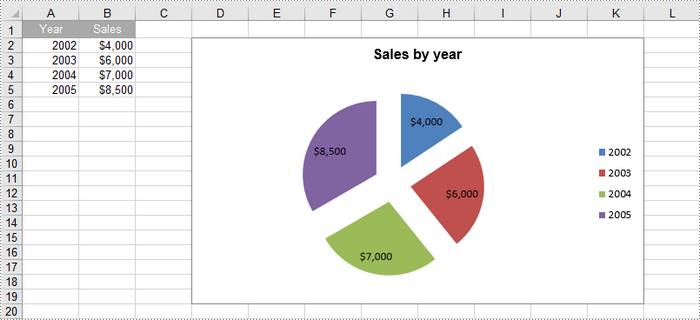
An exploded pie chart is a variation of the standard pie chart where one or more slices are separated or "exploded" from the main chart. To create an exploded pie chart, you can use the Worksheet.Charts.Add(ExcelChartType.PieExploded) method.
The steps to create an exploded pip chart in Excel are as follows:
- Create a Workbook object.
- Retrieve a specific worksheet from the workbook.
- Insert values into the worksheet cells that will be used as chart data.
- Add an exploded pie chart to the worksheet using Worksheet.Charts.Add(ExcelChartType. PieExploded) method.
- Set the chart data using Chart.DataRange property.
- Define the chart's position and size using Chart.LeftColumn, Chart.TopRow, Chart.RightColumn, and Chart.BottomRow properties.
- Set the chart title using Chart.ChartTitle property.
- Access and format the series through Chart.Series property.
- Save the workbook as an Excel file.
- Python
from spire.xls import *
from spire.xls.common import *

# Create a workbook
workbook = Workbook()

# Get the first sheet
sheet = workbook.Worksheets[0]

# Set values of the specified cells
sheet.Range["A1"].Value = "Year"
sheet.Range["A2"].Value = "2002"
sheet.Range["A3"].Value = "2003"
sheet.Range["A4"].Value = "2004"
sheet.Range["A5"].Value = "2005"
sheet.Range["B1"].Value = "Sales"
sheet.Range["B2"].NumberValue = 4000
sheet.Range["B3"].NumberValue = 6000
sheet.Range["B4"].NumberValue = 7000
sheet.Range["B5"].NumberValue = 8500

# Format the cells
sheet.Range["A1:B1"].RowHeight = 15
sheet.Range["A1:B1"].Style.Color = Color.get_DarkGray()
sheet.Range["A1:B1"].Style.Font.Color = Color.get_White()
sheet.Range["A1:B1"].Style.VerticalAlignment = VerticalAlignType.Center
sheet.Range["A1:B1"].Style.HorizontalAlignment = HorizontalAlignType.Center
sheet.Range["B2:B5"].Style.NumberFormat = "\"$\"#,##0"

# Add an exploded pie chart
chart = sheet.Charts.Add(ExcelChartType.PieExploded)

# Set region of chart data
chart.DataRange = sheet.Range["B2:B5"]
chart.SeriesDataFromRange = False

# Set position of chart
chart.LeftColumn = 4
chart.TopRow = 2
chart.RightColumn = 12
chart.BottomRow = 20

# Set chart title
chart.ChartTitle = "Sales by year"
chart.ChartTitleArea.IsBold = True
chart.ChartTitleArea.Size = 12

# Get the first series
cs = chart.Series[0]

# Set category labels for the series
cs.CategoryLabels = sheet.Range["A2:A5"]

# Set values for the series
cs.Values = sheet.Range["B2:B5"]

# Show vales in data labels
cs.DataPoints.DefaultDataPoint.DataLabels.HasValue = True

# Save the workbook to an Excel file
workbook.SaveToFile("output/ExplodedPieChart.xlsx", ExcelVersion.Version2016)

# Dispose resources
workbook.Dispose()
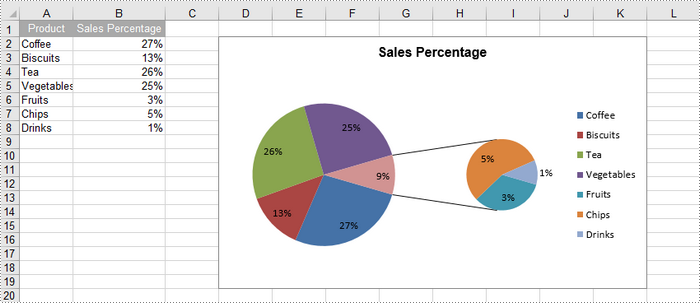
Create a Pie of Pie Chart in Excel in Python
A pie of pie chart is a specialized type of pie chart that allows for more detailed representation of data by providing a secondary pie chart for specific categories. To add a pip of pie chart to a worksheet, use the Worksheet.Charts.Add(ExcelChartType.PieOfPie) method.
The detailed steps to create a pie of pie chart in Excel are as follows:
- Create a Workbook object.
- Retrieve a specific worksheet from the workbook.
- Insert values into the worksheet cells that will be used as chart data.
- Add a pie of pie chart to the worksheet using Worksheet.Charts.Add(ExcelChartType.PieOfPie) method.
- Set the chart data, position, size, title using the properties under the Chart object.
- Access the first series using Chart.Series[0] property.
- Set the split value that determines what displays in the secondary pie using Series.Format.Options.SplitValue property.
- Save the workbook as an Excel file.
- Python
from spire.xls import *
from spire.xls.common import *

# Create a workbook
workbook = Workbook()

# Get the first sheet
sheet = workbook.Worksheets[0]

# Set values of the specified cells
sheet.Range["A1"].Value = "Product"
sheet.Range["A2"].Value = "Coffee"
sheet.Range["A3"].Value = "Biscuits"
sheet.Range["A4"].Value = "Tea"
sheet.Range["A5"].Value = "Vegetables"
sheet.Range["A6"].Value = "Fruits"
sheet.Range["A7"].Value = "Chips"
sheet.Range["A8"].Value = "Drinks"
sheet.Range["B1"].Value = "Sales Percentage"
sheet.Range["B2"].NumberValue = 0.27
sheet.Range["B3"].NumberValue = 0.13
sheet.Range["B4"].NumberValue = 0.26
sheet.Range["B5"].NumberValue = 0.25
sheet.Range["B6"].NumberValue = 0.03
sheet.Range["B7"].NumberValue = 0.05
sheet.Range["B8"].NumberValue = 0.01

# Autofit column width
sheet.AutoFitColumn(2)

# Format the cells
sheet.Range["A1:B1"].RowHeight = 15
sheet.Range["A1:B1"].Style.Color = Color.get_DarkGray()
sheet.Range["A1:B1"].Style.Font.Color = Color.get_White()
sheet.Range["A1:B1"].Style.VerticalAlignment = VerticalAlignType.Center
sheet.Range["A1:B1"].Style.HorizontalAlignment = HorizontalAlignType.Center
sheet.Range["B2:B8"].Style.NumberFormat = "0%"

# Add a pie of pie chart
chart = sheet.Charts.Add(ExcelChartType.PieOfPie)

# Set region of chart data
chart.DataRange = sheet.Range["B2:B58"]
chart.SeriesDataFromRange = False

# Set position of chart
chart.LeftColumn = 4
chart.TopRow = 2
chart.RightColumn = 12
chart.BottomRow = 20

# Chart title
chart.ChartTitle = "Sales Percentage"
chart.ChartTitleArea.IsBold = True
chart.ChartTitleArea.Size = 12

# Get the first series
cs = chart.Series[0]

# Set category labels for the series
cs.CategoryLabels = sheet.Range["A2:A8"]

# Set values for the series
cs.Values = sheet.Range["B2:B8"]

# Show vales in data labels
cs.DataPoints.DefaultDataPoint.DataLabels.HasValue = True

# Set the size of the secondary pie
cs.Format.Options.PieSecondSize = 50

# Set the split value, which determines what displays in the secondary pie
cs.Format.Options.SplitType = SplitType.Percent
cs.Format.Options.SplitValue = 10

# Save the workbook to an Excel file
workbook.SaveToFile("output/PieOfPieChart.xlsx", ExcelVersion.Version2016)

# Dispose resources
workbook.Dispose()
Apply for a Temporary License
If you'd like to remove the evaluation message from the generated documents, or to get rid of the function limitations, please request a 30-day trial license for yourself.
The need to convert PDF documents into more flexible and editable formats, such as Markdown, has become a common task for developers and content creators. Converting PDFs to Markdown files facilitates easier editing and version control, and enhances content portability across different platforms and applications, making it particularly suitable for modern web publishing workflows. By utilizing Spire.PDF for .NET, developers can automate the conversion process, ensuring that the rich formatting and structure of the original PDFs are preserved in the resulting Markdown files.
This article will demonstrate how to use Spire.PDF for .NET to convert PDF documents to Markdown format with C# code.
Install Spire.PDF for .NET
To begin with, you need to add the DLL files included in the Spire.PDF for.NET package as references in your .NET project. The DLL files can be either downloaded from this link or installed via NuGet.
PM> Install-Package Spire.PDF
Convert PDF Documents to Markdown Files
With the Spire.PDF for .NET library, developers can easily load any PDF file using the PdfDocument.LoadFromFile(string filename) method and then save the document in the desired format by calling the PdfDocument.SaveToFile(string filename, FileFormat fileFormat) method. To convert a PDF to Markdown format, simply specify the FileFormat.Markdown enumeration as a parameter when invoking the method.
The detailed steps for converting PDF documents to Markdown files are as follows:
- Create an instance of PdfDocument class.
- Load a PDF document using PdfDocument.LoadFromFile(string filename) method.
- Convert the document to a Markdown file using PdfDocument.SaveToFile(string filename, FileFormat.Markdown) method.
- C#
using Spire.Pdf;

namespace PDFToMarkdown
{
    class Program
    {
        static void Main(string[] args)
        {
            // Create an instance of PdfDocument class
            PdfDocument pdf = new PdfDocument();

            // Load a PDF document
            pdf.LoadFromFile("Sample.pdf");

            // Convert the document to Markdown file
            pdf.SaveToFile("output/PDFToMarkdown.md", FileFormat.Markdown);

            // Release resources
            pdf.Close();
        }
    }
}
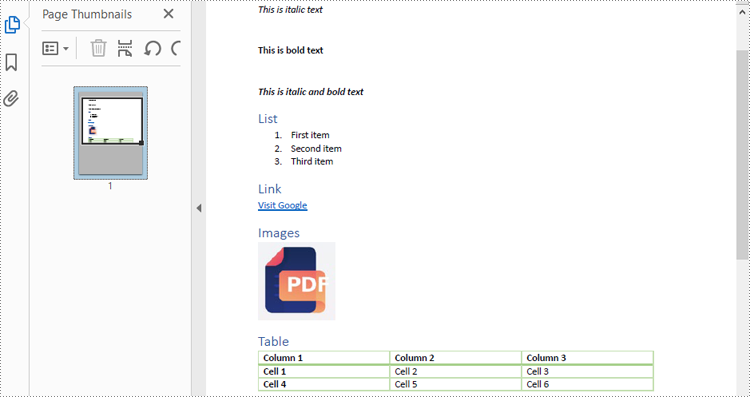
The PDF Document:
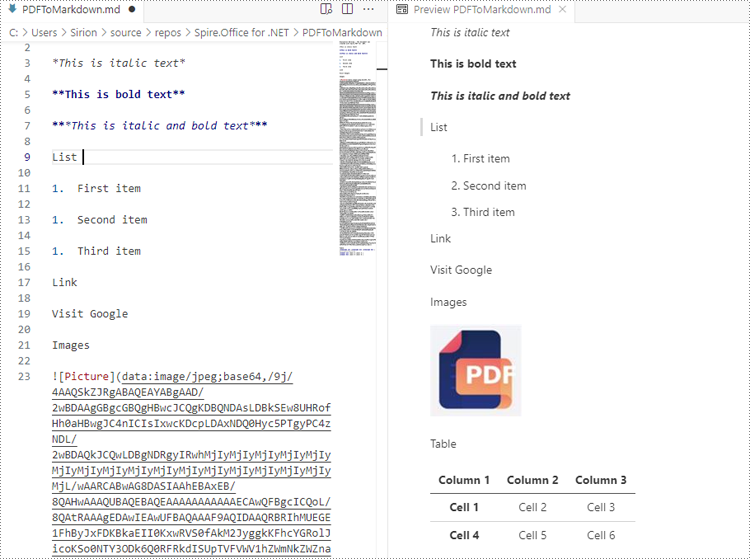
The Result Markdown File:
Convert PDF to Markdown by Streams
In addition to directly reading files for manipulation, Spire.PDF for .NET also supports loading a PDF document from a stream using PdfDocument.LoadFromStream() method and converting it to a Markdown file stream using PdfDocument.SaveToStream() method. Using streams reduces memory usage, supports large files, enables real-time data transfer, and simplifies data exchange with other systems.
The detailed steps for converting PDF documents to Markdown files by streams are as follows:
- Create a Stream object of PDF documents by downloading from the web or reading from a file.
- Load the PDF document from the stream using PdfDocument.LoadFromStream(Stream stream) method.
- Create another Stream object to store the converted Markdown file.
- Convert the PDF document to a Markdown file stream using PdfDocument.SaveToStream(Stream stream, FileFormat.Markdown) method.
- C#
using Spire.Pdf;
using System.IO;
using System.Net.Http;

namespace PDFToMarkdownByStream
{
    class Program
    {
        static async Task Main(string[] args)
        {
            // Create an instance of PdfDocument class
            PdfDocument pdf = new PdfDocument();

            // Download a PDF document from a url as bytes
            using (HttpClient client = new HttpClient())
            {
                byte[] pdfBytes = await client.GetByteArrayAsync("http://example.com/Sample.pdf");

                // Create a MemoryStream using the bytes
                using (MemoryStream inputStream = new MemoryStream(pdfBytes))
                {
                    // Load the PDF document from the stream
                    pdf.LoadFromStream(inputStream);

                    // Create another MemoryStream object to store the Markdown file
                    using (MemoryStream outputStream = new MemoryStream())
                    {
                        // Convert the PDF document to a Markdown file stream
                        pdf.SaveToStream(outputStream, FileFormat.Markdown);
                        outputStream.Position = 0; // Reset the position of the stream for subsequent reads

                        // Upload the result stream or write it to a file
                        await client.PostAsync("http://example.com/upload", new StreamContent(outputStream));
                        File.WriteAllBytes("output.md", outputStream.ToArray());
                    }
                }
            }

            // Release resources
            pdf.Close();
        }
    }
}
Apply for a Temporary License
If you'd like to remove the evaluation message from the generated documents, or to get rid of the function limitations, please request a 30-day trial license for yourself.
