
Knowledgebase (2370)
Children categories
PowerPoint presentations often contain sensitive information, such as financial data, trade secrets, or personal details. When sharing these files via email or cloud storage, it is important to prevent unauthorized individuals from accessing or viewing them. To protect the content of your PowerPoint presentation, there are various security measures you can employ. For instance, you can implement password protection, or make the presentation as final or read-only. In certain situations, you may find the need to unprotect a password-protected or encrypted PowerPoint presentation. This may be necessary when you need to share the file with the public or when the password is no longer needed. In this article, we will explain how to protect or unprotect a PowerPoint presentation in Python using Spire.Presentation for Python.
- Protect a PowerPoint Presentation with a Password
- Mark a PowerPoint Presentation as Final
- Make a PowerPoint Presentation Read-Only
- Remove Password Protection from a PowerPoint Presentation
- Remove Mark as Final Option from a PowerPoint Presentation
- Remove Read-Only Option from a PowerPoint Presentation
Install Spire.Presentation for Python
This scenario requires Spire.Presentation for Python and plum-dispatch v1.7.4. They can be easily installed in your Windows through the following pip command.
pip install Spire.Presentation
If you are unsure how to install, please refer to this tutorial: How to Install Spire.Presentation for Python on Windows
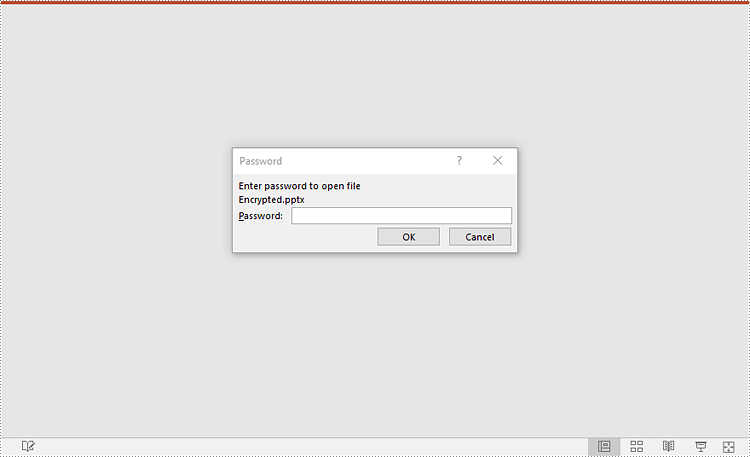
Protect a PowerPoint Presentation with a Password
You can protect a PowerPoint presentation with a password to ensure that only the people who have the right password can view and edit it.
The following steps demonstrate how to protect a PowerPoint presentation with a password:
- Create an object of the Presentation class.
- Load a PowerPoint presentation using Presentation.LoadFromFile() method.
- Encrypt the presentation with a password using Presentation.Encrypt() method.
- Save the resulting presentation using Presentation.SaveToFile() method.
- Python
from spire.presentation import *

# Create a Presentation object
presentation = Presentation()
# Load a PowerPoint presentation
presentation.LoadFromFile("Sample.pptx")

# Encrypy the presentation with a password
presentation.Encrypt("your password")

# Save the resulting presentation
presentation.SaveToFile("Encrypted.pptx", FileFormat.Pptx2016)
presentation.Dispose()
Mark a PowerPoint Presentation as Final
You can mark a PowerPoint presentation as final to inform readers that the document is final and no further editing is expected.
The following steps demonstrate how to mark a PowerPoint presentation as final:
- Create an object of the Presentation class.
- Load a PowerPoint presentation using Presentation.LoadFromFile() method.
- Mark the presentation as final using presentation.DocumentProperty.MarkAsFinal property.
- Save the resulting presentation using Presentation.SaveToFile() method.
- Python
from spire.presentation import *

# Create a Presentation object
presentation = Presentation()
# Load a PowerPoint presentation
presentation.LoadFromFile("Sample.pptx")

# Mark the presentation as final
presentation.DocumentProperty.MarkAsFinal = True

# Save the resulting presentation
presentation.SaveToFile("MarkAsFinal.pptx", FileFormat.Pptx2016)
presentation.Dispose()

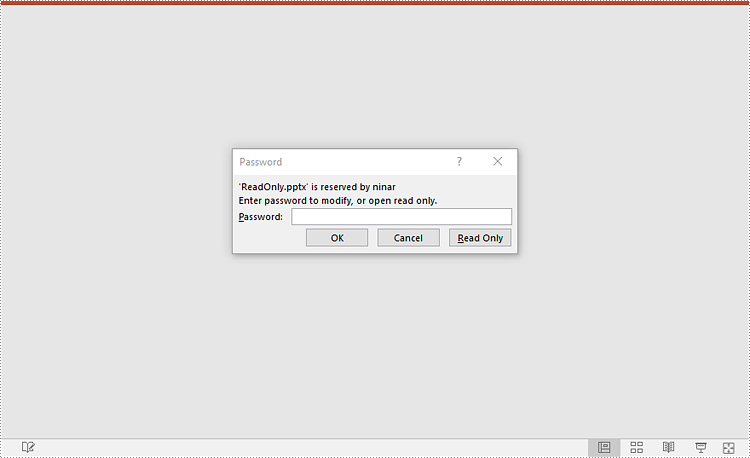
Make a PowerPoint Presentation Read-Only
You can make a PowerPoint presentation read-only to allow others to view it while preventing them from making any changes to the content.
The following steps demonstrate how to make a PowerPoint presentation read-only:
- Create an object of the Presentation class.
- Load a PowerPoint presentation using Presentation.LoadFromFile() method.
- Make the presentation read-only using Presentation.Protect() method.
- Save the resulting presentation using Presentation.SaveToFile() method.
- Python
from spire.presentation import *

# Create a Presentation object
presentation = Presentation()
# Load a PowerPoint presentation
presentation.LoadFromFile("Sample.pptx")

# Make the presentation read-only by protecting it with a password
presentation.Protect("your password")

# Save the resulting presentation
presentation.SaveToFile("ReadOnly.pptx", FileFormat.Pptx2016)
presentation.Dispose()
Remove Password Protection from a PowerPoint Presentation
You can remove password protection from a PowerPoint presentation by loading the presentation with the correct password and then removing the password protection from it.
The following steps demonstrate how to remove password protection from a PowerPoint presentation:
- Create an object of the Presentation class.
- Load a password-protected PowerPoint presentation with its password using Presentation.LoadFromFile() method.
- Remove password protection from the presentation using Presentation.RemoveEncryption() method.
- Save the resulting presentation using Presentation.SaveToFile() method.
- Python
from spire.presentation import *

# Create a Presentation object
presentation = Presentation()
# Load an encrypted PowerPoint presentation with its password
presentation.LoadFromFile("Encrypted.pptx", "your password")

# Remove password encryption from the presentation
presentation.RemoveEncryption()

# Save the resulting presentation
presentation.SaveToFile("Decrypted.pptx", FileFormat.Pptx2016)
presentation.Dispose()
Remove Mark as Final Option from a PowerPoint Presentation
The mark as final feature makes a PowerPoint presentation read-only to prevent further changes, if you decide to make changes to the presentation later, you can remove the mark as final option from it.
The following steps demonstrate how to remove the mark as final option from a PowerPoint presentation:
- Create an object of the Presentation class.
- Load a PowerPoint presentation that has been marked as final using Presentation.LoadFromFile() method.
- Remove the mark as final option from the presentation using presentation.DocumentProperty.MarkAsFinal property.
- Save the resulting presentation using Presentation.SaveToFile() method.
- Python
from spire.presentation import *

# Create a Presentation object
presentation = Presentation()
# Load a PowerPoint presentation that has been marked as final
presentation.LoadFromFile("MarkAsFinal.pptx")

# Remove the mark as final option from the presentation
presentation.DocumentProperty.MarkAsFinal = False

# Save the resulting presentation
presentation.SaveToFile("RemoveMarkAsFinal.pptx", FileFormat.Pptx2016)
presentation.Dispose()
Remove Read-Only Option from a PowerPoint Presentation
Removing the read-only option from a PowerPoint presentation allows you to regain full editing capabilities, enabling you to modify, add, or delete content within the presentation as needed.
The following steps demonstrate how to remove the read-only option from a PowerPoint presentation:
- Create an object of the Presentation class.
- Load a PowerPoint presentation that has been made as read-only using Presentation.LoadFromFile() method.
- Remove the read-only option from the presentation using Presentation.RemoveProtect() method.
- Save the resulting presentation using Presentation.SaveToFile() method.
- Python
from spire.presentation import *

# Create a Presentation object
presentation = Presentation()
# Load a PowerPoint presentation that has been made as read-only
presentation.LoadFromFile("ReadOnly.pptx")

# Remove the read-only option from the presentation
presentation.RemoveProtect()

# Save the resulting presentation
presentation.SaveToFile("RemoveReadOnly.pptx", FileFormat.Pptx2016)
presentation.Dispose()
Apply for a Temporary License
If you'd like to remove the evaluation message from the generated documents, or to get rid of the function limitations, please request a 30-day trial license for yourself.
Data validation in Excel is a powerful feature that allows you to control the type and range of data that can be entered into a cell or a range of cells. The main goal of data validation is to prevent errors and inconsistencies in data, which can lead to inaccurate analysis, reporting, and decision-making. Data validation helps ensure data accuracy by setting specific criteria for data entry. In this article, you will learn how to add or remove data validation in Excel in Python using Spire.XLS for Python.
Install Spire.XLS for Python
This scenario requires Spire.XLS for Python and plum-dispatch v1.7.4. They can be easily installed in your Windows through the following pip command.
pip install Spire.XLS
If you are unsure how to install, please refer to this tutorial: How to Install Spire.XLS for Python on Windows
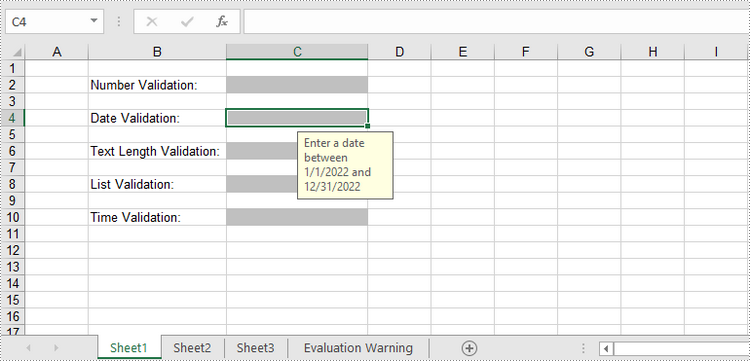
Add Various Types of Data Validation to Excel in Python
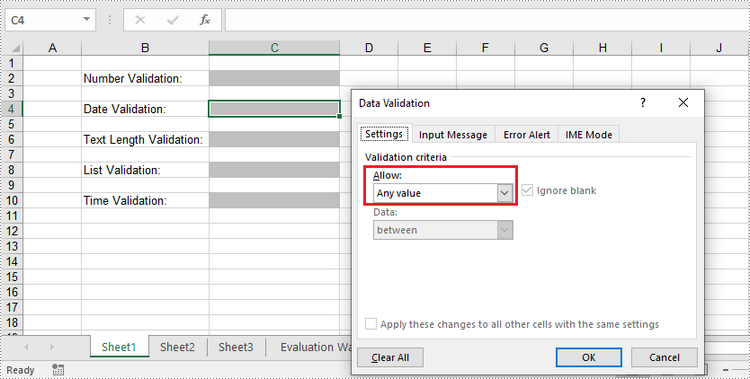
Spire.XLS for Python provides the DataValidation class to handle data validation in a specific cell or range. Through the properties under the DataValidation object, you can specify validation type, formula, compare operator, etc. The following are the steps to add data validation to an Excel cell using Spire.XLS for Python.
- Create a Workbook object.
- Get a specific worksheet through Workbook.Worksheets[index] property.
- Get a specific cell through Worksheet.Range property.
- Set the data validation type, formula, compare operator and other related attributes through the properties under CellRarange.DataValidation object.
- Save the workbook to another Excel file using Workbook.SaveToFile() method.
- Python
from spire.xls import *
from spire.xls.common import *

# Create a Workbook object
workbook = Workbook()

# Get the first worksheet
sheet = workbook.Worksheets[0]

# Insert text in cells
sheet.Range["B2"].Text = "Number Validation:"
sheet.Range["B4"].Text = "Date Validation:"
sheet.Range["B6"].Text = "Text Length Validation:"
sheet.Range["B8"].Text = "List Validation:"
sheet.Range["B10"].Text = "Time Validation:"

# Add number validation to C2
rangeNumber = sheet.Range["C2"]
rangeNumber.DataValidation.AllowType = CellDataType.Integer
rangeNumber.DataValidation.CompareOperator = ValidationComparisonOperator.Between
rangeNumber.DataValidation.Formula1 = "1"
rangeNumber.DataValidation.Formula2 = "10"
rangeNumber.DataValidation.InputMessage = "Enter a number between 1 and 10"
rangeNumber.Style.KnownColor = ExcelColors.Gray25Percent

# Add date validation to C4
rangeDate = sheet.Range["C4"]
rangeDate.DataValidation.AllowType = CellDataType.Date
rangeDate.DataValidation.CompareOperator = ValidationComparisonOperator.Between
rangeDate.DataValidation.Formula1 = "01/01/2022"
rangeDate.DataValidation.Formula2 = "31/12/2022"
rangeDate.DataValidation.InputMessage = "Enter a date between 01/01/2022 and 31/12/2022"
rangeDate.Style.KnownColor = ExcelColors.Gray25Percent

# Add text length validation to C6
rangeTextLength = sheet.Range["C6"]
rangeTextLength.DataValidation.AllowType = CellDataType.TextLength
rangeTextLength.DataValidation.CompareOperator = ValidationComparisonOperator.LessOrEqual
rangeTextLength.DataValidation.Formula1 = "5"
rangeTextLength.DataValidation.InputMessage = "Enter text lesser than 5 characters"
rangeTextLength.Style.KnownColor = ExcelColors.Gray25Percent

# Apply list validation to C8
rangeList = sheet.Range["C8"]
rangeList.DataValidation.Values = ["United States", "Canada", "United Kingdom", "Germany"]
rangeList.DataValidation.IsSuppressDropDownArrow = False
rangeList.DataValidation.InputMessage = "Choose an item from the list"
rangeList.Style.KnownColor = ExcelColors.Gray25Percent

# Apply time validation to C10
rangeTime = sheet.Range["C10"]
rangeTime.DataValidation.AllowType = CellDataType.Time
rangeTime.DataValidation.CompareOperator = ValidationComparisonOperator.Between
rangeTime.DataValidation.Formula1 = "9:00"
rangeTime.DataValidation.Formula2 = "12:00"
rangeTime.DataValidation.InputMessage = "Enter a time between 9:00 and 12:00"
rangeTime.Style.KnownColor = ExcelColors.Gray25Percent

# Auto fit width of column 2
sheet.AutoFitColumn(2)

# Set the width of column 3
sheet.Columns[2].ColumnWidth = 20

# Save to file
workbook.SaveToFile("output/DataValidation.xlsx", ExcelVersion.Version2016)
Remove Data Validation from Excel in Python
To remove the data validation from an Excel worksheet, use the Worksheet.DVTable.Remove(list rectangles) method. The parameter list specifies the cells to remove validation. The following are the detailed steps.
- Create a Workbook object.
- Load the Excel file containing data validation using Workbook.LoadFromFile() method.
- Get the specified worksheet though Workbook.Worksheets[index] property.
- Create a list of rectangles, which is used to specify the cells where the validation will be removed.
- Remove the data validation from the selected cells using Worksheet.DVTable.Remove() method.
- Save the workbook to another Excel file using Workbook.SaveToFile() method.
- Python
from spire.xls import *
from spire.xls.common import *

# Create a Workbook object
workbook = Workbook()

# Load a sample Excel file
workbook.LoadFromFile("C:\\Users\\Administrator\\Desktop\\DataValidation.xlsx")

# Get the first worksheet
worksheet = workbook.Worksheets[0]

# Create a list of rectangles to specify the cells or cell ranges where the data validation will be removed
rects= []
rects.append(Rectangle.FromLTRB(0,0,2,9))

# Remove the data validation from the selected cells
worksheet.DVTable.Remove(rects)

# Save the workbook to an Excel file
workbook.SaveToFile("output/RemoveDataValidation.xlsx")
Apply for a Temporary License
If you'd like to remove the evaluation message from the generated documents, or to get rid of the function limitations, please request a 30-day trial license for yourself.
Speaker notes in PowerPoint play a crucial role in enhancing the presenter's delivery and ensuring a seamless presentation experience. They can be added to individual slides to provide valuable guidance, reminders, and supplementary information for the presenter. Unlike the content displayed on the slides, speaker notes are typically not visible to the audience during the actual presentation. In this article, we'll explain how to add, read or delete speaker notes in a PowerPoint presentation in Python using Spire.Presentation for Python.
- Add Speaker Notes to PowerPoint in Python
- Read Speaker Notes in PowerPoint in Python
- Delete Speaker Notes from PowerPoint in Python
Install Spire.Presentation for Python
This scenario requires Spire.Presentation for Python and plum-dispatch v1.7.4. They can be easily installed in your Windows through the following pip command.
pip install Spire.Presentation
If you are unsure how to install, please refer to this tutorial: How to Install Spire.Presentation for Python on Windows
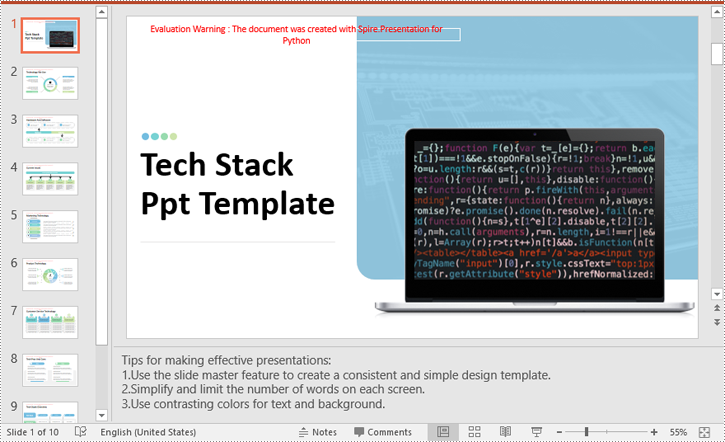
Add Speaker Notes to PowerPoint in Python
Spire.Presentation for Python provides the ISlide.AddNotesSlides() method to add notes to a PowerPoint slide. The detailed steps are as follows.
- Create a Presentation object.
- Load a PowerPoint presentation using Presentation.LoadFromFile() method.
- Get the slide that you want to add notes to using Presentation.Slides[index] property.
- Add a notes slide to the slide using ISlide.AddNotesSlides() method.
- Create TextParagraph objects and set text for the paragraphs using TextParagraph.Text property, then add the paragraphs to the notes slide using NotesSlide.NotesTextFrame.Paragraphs.Append() method.
- Save the resulting presentation using Presentation.SaveToFile() method.
- Python
from spire.presentation.common import *
from spire.presentation import *

# Create a Presentation object
ppt = Presentation()
# Load a PowerPoint presentation
ppt.LoadFromFile("Sample.pptx")

# Get the first slide
slide = ppt.Slides[0]

# Add a notes slide to the slide
notesSlide = slide.AddNotesSlide()

# Add 4 paragraphs to the notes slide
paragraph = TextParagraph()
paragraph.Text = "Tips for making effective presentations:"
notesSlide.NotesTextFrame.Paragraphs.Append(paragraph)

paragraph = TextParagraph()
paragraph.Text = "Use the slide master feature to create a consistent and simple design template."
notesSlide.NotesTextFrame.Paragraphs.Append(paragraph)

paragraph = TextParagraph()
paragraph.Text = "Simplify and limit the number of words on each screen."
notesSlide.NotesTextFrame.Paragraphs.Append(paragraph)

paragraph = TextParagraph()
paragraph.Text = "Use contrasting colors for text and background."
notesSlide.NotesTextFrame.Paragraphs.Append(paragraph)

# Set bullet type and style for specific paragraphs
for i in range(1, notesSlide.NotesTextFrame.Paragraphs.Count):
    notesSlide.NotesTextFrame.Paragraphs[i].BulletType = TextBulletType.Numbered
    notesSlide.NotesTextFrame.Paragraphs[i].BulletStyle = NumberedBulletStyle.BulletArabicPeriod

# Save the resulting presentation
ppt.SaveToFile("AddSpeakerNotes.pptx", FileFormat.Pptx2016)
ppt.Dispose()
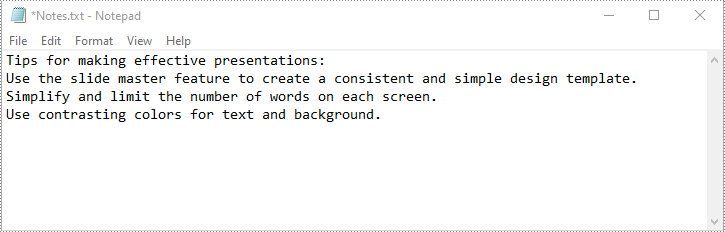
Read Speaker Notes in PowerPoint in Python
To read the text content of the notes, you can use the NotesSlide.NotesTextFrame.Text property. The detailed steps are as follows.
- Create a Presentation object.
- Load a PowerPoint presentation using Presentation.LoadFromFile() method.
- Get the slide that you want to read notes from using Presentation.Slides[index] property.
- Get the notes slide of the slide using ISlide.NotesSlide property.
- Get the text content of the notes slide using NotesSlide.NotesTextFrame.Text property.
- Write the text content into a text file.
- Python
from spire.presentation.common import *
from spire.presentation import *

# Create a Presentation object
ppt = Presentation()
# Load a PowerPoint presentation
ppt.LoadFromFile("AddSpeakerNotes.pptx")

# Get the first slide
slide = ppt.Slides[0]

# Get the notes slide of the slide
notesSlide = slide.NotesSlide

# Get the text content of the notes slide
notes = notesSlide.NotesTextFrame.Text

# Write the text content to a text file
with open("Notes.txt", 'w') as file:
    file.write(notes)

ppt.Dispose()
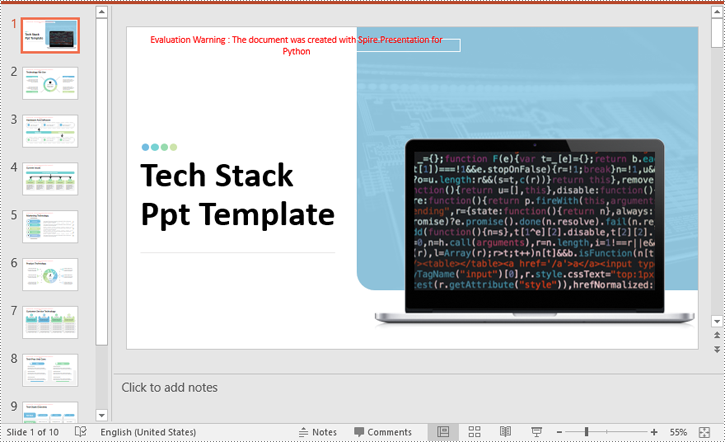
Delete Speaker Notes from PowerPoint in Python
You can delete a specific paragraph of note or delete all the notes from a slide using the NotesSlide.NotesTextFrame.Paragraphs.RemoveAt(index) or NotesSlide.NotesTextFrame.Paragraphs.Clear() method. The detailed steps are as follows.
- Create a Presentation object.
- Load a PowerPoint presentation using Presentation.LoadFromFile() method.
- Get the slide that you want to delete notes from using Presentation.Slides[index] property.
- Get the notes slide of the slide using ISlide.NotesSlide property.
- Delete a specific paragraph of note or delete all the notes from the notes slide using the NotesSlide.NotesTextFrame.Paragraphs.RemoveAt(index) or NotesSlide.NotesTextFrame.Paragraphs.Clear() method.
- Save the resulting presentation using Presentation.SaveToFile() method.
- Python
from spire.presentation.common import *
from spire.presentation import *

# Create a Presentation object
presentation = Presentation()
# Load a PowerPoint presentation
presentation.LoadFromFile("AddSpeakerNotes.pptx")

# Get the first slide
slide = presentation.Slides[0]

# Get the notes slide of the slide
notesSlide = slide.NotesSlide

# Remove a specific paragraph of note from the notes slide
# notesSlide.NotesTextFrame.Paragraphs.RemoveAt(1)

# Remove all the notes from the notes slide
notesSlide.NotesTextFrame.Paragraphs.Clear()

# Save the resulting presentation
presentation.SaveToFile("DeleteSpeakerNotes.pptx", FileFormat.Pptx2013)
presentation.Dispose()
Apply for a Temporary License
If you'd like to remove the evaluation message from the generated documents, or to get rid of the function limitations, please request a 30-day trial license for yourself.
