
Knowledgebase (2370)
Children categories
Adding and deleting slides in PowerPoint are essential actions that allow presenters to control the structure and content of their presentations. Adding slides provides the opportunity to expand and enhance the presentation by introducing new topics or providing supporting information. On the other hand, deleting slides helps streamline the presentation by removing redundant, repetitive, or irrelevant content. In this article, we will demonstrate how to add or delete slides in a PowerPoint Presentation in Python using Spire.Presentation for Python.
- Add a New Slide at the End of the PowerPoint Document in Python
- Insert a New Slide Before a Specific Slide in PowerPoint in Python
- Delete a Specific Slide from a PowerPoint Document in Python
Install Spire.Presentation for Python
This scenario requires Spire.Presentation for Python and plum-dispatch v1.7.4. They can be easily installed in your Windows through the following pip command.
pip install Spire.Presentation
If you are unsure how to install, please refer to this tutorial: How to Install Spire.Presentation for Python on Windows
Add a New Slide at the End of the PowerPoint Document in Python
Spire.Presentation for Python provides the Presentation.Slides.Append() method to add a new slide after the last slide of a PowerPoint presentation. The detailed steps are as follows.
- Create an object of the Presentation class.
- Load a PowerPoint presentation using Presentation.LoadFromFile() method.
- Add a new blank slide at the end of the presentation using Presentation.Slides.Append() method.
- Save the result presentation using Presentation.SaveToFile() method.
- Python
from spire.presentation.common import *
from spire.presentation import *

# Create a Presentation object
presentation = Presentation()

# Load a PowerPoint presentation
presentation.LoadFromFile("Sample.pptx")

# Add a new slide at the end of the presentation
presentation.Slides.Append()

# Save the result presentation to a .pptx file
presentation.SaveToFile("AddSlide.pptx", FileFormat.Pptx2013)
presentation.Dispose()
Insert a New Slide Before a Specific Slide in PowerPoint in Python
You can use the Presentation.Slides.Insert() method to insert a new slide before a specific slide of a PowerPoint presentation. The detailed steps are as follows.
- Create an object of the Presentation class.
- Load a PowerPoint presentation using Presentation.LoadFromFile() method.
- Insert a blank slide before a specific slide using Presentation.Slides.Insert() method.
- Save the result presentation using Presentation.SaveToFile() method.
- Python
from spire.presentation.common import *
from spire.presentation import *

# Create a Presentation object
presentation = Presentation()

# Load a PowerPoint presentation
presentation.LoadFromFile("Sample.pptx")

# Insert a blank slide before the second slide
presentation.Slides.Insert(1)

# Save the result presentation to a .pptx file
presentation.SaveToFile("InsertSlide.pptx", FileFormat.Pptx2013)
presentation.Dispose()
Delete a Specific Slide from a PowerPoint Document in Python
To delete a specific slide from a PowerPoint presentation, you can use the Presentation.Slides.RemoveAt() method. The detailed steps are as follows.
- Create an object of the Presentation class.
- Load a PowerPoint presentation using Presentation.LoadFromFile() method.
- Remove a specific slide from the presentation using Presentation.Slides.RemoveAt() method.
- Save the result presentation using Presentation.SaveToFile() method.
- Python
from spire.presentation.common import *
from spire.presentation import *

# Create a Presentation object
presentation = Presentation()

# Load a PowerPoint presentation
presentation.LoadFromFile("Sample.pptx")

# Remove the first slide
presentation.Slides.RemoveAt(0)

# Save the result presentation to a .pptx file
presentation.SaveToFile("RemoveSlide.pptx", FileFormat.Pptx2013)
presentation.Dispose()
Apply for a Temporary License
If you'd like to remove the evaluation message from the generated documents, or to get rid of the function limitations, please request a 30-day trial license for yourself.
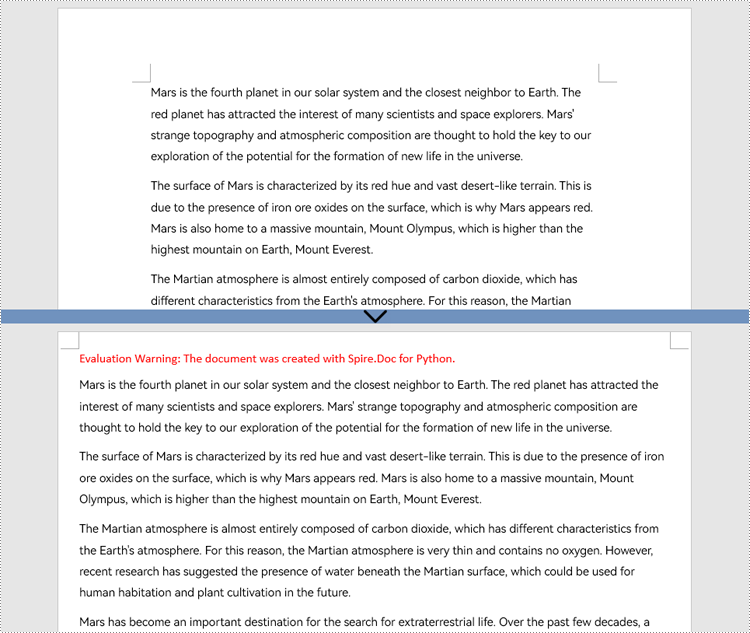
Setting proper margins is an essential step in creating professional Word documents. Margins may seem like a small detail, but they play a vital role in improving the readability and visual appeal of a document. By defining the space around content, margins help maintain a consistent and balanced layout, prevent text from being truncated, and make documents look more organized and aesthetically pleasing. This article will show how to use Spire.Doc for Python to set page margins for Word documents through Python programs.
Install Spire.Doc for Python
This scenario requires Spire.Doc for Python and plum-dispatch v1.7.4. They can be easily installed in your Windows through the following pip command.
pip install Spire.Doc
If you are unsure how to install, please refer to this tutorial: How to Install Spire.Doc for Python on Windows
Set the Page Margins of a Word Document
Spire.Doc for Python provides properties under the Margins class that can be used to set margins for each side of a document separately or to set the same margins for all sides. One important thing to note is that the margins are set based on sections. For consistent margins throughout the document, it is necessary to iterate through each section of the document to set the margins. Below are the detailed steps for setting page margins:
- Create an object of Document class.
- Load a Word document using Document.LoadFromFile() method.
- Loop through the sections of the document.
- Get a section using Document.Sections.get_Item() method.
- Get the margins of the section using Section.PageSetup.Margins property.
- Set the top, bottom, left, and right margin using property under Margins class.
- Python
from spire.doc import *
from spire.doc.common import *

# Create an object of Document class
doc = Document()

# Load a Word document
doc.LoadFromFile("Sample.docx")

# Loop thorugh the sections of document
for i in range(doc.Sections.Count):
    # Get a section
    section = doc.Sections.get_Item(i)
    # Get the margins of the section
    margins = section.PageSetup.Margins
    # Set the top, bottom, left, and right margins
    margins.Top = 17.9
    margins.Bottom = 17.9
    margins.Left = 20.9
    margins.Right = 20.9
    # margins.All = 17.9

# Save the document
doc.SaveToFile("output/SetPageMargins.docx", FileFormat.Auto)
Apply for a Temporary License
If you'd like to remove the evaluation message from the generated documents, or to get rid of the function limitations, please request a 30-day trial license for yourself.
Extract Text from PDF in Python: A Complete Guide with Practical Code Samples
2023-10-09 01:26:32 Written by Administrator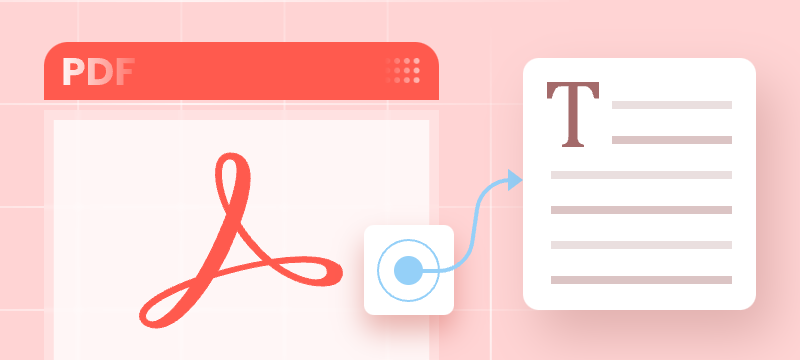
PDF files are everywhere—from contracts and research papers to eBooks and invoices. While they preserve formatting perfectly, extracting text from PDFs can be challenging, especially with large or complex documents. Manual copying is not only slow but often inaccurate.
Whether you’re a developer automating workflows, a data analyst processing content, or simply someone needing quick text extraction, programmatic methods can save you valuable time and effort.
In this comprehensive guide, you’ll learn how to extract text from PDF files in Python using Spire.PDF for Python — a powerful and easy-to-use PDF processing library. We’ll cover extracting all text, targeting specific pages or areas, ignoring hidden text, and capturing layout details such as text position and size.
Table of Contents
- Why Extract Text from PDF Files
- Install Spire.PDF for Python: Powerful PDF Parser Library
- Extract Text from PDF (Basic Example)
- Advanced Text Extraction Features
- Conclusion
- FAQs
Why Extract Text from PDF Files
Text extraction from PDFs is essential for many use cases, including:
- Automating data entry and document processing
- Enabling full-text search and indexing
- Performing data analysis on reports and surveys
- Extracting content for machine learning and NLP
- Converting PDFs to other editable formats
Install Spire.PDF for Python: Powerful PDF Parser Library
Spire.PDF for Python is a comprehensive and easy-to-use PDF processing library that simplifies all your PDF manipulation needs. It offers advanced text extraction capabilities that work seamlessly with both simple and complex PDF documents.
Installation
The library can be installed easily via pip. Open your terminal and run the following command:
pip install spire.pdf
Need help with the installation? Follow this step-by-step guide: How to Install Spire.PDF for Python on Windows
Extract Text from PDF (Basic Example)
If you just want to quickly read all the text from a PDF, this simple example shows how to do it. It iterates over each page, extracts the full text using PdfTextExtractor, and saves it to a text file with spacing and line breaks preserved.
from spire.pdf.common import *
from spire.pdf import *

# Create a PdfDocument object
doc = PdfDocument()

# Load a PDF document
doc.LoadFromFile('C:/Users/Administrator/Desktop/Terms of service.pdf')

# Prepare a variable to hold the extracted text
all_text = ""

# Create a PdfTextExtractOptions object
extractOptions = PdfTextExtractOptions()
# Extract all text including whitespaces
extractOptions.IsExtractAllText = True

# Loop through all pages and extract text
for i in range(doc.Pages.Count):
    page = doc.Pages.get_Item(i)
    textExtractor = PdfTextExtractor(page)
    text = textExtractor.ExtractText(extractOptions)
    # Append text from each page
    all_text += text + "\n"

# Write all extracted text to a file
with open('output/TextOfAllPages.txt', 'w', encoding='utf-8') as file:
    file.write(all_text)
Advanced Text Extraction Features
For greater control over what and how text is extracted, Spire.PDF for Python offers advanced options. You can selectively extract content from specific pages or regions, or even with layout details, such as text position and size, to better suit your specific data processing needs.
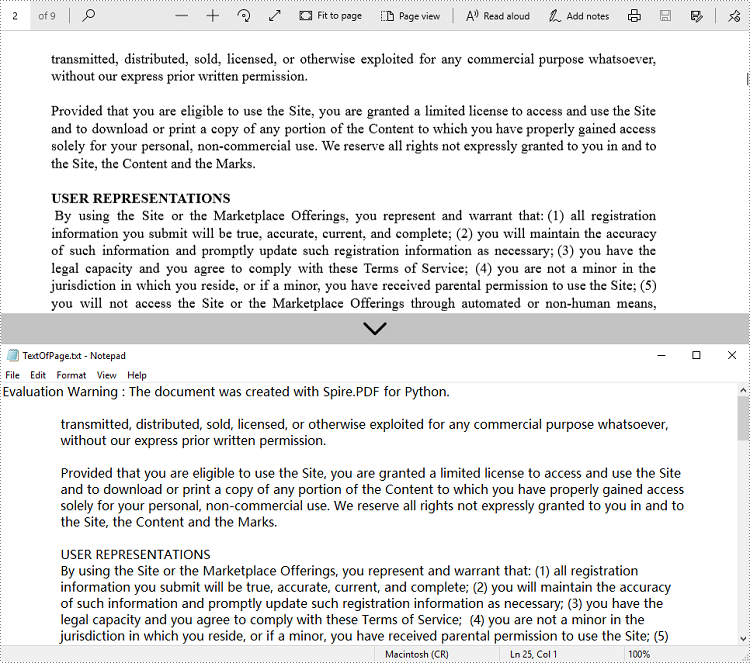
Retrieve Text from Selected Pages
Instead of processing an entire PDF, you can target specific pages for text extraction. This is especially useful for large documents where only certain sections are relevant for your task.
from spire.pdf.common import *
from spire.pdf import *

# Create a PdfDocument object
doc = PdfDocument()

# Load a PDF document
doc.LoadFromFile('C:/Users/Administrator/Desktop/Terms of service.pdf')

# Create a PdfTextExtractOptions object and enable full text extraction
extractOptions = PdfTextExtractOptions()
# Extract all text including whitespaces
extractOptions.IsExtractAllText = True

# Get a specific page (e.g., page 2)
page = doc.Pages.get_Item(1)

# Create a PdfTextExtractor object
textExtractor = PdfTextExtractor(page)

# Extract text from the page
text = textExtractor.ExtractText(extractOptions)

# Write the extracted text to a file using UTF-8 encoding
with open('output/TextOfPage.txt', 'w', encoding='utf-8') as file:
    file.write(text)
Get Text from Defined Area
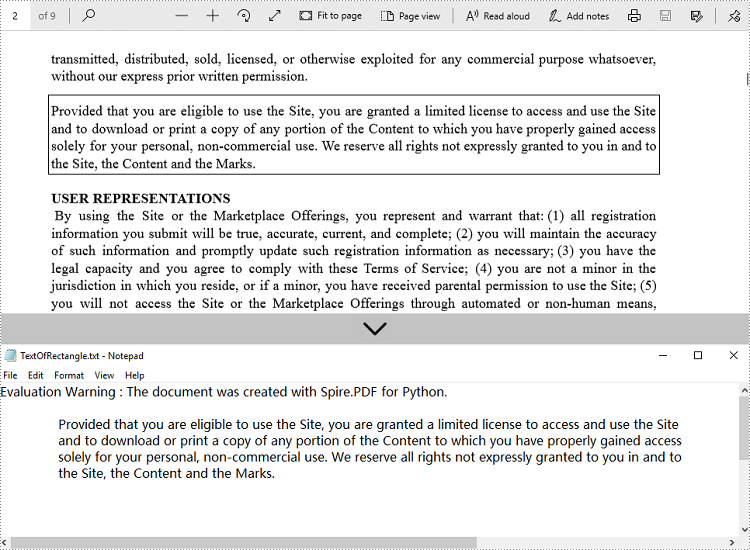
When dealing with structured documents like forms or invoices, extracting text from a specific region can be more efficient. You can define a rectangular area and extract only the text within that boundary on the page.
from spire.pdf.common import *
from spire.pdf import *

# Create a PdfDocument object
doc = PdfDocument()

# Load a PDF document
doc.LoadFromFile('C:/Users/Administrator/Desktop/Terms of service.pdf')

# Get a specific page (e.g., page 2)
page = doc.Pages.get_Item(1)

# Create a PdfTextExtractor object
textExtractor = PdfTextExtractor(page)

# Create a PdfTextExtractOptions object
extractOptions = PdfTextExtractOptions()

# Define the rectangular area to extract text from
# RectangleF(left, top, width, height)
extractOptions.ExtractArea = RectangleF(0.0, 100.0, 890.0, 80.0)

# Extract text from the specified area, keeping white spaces
text = textExtractor.ExtractText(extractOptions)

# Write the extracted text to a file using UTF-8 encoding
with open('output/TextOfRectangle.txt', 'w', encoding='utf-8') as file:
    file.write(text)
Ignore Hidden Text During Extraction
Some PDFs contain hidden or invisible text, often used for accessibility or OCR layers. You can choose to ignore such content during extraction to focus only on what is actually visible to users.
from spire.pdf.common import *
from spire.pdf import *

# Create a PdfDocument object
doc = PdfDocument()

# Load a PDF document
doc.LoadFromFile('C:/Users/Administrator/Desktop/Terms of service.pdf')

# Create a PdfTextExtractOptions object
extractOptions = PdfTextExtractOptions()
# Ignore hidden text during extraction
extractOptions.IsShowHiddenText = False

# Get a specific page (e.g., page 2)
page = doc.Pages.get_Item(1)

# Create a PdfTextExtractor object
textExtractor = PdfTextExtractor(page)

# Extract text from the page
text = textExtractor.ExtractText(extractOptions)

# Write the extracted text to a file using UTF-8 encoding
with open('output/ExcludeHiddenText.txt', 'w', encoding='utf-8') as file:
    file.write(text)
Retrieve Text with Position (Coordinates) and Size Information
For layout-sensitive applications—such as converting PDF content into editable formats or reconstructing page structure—you can extract text along with its position and size. This provides precise control over how content is interpreted and used.
from spire.pdf.common import *
from spire.pdf import *

# Create a PdfDocument object
doc = PdfDocument()

# Load a PDF document
doc.LoadFromFile('C:/Users/Administrator/Desktop/Terms of service.pdf')

# Loop through all pages of the document
for i in range(doc.Pages.Count):
    page = doc.Pages.get_Item(i)

    # Create a PdfTextFinder object for the current page
    finder = PdfTextFinder(page)

    # Find all text fragments on the page
    fragments = finder.FindAllText()

    print(f"Page {i + 1}:")

    # Loop through all text fragments
    for fragment in fragments:
        # Extract text content from the current text fragment
        text = fragment.Text

        # Get bounding rectangles with position and size
        rects = fragment.Bounds

        print(f'Text: "{text}"')

        # Iterate through all rectangles
        for rect in rects:
            # Print the position and size information of the current rectangle
            print(f"Position: ({rect.X}, {rect.Y}), Size: ({rect.Width} x {rect.Height})")

        print()
Conclusion
Extracting text from PDF files in Python becomes efficient and flexible with Spire.PDF for Python. Whether you need to process entire documents or extract text from specific pages or regions, Spire.PDF provides a robust set of tools to meet your needs. By automating text extraction, you can streamline workflows, power intelligent search systems, or prepare data for analysis and machine learning.
FAQs
Q1: Can text be extracted from password-protected PDFs?
A1: Yes, Spire.PDF for Python can open and extract text from secured files by providing the correct password when loading the PDF document.
Q2: Is batch text extraction from multiple PDFs supported?
A2: Yes, you can programmatically iterate through a directory of PDF files and apply text extraction to each file efficiently using Spire.PDF for Python.
Q3: Is it possible to extract images or tables from PDFs?
A3: While this guide focuses on text extraction, Spire.PDF for Python also supports image extraction and table extraction.
Q4: Can text be extracted from scanned (image-based) PDFs?
A4: Extracting text from scanned PDFs requires OCR (Optical Character Recognition). Spire.PDF for Python does not include built-in OCR, but you can combine it with an OCR library like Spire.OCR for image-to-text conversion.
Get a Free License
To fully experience the capabilities of Spire.PDF for Python without any evaluation limitations, you can request a free 30-day trial license.
