
Knowledgebase (2370)
Children categories
Adding or removing rows and columns in a Word table allows you to adjust the table's structure to accommodate your data effectively. By adding rows and columns, you can effortlessly expand the table as your data grows, ensuring that all relevant information is captured and displayed in a comprehensive manner. On the other hand, removing unnecessary rows and columns allows you to streamline the table, eliminating any redundant or extraneous data that may clutter the document. In this article, we will demonstrate how to add or delete table rows and columns in Word in Python using Spire.Doc for Python.
- Add or Insert a Row into a Word Table in Python
- Add or Insert a Column into a Word Table in Python
- Delete a Row from a Word Table in Python
- Delete a Column from a Word Table in Python
Install Spire.Doc for Python
This scenario requires Spire.Doc for Python and plum-dispatch v1.7.4. They can be easily installed in your Windows through the following pip command.
pip install Spire.Doc
If you are unsure how to install, please refer to this tutorial: How to Install Spire.Doc for Python on Windows
Add or Insert a Row into a Word Table in Python
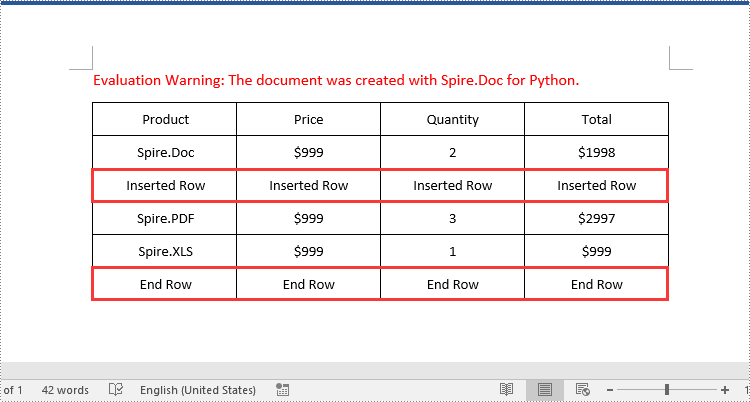
You can add a row to the end of a Word table or insert a row at a specific location of a Word table using the Table.AddRow() or Table.InsertRow() method. The following are the detailed steps:
- Create a Document object.
- Load a Word document using Document.LoadFromFile() method.
- Get the first section of the document using Document.Sections[] property.
- Get the first table of the section using Section.Tables[] property.
- Insert a row at a specific location of the table using Table.Rows.Insert() method.
- Add data to the newly inserted row.
- Add a row to the end of the table using Table.AddRow() method.
- Add data to the newly added row.
- Save the resulting document using Document.SaveToFile() method.
- Python
from spire.doc import *
from spire.doc.common import *

# Create a Document object
document = Document()
# Load a Word document
document.LoadFromFile("Table1.docx")

# Get the first section of the document
section = document.Sections.get_Item(0)

# Get the first table of the first section
table = section.Tables.get_Item(0) if isinstance(section.Tables.get_Item(0), Table) else None

# Insert a row into the table as the third row
table.Rows.Insert(2, table.AddRow())
# Get the inserted row
insertedRow = table.Rows[2]
# Add data to the row
for i in range(insertedRow.Cells.Count):
    cell = insertedRow.Cells[i]
    paragraph = cell.AddParagraph()
    paragraph.AppendText("Inserted Row")
    paragraph.Format.HorizontalAlignment = HorizontalAlignment.Center
    cell.CellFormat.VerticalAlignment = VerticalAlignment.Middle

# Add a row at the end of the table
addedRow = table.AddRow()
# Add data to the row
for i in range(addedRow.Cells.Count):
    cell = addedRow.Cells[i]
    paragraph = cell.AddParagraph()
    paragraph.AppendText("End Row")
    paragraph.Format.HorizontalAlignment = HorizontalAlignment.Center
    cell.CellFormat.VerticalAlignment = VerticalAlignment.Middle

# Save the resulting document
document.SaveToFile("AddRows.docx", FileFormat.Docx2016)
document.Close()
Add or Insert a Column into a Word Table in Python
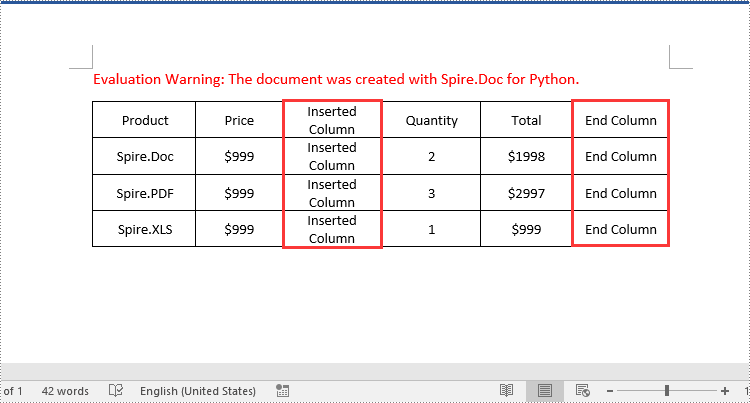
Spire.Doc for Python doesn't offer a direct method to add or insert a column into a Word table. But you can achieve this by adding or inserting cells at a specific location of each table row using TableRow.Cells.Add() or TableRow.Cells.Insert() method. The detailed steps are as follows:
- Create a Document object.
- Load a Word document using Document.LoadFromFile() method.
- Get the first section of the document using Document.Sections[] property.
- Get the first table of the section using Section.Tables[] property.
- Loop through each row of the table.
- Create a TableCell object, then insert it at a specific location of each row using TableRow.Cells.Insert() method and set cell width.
- Add data to the cell and set text alignment.
- Add a cell to the end of each row using TableRow.AddCell() method and set cell width.
- Add data to the cell and set text alignment.
- Save the resulting document using Document.SaveToFile() method.
- Python
from spire.doc import *
from spire.doc.common import *

# Create a Document object
document = Document()
# Load a Word document
document.LoadFromFile("Table1.docx")

# Get the first section of the document
section = document.Sections.get_Item(0)

# Get the first table of the first section
table = section.Tables.get_Item(0) if isinstance(section.Tables.get_Item(0), Table) else None

# Loop through the rows of the table
for i in range(table.Rows.Count):
    row = table.Rows.get_Item(i)
    # Create a TableCell object
    cell = TableCell(document)
    # Insert the cell as the third cell of the row and set cell width
    row.Cells.Insert(2, cell)
    cell.Width = row.Cells[0].Width
    # Add data to the cell
    paragraph = cell.AddParagraph()
    paragraph.AppendText("Inserted Column")
    # Set text alignment
    paragraph.Format.HorizontalAlignment = HorizontalAlignment.Center
    cell.CellFormat.VerticalAlignment = VerticalAlignment.Middle

    # Add a cell to the end of the row and set cell width
    cell = row.AddCell()
    cell.Width = row.Cells[1].Width
    # Add data to the cell
    paragraph = cell.AddParagraph()
    paragraph.AppendText("End Column")
    # Set text alignment
    paragraph.Format.HorizontalAlignment = HorizontalAlignment.Center
    cell.CellFormat.VerticalAlignment = VerticalAlignment.Middle

# Save the resulting document
document.SaveToFile("AddColumns.docx", FileFormat.Docx2016)
document.Close()
Delete a Row from a Word Table in Python
To delete a specific row from a Word table, you can use the Table.Rows.RemoveAt() method. The detailed steps are as follows:
- Create a Document object.
- Load a Word document using Document.LoadFromFile() method.
- Get the first section of the document using Document.Sections[] property.
- Get the first table of the section using Section.Tables[] property.
- Remove a specific row from the table using Table.Rows.RemoveAt() method.
- Save the resulting document using Document.SaveToFile() method.
- Python
from spire.doc import *
from spire.doc.common import *

# Create a Document object
document = Document()
# Load a Word document
document.LoadFromFile("AddRows.docx")

# Get the first section of the document
section = document.Sections.get_Item(0)

# Get the first table of the first section
table = section.Tables.get_Item(0) if isinstance(section.Tables.get_Item(0), Table) else None

# Remove the third row
table.Rows.RemoveAt(2)
# Remove the last row
table.Rows.RemoveAt(table.Rows.Count - 1)

# Save the resulting document
document.SaveToFile("RemoveRows.docx", FileFormat.Docx2016)
document.Close()

Delete a Column from a Word Table in Python
To delete a specific column from a Word table, you need to remove the corresponding cell from each table row using the TableRow.Cells.RemoveAt() method. The detailed steps are as follows:
- Create a Document object.
- Load a Word document using Document.LoadFromFile() method.
- Get the first section of the document using Document.Sections[] property.
- Get the first table of the section using Section.Tables[] property.
- Loop through each row of the table.
- Remove a specific cell from each row using TableRow.Cells.RemoveAt() method.
- Save the resulting document using Document.SaveToFile() method.
- Python
from spire.doc import *
from spire.doc.common import *

# Create a Document object
document = Document()
# Load a Word document
document.LoadFromFile("AddColumns.docx")

# Get the first section of the document
section = document.Sections.get_Item(0)

# Get the first table of the first section
table = section.Tables.get_Item(0) if isinstance(section.Tables.get_Item(0), Table) else None

# Loop through the rows of the table
for i in range(table.Rows.Count):
    row = table.Rows.get_Item(i)
    # Remove the third cell from the row
    row.Cells.RemoveAt(2)
    # Remove the last cell from the row
    row.Cells.RemoveAt(row.Cells.Count - 1)

# Save the resulting document
document.SaveToFile("RemoveColumns.docx", FileFormat.Docx2016)
document.Close()

Apply for a Temporary License
If you'd like to remove the evaluation message from the generated documents, or to get rid of the function limitations, please request a 30-day trial license for yourself.
The Excel workbook is a powerful spreadsheet that enables the creation, manipulation, and analysis of data in a variety of ways. One of the useful features that workbooks offer is the ability to hide or unhide worksheets in a workbook. Hiding worksheets can help protect sensitive or confidential information, reduce clutter, or organize data more efficiently. And when users need to re-display the hidden worksheets, they can also unhide them with simple operations. This article is going to explain how to hide or unhide worksheets in Excel workbooks through Python programs using Sprie.XLS for Python.
Install Spire.XLS for Python
This scenario requires Spire.XLS for Python and plum-dispatch v1.7.4. They can be easily installed in your Windows through the following pip command.
pip install Spire.XLS
If you are unsure how to install, please refer to this tutorial: How to Install Spire.XLS for Python on Windows
Hide Excel Worksheets in Python
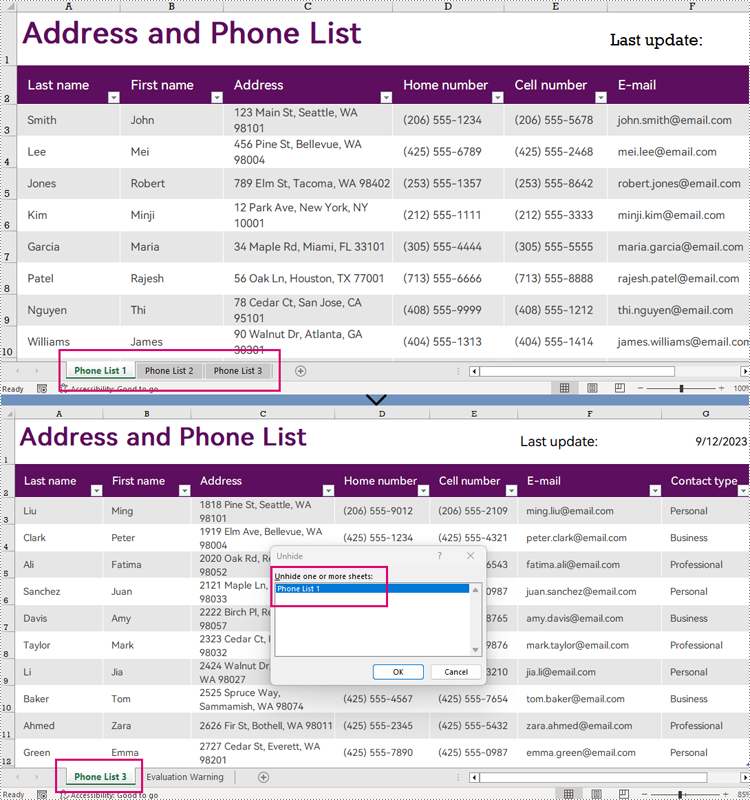
The Worksheet.Visibility property in Spire.XLS for Python can be used to set the visibility of a worksheet. By assigning WorksheetVisibility.Hidden or WorksheetVisibility.StrongHidden to this property, users can change the visibility of a worksheet to hidden or very hidden (completely not shown in Excel and can only be unhidden through code).
The detailed steps for hiding worksheets are as follows:
- Create an object of Workbook class.
- Load a workbook using Workbook.LoadFromFile() method.
- Change the status of the first worksheet to hidden by assigning WorksheetVisibility.Hidden to the Workbook.Worksheets[].Visibility property.
- Change the status of the second worksheet to very hidden by assigning WorksheetVisibility.StrongHidden to the Workbook.Worksheets[].Visibility property.
- Save the workbook using Workbook.SaveToFile() method.
- Python
from spire.xls import *

# Create an object of Workbook
workbook = Workbook()

# Load an Excel workbook
workbook.LoadFromFile("Sample.xlsx")

# Hide the first worksheet
workbook.Worksheets[0].Visibility = WorksheetVisibility.Hidden

# Change the second worksheet to very hidden
workbook.Worksheets[1].Visibility = WorksheetVisibility.StrongHidden

# Save the workbook
workbook.SaveToFile("output/HideWorksheets.xlsx")
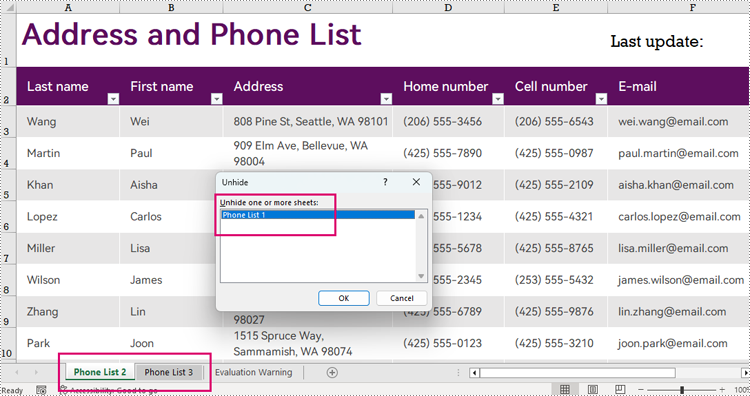
Unhide Excel Worksheets in Python
Unhiding a worksheet can be done by assigning WorksheetVisibility.Visible to the Workbook.Worksheets[].Visibility property. The detailed steps are as follows:
- Create an object of Workbook class.
- Load a workbook using Workbook.LoadFromFile() method.
- Unhide the very hidden worksheet by assigning WorksheetVisibility.Visible to the Workbook.Worksheets[].Visibility property.
- Save the workbook using Workbook.SaveToFile() method.
- Python
from spire.xls import *

# Create an object of Workbook
workbook = Workbook()

# Load an Excel workbook
workbook.LoadFromFile("output/HideWorksheets.xlsx")

# Unhide the second worksheet
workbook.Worksheets[0].Visibility = WorksheetVisibility.Visible

# Save the workbook
workbook.SaveToFile("output/UnhideWorksheet.xlsx")
Apply for a Temporary License
If you'd like to remove the evaluation message from the generated documents, or to get rid of the function limitations, please request a 30-day trial license for yourself.
Converting a Word document into images can be a useful and convenient option when you want to share or present the content without worrying about formatting issues or compatibility across devices. By converting a Word document into images, you can ensure that the text, images, and formatting remain intact, making it an ideal solution for sharing documents on social media, websites, or through email. In this article, you will learn how to convert Word to PNG, JPEG or SVG in Python using Spire.Doc for Python.
Install Spire.Doc for Python
This scenario requires Spire.Doc for Python and plum-dispatch v1.7.4. They can be easily installed in your Windows through the following pip command.
pip install Spire.Doc
If you are unsure how to install, please refer to this tutorial: How to Install Spire.Doc for Python on Windows
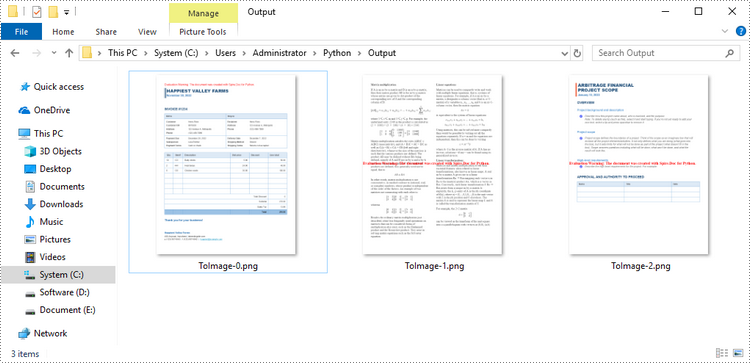
Convert Word to PNG or JPEG in Python
Spire.Doc for Python offers the Document.SaveImageToStream() method to convert a certain page into a bitmap image. Afterwards, you can save the bitmap image to a popular image format such as PNG, JPEG, or BMP. The detailed steps are as follows.
- Create a Document object.
- Load a Word file using Document.LoadFromFile() method.
- Retrieve each page in the document, and convert a specific page into a bitmap image using Document.SaveImageToStreams() method.
- Save the bitmap image into a PNG or JPEG file.
- Python
from spire.doc import *
from spire.doc.common import *

# Create a Document object
document = Document()

# Load a Word file
document.LoadFromFile("C:\\Users\\Administrator\\Desktop\\input.docx")

# Loop through the pages in the document
for i in range(document.GetPageCount()):

    # Convert a specific page to bitmap image
    imageStream = document.SaveImageToStreams(i, ImageType.Bitmap)

    # Save the bitmap to a PNG file
    with open('Output/ToImage-{0}.png'.format(i),'wb') as imageFile:
        imageFile.write(imageStream.ToArray())

document.Close()
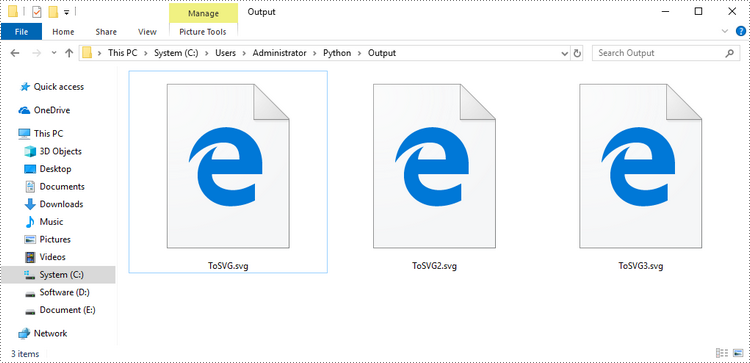
Convert Word to SVG in Python
To convert a Word document into multiple SVG files, you can simply use the Document.SaveToFile() method. Here are the steps.
- Create a Document object.
- Load a Word file using Document.LoadFromFile() method.
- Convert it to individual SVG files using Document.SaveToFile() method.
- Python
from spire.doc import *
from spire.doc.common import *

# Create a Document object
document = Document()

# Load a Word file
document.LoadFromFile("C:\\Users\\Administrator\\Desktop\\input.docx")

# Convert it to SVG files
document.SaveToFile("output/ToSVG.svg", FileFormat.SVG)

document.Close()
Get a Free License
To fully experience the capabilities of Spire.Doc for Python without any evaluation limitations, you can request a free 30-day trial license.
