
Knowledgebase (2370)
Children categories
Repeating watermarks, also called multi-line watermarks, are a type of watermark that appears multiple times on a page of a Word document at regular intervals. Compared with single watermarks, repeating watermarks are more difficult to remove or obscure, thus offering a better deterrent to unauthorized copying and distribution. This article is going to show how to insert repeating text and image watermarks into Word documents programmatically using Spire.Doc for Java.
- Add Repeating Text Watermarks to Word Documents in Java
- Add Repeating Picture Watermarks to Word Documents in Java
Install Spire.Doc for Java
First of all, you're required to add the Spire.Doc.jar file as a dependency in your Java program. The JAR file can be downloaded from this link. If you use Maven, you can easily import the JAR file in your application by adding the following code to your project's pom.xml file.
<repositories>
    <repository>
        <id>com.e-iceblue</id>
        <name>e-iceblue</name>
        <url>https://repo.e-iceblue.com/nexus/content/groups/public/</url>
    </repository>
</repositories>
<dependencies>
    <dependency>
        <groupId>e-iceblue</groupId>
        <artifactId>spire.doc</artifactId>
        <version>14.7.0</version>
    </dependency>
</dependencies>
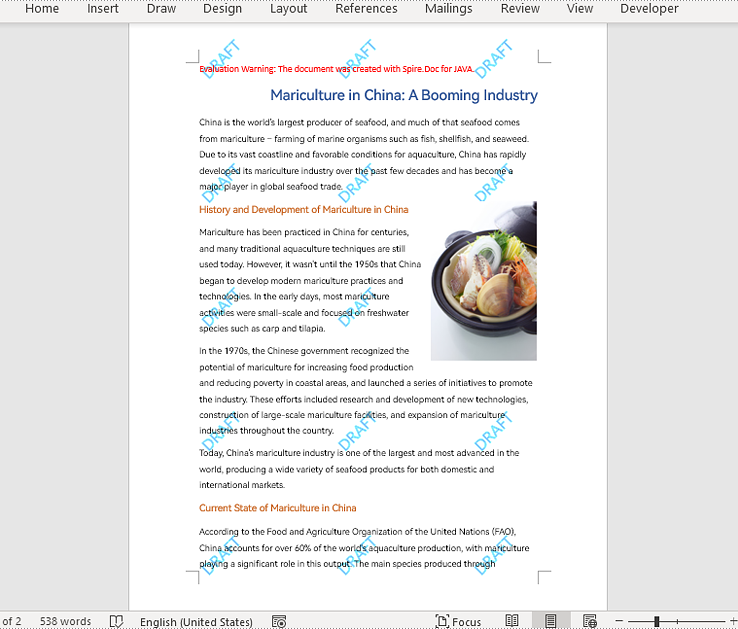
Add Repeating Text Watermarks to Word Documents in Java
We can insert repeating text watermarks to Word documents by adding repeating WordArt to the headers of a document at specified intervals. The detailed steps are as follows:
- Create an object of Document class.
- Load a Word document using Document.loadFromFile() method.
- Create an object of ShapeObject class and set the WordArt text using ShapeObject.getWordArt().setText() method.
- Specify the rotation angle and the number of vertical repetitions and horizontal repetitions.
- Set the format of the shape using methods under ShapeObject class.
- Loop through the sections in the document to insert repeating watermarks to each section by adding the WordArt shape to the header of each section multiple times at specified intervals using Paragraph.getChildObjects().add(ShapeObject) method.
- Save the document using Document.saveToFile() method.
- Java
import com.spire.doc.Document;
import com.spire.doc.HeaderFooter;
import com.spire.doc.Section;
import com.spire.doc.documents.Paragraph;
import com.spire.doc.documents.ShapeLineStyle;
import com.spire.doc.documents.ShapeType;
import com.spire.doc.fields.ShapeObject;

import java.awt.*;

public class insertRepeatingTextWatermark {
    public static void main(String[] args) {

        //Create an object of Document class
        Document doc = new Document();

        //Load a Word document
        doc.loadFromFile("Sample.docx");

        //Create an object of ShapeObject class and set the WordArt text
        ShapeObject shape = new ShapeObject(doc, ShapeType.Text_Plain_Text);
        shape.getWordArt().setText("DRAFT");

        //Specify the watermark rotating angle and the number of vertical repetitions and horizontal repetitions
        double rotation = 315;
        int ver = 5;
        int hor = 3;

        //Set the format of the WordArt shape
        shape.setWidth(60);
        shape.setHeight(20);
        shape.setVerticalPosition(30);
        shape.setHorizontalPosition(20);
        shape.setRotation(rotation);
        shape.setFillColor(Color.BLUE);
        shape.setLineStyle(ShapeLineStyle.Single);
        shape.setStrokeColor(Color.CYAN);
        shape.setStrokeWeight(1);

        //Loop through the sections in the document
        for (Section section : (Iterable<Section>) doc.getSections()) {
            //Get the header of a section
            HeaderFooter header = section.getHeadersFooters().getHeader();
            //Add paragraphs to the header
            Paragraph paragraph = header.addParagraph();
            for (int i = 0; i < ver; i++) {
                for (int j = 0; j < hor; j++) {
                    //Add the WordArt shape to the header
                    shape = (ShapeObject) shape.deepClone();
                    shape.setVerticalPosition((float) (section.getPageSetup().getPageSize().getHeight()/ver * i + Math.sin(rotation) * shape.getWidth()/2));
                    shape.setHorizontalPosition((float) ((section.getPageSetup().getPageSize().getWidth()/hor - shape.getWidth()/2) * j));
                    paragraph.getChildObjects().add(shape);
                }
            }
        }

        //Save the document
        doc.saveToFile("RepeatingTextWatermark.docx");
        doc.dispose();
    }
}
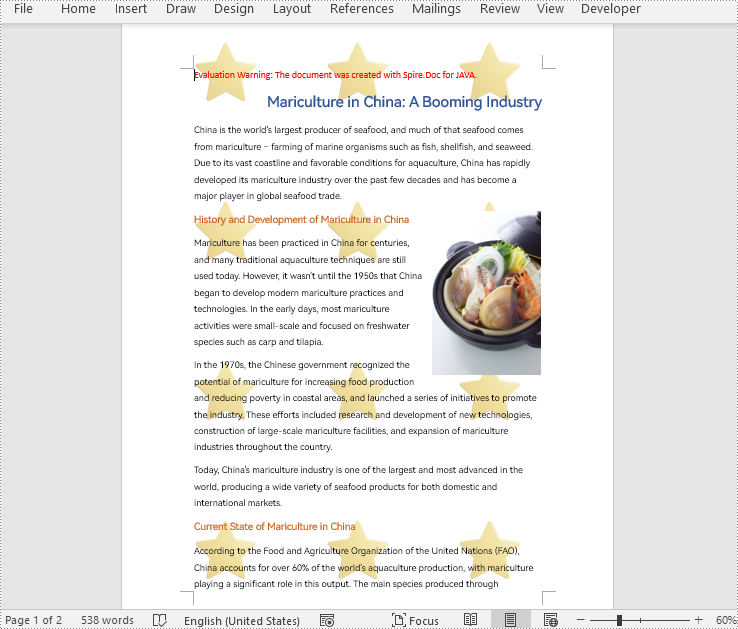
Add Repeating Picture Watermarks to Word Documents in Java
Similarly, we can insert repeating image watermarks into Word documents by adding repeating pictures to headers at regular intervals. The detailed steps are as follows:
- Create an object of Document class.
- Load a Word document using Document.loadFromFile() method.
- Load a picture using DocPicture.loadImage() method.
- Set the text wrapping style of the picture as Behind using DocPicture.setTextWrappingStyle(TextWrappingStyle.Behind) method.
- Specify the number of vertical repetitions and horizontal repetitions.
- Loop through the sections in the document to insert repeating picture watermarks to the document by adding a picture to the header of each section at specified intervals using Paragraph.getChildObjects().add(DocPicture) method.
- Save the document using Document.saveToFile() method.
- Java
import com.spire.doc.Document;
import com.spire.doc.FileFormat;
import com.spire.doc.HeaderFooter;
import com.spire.doc.Section;
import com.spire.doc.documents.Paragraph;
import com.spire.doc.documents.TextWrappingStyle;
import com.spire.doc.fields.DocPicture;

public class insertRepeatingPictureWatermark {
    public static void main(String[] args) {

        //Create an object of Document class
        Document doc = new Document();

        //Load a Word document
        doc.loadFromFile("Sample.docx");

        //Load a picture
        DocPicture pic = new DocPicture(doc);
        pic.loadImage("watermark.png");

        //Set the text wrapping style of the picture as Behind
        pic.setTextWrappingStyle(TextWrappingStyle.Behind);

        //Specify the number of vertical repetitions and horizontal repetitions
        int ver = 4;
        int hor = 3;

        //Loop through the sections in the document
        for (Section section : (Iterable<Section>) doc.getSections()) {
            //Get the header of a section
            HeaderFooter header = section.getHeadersFooters().getHeader();
            //Add a paragraph to the section
            Paragraph paragraph = header.addParagraph();
            for (int i = 0; i < ver; i++) {
                for (int j = 0; j < hor; j++) {
                    //Add the picture to the header
                    pic = (DocPicture) pic.deepClone();
                    pic.setVerticalPosition((float) ((section.getPageSetup().getPageSize().getHeight()/ver) * i));
                    pic.setHorizontalPosition((float) (section.getPageSetup().getPageSize().getWidth()/hor - pic.getWidth()/2) * j);
                    paragraph.getChildObjects().add(pic);
                }
            }
        }

        //Save the document
        doc.saveToFile("RepeatingPictureWatermark.docx", FileFormat.Auto);
        doc.dispose();
    }
}
Apply for a Temporary License
If you'd like to remove the evaluation message from the generated documents, or to get rid of the function limitations, please request a 30-day trial license for yourself.
Converting Excel files to PDF format can be a useful way to share and distribute spreadsheets, especially if you want to ensure that the formatting and layout of the file remains consistent across different devices and software. In addition, PDFs often appear more polished and professional than Excel files, making them a popular choice for official reports, presentations, and other business documents. In this article, you will learn how to convert Excel to PDF in Python using Spire.XLS for Python.
Install Spire.XLS for Python
This scenario requires Spire.XLS for Python and plum-dispatch v1.7.4. They can be easily installed in your Windows through the following pip command.
pip install Spire.XLS
If you are unsure how to install, please refer to this tutorial: How to Install Spire.XLS for Python on Windows
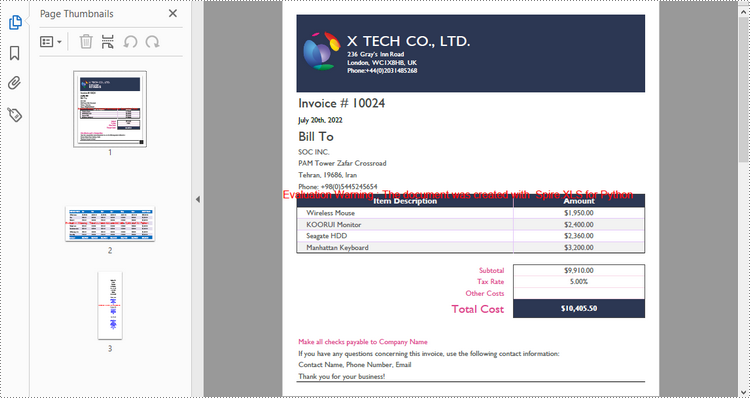
Convert a Whole Excel Document to PDF in Python
The Workbook.SaveToFile() method is used to convert a complete Excel document into a single PDF file. Once the conversion is done, each worksheet will appear as a separate page in the resultant PDF file. To control the conversion settings, use the Workbook.ConverterSetting property.
The following are the detailed steps to convert an Excel document to a PDF file in Python.
- Create a Workbook object.
- Load an Excel document using Workbook.LoadFromFile() method.
- Set the margins of every worksheet through Worksheet.PageSetup property, which will later become the blank edges of the generated PDF.
- Set the Excel to PDF conversion options through the properties under Workbook.ConverterSetting object.
- Convert the whole Excel document to PDF using Workbook.SaveToFile() method.
- Python
from spire.xls import *
from spire.xls.common import *

# Create a Workbook object
workbook = Workbook()

# Load an Excel document
workbook.LoadFromFile("C:\\Users\\Administrator\\Desktop\\sample.xlsx")

# Iterate through the worksheets in the workbook
for sheet in workbook.Worksheets:

    # Get the PageSetup object
    pageSetup = sheet.PageSetup

    # Set page margins
    pageSetup.TopMargin = 0.3
    pageSetup.BottomMargin = 0.3
    pageSetup.LeftMargin = 0.3
    pageSetup.RightMargin = 0.3

# Set worksheet to fit to page when converting
workbook.ConverterSetting.SheetFitToPage = True

# Convert to PDF file
workbook.SaveToFile("output/ToPdf.pdf", FileFormat.PDF)
workbook.Dispose()
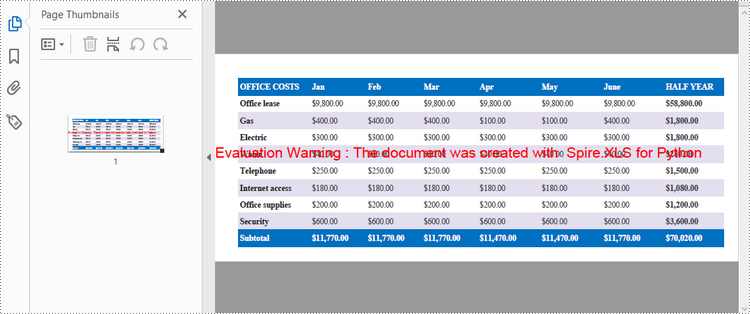
Convert a Particular Worksheet to PDF in Python
The Worksheet.SaveToPdf() method is used to convert a specific worksheet into a PDF document. The detailed steps are as follows.
- Create a Workbook object.
- Load an Excel document using Workbook.LoadFromFile() method.
- Get a particular worksheet through Workbook.Worksheets[] property.
- Set the margins of the worksheet through Worksheet.PageSetup property, which will later become the blank edges of the generated PDF.
- Set the Excel to PDF conversion options through the properties under Workbook.ConverterSetting object.
- Convert the worksheet to PDF using Worksheet.SaveToPdf() method.
- Python
from spire.xls import *
from spire.xls.common import *

# Create a Workbook object
workbook = Workbook()

# Load an Excel document
workbook.LoadFromFile("C:\\Users\\Administrator\\Desktop\\input.xlsx")

# Get a particular worksheet
sheet = workbook.Worksheets[1]

# Get the PageSetup object
pageSetup = sheet.PageSetup

# Set page margins
pageSetup.TopMargin = 0.3
pageSetup.BottomMargin = 0.3
pageSetup.LeftMargin = 0.3
pageSetup.RightMargin = 0.3

# Set worksheet to fit to page when converting
workbook.ConverterSetting.SheetFitToPage = True

# Convert the worksheet to PDF file
sheet.SaveToPdf("output/WorksheetToPdf.pdf")
workbook.Dispose()
Apply for a Temporary License
If you'd like to remove the evaluation message from the generated documents, or to get rid of the function limitations, please request a 30-day trial license for yourself.
Document properties in Excel are important pieces of metadata that provide additional information about a workbook. If you are managing multiple Excel workbooks and want to keep track of information like author, title, and other relevant metadata, you can read their document properties to quickly gather this information. Besides, in certain situations, you may need to delete document properties from Excel. For instance, if sensitive data is inadvertently stored in document properties, you may need to delete these document properties before sharing the workbook to ensure data security and confidentiality. This article will show you how to read or delete document properties from Excel in Java using Spire.XLS for Java library.
- Read Standard and Custom Document Properties from Excel in Java
- Delete Standard and Custom Document Properties from Excel in Java
Install Spire.XLS for Java
First of all, you're required to add the Spire.Xls.jar file as a dependency in your Java program. The JAR file can be downloaded from this link. If you use Maven, you can easily import the JAR file in your application by adding the following code to your project's pom.xml file.
<repositories>
    <repository>
        <id>com.e-iceblue</id>
        <name>e-iceblue</name>
        <url>https://repo.e-iceblue.com/nexus/content/groups/public/</url>
    </repository>
</repositories>
<dependencies>
    <dependency>
        <groupId>e-iceblue</groupId>
        <artifactId>spire.xls</artifactId>
        <version>16.7.3</version>
    </dependency>
</dependencies>
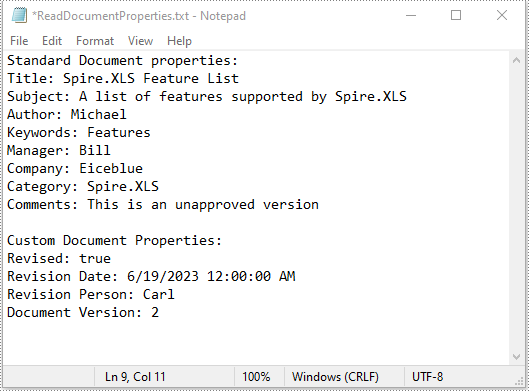
Read Standard and Custom Document Properties from Excel in Java
Standard document properties are pre-built properties included in every Excel file. These properties can include information such as the author, title, subject, keywords, and other details about the file. Custom document properties in Excel are user-defined, meaning that users can create them according to their specific needs. The value of custom document properties can be assigned as text, date time, numeric values, or simply a yes or no.
The following steps demonstrate how to read standard document properties and custom document properties of an Excel file using Spire.XLS for Java:
- Initialize an instance of the Workbook class.
- Load an Excel file using the Workbook.loadFromFile() method.
- Initialize an instance of the StringBuilder class for storing the standard and custom document properties.
- Get the collection of all standard document properties of the file using the Workbook.getDocumentProperties() method.
- Get specific standard document properties using the corresponding methods under the BuiltInDocumentProperties class.
- Append the standard document properties to the StringBuilder instance.
- Get the collection of all custom document properties of the file using the Workbook.getCustomDocumentProperties() method.
- Iterate through the collection.
- Get the name and value of each custom document property using the IDocumentProperty.getName() and IDocumentProperty.getValue() methods and append them to the StringBuilder instance.
- Write the content of the StringBuilder instance into a text file.
- Java
import com.spire.xls.Workbook;
import com.spire.xls.collections.BuiltInDocumentProperties;
import com.spire.xls.core.ICustomDocumentProperties;

import java.io.BufferedWriter;
import java.io.FileWriter;
import java.io.IOException;

public class ReadStandardDocumentProperties {
    public static void main(String[] args) throws IOException {
        //Initialize an instance of the Workbook class.
        Workbook workbook = new Workbook();
        //Load an Excel file
        workbook.loadFromFile("Sample.xlsx");

        //Initialize an instance of the StringBuilder instance
        StringBuilder sb = new StringBuilder();

        //Get the collection of all standard document properties
        BuiltInDocumentProperties standardProperties = workbook.getDocumentProperties();

        //Get specific standard document properties
        String title = standardProperties.getTitle();
        String subject = standardProperties.getSubject();
        String author = standardProperties.getAuthor();
        String keywords = standardProperties.getKeywords();
        String manager = standardProperties.getManager();
        String company = standardProperties.getCompany();
        String category = standardProperties.getCategory();
        String comments = standardProperties.getComments();

        //Append the standard document properties to the StringBuilder instance
        sb.append("Standard Document properties:"
                +"\r\nTitle: " + title
                + "\r\nSubject: " + subject
                + "\r\nAuthor: " + author
                + "\r\nKeywords: "+ keywords
                + "\r\nManager: " + manager.toString()
                + "\r\nCompany: " + company.toString()
                + "\r\nCategory: " + category.toString()
                + "\r\nComments: " + comments.toString()
        );

        sb.append("\r\n\nCustom Document Properties:");

        //Get the collection of all custom document properties
        ICustomDocumentProperties customProperties = workbook.getCustomDocumentProperties();
        //Iterate through the collection
        for(int i =0; i < customProperties.getCount(); i++)
        {
            //Append the name and value of each custom document property to the StringBuilder instance
            sb.append("\r\n" + customProperties.get(i).getName() + ": " + customProperties.get(i).getValue());
        }

        //Write the content of the StringBuilder instance into a text file
        String output = "ReadDocumentProperties.txt";
        FileWriter fw = new FileWriter(output, true);
        BufferedWriter bw = new BufferedWriter(fw);
        bw.append(sb);
        bw.close();
        fw.close();
        workbook.dispose();
    }
}
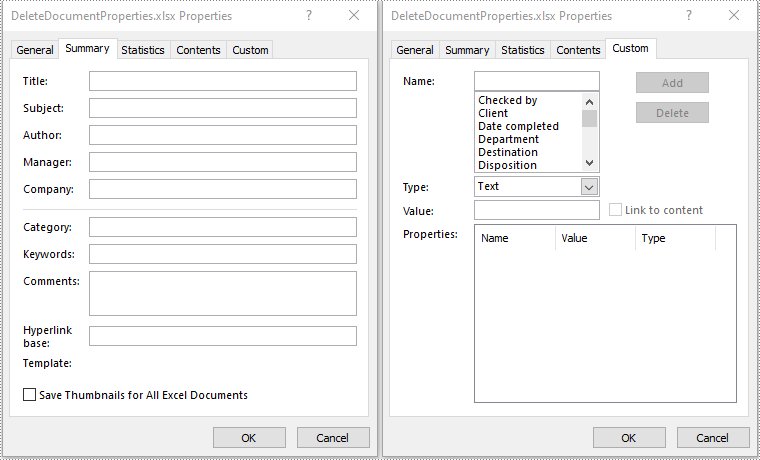
Delete Standard and Custom Document Properties from Excel in Java
You can easily delete standard document properties from an Excel file by setting their values as empty. For custom document properties, you can use the ICustomDocumentProperties.remove() method to delete them.
The following steps demonstrate how to delete standard and custom document properties from an Excel file using Spire.XLS for Java:
- Initialize an instance of the Workbook class.
- Load an Excel file using the Workbook.loadFromFile() method.
- Get the collection of all standard document properties of the file using the Workbook.getDocumentProperties() method.
- Set the values of specific standard document properties as empty using the corresponding methods under the BuiltInDocumentProperties class.
- Get the collection of all custom document properties of the file using the Workbook.getCustomDocumentProperties() method.
- Iterate through the collection.
- Delete each custom document property from the collection using the ICustomDocumentProperties.remove() method.
- Save the result file using the Workbook.saveToFile() method.
- Java
import com.spire.xls.ExcelVersion;
import com.spire.xls.Workbook;
import com.spire.xls.collections.BuiltInDocumentProperties;
import com.spire.xls.core.ICustomDocumentProperties;

public class DeleteDocumentProperties {
    public static void main(String[] args) {
        //Initialize an instance of the Workbook class.
        Workbook workbook = new Workbook();
        //Load an Excel file
        workbook.loadFromFile("Sample.xlsx");

        //Get the collection of all standard document properties
        BuiltInDocumentProperties standardProperties = workbook.getDocumentProperties();

        //Set the value of each standard document property as empty
        standardProperties.setTitle("");
        standardProperties.setSubject("");
        standardProperties.setAuthor("");
        standardProperties.setManager("");
        standardProperties.setCompany("");
        standardProperties.setCategory("");
        standardProperties.setKeywords("");
        standardProperties.setComments("");

        //Get the collection of all custom document properties
        ICustomDocumentProperties customProperties = workbook.getCustomDocumentProperties();
        //Iterate through the collection
        for(int i = customProperties.getCount() - 1; i >= 0; i--)
        {
            //Delete each custom document property from the collection by its name
            customProperties.remove(customProperties.get(i).getName());
        }

        //Save the result file
        workbook.saveToFile("DeleteDocumentProperties.xlsx", ExcelVersion.Version2016);
        workbook.dispose();
    }
}
Apply for a Temporary License
If you'd like to remove the evaluation message from the generated documents, or to get rid of the function limitations, please request a 30-day trial license for yourself.
