
Python (365)
Python: Count Words, Pages, Characters, Paragraphs and Lines in Word
2024-06-17 01:10:38 Written by AdministratorVarious written documents, such as academic papers, reports, and legal materials, often have specific formatting guidelines that encompass word count, page count, and other essential metrics. Accurately measuring these elements is crucial as it ensures that your document adheres to the required standards and meets the expected quality benchmarks. In this article, we will explain how to count words, pages, characters, paragraphs, and lines in a Word document in Python using Spire.Doc for Python.
- Count Words, Pages, Characters, Paragraphs, and Lines in a Word Document in Python
- Count Words and Characters in a Specific Paragraph of a Word Document in Python
Install Spire.Doc for Python
This scenario requires Spire.Doc for Python. It can be easily installed in your Windows through the following pip commands.
pip install Spire.Doc
If you are unsure how to install, please refer to: How to Install Spire.Doc for Python on Windows
Count Words, Pages, Characters, Paragraphs, and Lines in a Word Document in Python
Spire.Doc for Python offers the BuiltinDocumentProperties class that empowers you to retrieve crucial information from your Word document. By utilizing this class, you can access a wealth of details, including the built-in document properties, as well as the number of words, pages, characters, paragraphs, and lines contained within the document.
The steps below explain how to get the number of words, pages, characters, paragraphs, and lines in a Word document in Python using Spire.Doc for Python:
- Create an object of the Document class.
- Load a Word document using the Document.LoadFromFile() method.
- Get the BuiltinDocumentProperties object using the Document.BuiltinDocumentProperties property.
- Get the number of words, characters, paragraphs, lines, and pages in the document using the WordCount, CharCount, ParagraphCount, LinesCount, PageCount properties of the BuiltinDocumentProperties class, and append the result to a list.
- Write the content of the list into a text file.
- Python
from spire.doc import *
from spire.doc.common import *

# Create an object of the Document class
doc = Document()
# Load a Word document
doc = Document("Input.docx")

# Create a list
sb = []

# Get the built-in properties of the document
properties = doc.BuiltinDocumentProperties

# Get the number of words, characters, paragraphs, lines, and pages and append the result to the list
sb.append("The number of words: " + str(properties.WordCount))
sb.append("The number of characters: " + str(properties.CharCount))
sb.append("The number of paragraphs: " + str(properties.ParagraphCount))
sb.append("The number of lines: " + str(properties.LinesCount))
sb.append("The number of pages: " + str(properties.PageCount))

# Save the data in the list to a text file
with open("result.txt", "w") as file:
file.write("\n".join(sb))

doc.Close()

Count Words and Characters in a Specific Paragraph of a Word Document in Python
In addition to retrieving the overall word count, page count, and other metrics for an entire Word document, you are also able to get the word count and character count for a specific paragraph by using the Paragraph.WordCount and Paragraph.CharCount properties.
The steps below explain how to get the number of words and characters of a paragraph in a Word document in Python using Spire.Doc for Python:
- Create an object of the Document class.
- Load a Word document using the Document.LoadFromFile() method.
- Get a specific paragraph using the Document.Sections[sectionIndex].Paragraphs[paragraphIndex] property.
- Get the number of words and characters in the paragraph using the Paragraph.WordCount and Paragraph.CharCount properties, and append the result to a list.
- Write the content of the list into a text file.
- Python
from spire.doc import *
from spire.doc.common import *

# Create an object of the Document class
doc = Document()
# Load a Word document
doc = Document("Input.docx")

# Get a specific paragraph
paragraph = doc.Sections.get_Item(0).Paragraphs.get_Item(0)

# Create a list
sb = []

# Get the number of words and characters in the paragraph and append the result to the list
sb.append("The number of words: " + str(paragraph.WordCount))
sb.append("The number of characters: " + str(paragraph.CharCount))

# Save the data in the list to a text file
with open("result.txt", "w") as file:
file.write("\n".join(sb))

doc.Close()

Apply for a Temporary License
If you'd like to remove the evaluation message from the generated documents, or to get rid of the function limitations, please request a 30-day trial license for yourself.
When dealing with a large volume of customized documents such as contracts, reports, or personal letters, the variable feature in Word documents becomes crucial. Variables allow you to store and reuse information like dates, names, or product details, making the documents more personalized and dynamic. This article will delve into how to use Spire.Doc for Python to insert, count, retrieve, and delete variables in Word documents, enhancing the efficiency and flexibility of document management.
- Add Variables into Word Documents
- Count the Number of Variables in a Word Document
- Retrieve Variables from a Word Document
- Delete Variables from a Word Document
Install Spire.Doc for Python
This scenario requires Spire.Doc for Python and plum-dispatch v1.7.4. They can be easily installed in your Window through the following pip command.
pip install Spire.Doc
If you are unsure how to install, please refer to this tutorial: How to Install Spire.Doc for Python on Window
Add Variables into Word Documents with Python
The way Word variables work is based on the concept of "fields". When you insert a variable into a Word document, what you're actually doing is inserting a field, which points to a value stored either in the document properties or an external data source. Upon updating the fields, Word recalculates them to display the most current information.
Spire.Doc for Python offers the VariableCollection.Add(name, value) method to insert variables into Word documents. Here are the detailed steps:
- Create a Document object.
- Call the Document.AddSection() method to create a new section.
- Call the Section.AddParagraph() method to create a new paragraph.
- Call the Paragraph.AppendField(fieldName, fieldType) method to add a variable field (FieldDocVariable) within the paragraph.
- Set Document.IsUpdateFields to True to update the fields.
- Save the document by Document.SaveToFile() method.
- Python
from spire.doc import *
# Create a Document object
document = Document()
# Add a new section to the document
section = document.AddSection()
# Add a new paragraph within the newly created section
paragraph = section.AddParagraph()
# Append a FieldDocVariable type field named "CompanyName" to the paragraph
paragraph.AppendField("CompanyName", FieldType.FieldDocVariable)
# Add the variable to the document's variable collection
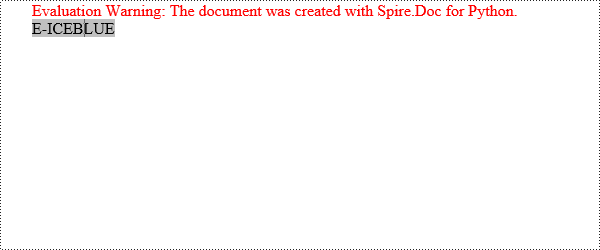
document.Variables.Add("CompanyName", "E-ICEBLUE")
# Update fields
document.IsUpdateFields = True
# Save the document to a specified path
document.SaveToFile("AddVariable.docx", FileFormat.Docx2016)
# Dispose the document
document.Dispose()
Count the Number of Variables in a Word Document with Python
Here are the detailed steps to use the Document.Variables.Count property to get the number of variables:
- Create a Document object.
- Call the Document.LoadFromFile() method to load the document that contains the variables.
- Use the Document.Variables.Count property to obtain the number of variables.
- Print the count in console.
- Python
from spire.doc import *
# Create a Document object
document = Document()
# Load an existing document
document.LoadFromFile("AddVariable.docx")
# Get the count of variables in the document
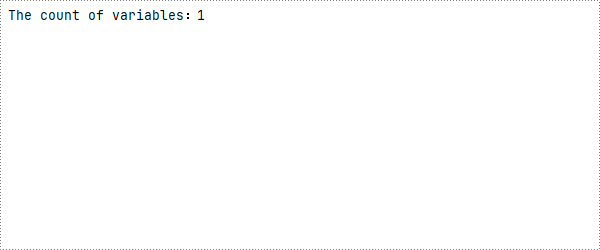
count=document.Variables.Count
# Print to console
print(f"The count of variables:{count}")
Retrieve Variables from a Word Document with Python
Spire.Doc for Python provides the GetNameByIndex(int index) and GetValueByIndex(int index) methods to retrieve variable names and values by their indices. Below are the detailed steps:
- Create a Document object.
- Call the Document.LoadFromFile() method to load the document that contains the variables.
- Call the Document.Variables.GetNameByIndex(index) method to obtain the variable name.
- Call the Document.Variables.GetValueByIndex(index) method to obtain the variable value.
- Call the Document.Variables.get_Item(name) to obtain variable value through the variable name.
- Print the count in console.
- Python
from spire.doc import *
# Create a Document object
document = Document()
# Load an existing document
document.LoadFromFile("AddVariable.docx")
# Obtain variable name based on index 0
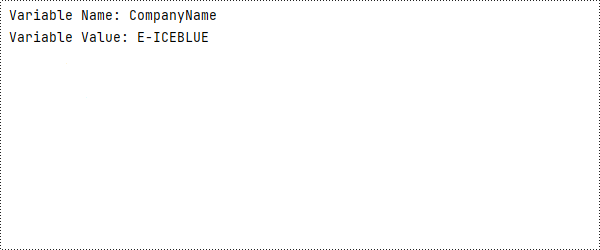
name=document.Variables.GetNameByIndex(0)
# Obtain variable value based on index 0
value=document.Variables.GetValueByIndex(0)
# Obtain variable value through the variable name
value1=document.Variables.get_Item("CompanyName")
# Print to console
print("Variable Name:", name)
print("Variable Value:", value)
Delete Variables from a Word Document with Python
The VariableCollection.Remove(name) method can be used to delete a specified variable from the document, with the parameter being the name of the variable.
- Create a Document object.
- Call the Document.LoadFromFile() method to load the document that contains the variables.
- Call the Document.Variables.Remove(name) method to remove the variable.
- Set Document.IsUpdateFields to True to update the fields.
- Save the document by Document.SaveToFile() method.
- Python
from spire.doc import *

# Create a Document object
document = Document()

# Load an existing document
document.LoadFromFile("AddVariable.docx")

# Remove the variable named "CompanyName"
document.Variables.Remove("CompanyName")

# Update fields
document.IsUpdateFields=True

# Save the document
document.SaveToFile("RemoveVariable.docx",FileFormat.Docx2016)

# Dispose the document
document.Dispose()
Apply for a Temporary License
If you'd like to remove the evaluation message from the generated documents, or to get rid of the function limitations, please request a 30-day trial license for yourself.
Spire.Doc for Python is a robust library that enables you to read and write Microsoft Word documents using Python. With Spire.Doc, you can create, read, edit, and convert both DOC and DOCX file formats without requiring Microsoft Word to be installed on your system.
This article demonstrates how to install Spire.Doc for Python on Mac.
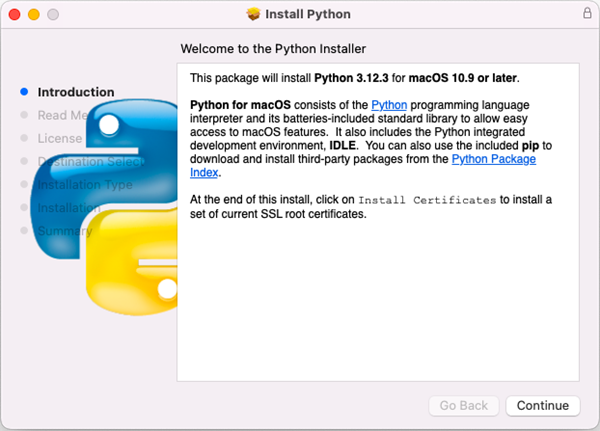
Step 1
Download the most recent version of Python for macOS and install it on your Mac. If you have already completed this step, proceed directly to step 2.
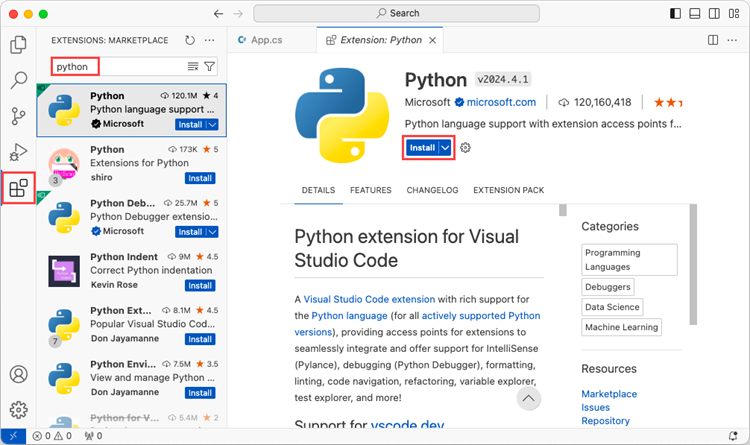
Step 2
Open VS Code and search for 'Python' in the Extensions panel. Click 'Install' to add support for Python in your VS Code.
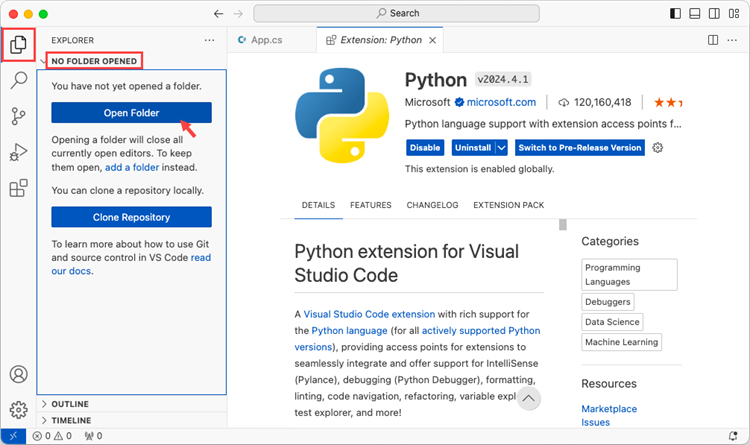
Step 3
Click 'Explorer' > 'NO FOLRDER OPENED' > 'Open Folder'.
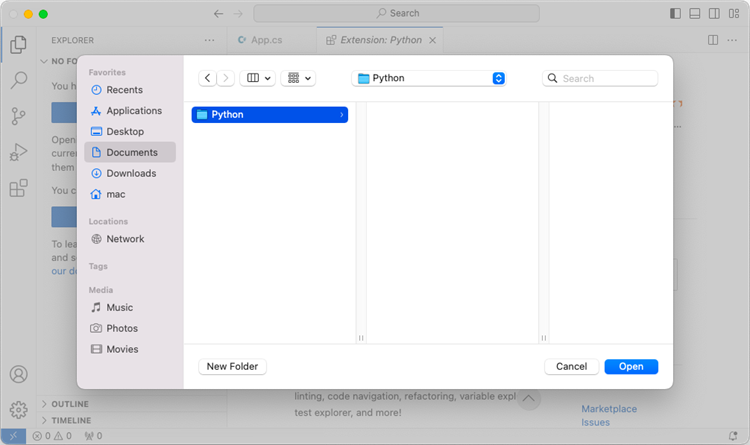
Choose an existing folder as the workspace, or you can create a new folder and then open it.
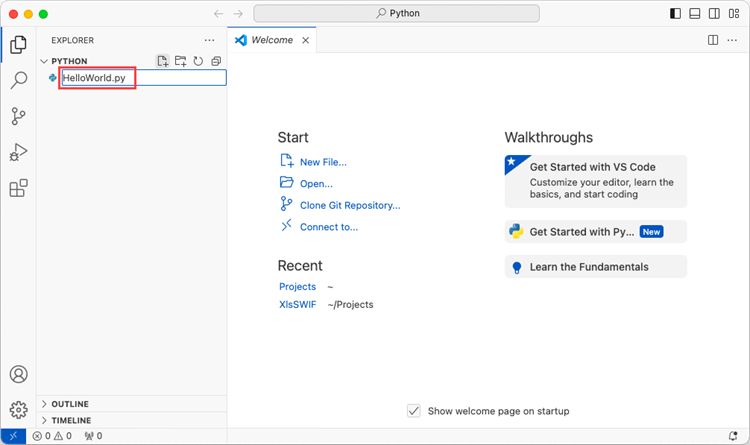
Add a .py file to the folder you just opened and name it whatever you want (in this case, HelloWorld.py).
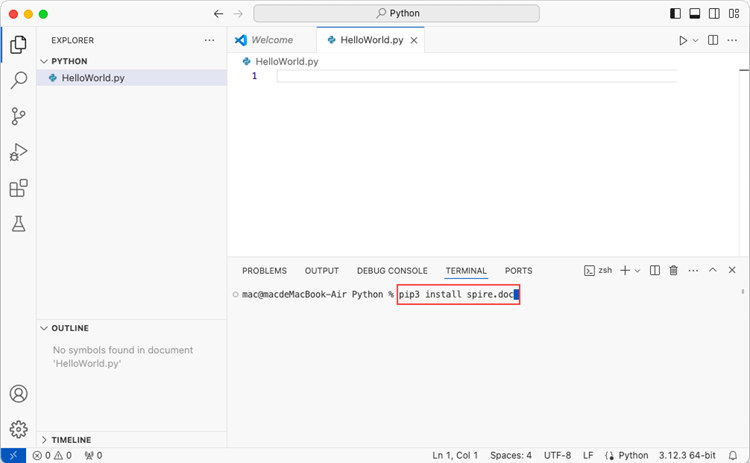
Step 4
Use the keyboard shortcut Ctrl + ' to open the Terminal. Then, install Spire.Doc for Python by entering the following command line in the terminal.
pip3 install spire.doc
Note that pip3 is a package installer specifically designed for Python 3.x versions, while pip is a package installer for Python 2.x versions. If you are working with Python 2.x, you can use the pip command.
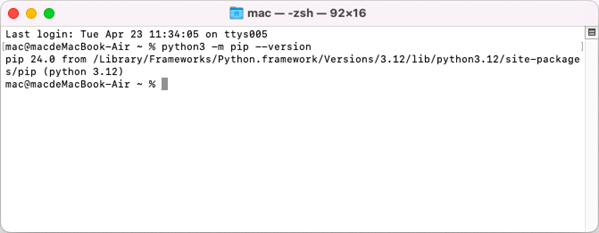
Step 5
Open a Terminal window on your Mac, and type the following command to obtain the installation path of Python on your system.
python3 -m pip --version
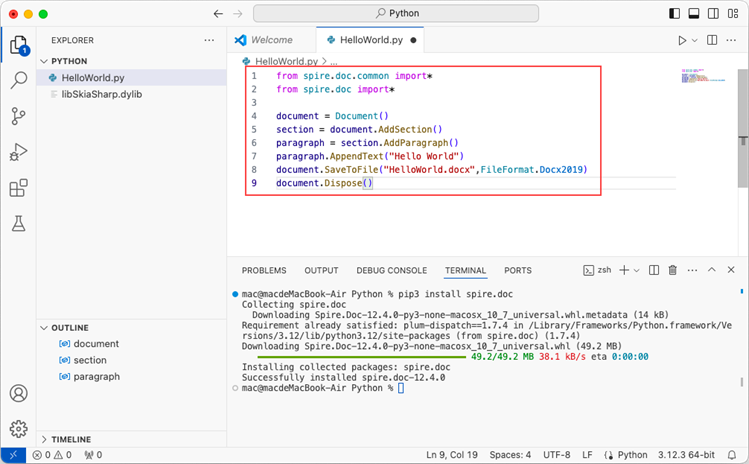
Step 6
Add the following code snippet to the 'HelloWorld.py' file.
- Python
from spire.doc.common import *
from spire.doc import *

document = Document()
section = document.AddSection()
paragraph = section.AddParagraph()
paragraph.AppendText("Hello World")
document.SaveToFile("HelloWorld.docx", FileFormat.Docx2019)
document.Dispose()
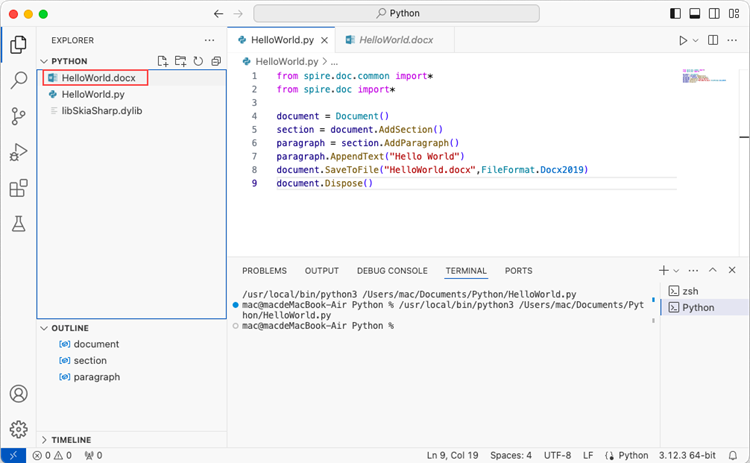
After executing the Python file, you will find the resulting Word document in the 'EXPLORER' panel.
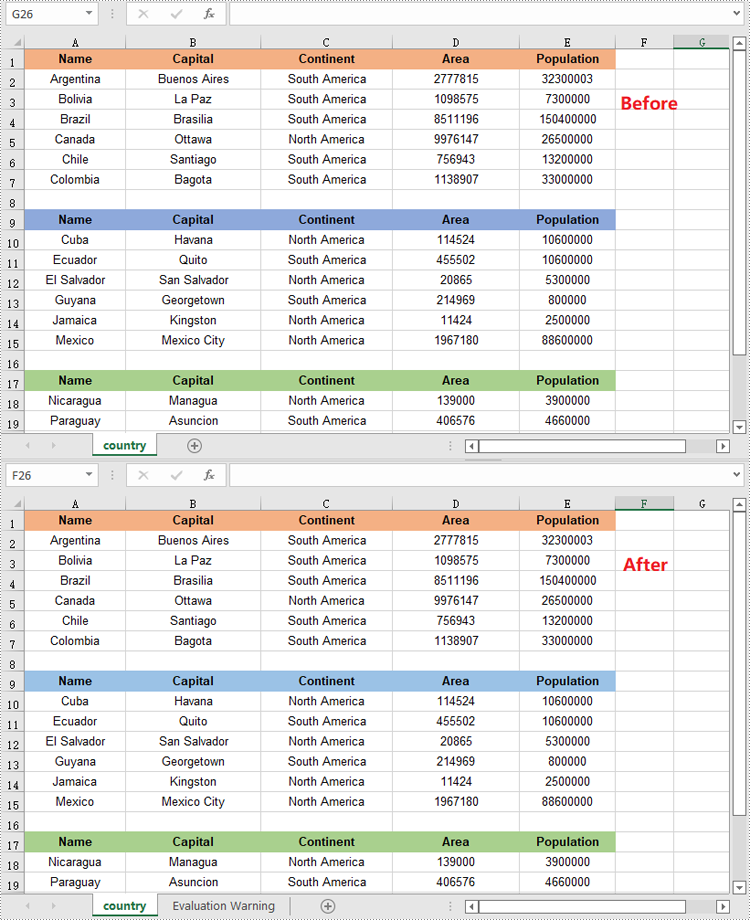
Section breaks in Word allow users to divide a document into sections, each with unique formatting options. This is especially useful when working with long documents where you want to apply different layouts, headers, footers, margins or page orientations within the same document. In this article, you will learn how to insert or remove section breaks in Word in Python using Spire.Doc for Python.
Install Spire.Doc for Python
This scenario requires Spire.Doc for Python and plum-dispatch v1.7.4. They can be easily installed in your Windows through the following pip commands.
pip install Spire.Doc
If you are unsure how to install, please refer to this tutorial: How to Install Spire.Doc for Python on Windows
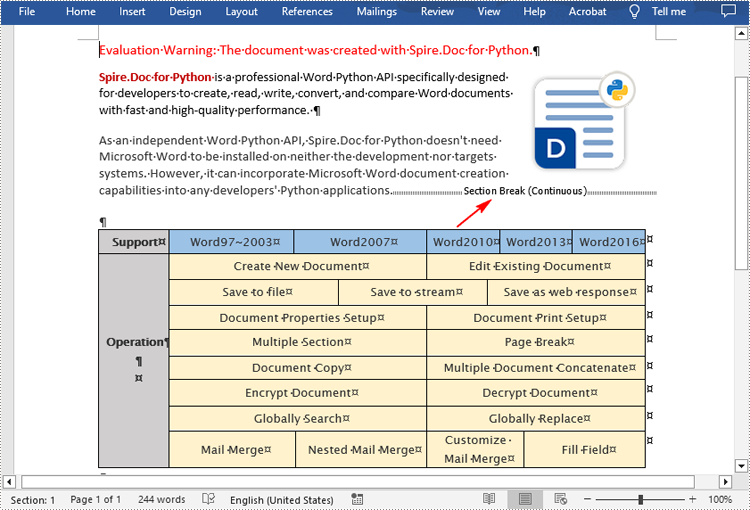
Insert Section Breaks in Word in Python
Spire.Doc for Python provides the Paragraph.InsertSectionBreak(breakType: SectionBreakType) method to insert a specified type of section break to a paragraph. The following table provides an overview of the supported section break types, along with their corresponding Enums and descriptions:
| Section Break | Enum | Description |
| New page | SectionBreakType.New_Page | Start the new section on a new page. |
| Continuous | SectionBreakType.No_Break | Start the new section on the same page, allowing for continuous content flow. |
| Odd page | SectionBreakType.Odd_Page | Start the new section on the next odd-numbered page. |
| Even page | SectionBreakType.Even_Page | Start the new section on the next even-numbered page. |
| New column | SectionBreakType.New_Column | Start the new section in the next column if columns are enabled. |
The following are the detailed steps to insert a continuous section break:
- Create a Document instance.
- Load a Word document using Document.LoadFromFile() method.
- Get a specified section using Document.Sections[] property.
- Get a specified paragraph of the section using Section.Paragraphs[] property.
- Add a section break to the end of the paragraph using Paragraph.InsertSectionBreak() method.
- Save the result document using Document.SaveToFile() method.
- Python
from spire.doc import *
from spire.doc.common import *

inputFile = "sample.docx"
outputFile = "InsertSectionBreak.docx"

# Create a Document instance
document = Document()

# Load a Word document
document.LoadFromFile(inputFile)

# Get a specific section
section = document.Sections.get_Item(0)

# Get a specific paragraph
paragraph = section.Paragraphs.get_Item(0)

# Insert a continuous section break
paragraph.InsertSectionBreak(SectionBreakType.NoBreak)

# Save the result document
document.SaveToFile(outputFile, FileFormat.Docx2016)
document.Close()
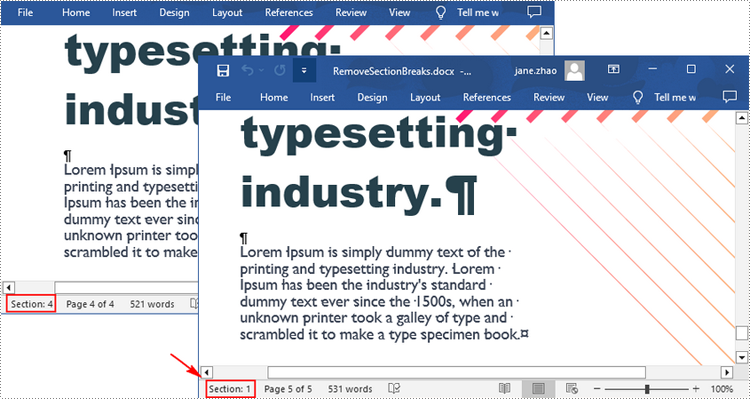
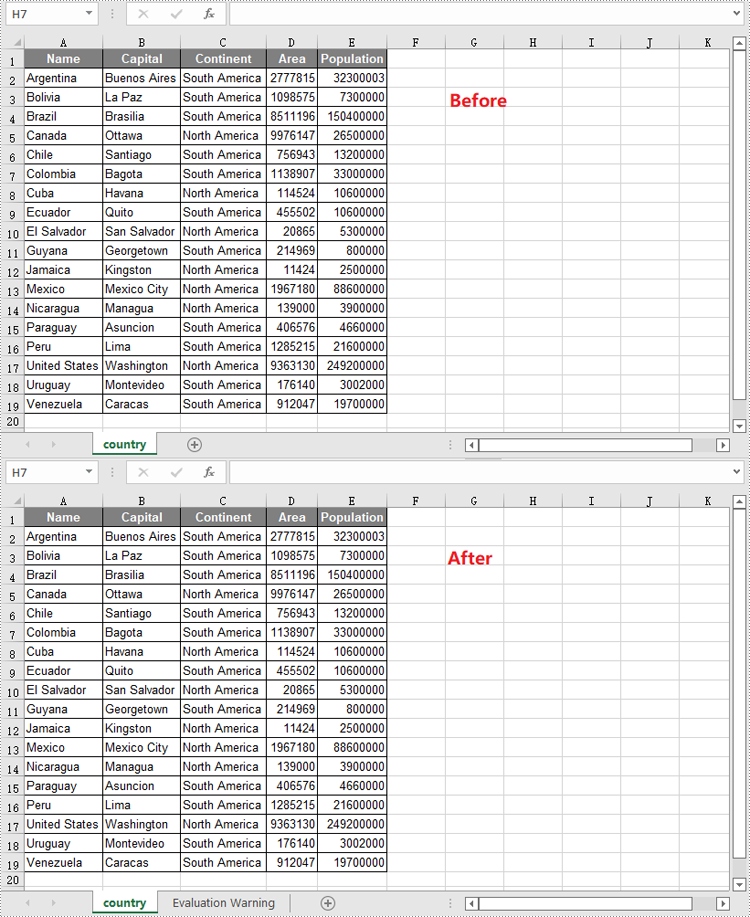
Remove Section Breaks in Word in Python
To delete all sections breaks in a Word document, we need to access the first section in the document, then copy the contents of the other sections to the first section and delete them. The following are the detailed steps:
- Create a Document instance.
- Load a Word document using Document.LoadFromFile() method.
- Get the first section using Document.Sections[] property.
- Iterate through other sections in the document.
- Get the second section, and then iterate through to get its child objects.
- Clone the child objects of the second section and add them to the first section using Section.Body.ChildObjects.Add() method.
- Delete the second section using Document.Sections.Remove() method.
- Repeat the process to copy and delete the remaining sections.
- Save the result document using Document.SaveToFile() method.
- Python
from spire.doc import *
from spire.doc.common import *

inputFile = "Report.docx"
outputFile = "RemoveSectionBreaks.docx"

# Create a Document instance
document = Document()

# Load a Word document
document.LoadFromFile(inputFile)

# Get a specific section
section = document.Sections.get_Item(0)

# Iterate through other sections in the document
for i in range(document.Sections.Count - 1):
    # Get the second section in the document
    section = document.Sections[1]

    # Iterate through all child objects of the second section
    for j in range(section.Body.ChildObjects.Count):
        # Get the child objects
        obj = section.Body.ChildObjects.get_Item(j)
        # Clone the child objects to the first section
        sec.Body.ChildObjects.Add(obj.Clone())
        # Remove the second section
        document.Sections.Remove(section)

# Save the result document
document.SaveToFile(outputFile, FileFormat.Docx2016)
document.Close()
Apply for a Temporary License
If you'd like to remove the evaluation message from the generated documents, or to get rid of the function limitations, please request a 30-day trial license for yourself.
Knowing how to remove headers or footers in Word is an essential skill as there may be times you need to change the formatting of your document or collaborate with others who do not need the headers or footers. In this article, you will learn how to remove headers or footers in Word in Python using Spire.Doc for Python.
Install Spire.Doc for Python
This scenario requires Spire.Doc for Python and plum-dispatch v1.7.4. They can be easily installed in your Windows through the following pip commands.
pip install Spire.Doc
If you are unsure how to install, please refer to this tutorial: How to Install Spire.Doc for Python on Windows
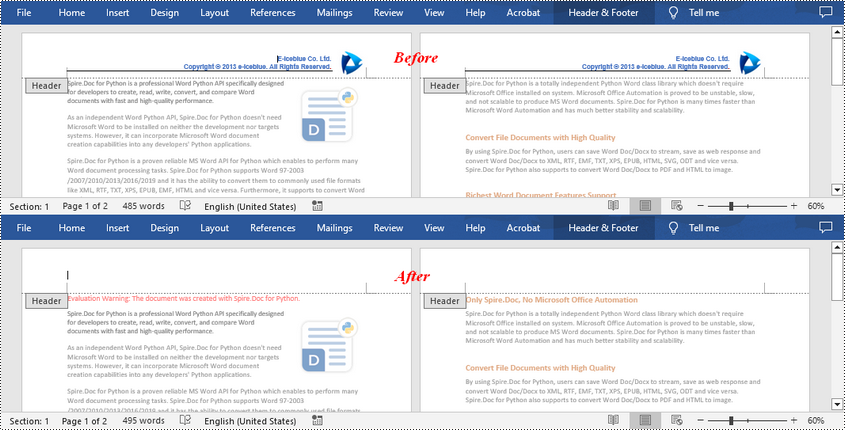
Remove Headers in a Word Document in Python
Spire.Doc for Python supports getting different headers in the first pages, odd pages, and even pages, and then delete all of them through the HeaderFooter.ChildObjects.Clear() method. The following are the detailed steps:
- Create a Document instance.
- Load a Word document using Document.LoadFromFile() method.
- Get a specified section using Document.Sections[] property.
- Iterate through all paragraphs in the section, and then all child objects in each paragraph.
- Get the headers for the first, odd, and even pages using Section.HeadersFooters[hfType: HeaderFooterType] property, and then delete them using HeaderFooter.ChildObjects.Clear() method.
- Save the result document using Document.SaveToFile() method.
- Python
from spire.doc import *
from spire.doc.common import *

inputFile = "HeaderFooter.docx"
outputFile = "RemoveHeaders.docx"

# Create a Document instance
doc = Document()

# Load a Word document
doc.LoadFromFile(inputFile)

# Get the first section
section = doc.Sections[0]

# Iterate through all paragraphs in the section
for i in range(section.Paragraphs.Count):
    para = section.Paragraphs.get_Item(i)

    # Iterate through all child objects in each paragraph
    for j in range(para.ChildObjects.Count):
        obj = para.ChildObjects.get_Item(j)

        # Delete header in the first page
        header = None
        header = section.HeadersFooters[HeaderFooterType.HeaderFirstPage]
        if header is not None:
            header.ChildObjects.Clear()

        # Delete headers in the odd pages
        header = section.HeadersFooters[HeaderFooterType.HeaderOdd]
        if header is not None:
            header.ChildObjects.Clear()

        # Delete headers in the even pages
        header = section.HeadersFooters[HeaderFooterType.HeaderEven]
        if header is not None:
            header.ChildObjects.Clear()

# Save the result document
doc.SaveToFile(outputFile, FileFormat.Docx)
doc.Close()
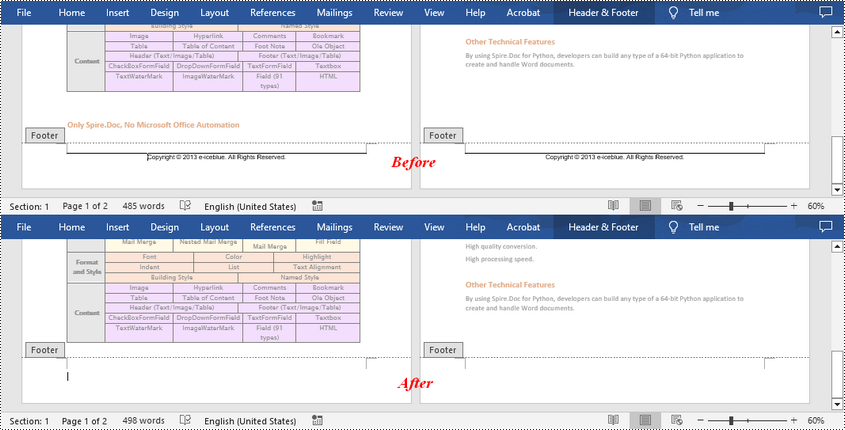
Remove Footers in a Word Document in Python
Deleting footers is similar to that of deleting headers, you can also get the footers on different pages first and then delete them at once. The following are the detailed steps:
- Create a Document instance.
- Load a Word document using Document.LoadFromFile() method.
- Get a specified section using Document.Sections[] property.
- Iterate through all paragraphs in the section, and then all child objects in each paragraph.
- Get the footers for the first, odd, and even pages using Section.HeadersFooters[hfType: HeaderFooterType] property, and then delete them using HeaderFooter.ChildObjects.Clear() method.
- Save the result document using Document.SaveToFile() method.
- Python
from spire.doc import *
from spire.doc.common import *

inputFile = "HeaderFooter.docx"
outputFile = "RemoveFooters.docx"

# Create a Document instance
doc = Document()

# Load a Word document
doc.LoadFromFile(inputFile)

# Get the first section
section = doc.Sections[0]

# Iterate through all paragraphs in the section
for i in range(section.Paragraphs.Count):
    para = section.Paragraphs.get_Item(i)

    # Iterate through all child objects in each paragraph
    for j in range(para.ChildObjects.Count):
        obj = para.ChildObjects.get_Item(j)

        # Delete footer in the first page
        footer = None
        footer = section.HeadersFooters[HeaderFooterType.FooterFirstPage]
        if footer is not None:
            footer.ChildObjects.Clear()

        # Delete footers in the odd pages
        footer = section.HeadersFooters[HeaderFooterType.FooterOdd]
        if footer is not None:
            footer.ChildObjects.Clear()

        # Delete footers in the even pages
        footer = section.HeadersFooters[HeaderFooterType.FooterEven]
        if footer is not None:
            footer.ChildObjects.Clear()

# Save the result document
doc.SaveToFile(outputFile, FileFormat.Docx)
doc.Close()
Apply for a Temporary License
If you'd like to remove the evaluation message from the generated documents, or to get rid of the function limitations, please request a 30-day trial license for yourself.
Comments in Word documents are often used for collaborative review and feedback purposes. They may contain text and images that provide valuable information to guide document improvements. Extracting the text and images from comments allows you to analyze and evaluate the feedback provided by reviewers, helping you gain a comprehensive understanding of the strengths, weaknesses, and suggestions related to the document. In this article, we will demonstrate how to extract text and images from Word comments in Python using Spire.Doc for Python.
Install Spire.Doc for Python
This scenario requires Spire.Doc for Python and plum-dispatch v1.7.4. They can be easily installed in your Windows through the following pip command.
pip install Spire.Doc
If you are unsure how to install, please refer to this tutorial: How to Install Spire.Doc for Python on Windows
Extract Text from Word Comments in Python
You can easily retrieve the author and text of a Word comment using the Comment.Format.Author and Comment.Body.Paragraphs[index].Text properties provided by Spire.Doc for Python. The detailed steps are as follows.
- Create an object of the Document class.
- Load a Word document using the Document.LoadFromFile() method.
- Create a list to store the extracted comment data.
- Iterate through the comments in the document.
- For each comment, iterate through the paragraphs of the comment body.
- For each paragraph, get the text using the Comment.Body.Paragraphs[index].Text property.
- Get the author of the comment using the Comment.Format.Author property.
- Add the text and author of the comment to the list.
- Save the content of the list to a text file.
- Python
from spire.doc import *
from spire.doc.common import *

# Create an object of the Document class
document = Document()
# Load a Word document containing comments
document.LoadFromFile("Comments.docx")

# Create a list to store the extracted comment data
comments = []

# Iterate through the comments in the document
for i in range(document.Comments.Count):
    comment = document.Comments[i]
    comment_text = ""

    # Iterate through the paragraphs in the comment body
    for j in range(comment.Body.Paragraphs.Count):
        paragraph = comment.Body.Paragraphs[j]
        comment_text += paragraph.Text + "\n"

    # Get the comment author
    comment_author = comment.Format.Author

    # Append the comment data to the list
    comments.append({
        "author": comment_author,
        "text": comment_text
    })

# Write the comment data to a file
with open("comment_data.txt", "w", encoding="utf-8") as file:
    for comment in comments:
        file.write(f"Author: {comment['author']}\nText: {comment['text']}\n\n")

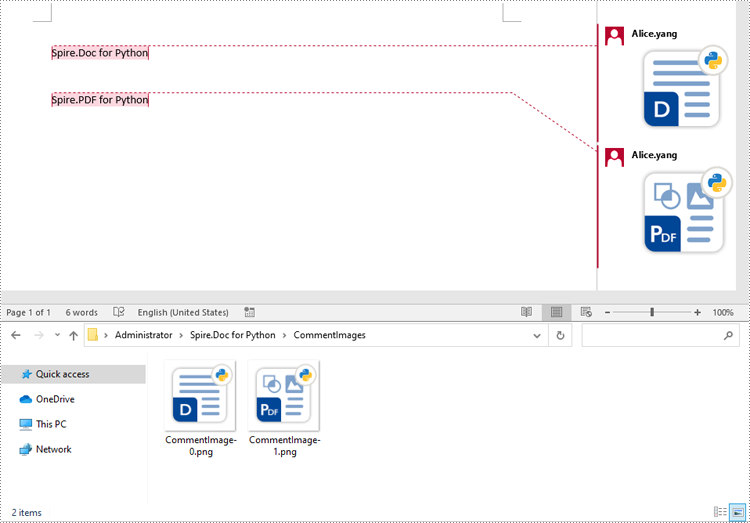
Extract Images from Word Comments in Python
To extract images from Word comments, you need to iterate through the child objects in the paragraphs of the comments to find the DocPicture objects, then get the image data using DocPicture.ImageBytes property, finally save the image data to image files.
- Create an object of the Document class.
- Load a Word document using the Document.LoadFromFile() method.
- Create a list to store the extracted image data.
- Iterate through the comments in the document.
- For each comment, iterate through the paragraphs of the comment body.
- For each paragraph, iterate through the child objects of the paragraph.
- Check if the object is a DocPicture object.
- If the object is a DocPicture, get the image data using the DocPicture.ImageBytes property and add it to the list.
- Save the image data in the list to individual image files.
- Python
from spire.doc import *
from spire.doc.common import *

# Create an object of the Document class
document = Document()
# Load a Word document containing comments
document.LoadFromFile("Comments.docx")

# Create a list to store the extracted image data
images = []

# Iterate through the comments in the document
for i in range(document.Comments.Count):
    comment = document.Comments.get_Item(i)
    # Iterate through the paragraphs in the comment body
    for j in range(comment.Body.Paragraphs.Count):
        paragraph = comment.Body.Paragraphs.get_Item(j)
        # Iterate through the child objects in the paragraph
        for o in range(paragraph.ChildObjects.Count):
            obj = paragraph.ChildObjects.get_Item(o)
            # Find the images
            if isinstance(obj, DocPicture):
                picture = obj
                # Get the image data and add it to the list
                data_bytes = picture.ImageBytes
                images.append(data_bytes)

# Save the image data to image files
for i, image_data in enumerate(images):
    file_name = f"CommentImage-{i}.png"
    with open(os.path.join("CommentImages/", file_name), 'wb') as image_file:
        image_file.write(image_data)
Apply for a Temporary License
If you'd like to remove the evaluation message from the generated documents, or to get rid of the function limitations, please request a 30-day trial license for yourself.
Drop-down lists in Excel worksheets are an indispensable tool for enhancing data accuracy, efficiency, and usability in spreadsheet management. By offering pre-defined options within a cell, they not only streamline data entry processes but also enforce consistency, reducing the likelihood of input errors. This feature is particularly valuable when working with large datasets or collaborative projects where maintaining uniformity across multiple entries is crucial. This article demonstrates how to create customized drop-down lists within Excel worksheets using Spire.XLS for Python, empowering users to create organized and user-friendly worksheets.
- Create Drop-Down Lists Based on Cell Values Using Python
- Create Drop-Down Lists Based on Strings Using Python
Install Spire.XLS for Python
This scenario requires Spire.XLS for Python and plum-dispatch v1.7.4. They can be easily installed in your Windows through the following pip command.
pip install Spire.XLS
If you are unsure how to install, please refer to: How to Install Spire.XLS for Python on Windows
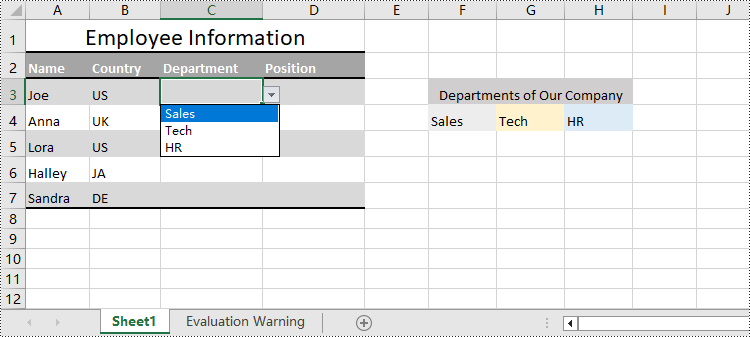
Create Drop-Down Lists Based on Cell Values Using Python
In Excel worksheets, creating drop-down lists is accomplished through the data validation feature. With Spire.XLS for Python, developers can use the CellRange.DataValidation.DataRange property to create drop-down lists within cells and use the data from the specified cell range as list options.
The detailed steps for creating a drop-down list based on cell values are as follows:
- Create an instance of Workbook class.
- Load an Excel file using Workbook.LoadFromFile() method.
- Get a worksheet using Workbook.Worksheets.get_Item() method.
- Get a specific cell range through Worksheet.Range[] property.
- Set the data range for data validation of the cell range through CellRange.DataValidation.DataRange property to create drop-down lists with cell values.
- Save the workbook using Workbook.SaveToFile() method.
- Python
from spire.xls import *
from spire.xls.common import *

# Create an instance of Workbook
workbook = Workbook()

# Load an Excel file
workbook.LoadFromFile("Sample.xlsx")

# Get the first worksheet
sheet = workbook.Worksheets.get_Item(0)

# Get a specific cell range
cellRange = sheet.Range["C3:C7"]

# Set the data range for data validation to create drop-down lists in the cell range
cellRange.DataValidation.DataRange = sheet.Range["F4:H4"]

# Save the workbook
workbook.SaveToFile("output/DropDownListExcel.xlsx", FileFormat.Version2016)
workbook.Dispose()
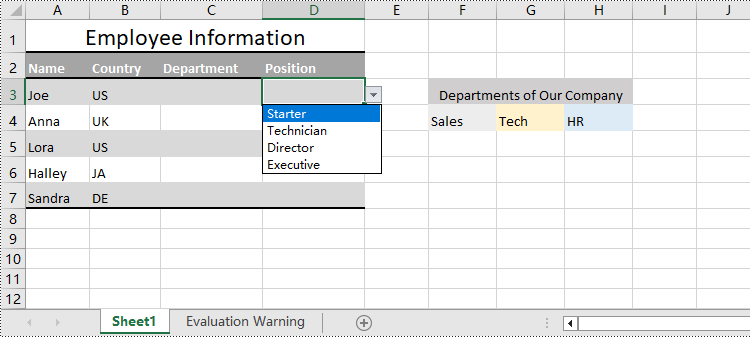
Create Drop-Down Lists Based on String Using Python
Spire.XLS for Python also provides the CellRange.DataValidation.Values property to create drop-down lists in cells directly using string lists.
The detailed steps for creating drop-down lists based on values are as follows:
- Create an instance of Workbook class.
- Load an Excel file using Workbook.LoadFromFile() method.
- Get a worksheet using Workbook.Worksheets.get_Item() method.
- Get a specific cell range through Worksheet.Range[] property.
- Set a string list as the values of data validation in the cell range through CellRange.DataValidation.Values property to create drop-down lists based on strings.
- Save the workbook using Workbook.SaveToFile() method.
- Python
from spire.xls import *
from spire.xls.common import *

# Create an instance of Workbook
workbook = Workbook()

# Load an Excel file
workbook.LoadFromFile("Sample.xlsx")

# Get the first worksheet
sheet = workbook.Worksheets.get_Item(0)

# Get a cell range
cellRange = sheet.Range["D3:D7"]

# Set the value for data validation to create drop-down lists
cellRange.DataValidation.Values = ["Starter", "Technician", "Director", "Executive"]

# Save the workbook
workbook.SaveToFile("output/ValueDropDownListExcel.xlsx", FileFormat.Version2016)
workbook.Dispose()
Apply for a Temporary License
If you'd like to remove the evaluation message from the generated documents, or to get rid of the function limitations, please request a 30-day trial license for yourself.
With the increasing popularity of team collaboration, the track changes function in Word documents has become the cornerstone of version control and content review. However, for developers who pursue automation and efficiency, how to flexibly extract these revision information from Word documents remains a significant challenge. This article will introduce you to how to use Spire.Doc for Python to obtain revision information in Word documents.
Install Spire.Doc for Python
This scenario requires Spire.Doc for Python and plum-dispatch v1.7.4. They can be easily installed in your Windows through the following pip command.
pip install Spire.Doc
If you are unsure how to install, please refer to this tutorial: How to Install Spire.Doc for Python on Windows
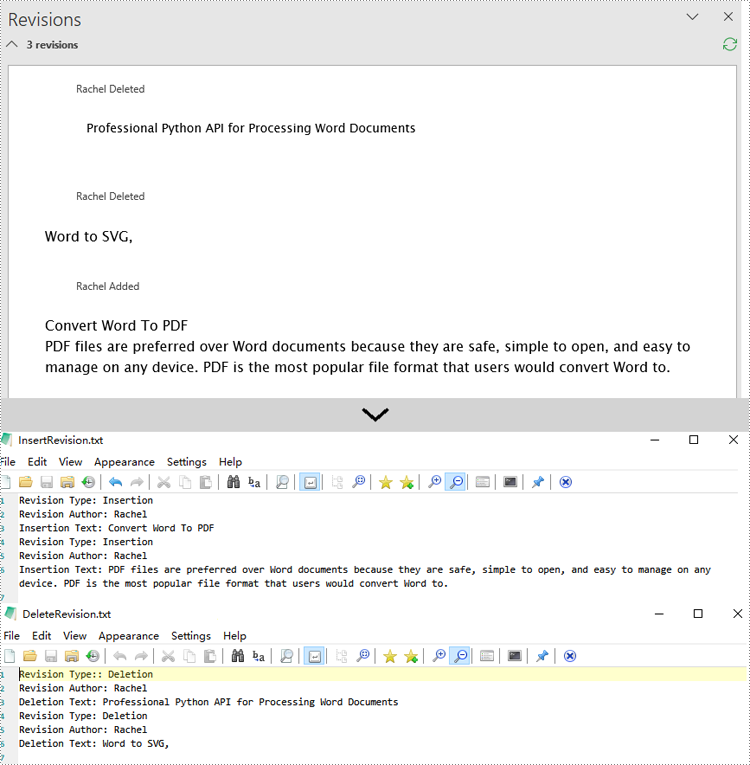
Get Revisions of Word Document in Python
Spire.Doc for Python provides the IsInsertRevision and DeleteRevision properties to support determining whether an element in a Word document is an insertion revision or a deletion revision. Here are the detailed steps:
- Create an instance of the Document class and load the Word document that contains revisions.
- Initialize lists to collect insertion and deletion revision information.
- Iterate through the sections of the document and their body elements.
- Obtain the paragraphs in the body and use the IsInsertRevision property to determine if the paragraph is an insertion revision.
- Get the type, author, and associated text of the insertion revision.
- Use the IsDeleteRevision property to determine if the paragraph is a deletion revision, and obtain its revision type, author, and associated text.
- Iterate through the child elements of the paragraph, similarly checking if the TextRange is an insertion or deletion revision, and retrieve the revision type, author, and associated text.
- Define a WriteAllText function to save the insertion and deletion revision information to TXT documents.
- Python
from spire.doc import *

# Function to write text to a file
def WriteAllText(fname: str, text: str):
    with open(fname, "w", encoding='utf-8') as fp:
        fp.write(text)

# Input and output file names
inputFile = "sample.docx"
outputFile1 = "InsertRevision.txt"
outputFile2 = "DeleteRevision.txt"

# Create a Document object
document = Document()

# Load the Word document
document.LoadFromFile(inputFile)

# Initialize lists to store insert and delete revisions
insert_revisions = []
delete_revisions = []

# Iterate through sections in the document
for k in range(document.Sections.Count):
    sec = document.Sections.get_Item(k)

    # Iterate through body elements in the section
    for m in range(sec.Body.ChildObjects.Count):
        # Check if the item is a Paragraph
        docItem = sec.Body.ChildObjects.get_Item(m)
        if isinstance(docItem, Paragraph):
            para = docItem
            para.AppendField("",FieldType.FieldDocVariable)

            # Check if the paragraph is an insertion revision
            if para.IsInsertRevision:
                insRevison = para.InsertRevision
                insType = insRevison.Type
                insAuthor = insRevison.Author

                # Add insertion revision details to the list
                insert_revisions.append(f"Revision Type: {insType.name}\n")
                insert_revisions.append(f"Revision Author: {insAuthor}\n")
                insert_revisions.append(f"Insertion Text: {para.Text}\n")
            # Check if the paragraph is a deletion revision
            elif para.IsDeleteRevision:
                delRevison = para.DeleteRevision
                delType = delRevison.Type
                delAuthor = delRevison.Author

                # Add deletion revision details to the list
                delete_revisions.append(f"Revision Type:: {delType.name}\n")
                delete_revisions.append(f"Revision Author: {delAuthor}\n")
                delete_revisions.append(f"Deletion Text: {para.Text}\n")
            else:
                # Iterate through all child objects of Paragraph
                for j in range(para.ChildObjects.Count):
                    obj = para.ChildObjects.get_Item(j)
                    # Check if the current object is an instance of TextRange
                    if isinstance(obj, TextRange):
                        textRange = obj

                        # Check if the textrange is an insertion revision
                        if textRange.IsInsertRevision:
                            insRevison = textRange.InsertRevision
                            insType = insRevison.Type
                            insAuthor = insRevison.Author

                            # Add insertion revision details to the list
                            insert_revisions.append(f"Revision Type: {insType.name}\n")
                            insert_revisions.append(f"Revision Author: {insAuthor}\n")
                            insert_revisions.append(f"Insertion Text: {textRange.Text}\n")
                        # Check if the textrange is a deletion revision
                        elif textRange.IsDeleteRevision:
                            delRevison = textRange.DeleteRevision
                            delType = delRevison.Type
                            delAuthor = delRevison.Author

                            # Add deletion revision details to the list
                            delete_revisions.append(f"Revision Type: {delType.name}\n")
                            delete_revisions.append(f"Revision Author: {delAuthor}\n")
                            delete_revisions.append(f"Deletion Text: {textRange.Text}\n")

# Write all the insertion revision details to the 'outputFile1' file
WriteAllText(outputFile1, ''.join(insert_revisions))

# Write all the deletion revision details to the 'outputFile2' file
WriteAllText(outputFile2, ''.join(delete_revisions))

# Dispose the document
document.Dispose()
Apply for a Temporary License
If you'd like to remove the evaluation message from the generated documents, or to get rid of the function limitations, please request a 30-day trial license for yourself.
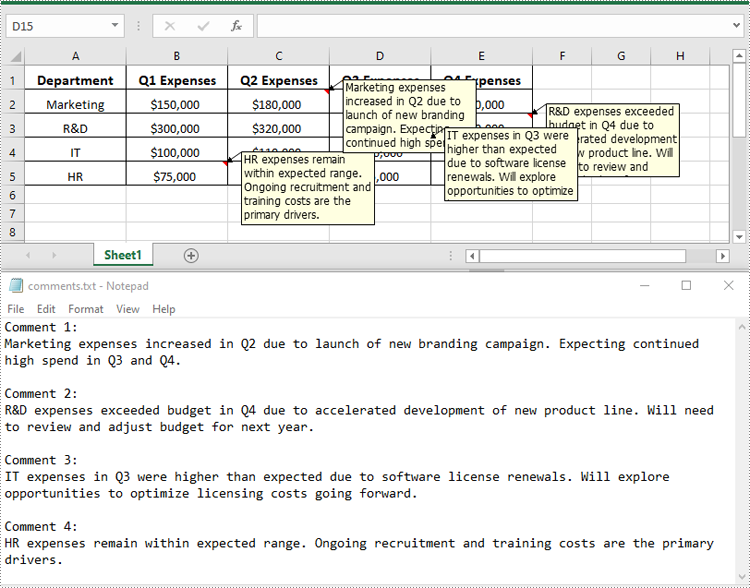
Excel files often contain a wealth of comments that can provide valuable context and insights. These comments may include important text notes, instructions, or even embedded images that can be incredibly useful for various data analysis and reporting tasks. Extracting this information from the comments can be a valuable step in unlocking the full potential of the data. In this article, we will demonstrate how to effectively extract text and images from comments in Excel files in Python using Spire.XLS for Python.
Install Spire.XLS for Python
This scenario requires Spire.XLS for Python and plum-dispatch v1.7.4. They can be easily installed in your Windows through the following pip command.
pip install Spire.XLS
If you are unsure how to install, please refer to this tutorial: How to Install Spire.XLS for Python on Windows
Extract Text from Comments in Excel in Python
You can get the text of comments using the ExcelCommentObject.Text property. The detailed steps are as follows.
- Create an object of the Workbook class.
- Load an Excel file using Workbook.LoadFromFile() method.
- Create a list to store the extracted comment text.
- Get the comments in the worksheet using Worksheet.Comments property.
- Traverse through the comments.
- Get the text of each comment using ExcelCommentObject.Text property and append it to the list.
- Save the content of the list to a text file.
- Python
from spire.xls import *
from spire.xls.common import *

# Create a Workbook object
workbook = Workbook()

# Load an Excel file
workbook.LoadFromFile("Comments.xlsx")

# Get the first worksheet
worksheet = workbook.Worksheets[0]

# Create a list to store the comment text
comment_text = []

# Get all the comments in the worksheet
comments = worksheet.Comments

# Extract the text from each comment and add it to the list
for i, comment in enumerate(comments, start=1):
    comment_text.append(f"Comment {i}:")
    text = comment.Text
    comment_text.append(text)
    comment_text.append("")

# Write the comment text to a file
with open("comments.txt", "w", encoding="utf-8") as file:
    file.write("\n".join(comment_text))
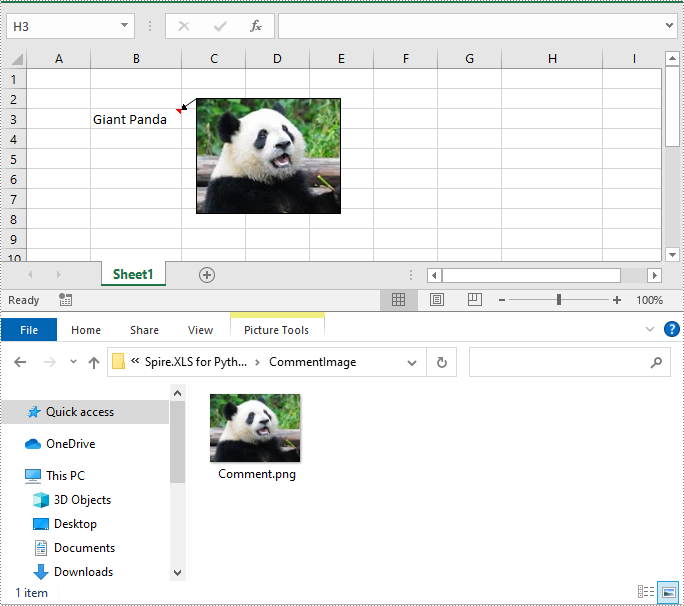
Extract Images from Comments in Excel in Python
To get the images embedded in Excel comments, you can use the ExcelCommentObject.Fill.Picture property. The detailed steps are as follows.
- Create an object of the Workbook class.
- Load an Excel file using Workbook.LoadFromFile() method.
- Get a specific comment in the worksheet using Worksheet.Comments[index] property.
- Get the embedded image in the comment using ExcelCommentObject.Fill.Picture property.
- Save the image to an image file.
- Python
from spire.xls import *
from spire.xls.common import *

# Create a Workbook object
workbook = Workbook()

# Load an Excel file
workbook.LoadFromFile("ImageComment.xlsx")

# Get the first worksheet
worksheet = workbook.Worksheets[0]

# Get a specific comment in the worksheet
comment = worksheet.Comments[0]

# Extract the image from the comment and save it to an image file
image = comment.Fill.Picture
image.Save("CommentImage/Comment.png")
Apply for a Temporary License
If you'd like to remove the evaluation message from the generated documents, or to get rid of the function limitations, please request a 30-day trial license for yourself.
Excel has been a widely used tool for data organization and analysis for many years. Over time, Microsoft has introduced different file formats for storing Excel data, the most common being the older XLS format and the more modern XLSX format.
The XLS format, introduced in the late 1990s, had certain limitations, such as a file size limit of 65,536 rows and 256 columns, and a maximum of 65,000 unique styles. The XLSX format, introduced in 2007, addressed these limitations by allowing for larger file sizes, more rows and columns, and expanded style capabilities. While XLSX is now the standard format, there are still many existing XLS files that need to be accessed and used, which makes the ability to convert between these formats an essential skill. In this article, we will explain how to convert Excel XLS to XLSX and vice versa in Python using Spire.XLS for Python.
Install Spire.XLS for Python
This scenario requires Spire.XLS for Python and plum-dispatch v1.7.4. They can be easily installed in your Windows through the following pip command.
pip install Spire.XLS
If you are unsure how to install, please refer to this tutorial: How to Install Spire.XLS for Python on Windows
Convert XLSX to XLS in Python
To convert an XLSX file to XLS format, you can use the Workbook.SaveToFile(fileName, ExcelVersion.Version97to2003) method. The ExcelVersion.Version97to2003 parameter specifies that the workbook should be saved in the Excel 97-2003 (XLS) format. The detailed steps are as follows.
- Create an object of the Workbook class.
- Load an XLSX file using the Workbook.LoadFromFile() method.
- Save the XLSX file to XLS format using the Workbook.SaveToFile(fileName, ExcelVersion.Version97to2003) method.
- Python
from spire.xls import *
from spire.xls.common import *

# Specify the input and output file paths
inputFile = "Sample1.xlsx"
outputFile = "XlsxToXls.xls"

# Create a Workbook object
workbook = Workbook()
# Load the XLSX file
workbook.LoadFromFile(inputFile)

# Save the XLSX file to XLS format
workbook.SaveToFile(outputFile, ExcelVersion.Version97to2003)
workbook.Dispose()
Convert XLS to XLSX in Python
To convert an XLS file to XLSX format, you need to specify the target Excel version to a version higher than 97-2003, such as 2007 (ExcelVersion.Version2007), 2010 (ExcelVersion.Version2010), 2013 (ExcelVersion.Version2013), or 2016 (ExcelVersion.Version2016). The detailed steps are as follows.
- Create an object of the Workbook class.
- Load an XLS file using the Workbook.LoadFromFile() method.
- Save the XLS file to an Excel 2016 (XLSX) file using the Workbook.SaveToFile(fileName, ExcelVersion.Version2016) method.
- Python
from spire.xls import *
from spire.xls.common import *

# Specify the input and output file paths
inputFile = "Sample2.xls"
outputFile = "XlsToXlsx.xlsx"

# Create a Workbook object
workbook = Workbook()
# Load the XLS file
workbook.LoadFromFile(inputFile)

# Save the XLS file to XLSX format
workbook.SaveToFile(outputFile, ExcelVersion.Version2016)
workbook.Dispose()
Apply for a Temporary License
If you'd like to remove the evaluation message from the generated documents, or to get rid of the function limitations, please request a 30-day trial license for yourself.
