
Python (365)
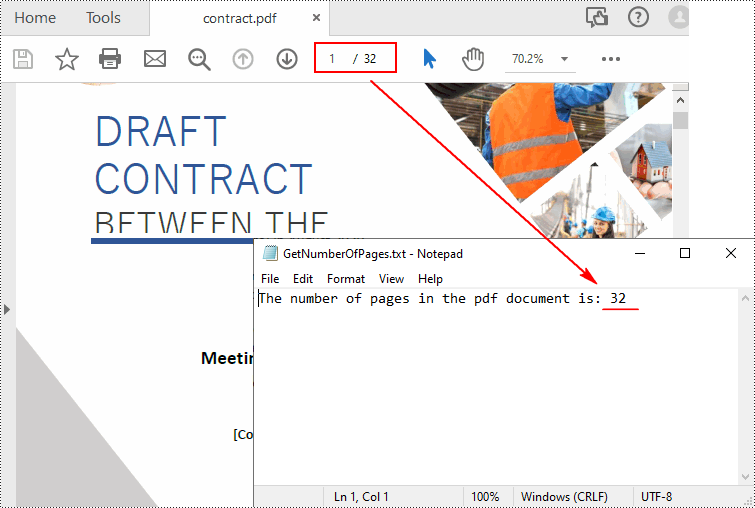
To get the number of pages in a PDF file, you can open the file in a PDF viewer such as Adobe, which has a built-in page count feature. However, when there is a batch of PDF files, opening each file to check how many pages it contains is a time-consuming task. In this article, you will learn how to quicky count the number of pages in a PDF file through programming using Spire.PDF for Python.
Install Spire.PDF for Python
This scenario requires Spire.PDF for Python and plum-dispatch v1.7.4. They can be easily installed in your Windows through the following pip command.
pip install Spire.PDF
If you are unsure how to install, please refer to this tutorial: How to Install Spire.PDF for Python on Windows
Count the Number of Pages in a PDF File in Python
Spire.PDF for Python offers the PdfDocument.Pages.Count property to quickly count the number of pages in a PDF file without opening it. The following are the detailed steps.
- Create a PdfDocument object.
- Load a sample PDF document using PdfDocument.LoadFromFile() method.
- Count the number of pages in the PDF document using PdfDocument.Pages.Count property.
- Write the result to a TXT file or print it out directly.
- Python
from spire.pdf.common import *
from spire.pdf import *

def AppendText(fname: str, text: str):
    fp = open(fname, "w")
    fp.write(text + "\n")
    fp.close()

# Specify the input and output files
inputFile = "contract.pdf"
outputFile = "GetNumberOfPages.txt"

# Create a PdfDocument object
pdf = PdfDocument()

# Load a PDF document from disk
pdf.LoadFromFile(inputFile)

# Count the number of pages in the document
count = pdf.Pages.Count
# Print the result
print("Total Pages:", count)

# Write the result to a TXT file
AppendText(
    outputFile, "The number of pages in the pdf document is: " + str(count))
pdf.Close()
Apply for a Temporary License
If you'd like to remove the evaluation message from the generated documents, or to get rid of the function limitations, please request a 30-day trial license for yourself.
Hyperlinks in PDF are interactive elements that, when clicked, can jump to a specific location in the document, to an external website, or to other resources. By inserting hyperlinks in a PDF document, you can provide supplementary information and enhance the overall integrity of the document. This article will demonstrate how to add hyperlinks to PDF files in Python using Spire.PDF for Python.
Install Spire.PDF for Python
This scenario requires Spire.PDF for Python and plum-dispatch v1.7.4. They can be easily installed in your Windows through the following pip command.
pip install Spire.PDFIf you are unsure how to install, please refer to this tutorial: How to Install Spire.PDF for Python on Windows
Add Hyperlinks to a PDF Document in Python
With Spire.PDF for Python, you can add web links, email links and file links to a PDF document. The following are the detailed steps:
- Create a pdf document and add a page to it.
- Specify a URL address and draw it directly on the page using PdfPageBase.Canvas.DrawString() method.
- Create a PdfTextWebLink object.
- Set the link's display text, URL address, and the font and brush used to draw it using properties of PdfTextWebLink class.
- Draw the link on the page using PdfTextWebLink.DrawTextWebLink() method.
- Create a PdfFileLinkAnnotation object and with a specified file.
- Add the file link to the page annotations using PdfPageBase.AnnotationsWidget.Add(PdfFileLinkAnnotation) method.
- Draw hypertext of the file link using PdfPageBase.Canvas.DrawString() method.
- Save the result file using PdfDocument.SaveToFile() method.
- Python
from spire.pdf.common import *
from spire.pdf import *

# Create a PdfDocument instance
pdf = PdfDocument()

# Add a page
page = pdf.Pages.Add()

# Initialize x, y coordinates
y = 30.0
x = 10.0

# Create true type fonts
font = PdfTrueTypeFont("Arial", 14.0,PdfFontStyle.Regular,True)
font1 = PdfTrueTypeFont("Arial", 14.0, PdfFontStyle.Underline,True)

# Add a simply link
label = "Simple Text Link: "
format = PdfStringFormat()
format.MeasureTrailingSpaces = True
page.Canvas.DrawString(label, font, PdfBrushes.get_Orange(), 0.0, y, format)
x = font.MeasureString(label, format).Width
url = "http://www.e-iceblue.com"
page.Canvas.DrawString(url, font1, PdfBrushes.get_Blue(), x, y)
y = y + 28

# Add a hypertext link
label = "Hypertext Link: "
page.Canvas.DrawString(label, font, PdfBrushes.get_Orange(), 0.0, y, format)
x = font.MeasureString(label, format).Width
webLink = PdfTextWebLink()
webLink.Text = "Home Page"
webLink.Url = url
webLink.Font = font1
webLink.Brush = PdfBrushes.get_Blue()
webLink.DrawTextWebLink(page.Canvas, PointF(x, y))
y = y + 28

# Add an Email link
label = "Email Link:  "
page.Canvas.DrawString(label, font, PdfBrushes.get_Orange(), 0.0, y, format)
x = font.MeasureString(label, format).Width
link = PdfTextWebLink()
link.Text = "Contact Us"
link.Url = "mailto:support@e-iceblue.com"
link.Font = font1
link.Brush = PdfBrushes.get_Blue()
link.DrawTextWebLink(page.Canvas, PointF(x, y))
y = y + 28

# Add a file link
label = "Document Link: "
page.Canvas.DrawString(label, font, PdfBrushes.get_Orange(), 0.0, y, format)
x = font.MeasureString(label, format).Width
text = "Open File"
location = PointF(x, y)
size = font1.MeasureString(text)
linkBounds = RectangleF(location, size)
fileLink = PdfFileLinkAnnotation(linkBounds,"C:\\Users\\Administrator\\Desktop\\Report.xlsx")
fileLink.Border = PdfAnnotationBorder(0.0)
page.AnnotationsWidget.Add(fileLink)
page.Canvas.DrawString(text, font1, PdfBrushes.get_Blue(), x, y)

#Save the result pdf file
pdf.SaveToFile("AddLinkstoPDF.pdf")
pdf.Close()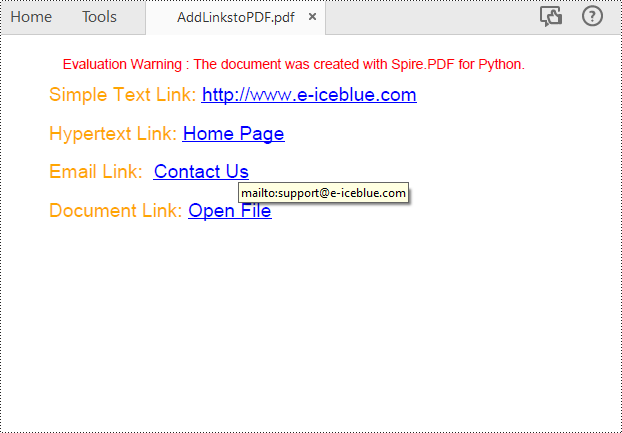
Insert Hyperlinks into Existing Text in PDF in Python
Adding a hyperlink to existing text in a PDF document requires locating the text first. Once the location has been obtained, an object of PdfUriAnnotation class with the link can be created and added to the position. The following are the detailed steps:
- Create a PdfDocument instance.
- Load a PDF file using PdfDocument.LoadFromFile() method.
- Get the first page using PdfDocument.Pages.get_Item() method.
- Create a PdfTextFinder object for the page and set the search parameter using finds.Options.Parameter.
- Find all occurrences of the specified text on the page using PdfTextFinder.Find() method.
- Loop through all occurrences of the found text and create a PdfUriAnnotation instance based on the bounds of each occurrence.
- Set the hyperlink URL, border, and border color using properties under PdfUriAnnotation class.
- Insert the hyperlink to the page annotations using PdfPageBase.AnnotationsWidget.Add(PdfUriAnnotation) method.
- Save the PDF file using PdfDocument.SaveToFile() method.
- Python
from spire.pdf.common import *
from spire.pdf import *

# Create a PdfDocument instance
pdf = PdfDocument()

# Load a PDF file
pdf.LoadFromFile("input.pdf")

# Get the first page
page = pdf.Pages.get_Item(0)

# Create a PdfTextFinder object for the current page
finds = PdfTextFinder(page)

# Set the search parameter to find exact matches
finds.Options.Parameter = TextFindParameter.IgnoreCase

# Find all occurrences of the specified text in the page
fragments  = finds.Find("big O notation")

# Iterate through the found text fragments and create hyperlink annotations for each occurrence
for fragment in fragments:
    # Get the bounds of the found text
    bounds = fragment.Bounds
    for bound in bounds:
        # Create a PdfUriAnnotation for the found text and set its properties
        uri = PdfUriAnnotation(bound)
        uri.Uri = "https://en.wikipedia.org/wiki/Big_O_notation"
        uri.Border = PdfAnnotationBorder(1.0)
        uri.Color = PdfRGBColor(Color.get_Blue())
        page.AnnotationsWidget.Add(uri)

#Save the result file
pdf.SaveToFile("SearchTextAndAddHyperlink1.pdf")
pdf.Close()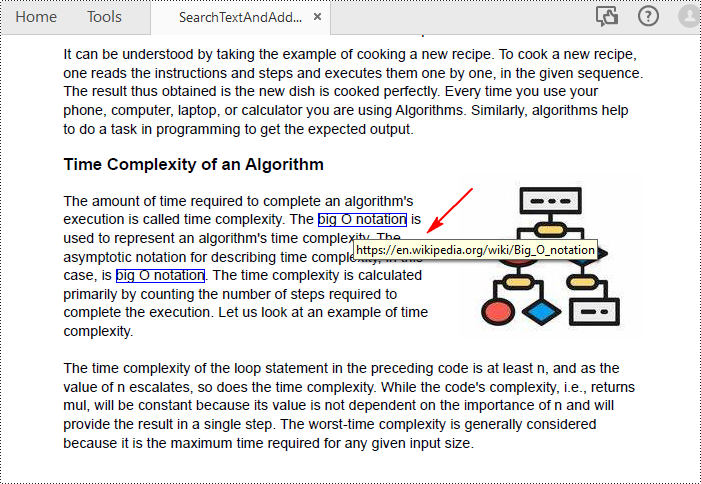
Apply for a Temporary License
If you'd like to remove the evaluation message from the generated documents, or to get rid of the function limitations, please request a 30-day trial license for yourself.
Excel provides various options to compress, resize, or move images, allowing users to effectively manage and optimize their spreadsheets. By utilizing these features, you can significantly reduce file size, adjust image dimensions to fit within cells, and effortlessly reposition images to enhance the visual appeal of your Excel documents. This article introduces how to programmatically compress, resize or move images in an Excel document in Python using Spire.XLS for Python.
- Compress Images in an Excel Document in Python
- Resize an Image in an Excel Worksheet in Python
- Move an Image within the Same Worksheet in Python
- Move an Image from a Worksheet to Another in Python
Install Spire.XLS for Python
This scenario requires Spire.XLS for Python and plum-dispatch v1.7.4. They can be easily installed in your Windows through the following pip command.
pip install Spire.XLS
If you are unsure how to install, please refer to this tutorial: How to Install Spire.XLS for Python on Windows
Compress Images in an Excel Document in Python
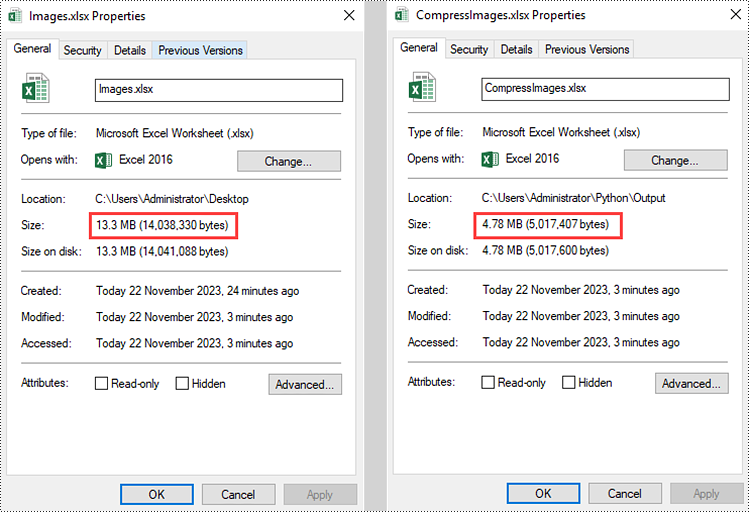
To compress the quality of an image, Spire.XLS for Python offers the ExcelPicture.Compress() method. The following are the steps to compress images in an Excel document using Spire.XLS for Python.
- Create a Workbook object.
- Load an Excel file using Workbook.LoadFromFile() method.
- Iterate through the worksheets in the document, and get the images from a specific sheet through Worksheet.Pictures property.
- Get a specific image from the image collection and compress it using ExcelPicture.Compress() method.
- Save the workbook to a different Excel file using Workbook.SaveToFile() method.
- Python
from spire.xls import *
from spire.xls.common import *

# Create a Workbook object
workbook = Workbook()

# Load an Excel document
workbook.LoadFromFile("C:/Users/Administrator/Desktop/Images.xlsx")

# Loop through the worksheets in the document
for sheet in workbook.Worksheets:

    # Loop through the images in the worksheet
    for picture in sheet.Pictures:

        # Compress a specific image
        picture.Compress(50)

# Save the file
workbook.SaveToFile("output/CompressImages.xlsx", ExcelVersion.Version2016)
workbook.Dispose()
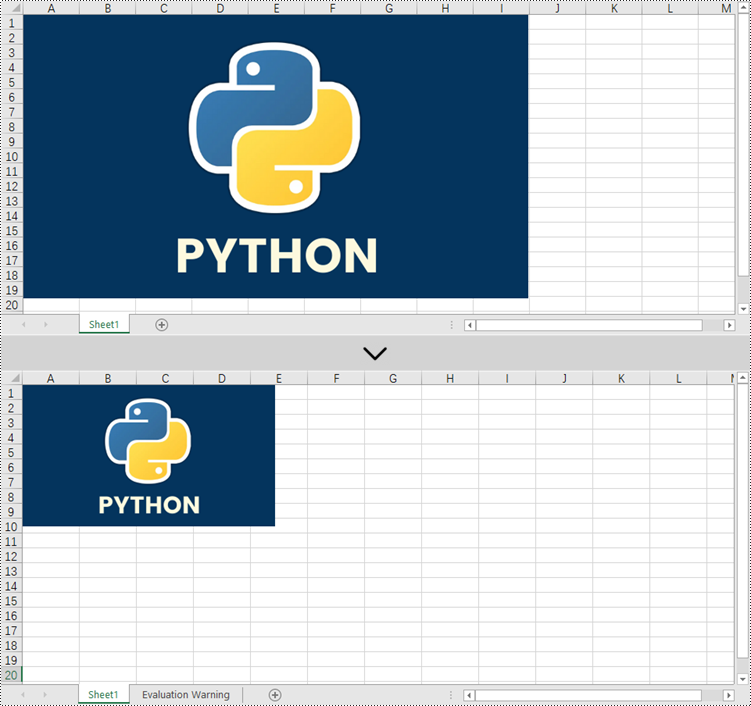
Resize an Image in an Excel Worksheet in Python
The width and height of an image can be set or get through the ExcelPicture.Width property and the ExcelPicture.Height property. To resize an image in Excel, follow the steps below.
- Create a Workbook object.
- Load an Excel file using Workbook.LoadFromFile() method.
- Get a specific worksheet though Workbook.Worksheets[index] property.
- Get a specific image from the worksheet through Worksheet.Pictures[index] property.
- Reset the size of the image through ExcelPicture.Width property and ExcelPicture.Height property.
- Save the workbook to a different Excel file using Workbook.SaveToFile() method.
- Python
from spire.xls import *
from spire.xls.common import *

# Create a Workbook object
workbook = Workbook()

# Load the Excel document
workbook.LoadFromFile("C:/Users/Administrator/Desktop/Image.xlsx")

# Get a specific worksheet
sheet = workbook.Worksheets[0]

# Get a specific picture from the worksheet
picture = sheet.Pictures[0]

# Resize the picture
picture.Width = (int)(picture.Width / 2)
picture.Height = (int)(picture.Height / 2)

# Save to file
workbook.SaveToFile("output/ResizeImage.xlsx", ExcelVersion.Version2016)
workbook.Dispose()
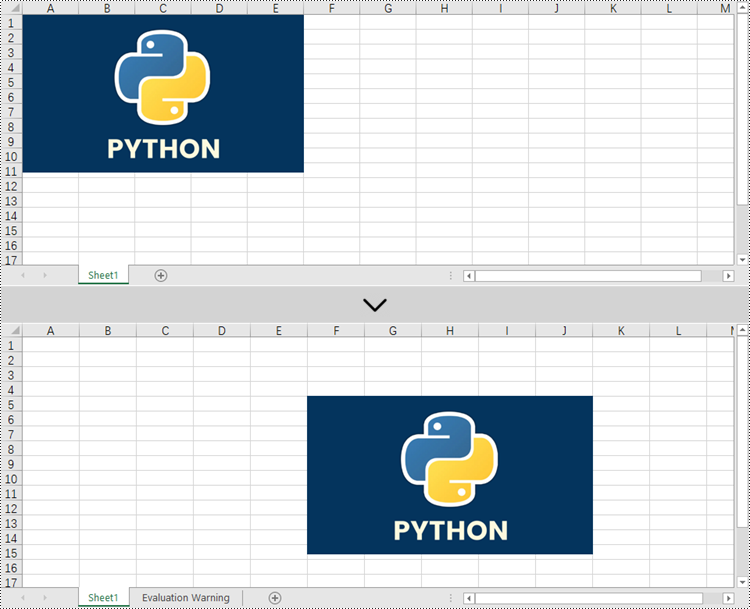
Move an Image within the Same Worksheet in Python
The start position of an image can be set or get through the ExcelPicture.TopRow property and the ExcelPicture.LetColumn property. To move an image within the same worksheet, follow the steps below.
- Create a Workbook object.
- Load an Excel file using Workbook.LoadFromFile() method.
- Get a specific worksheet though Workbook.Worksheets[index] property.
- Get a specific image from the worksheet through Worksheet.Pictures[index] property.
- Reset the position of the image in the worksheet through ExcelPicture.TopRow property and ExcelPicture.LeftColumn property.
- Save the workbook to a different Excel file using Workbook.SaveToFile() method.
- Python
from spire.xls import *
from spire.xls.common import *

# Create a Workbook object
workbook = Workbook()

# Load the Excel document
workbook.LoadFromFile("C:/Users/Administrator/Desktop/Image.xlsx")

# Get a specific worksheet
sheet = workbook.Worksheets[0]

# Get a specific picture from the worksheet
picture = sheet.Pictures[0]

# Reset the position of the picture
picture.TopRow = 5
picture.LeftColumn = 6

# Save to file
workbook.SaveToFile("output/MoveImage.xlsx", ExcelVersion.Version2016)
workbook.Dispose()
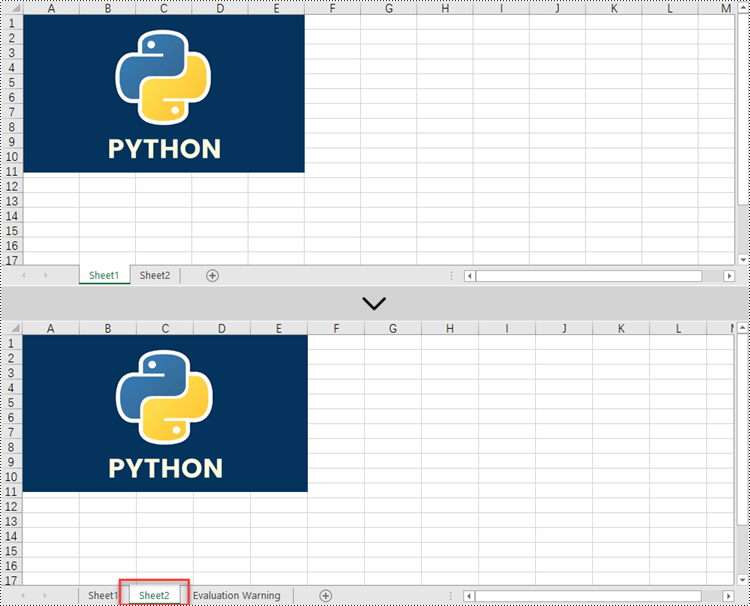
Move an Image from a Worksheet to Another in Python
Besides moving images in the same worksheet, you can also move images in different worksheets of the workbook. First, you need to get the desired image from a worksheet and add it to a different worksheet using the Worksheet.Pictures.Add() method, and then delete the original image using the ExcelPicture.Remove() method. The detailed steps are as follows.
- Create a Workbook object.
- Load an Excel file using Workbook.LoadFromFile() method.
- Get a specific worksheet though Workbook.Worksheets[index] property.
- Get a specific image from the worksheet through Worksheet.Pictures[index] property.
- Get another worksheet though Workbook.Worksheets[index] property.
- Add the image to the target worksheet using Worksheet.Pictures.Add() method.
- Remove the image from the source worksheet using ExcelPicture.Remove() method.
- Save the workbook to a different Excel file using Workbook.SaveToFile() method.
- Python
from spire.xls import *
from spire.xls.common import *

# Create a Workbook object
workbook = Workbook()

# Load the Excel document
workbook.LoadFromFile("C:/Users/Administrator/Desktop/Image.xlsx")

# Get the first worksheet
sheet = workbook.Worksheets[0]

# Get the first picture from the worksheet
picture = sheet.Pictures[0]

# Get the second worksheet
sheet_two = workbook.Worksheets[1]

# Add the picture to the second worksheet
sheet_two.Pictures.Add(1, 1, picture.Picture)

# Remove the picture in the first worksheet
picture.Remove()

# Save to file
workbook.SaveToFile("output/MoveImage.xlsx", ExcelVersion.Version2016)
workbook.Dispose()
Apply for a Temporary License
If you'd like to remove the evaluation message from the generated documents, or to get rid of the function limitations, please request a 30-day trial license for yourself.
The text highlighting feature in MS Word allows users to easily navigate and search for specific sections or content. By highlighting key paragraphs or keywords, users can quickly locate the desired information within the document. This feature is particularly useful when dealing with large documents, as it not only saves time but also minimizes the frustration associated with manual searching, enabling users to focus on the content that truly matters. In this article, we will demonstrate how to find and highlight text in a Word document in Python using Spire.Doc for Python.
- Find and Highlight All Instances of a Specified Text in Word in Python
- Find and Highlight the First Instance of a Specified Text in Word in Python
Install Spire.Doc for Python
This scenario requires Spire.Doc for Python and plum-dispatch v1.7.4. They can be easily installed in your Windows through the following pip command.
pip install Spire.Doc
If you are unsure how to install, please refer to this tutorial: How to Install Spire.Doc for Python on Windows
Find and Highlight All Instances of a Specified Text in Word in Python
You can use the Document.FindAllString() method provided by Spire.Doc for Python to find all instances of a specified text in a Word document. Then you can loop through these instances and highlight each of them with a bright color using TextRange.CharacterFormat.HighlightColor property. The detailed steps are as follows.
- Create an object of the Document class.
- Load a Word document using Document.LoadFromFile() method.
- Find all instances of a specific text in the document using Document.FindAllString() method.
- Loop through each found instance, and get it as a single text range using TextSelection.GetAsOneRange() method, then highlight the text range with color using TextRange.CharacterFormat.HighlightColor property.
- Save the resulting document using Document.SaveToFile() method.
- Python
from spire.doc import *
from spire.doc.common import *

# Specify the input and output file paths
inputFile = "Sample.docx"
outputFile = "HighlightAllInstances.docx"

# Create an object of the Document class
document = Document()

# Load a Word document
document.LoadFromFile(inputFile)

# Find all instances of a specific text
textSelections = document.FindAllString("Spire.Doc", False, True)

# Loop through all the instances
for selection in textSelections:
    # Get the current instance as a single text range
    textRange = selection.GetAsOneRange()
    # Highlight the text range with a color
    textRange.CharacterFormat.HighlightColor = Color.get_Yellow()

# Save the resulting document
document.SaveToFile(outputFile, FileFormat.Docx2016)
document.Close()
Find and Highlight the First Instance of a Specified Text in Word in Python
You can use the Document.FindString() method to find only the first instance of a specified text and then set a highlight color for it using TextRange.CharacterFormat.HighlightColor property. The detailed steps are as follows.
- Create an object of the Document class.
- Load a Word document using Document.LoadFromFile() method.
- Find the first instance of a specific text using Document.FindString() method.
- Get the instance as a single text range using TextSelection.GetAsOneRange() method, and then highlight the text range with color using TextRange.CharacterFormat.HighlightColor property.
- Save the result document using Document.SaveToFile() method.
- Python
from spire.doc import *
from spire.doc.common import *

# Specify the input and output file paths
inputFile = "Sample.docx"
outputFile = "HighlightTheFirstInstance.docx"

# Create an object of the Document class
document = Document()

# Load a Word document
document.LoadFromFile(inputFile)

# Find the first instance of a specific text
textSelection = document.FindString("Spire.Doc", False, True)

# Get the instance as a single text range
textRange = textSelection.GetAsOneRange()
# Highlight the text range with a color
textRange.CharacterFormat.HighlightColor = Color.get_Yellow()

# Save the resulting document
document.SaveToFile(outputFile, FileFormat.Docx2016)
document.Close()
Apply for a Temporary License
If you'd like to remove the evaluation message from the generated documents, or to get rid of the function limitations, please request a 30-day trial license for yourself.
A table is a structured way of organizing and presenting data in rows and columns. It usually consists of horizontal rows and vertical columns, and each intersection can contain text, numbers, or other types of data. By inserting a table into a presentation, users can create or display structured data on slides to make the content more organized. In addition, compared to text forms, tabular data can be more intuitive to show the differences between data, which helps readers understand more, thus enhancing the professionalism and readability of the presentation. This article is going to show how to use Spire.Presentation for Python to create or edit a table in a PowerPoint Presentation in Python programs.
- Insert Tables into PowerPoint Presentations in Python
- Edit Tables in PowerPoint Presentations in Python
Install Spire.Presentation for Python
This scenario requires Spire.Presentation for Python and plum-dispatch v1.7.4. They can be easily installed in your Windows through the following pip commands.
pip install Spire.Presentation
If you are unsure how to install, please refer to this tutorial: How to Install Spire.Presentation for Python on Windows
Insert Tables into PowerPoint Presentations in Python
Spire.Presentation for Python provides the Presentation.Slides[].Shapes.AppendTable(x: float, y: float, widths: List[float], heights: List[float]) method to add a table to a PowerPoint presentation. The detailed steps are as follows.
- Create an object of Presentation class.
- Load a sample presentation from disk using Presentation.LoadFromFile() method.
- Define the dimensions of the table.
- Add a new table to the sample presentation by calling Presentation.Slides[].Shapes.AppendTable(x: float, y: float, widths: List[float], heights: List[float]) method.
- Define the table data as a two-dimensional string array.
- Loop through the arrays and fill each cell of the table with these data by ITable[columnIndex, rowIndex].TextFrame.Text property.
- Set font name and font size for these data.
- Set the alignment of the first row in the table to center.
- Apply a built-in style to the table using ITable.StylePreset property.
- Save the result file using Presentation.SaveToFile() method.
- Python
from spire.presentation.common import *
import math
from spire.presentation import *
inputFile = "C:/Users/Administrator/Desktop/Sample.pptx"
outputFile = "C:/Users/Administrator/Desktop/CreateTable.pptx"
#Create an object of Presentation class
presentation = Presentation()
#Load a sample presentation from disk
presentation.LoadFromFile(inputFile)
#Define the dimensions of the table
widths = [100, 100, 150, 100, 100]
heights = [15, 15, 15, 15, 15, 15, 15, 15, 15, 15, 15, 15, 15]
#Add a new table to this presentation
left = math.trunc(presentation.SlideSize.Size.Width / float(2)) - 275
table = presentation.Slides[0].Shapes.AppendTable(left, 90, widths, heights)
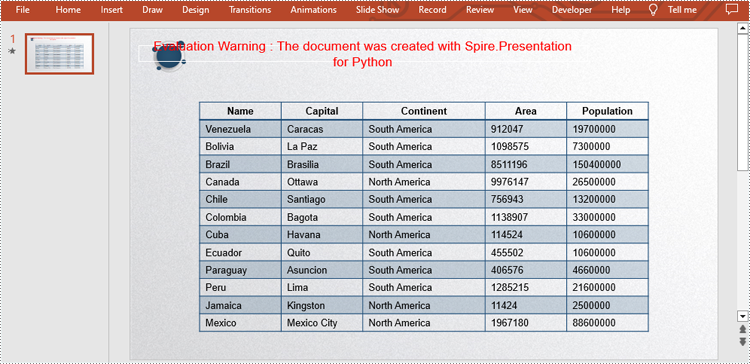
#Define the table data as a two-dimensional string array
dataStr = [["Name", "Capital", "Continent", "Area", "Population"],
["Venezuela", "Caracas", "South America", "912047", "19700000"],
["Bolivia", "La Paz", "South America", "1098575", "7300000"],
["Brazil", "Brasilia", "South America", "8511196", "150400000"],
["Canada", "Ottawa", "North America", "9976147", "26500000"],
["Chile", "Santiago", "South America", "756943", "13200000"],
["Colombia", "Bagota", "South America", "1138907", "33000000"],
["Cuba", "Havana", "North America", "114524", "10600000"],
["Ecuador", "Quito", "South America", "455502", "10600000"],
["Paraguay", "Asuncion", "South America", "406576", "4660000"],
["Peru", "Lima", "South America", "1285215", "21600000"],
["Jamaica", "Kingston", "North America", "11424", "2500000"],
["Mexico", "Mexico City", "North America", "1967180", "88600000"]]
#Loop through the arrays
for i in range(0, 13):
for j in range(0, 5):
#Fill each cell of the table with these data
table[j,i].TextFrame.Text = dataStr[i][j]
#Set font name and font size
table[j,i].TextFrame.Paragraphs[0].TextRanges[0].LatinFont = TextFont("Arial")
table[j,i].TextFrame.Paragraphs[0].TextRanges[0].FontHeight = 12
#Set the alignment of the first row in the table to center
for i in range(0, 5):
table[i,0].TextFrame.Paragraphs[0].Alignment = TextAlignmentType.Center
#Apply a style to the table
table.StylePreset = TableStylePreset.LightStyle3Accent1
#Save the result file
presentation.SaveToFile(outputFile, FileFormat.Pptx2010)
presentation.Dispose()
Edit Tables in PowerPoint Presentations in Python
You are also allowed to edit tables in the presentation as needed, such as replacing data, changing styles, highlighting data, and so on. Here are the detailed steps.
- Create an object of Presentation class.
- Load a sample presentation from disk using Presentation.LoadFromFile() method.
- Store the data used for replacement in a string.
- Loop through the shapes in the first slide, and determine if a certain shape is a table. If yes, convert it to an ITable object.
- Change the style of the table using ITable.StylePreset property.
- Replace the data in a specific cell range by using ITable[columnIndex, rowIndex].TextFrame.Text property.
- Highlight the new data using ITable[columnIndex, rowIndex].TextFrame.TextRange.HighlightColor.Color property.
- Save the result file using Presentation.SaveToFile() method.
- Python
from spire.presentation.common import *
from spire.presentation import *

inputFile = "C:/Users/Administrator/Desktop/CreateTable.pptx"
outputFile = "C:/Users/Administrator/Desktop/EditTable.pptx"

#Create an object of Presentation class
presentation = Presentation()

#Load a sample presentation from disk
presentation.LoadFromFile(inputFile)

#Store the data used in replacement in a string
strs = ["Germany", "Berlin", "Europe", "0152458", "20860000"]
table = None

#Loop through shapes in the first slide to get the table
for shape in presentation.Slides[0].Shapes:
    if isinstance(shape, ITable):
        table = shape

        #Change the style of the table
        table.StylePreset = TableStylePreset.LightStyle1Accent2
        for i, unusedItem in enumerate(table.ColumnsList):

            #Replace the data in a specific cell range
            table[i,2].TextFrame.Text = strs[i]

            #Highlight the new data
            table[i,2].TextFrame.TextRange.HighlightColor.Color = Color.get_Yellow()

#Save the result file
presentation.SaveToFile(outputFile, FileFormat.Pptx2013)
presentation.Dispose()

Apply for a Temporary License
If you'd like to remove the evaluation message from the generated documents, or to get rid of the function limitations, please request a 30-day trial license for yourself.
Grouping shapes in PowerPoint can greatly simplify the shape editing process, especially when dealing with complex arrangements of shapes. It allows you to modify the entire group collectively, saving time and effort compared to adjusting each shape individually. This is particularly beneficial when you need to apply consistent formatting or positioning to a set of shapes. Ungrouping shapes provides increased flexibility and customization options. By ungrouping a set of grouped shapes, you regain individual control over each shape. This allows you to make specific modifications, resize or reposition individual shapes, and apply unique formatting or styling as needed. In this article, we will explain how to group and ungroup shapes in PowerPoint in Python using Spire.Presentation for Python.
Install Spire.Presentation for Python
This scenario requires Spire.Presentation for Python and plum-dispatch v1.7.4. They can be easily installed in your Windows through the following pip command.
pip install Spire.Presentation
If you are unsure how to install, please refer to this tutorial: How to Install Spire.Presentation for Python on Windows
Group Shapes in PowerPoint in Python
Spire.Presentation for Python provides the ISlide.GroupShapes(shapeList: List) method to group two or more shapes on a specific slide. The detailed steps are as follows.
- Create an object of the Presentation class.
- Get the first slide using Presentation.Slides[0] property.
- Add two shapes to the slide using ISlide.Shapes.AppendShape() method.
- Create a list to store the shapes that need to be grouped.
- Add the two shapes to the list.
- Group the two shapes using ISlide.GroupShapes(shapeList: List) method.
- Save the result document using Presentation.SaveToFile() method.
- Python
from spire.presentation import *
# Create an object of the Presentation class
ppt = Presentation()
# Get the first slide
slide = ppt.Slides[0]
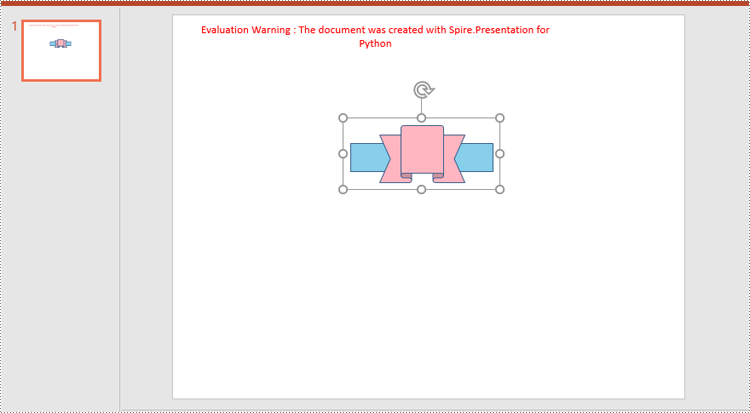
# Add two shapes to the slide
rectangle = slide.Shapes.AppendShape(ShapeType.Rectangle, RectangleF.FromLTRB (250, 180, 450, 220))
rectangle.Fill.FillType = FillFormatType.Solid
rectangle.Fill.SolidColor.KnownColor = KnownColors.SkyBlue
rectangle.Line.Width = 0.1
ribbon = slide.Shapes.AppendShape(ShapeType.Ribbon2, RectangleF.FromLTRB (290, 155, 410, 235))
ribbon.Fill.FillType = FillFormatType.Solid
ribbon.Fill.SolidColor.KnownColor = KnownColors.LightPink
ribbon.Line.Width = 0.1
# Add the two shapes to a list
shape_list = []
shape_list.append(rectangle)
shape_list.append(ribbon)
# Group the two shapes
slide.GroupShapes(shape_list)
# Save the resulting document
ppt.SaveToFile("GroupShapes.pptx", FileFormat.Pptx2013)
ppt.Dispose()
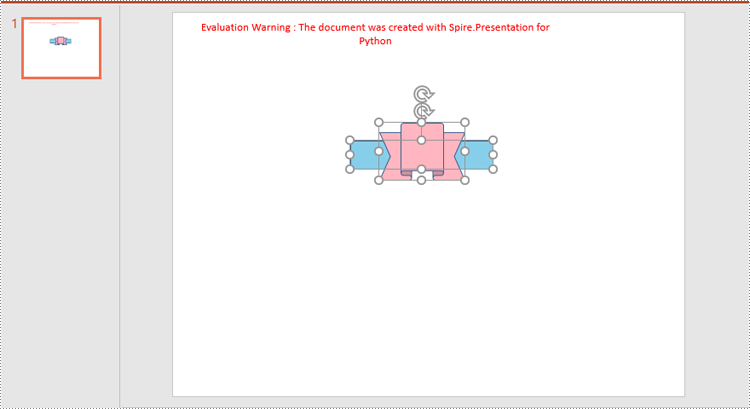
Ungroup Shapes in PowerPoint in Python
To ungroup the grouped shapes in a PowerPoint document, you need to iterate through all slides in the document and all shapes on each slide, find the grouped shapes and then ungroup them using ISlide.Ungroup(groupShape: GroupShape) method. The detailed steps are as follows.
- Create an object of the Presentation class.
- Load the PowerPoint document using Presentation.LoadFromFile() method.
- Iterate through all slides in the document.
- Iterate through all shapes on each slide.
- Check if the current shape is of GroupShape type. If the result is True, ungroup it using ISlide.Ungroup(groupShape: GroupShape) method.
- Save the result document using Presentation.SaveToFile() method.
- Python
from spire.presentation import *

# Create an object of the Presentation class
ppt = Presentation()
# Load a PowerPoint document
ppt.LoadFromFile("GroupShapes.pptx")

# Iterate through all slides in the document
for i in range(ppt.Slides.Count):
    slide = ppt.Slides[i]

    # Iterate through all shapes on each slide
    for j in range(slide.Shapes.Count):
        shape = slide.Shapes[j]

        # Check if the shape is a grouped shape
        if isinstance(shape, GroupShape):
            groupShape = shape
            # Ungroup the grouped shape
            slide.Ungroup(groupShape)

# Save the resulting document
ppt.SaveToFile("UngroupShapes.pptx", FileFormat.Pptx2013)
ppt.Dispose()
Apply for a Temporary License
If you'd like to remove the evaluation message from the generated documents, or to get rid of the function limitations, please request a 30-day trial license for yourself.
Watermarks serve as subtle overlays placed on the slides, typically in the form of text or images, which can convey messages, copyright information, company logos, or other visual elements. By incorporating watermarks into your PowerPoint presentations, you can enhance professionalism, reinforce branding, and discourage unauthorized use or distribution of your material. In this article, you will learn how to add text or image watermarks to a PowerPoint document in Python using Spire.Presentation for Python.
Install Spire.Presentation for Python
This scenario requires Spire.Presentation for Python and plum-dispatch v1.7.4. They can be easily installed in your Windows through the following pip command.
pip install Spire.Presentation
If you are unsure how to install, please refer to this tutorial: How to Install Spire.Presentation for Python on Windows
Add a Text Watermark to PowerPoint in Python
Unlike MS Word, PowerPoint does not have a built-in feature that allows to apply watermarks to each slide. However, you can add a shape with text or an image to mimic the watermark effect. A shape can be added to a slide using the ISlide.Shapes.AppendShape() method, and the text of the shape can be set through the IAutoShape.TextFrame.Text property. To prevent the shape from overlapping the existing content on the slide, you'd better send it to the bottom.
The following are the steps to add a text watermark to a slide using Spire.Presentation for Python.
- Create a Presentation object.
- Load a PowerPoint file using Presentation.LoadFromFile() method.
- Get a specific slide through Prentation.Slides[index] property.
- Add a shape to the slide using ISlide.Shapes.AppendShape() method.
- Add text to the shape through IAutoShape.TextFrame.Text property.
- Send the shape to back using IAutoShape.SetShapeArrange() method.
- Save the presentation to a PowerPoint file using Presentation.SaveToFile() method.
- Python
from spire.presentation.common import *
from spire.presentation import *

# Create a Presentation object
presentation = Presentation()

# Load a PowerPoint file
presentation.LoadFromFile("C:/Users/Administrator/Desktop/input.pptx")

# Define a rectangle
left = (presentation.SlideSize.Size.Width - 350.0) / 2
top = (presentation.SlideSize.Size.Height - 110.0) / 2
rect = RectangleF(left, top, 350.0, 110.0)

for i in range(0, presentation.Slides.Count):

    # Add a rectangle shape to
    shape = presentation.Slides[i].Shapes.AppendShape(
    ShapeType.Rectangle, rect)

    # Set the style of the shape
    shape.Fill.FillType = FillFormatType.none
    shape.ShapeStyle.LineColor.Color = Color.get_Transparent()
    shape.Rotation = -35
    shape.Locking.SelectionProtection = True
    shape.Line.FillType = FillFormatType.none

    # Add text to the shape
    shape.TextFrame.Text = "CONFIDENTIAL"
    textRange = shape.TextFrame.TextRange

    # Set the style of the text range
    textRange.Fill.FillType = FillFormatType.Solid
    textRange.Fill.SolidColor.Color = Color.FromArgb(120, Color.get_Black().R, Color.get_HotPink().G, Color.get_HotPink().B)
    textRange.FontHeight = 45
    textRange.LatinFont = TextFont("Times New Roman")

    # Send the shape to back
    shape.SetShapeArrange(ShapeArrange.SendToBack)

# Save to file
presentation.SaveToFile("output/TextWatermark.pptx", FileFormat.Pptx2010)
presentation.Dispose()
Add an Image Watermark to PowerPoint in Python
To add an image watermark, you need first to create a rectangle with the same size as an image. Then fill the shape with this image and place the shape at the center of a slide. To prevent the shape from overlapping the existing content on the slide, you need to send it to the bottom as well. The following are the steps to add an image watermark to a slide using Spire.Presentation for Python.
- Create a Presentation object.
- Load a PowerPoint file using Presentation.LoadFromFile() method.
- Get a specific slide through Prentation.Slides[index] property.
- Load an image using Presentation.Images.AppendStream() method.
- Add a shape that has the same size with the image to the slide using ISlide.Shapes.AppendShape() method.
- Fill the shape with the image through IAuotShape.Fill.PictureFill.Picture.EmbedImage property.
- Send the shape to back using IAutoShape.SetShapeArrange() method.
- Save the presentation to a PowerPoint file using Presentation.SaveToFile() method.
- Python
from spire.presentation.common import *
from spire.presentation import *

# Create a Presentation object
presentation = Presentation()

# Load a PowerPoint file
presentation.LoadFromFile("C:/Users/Administrator/Desktop/input.pptx")

# Load an image
stream = Stream("C:/Users/Administrator/Desktop/logo.png")
image = presentation.Images.AppendStream(stream)
stream.Close()

# Get width and height of the image
width = (float)(image.Width)
height = (float)(image.Height)

#
slideSize = presentation.SlideSize.Size

# Loop through the slides in the presentation
for i in range(0, presentation.Slides.Count):

    # Get a specific slide
    slide = presentation.Slides[i]

    # Add a shape to slide
    shape = slide.Shapes.AppendShape(ShapeType.Rectangle, RectangleF((slideSize.Width - width )/2, (slideSize.Height - height)/2, width, height))

    # Fill the shape with image
    shape.Line.FillType = FillFormatType.none
    shape.Locking.SelectionProtection = True
    shape.Fill.FillType =  FillFormatType.Picture
    shape.Fill.PictureFill.FillType = PictureFillType.Stretch
    shape.Fill.PictureFill.Picture.EmbedImage = image

    # Send the shape to back
    shape.SetShapeArrange(ShapeArrange.SendToBack)

# Save to file
presentation.SaveToFile("output/ImageWatermark.pptx", FileFormat.Pptx2013)
presentation.Dispose()
Apply for a Temporary License
If you'd like to remove the evaluation message from the generated documents, or to get rid of the function limitations, please request a 30-day trial license for yourself.
Layers in PDF are similar to layers in image editing software, where different elements of a document can be organized and managed separately. Each layer can contain different content, such as text, images, graphics, or annotations, and can be shown or hidden independently. PDF layers are often used to control the visibility and positioning of specific elements within a document, making it easier to manage complex layouts, create dynamic designs, or control the display of information. In this article, you will learn how to add, hide, remove layers in a PDF document in Python using Spire.PDF for Python.
- Add a Layer to PDF in Python
- Set Visibility of a Layer in PDF in Python
- Remove a Layer from PDF in Python
Install Spire.PDF for Python
This scenario requires Spire.PDF for Python and plum-dispatch v1.7.4. They can be easily installed in your Windows through the following pip commands.
pip install Spire.PDF
If you are unsure how to install, please refer to this tutorial: How to Install Spire.PDF for Python on Windows
Add a Layer to PDF in Python
A layer can be added to a PDF document using the Document.Layers.AddLayer() method. After the layer object is created, you can draw text, images, fields, or other elements on it to form its appearance. The detailed steps to add a layer to PDF using Spire.PDF for Java are as follows.
- Create a PdfDocument object.
- Load a PDF file using PdfDocument.LoadFromFile() method.
- Create a layer using Document.Layers.AddLayer() method.
- Get a specific page through PdfDocument.Pages[index] property.
- Create a canvas for the layer based on the page using PdfLayer.CreateGraphics() method.
- Draw text on the canvas using PdfCanvas.DrawString() method.
- Save the document to a different PDF file using PdfDocument.SaveToFile() method.
- Python
from spire.pdf.common import *
from spire.pdf import *

def AddLayerWatermark(doc):

    # Create a layer named "Watermark"
    layer = doc.Layers.AddLayer("Watermark")

    # Create a font
    font = PdfTrueTypeFont("Bodoni MT Black", 50.0, 1, True)

    # Specify watermark text
    watermarkText = "DO NOT COPY"

    # Get text size
    fontSize = font.MeasureString(watermarkText)

    # Get page count
    pageCount = doc.Pages.Count

    # Loop through the pages
    for i in range(0, pageCount):

        # Get a specific page
        page = doc.Pages.get_Item(i)

        # Create canvas for layer
        canvas = layer.CreateGraphics(page.Canvas)

        # Draw sting on the graphics
        canvas.DrawString(watermarkText, font, PdfBrushes.get_Gray(), (canvas.Size.Width - fontSize.Width)/2, (canvas.Size.Height - fontSize.Height)/2 )

# Create a PdfDocument instance
doc = PdfDocument()

# Load a PDF file
doc.LoadFromFile("C:\\Users\\Administrator\\Desktop\\input.pdf")

# Invoke AddLayerWatermark method to add a layer
AddLayerWatermark(doc)

# Save to file
doc.SaveToFile("output/AddLayer.pdf", FileFormat.PDF)
doc.Close()
Set Visibility of a Layer in PDF in Python
To control the visibility of layers in a PDF document, you can use the PdfDocument.Layers[index].Visibility property. Set it to off to hide a layer, or set it to on to unhide a layer. The detailed steps are as follows.
- Create a PdfDocument object.
- Load a PDF file using PdfDocument.LoadFromFile() method.
- Set the visibility of a certain layer through Document.Layers[index].Visibility property.
- Save the document to a different PDF file using PdfDocument.SaveToFile() method.
- Python
from spire.pdf.common import *
from spire.pdf import *

# Create a PdfDocument instance
doc = PdfDocument()

# Load a PDF file
doc.LoadFromFile("C:\\Users\\Administrator\\Desktop\\Layer.pdf")

# Hide a layer by setting the visibility to off
doc.Layers.get_Item(0).Visibility = PdfVisibility.Off

# Save to file
doc.SaveToFile("output/HideLayer.pdf", FileFormat.PDF)
doc.Close()
Remove a Layer from PDF in Python
If a layer is no more wanted, you can remove it using the PdfDocument.Layers.RmoveLayer() method. The following are the detailed steps.
- Create a PdfDocument object.
- Load a PDF file using PdfDocument.LoadFromFile() method.
- Get a specific layer through PdfDocument.Layers[index] property.
- Remove the layer from the document using PdfDcument.Layers.RemoveLayer(PdfLayer.Name) method.
- Save the document to a different PDF file using PdfDocument.SaveToFile() method.
- Python
from spire.pdf.common import *
from spire.pdf import *

# Create a PdfDocument instance
doc = PdfDocument()

# Load a PDF file
doc.LoadFromFile("C:\\Users\\Administrator\\Desktop\\Layer.pdf")

# Delete the specific layer
doc.Layers.RemoveLayer(doc.Layers.get_Item(0).Name)

# Save to file
doc.SaveToFile("output/RemoveLayer.pdf", FileFormat.PDF)
doc.Close()
Apply for a Temporary License
If you'd like to remove the evaluation message from the generated documents, or to get rid of the function limitations, please request a 30-day trial license for yourself.
Highlighting important text with vibrant colors is a commonly employed method for navigating and emphasizing content in PDF documents. Particularly in lengthy PDFs, emphasizing key information aids readers swiftly comprehending the document content, thereby enhancing reading efficiency. Utilizing Python programs enables document creators to effortlessly and expeditiously execute the highlighting process. This article will explain how to use Spire.PDF for Python to find and highlight text in PDF documents with Python programs.
- Find and Highlight Specific Text in PDF with Python
- Find and Highlight Text in a Specified PDF Page Area with Python
- Find and Highlight Text in PDF using Regular Expression with Python
Install Spire.PDF for Python
This scenario requires Spire.PDF for Python and plum-dispatch v1.7.4. They can be easily installed in your Windows through the following pip command.
pip install Spire.PDFIf you are unsure how to install, please refer to this tutorial: How to Install Spire.PDF for Python on Windows
Find and Highlight Specific Text in PDF with Python
Spire.PDF for Python enables developers to find all occurrences of specific text on a page with PdfTextFinder class and apply highlight color to an occurrence with HighLight() method. Below is an example of using Spire.PDF for Python to highlight all occurrence of specific text:
- Create an object of PdfDocument class and load a PDF document using PdfDocument.LoadFromFile() method.
- Loop through the pages in the document.
- Get a page using PdfDocument.Pages.get_Item() method.
- Create a PdfTextFinder object for the current page.
- Set the search parameter using finds.Options.Parameter.
- Find all occurrences of specific text on the page using PdfTextFinder.Find() method.
- Loop through the occurrences and apply a highlight color to each occurrence using HighLight() method.
- Save the document using PdfDocument.SaveToFile() method.
- Python
from spire.pdf.common import *
from spire.pdf import *

# Create an object of PdfDocument class and load a PDF document
pdf = PdfDocument()
pdf.LoadFromFile("Sample.pdf")

# Iterate through each page in the PDF
for i in range(pdf.Pages.Count):
    page = pdf.Pages.get_Item(i)

    # Create a PdfTextFinder object for the current page
    finds = PdfTextFinder(page)

    # Set the search parameter to find exact matches
    finds.Options.Parameter = TextFindParameter.IgnoreCase

    # Find all occurrences of specific text on the page
    result = finds.Find("cloud server")

    # Iterate through each instance of the word "science" found on the page
    for find in result:
        # Highlight the searched text
        find.HighLight(Color.get_Cyan())

# Save the modified document to a new file
pdf.SaveToFile("output/FindHighlight.pdf", FileFormat.PDF)
pdf.Close()
Find and Highlight Text in a Specified PDF Page Area with Python
In addition to finding and highlighting specified text on the entire PDF page, Spire.PDF for Python also supports finding and highlighting specified text in specified areas on the page by setting the finds.Options.Area property of PdfTextFinder class to a RectangleF instance. The detailed steps are as follows:
- Create an object of PdfDocument class and load a PDF document using PdfDocument.LoadFromFile() method.
- Get the first page of the document using PdfDocument.Pages.get_Item() method.
- Define a rectangular area using RectangleF.
- Create a PdfTextFinder object for the page and set the search parameter using finds.Options.Parameter.
- Set the search area to the defined rectangle using finds.Options.Area.
- Find all occurrences of specific text in the specified rectangular area using PdfTextFinder.Find() method.
- Loop through the occurrences and apply a highlight color to each occurrence using HighLight() method.
- Save the document using PdfDocument.SaveToFile() method.
- Python
from spire.pdf.common import *
from spire.pdf import *

# Create an objetc of PdfDocument and load a PDF document
pdf = PdfDocument()
pdf.LoadFromFile("Sample.pdf")

# Get a page
pdfPageBase = pdf.Pages.get_Item(0)

# Define a rectangular area
rctg = RectangleF(0.0, 0.0, pdfPageBase.ActualSize.Width, 300.0)

# Create a PdfTextFinder object for the page
finds = PdfTextFinder(pdfPageBase)
# Set the search parameter to find exact matches
finds.Options.Parameter = TextFindParameter.IgnoreCase
# Set the search area to the defined rectangle
finds.Options.Area = rctg

# Find all occurrences of specific text on the page
result = finds.Find("cloud server")
# Find text in the rectangle
for find in result:
        #Highlight searched text
        find.HighLight(Color.get_Green())

# Save the document
pdf.SaveToFile("output/FindHighlightArea.pdf")
pdf.Close()
Find and Highlight Text in PDF using Regular Expression with Python
Sometimes the text that needs to be highlighted is not exactly the same words. In this case, the use of regular expressions allows more flexibility in text search. By setting finds.Options.Parameter to TextFindParameter.Regex, we can find text using regular expression with PdfTextFinder class. The detailed steps are as follows:
- Create an object of PdfDocument class and load a PDF document using PdfDocument.LoadFromFile() method.
- Specify the regular expression.
- Get a page using PdfDocument.Pages.get_Item() method.
- Create a PdfTextFinder object for the page and set the search parameter to TextFindParameter.Regex.
- Find matched text with the regular expression on the page using PdfTextFinder.Find() method.
- Loop through the matched text and apply Highlight color to the text using HighLight() method.
- Save the document using PdfDocument.SaveToFile() method.
- Python
from spire.pdf import *
from spire.pdf.common import*

# Create an object of PdfDocument class and load a PDF document
pdf = PdfDocument()
pdf.LoadFromFile("Sample.pdf")

# Specify the regular expression that matches two words after *
regex = "\\*(\\w+\\s+\\w+)"

# Get the second page
page = pdf.Pages.get_Item(1)

# Find matched text on the page using regular expression
finds = PdfTextFinder(page)
finds.Options.Parameter =TextFindParameter.Regex
result = finds.Find(regex)

# Highlight the matched text
for text in result:
    text.HighLight(Color.get_DeepPink())

# Save the document
pdf.SaveToFile("output/FindHighlightRegex.pdf")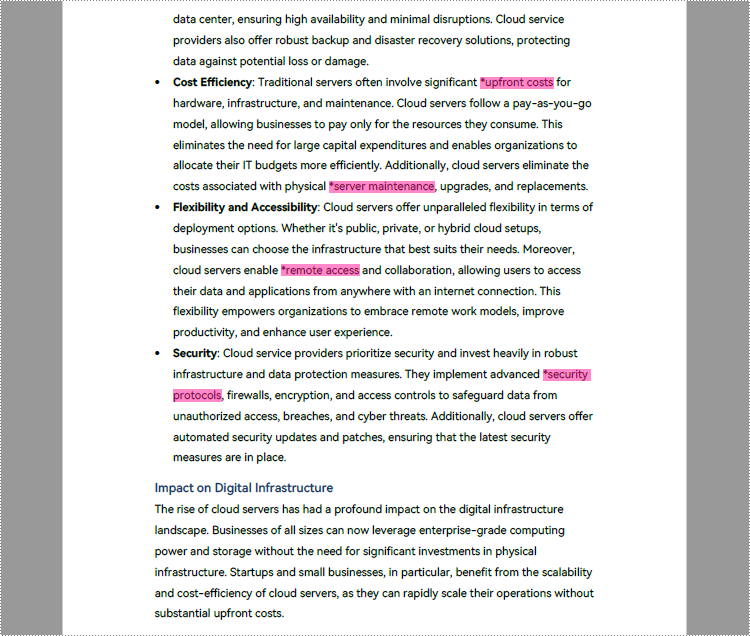
Apply for a Temporary License
If you'd like to remove the evaluation message from the generated documents, or to get rid of the function limitations, please request a 30-day trial license for yourself.
The use of appropriate fonts in PDF can greatly improve the overall readability and aesthetics of the document. In addition to the commonly used standard fonts, sometimes you may also need to embed private fonts. In this article, you will learn how to use different fonts in PDF in Python using Spire.PDF for Python.
Install Spire.PDF for Python
This scenario requires Spire.PDF for Python and plum-dispatch v1.7.4. They can be easily installed in your Windows through the following pip command.
pip install Spire.PDF
If you are unsure how to install, please refer to this tutorial: How to Install Spire.PDF for Python on Windows
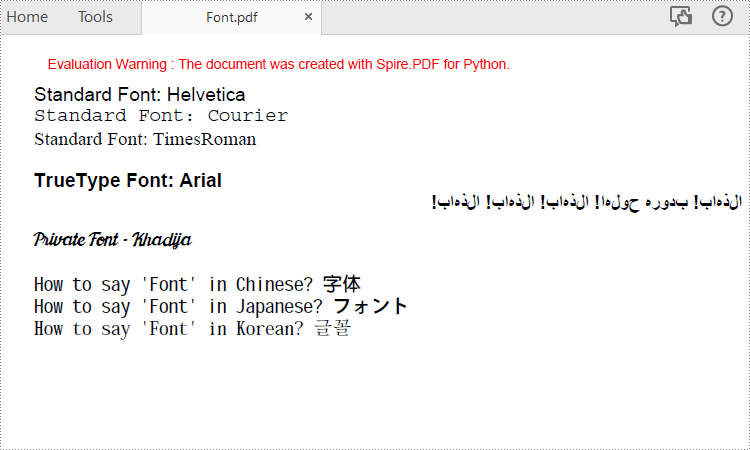
Apply Different Fonts in a PDF Document in Python
Spire.PDF for Python supports standard PDF fonts, TrueType fonts, private fonts as well as CJK font. The following are the steps to draw text in PDF using these fonts.
- Create a PdfDocument instance.
- Add a page and then create a brush.
- Create an instance of the PdfFont class with a standard PDF font, and then use the PdfPageBase.getCanvas().drawString() method to draw text on the page with the standard font.
- Create an instance of the PdfTrueTypeFont class with a specified font, and then draw text on the page with the TrueType font.
- Load a private font and create an instance of the PdfTrueTypeFont class with it. Then draw text on the page with the private font.
- Create an instance of PdfCjkStandardFont class with a CJK font, and then draw text on the page with the CJK font.
- Save the result document using PdfDocument.SaveToFile() method.
- Python
from spire.pdf.common import *
from spire.pdf import *

# Create a PdfDocument object
pdf = PdfDocument()

# Add a page
page = pdf.Pages.Add()

# Create a brush
brush = PdfBrushes.get_Black()

# Initialize y coordinate
y = 30.0

# Draw text using standard fonts
font = PdfFont(PdfFontFamily.Helvetica, 14.0)
page.Canvas.DrawString("Standard Font: Helvetica", font, brush, 0.0, y)
font = PdfFont(PdfFontFamily.Courier, 14.0)
page.Canvas.DrawString("Standard Font: Courier", font, brush, 0.0, (y := y + 16.0))
font = PdfFont(PdfFontFamily.TimesRoman, 14.0)
page.Canvas.DrawString("Standard Font: TimesRoman", font, brush, 0.0, (y := y + 16.0))

#Draw text using truetype font
trueTypeFont = PdfTrueTypeFont("Arial", 14.0, PdfFontStyle.Bold,True)
page.Canvas.DrawString("TrueType Font: Arial", trueTypeFont, brush, 0.0, (y := y + 30.0))

# Draw Arabic text from right to left
arabicText = "\u0627\u0644\u0630\u0647\u0627\u0628\u0021\u0020" + "\u0628\u062F\u0648\u0631\u0647\u0020\u062D\u0648\u0644\u0647\u0627\u0021\u0020" + "\u0627\u0644\u0630\u0647\u0627\u0628\u0021\u0020" + "\u0627\u0644\u0630\u0647\u0627\u0628\u0021\u0020" + "\u0627\u0644\u0630\u0647\u0627\u0628\u0021"
trueTypeFont = PdfTrueTypeFont("Arial", 14.0, PdfFontStyle.Bold,True)
rctg = RectangleF(PointF(0.0, (y := y + 16.0)), page.Canvas.ClientSize)
strformat = PdfStringFormat(PdfTextAlignment.Right)
strformat.RightToLeft = True
page.Canvas.DrawString(arabicText, trueTypeFont, brush, rctg, strformat)

# Draw text using private font
trueTypeFont = PdfTrueTypeFont("Khadija.ttf", 14.0)
page.Canvas.DrawString("Private Font - Khadija", trueTypeFont, brush, 0.0, (y := y + 30.0))

# Draw text using cjk fonts
cjkFont = PdfCjkStandardFont(PdfCjkFontFamily.MonotypeHeiMedium, 14.0)
page.Canvas.DrawString("How to say 'Font' in Chinese? \u5B57\u4F53", cjkFont, brush, 0.0, (y := y + 30.0))
cjkFont = PdfCjkStandardFont(PdfCjkFontFamily.HanyangSystemsGothicMedium, 14.0)
page.Canvas.DrawString("How to say 'Font' in Japanese? \u30D5\u30A9\u30F3\u30C8", cjkFont, brush, 0.0, (y := y + 16.0))
cjkFont = PdfCjkStandardFont(PdfCjkFontFamily.HanyangSystemsShinMyeongJoMedium, 14.0)
page.Canvas.DrawString("How to say 'Font' in Korean? \uAE00\uAF34", cjkFont, brush, 0.0, (y := y + 16.0))

#Save the result document
pdf.SaveToFile("Font.pdf")
pdf.Close()
Apply for a Temporary License
If you'd like to remove the evaluation message from the generated documents, or to get rid of the function limitations, please request a 30-day trial license for yourself.
