Wie man eine Excel-Datei dupliziert (jenseits von Strg+C & Strg+V)
Inhaltsverzeichnis
Jeder kennt die klassische Strg+C und Strg+V Methode, um Excel-Dateien zu duplizieren. Das funktioniert, ist aber nicht immer der klügste oder schnellste Weg, eine Excel-Datei effizient zu duplizieren. Was ist, wenn Sie ein Backup erstellen möchten, ohne Ihren Ordner mit endlosen „Dateiname - Kopie“-Versionen zu überfüllen? Was ist, wenn Sie eine sichere Duplikat-Excel-Datei öffnen müssen, ohne das Risiko einzugehen, das Original zu verändern? Oder was ist, wenn Sie Excel-Dateien in großen Mengen duplizieren und dabei automatisch Zeitstempel oder benutzerdefinierte Namen hinzufügen müssen?
Dieser Blogbeitrag geht über grundlegende Tastenkombinationen hinaus und untersucht praktische manuelle Tricks und leistungsstarke Automatisierungstechniken zum Duplizieren von Excel-Dateien – Methoden, die viele alltägliche Benutzer und sogar erfahrene Profis nie entdecken.
Auf dieser Seite:
- Manuelle Wege, eine Excel-Datei zu duplizieren
- Warum automatisieren?
- Automatisierung für Entwickler
- Fazit
- FAQs
1. Manuelle Wege, eine Excel-Datei zu duplizieren
1.1 Methode 1: Speichern unter – Erstellen eines versionierten Backups
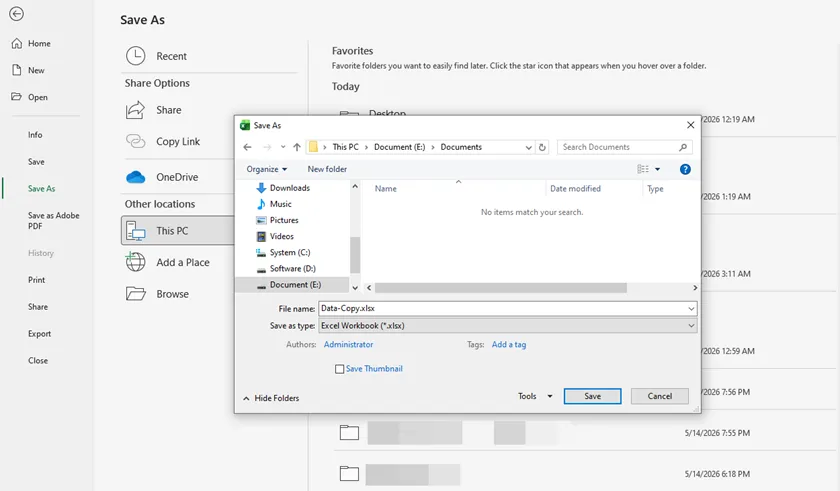
Die meisten Benutzer denken, „Speichern unter“ sei nur zum Speichern von Änderungen gedacht, aber es ist tatsächlich der sicherste Weg, eine gerade geöffnete Datei zu duplizieren. Anstatt eine unordentliche Kopie in Ihrem Ordner zu erstellen, können Sie mit dieser Methode die Datei umbenennen und den genauen Speicherort während des Speichervorgangs auswählen.
Schritte:
- Klicken Sie bei geöffneter Excel-Datei auf Datei > Speichern unter.
- Wählen Sie einen Speicherort (OneDrive, Dieser PC oder einen bestimmten Ordner).
- Geben Sie einen neuen Namen für die Duplikatdatei ein (z. B. „Q1_Bericht_Backup“ statt „Q1_Bericht“).
- Klicken Sie auf Speichern. Die Originaldatei bleibt unverändert und Sie arbeiten nun an der neuen Kopie.
Am besten geeignet für: Verwenden Sie diese Methode, wenn Sie vorhaben, wichtige Änderungen an einem kritischen Bericht vorzunehmen. Sie erstellt eine archivierte Version des Originalzustands, ohne Excel jemals verlassen zu müssen.
Einschränkung: Dies funktioniert nur, wenn die Datei bereits geöffnet ist. Sie können „Speichern unter“ nicht für eine geschlossene Datei im Datei-Explorer verwenden.
1.2 Methode 2: Drag-and-Drop – Eine oder mehrere Dateien duplizieren
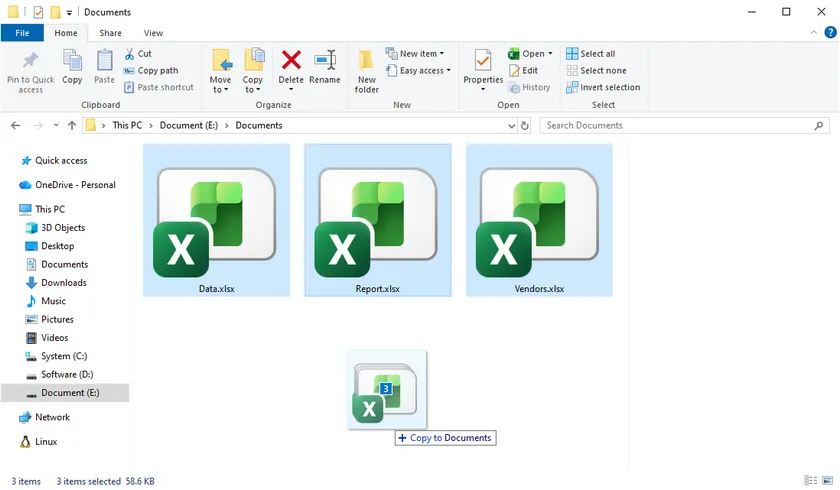
Wenn Sie mehrere Excel-Dateien auf einmal duplizieren müssen, ist dies die schnellste integrierte Methode im Windows Datei-Explorer oder macOS Finder. Anstatt Menüs zu öffnen oder wiederholt kopieren und einfügen zu verwenden, können Sie mit einer einzigen Drag-Aktion und einer Modifikatortaste mehrere Dateiduplikate erstellen.
Schritte (Windows):
- Öffnen Sie den Datei-Explorer und suchen Sie die zu duplizierenden Excel-Dateien.
- Wählen Sie eine Datei oder mehrere Dateien aus (halten Sie Strg gedrückt, um mehrere auszuwählen).
- Halten Sie die Strg-Taste auf Ihrer Tastatur gedrückt.
- Ziehen Sie die ausgewählten Dateien bei gedrückter Strg-Taste in einen leeren Bereich im selben Ordner.
- Lassen Sie zuerst die Maustaste los, dann die Strg-Taste.
- Kopien erscheinen sofort mit Namen wie „Dateiname - Kopie.xlsx“.
Schritte (Mac):
- Öffnen Sie den Finder und suchen Sie die Excel-Dateien.
- Wählen Sie eine oder mehrere Dateien aus.
- Halten Sie die Option-Taste gedrückt.
- Ziehen Sie die Dateien innerhalb desselben Ordners.
- Lassen Sie zuerst die Maustaste los, dann die Option-Taste.
- Duplikate werden sofort erstellt.
Am besten geeignet für: Schnelles Duplizieren mehrerer Excel-Dateien in großen Mengen, z. B. zum Erstellen von Backups für Berichte, Datensätze oder Vorlagen.
Einschränkung: Diese Methode erlaubt kein Umbenennen während des Drag-and-Drop-Vorgangs. Alle Duplikate verwenden Standardnamen wie „Dateiname - Kopie“, sodass Sie sie möglicherweise nachträglich umbenennen müssen, wenn eine einheitliche Benennung erforderlich ist.
1.3 Methode 3: Als Kopie öffnen – Versehentliche Bearbeitungen vermeiden
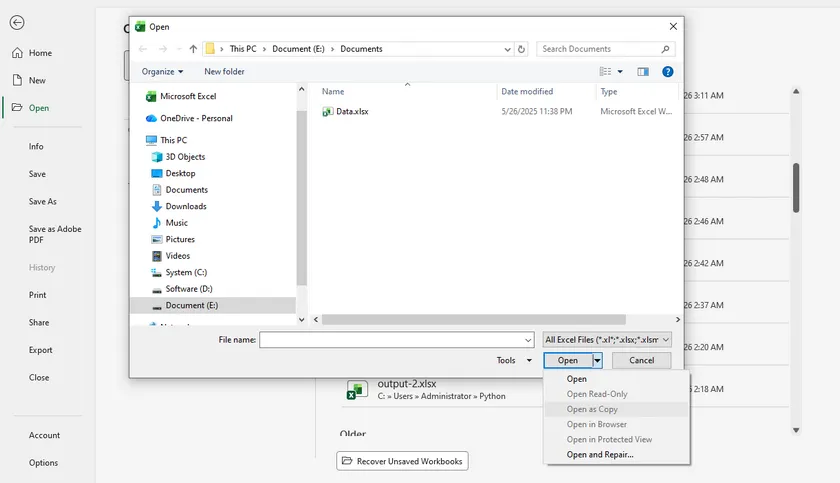
Versteckt im Dialogfeld „Öffnen“ von Excel gibt es eine Funktion, die verhindert, dass Sie jemals versehentlich eine Originaldatei bearbeiten. Wenn Sie „Als Kopie öffnen“ auswählen, öffnet Excel einen temporären Klon Ihrer Arbeitsmappe. Wenn Sie ohne zu speichern schließen, verschwindet die Kopie vollständig – das Original bleibt unberührt.
Schritte:
- Öffnen Sie Microsoft Excel (nicht die Datei direkt).
- Klicken Sie auf Datei > Öffnen > Durchsuchen.
- Navigieren Sie zu der Excel-Datei, die Sie duplizieren möchten.
- Klicken Sie einmal auf die Datei, um sie auszuwählen, und klicken Sie dann auf den Pfeil neben der Schaltfläche Öffnen (nicht auf die Schaltfläche selbst).
- Wählen Sie im Dropdown-Menü Als Kopie öffnen aus.
Excel öffnet ein Duplikat mit dem Namen „Kopie von [Originaldateiname].xlsx“. Die Originaldatei bleibt geschlossen und völlig unberührt.
Am besten geeignet für: Dies ist perfekt für die Überprüfung einer sensiblen Datei, das Testen komplexer Formeln oder das Teilen Ihres Bildschirms während eines Meetings – denn selbst wenn Sie Änderungen vornehmen und versehentlich Strg+S drücken, speichern Sie in der temporären Kopie, nicht im Original.
Einschränkung: Wenn Sie die Änderungen absichtlich behalten möchten, müssen Sie Datei > Speichern unter verwenden, um die Kopie an einem permanenten Speicherort zu speichern. Ein einfaches Klicken auf „Speichern“ überschreibt nicht das Original, aber die Kopie verschwindet, wenn Sie Excel schließen, es sei denn, Sie speichern sie woanders.
1.4 Schnellreferenztabelle: Welche manuelle Methode wann verwenden
| Situation | Beste Methode (über Strg+V hinaus) |
|---|---|
| Sie haben die Datei geöffnet und benötigen ein sauberes, versioniertes Backup | Speichern unter |
| Sie möchten eine Kopie im selben Ordner, ohne Menüs zu verwenden | Strg/Option + Ziehen |
| Sie möchten mehrere Dateien gleichzeitig duplizieren (z. B. 10 Backups in einem Vorgang) | Strg/Option + Ziehen (mit mehreren ausgewählten Dateien) |
| Sie möchten eine Datei zur Überprüfung öffnen, ohne das Original zu verändern | Als Kopie öffnen |
2. Warum automatisieren?
Manuelle Tricks eignen sich gut für einmalige Aufgaben. Aber wenn Sie täglich 50 Dateien duplizieren – oder wenn Sie jedem Duplikat automatisch einen Zeitstempel hinzufügen möchten – ist Automatisierung die Antwort. Der folgende Abschnitt ist für C#-Entwickler geschrieben, aber jeder, der daran interessiert ist, Excel-Kopien zu automatisieren, ist herzlich eingeladen, mitzulesen.
3. Automatisierung für Entwickler
3.1 Methode 1: Reine Dateikopie mit .NET File.Copy
Für Entwickler bietet das .NET Framework eine native Möglichkeit, Excel-Dateien ohne externe Bibliotheken zu duplizieren. Diese Methode behandelt die Excel-Datei als rohe Binärdaten, was sie für Stapeloperationen wie nächtliche Backups oder Archivierungen unglaublich schnell macht.
using System.IO;

File.Copy("source.xlsx", "destination.xlsx", overwrite: true);
Am besten geeignet für: Stapelweise exakte Duplikate, automatisierte Archivierung, Integration in Backend-Dienste.
Einschränkung: Sie können keinen Inhalt innerhalb der Datei ändern – keine Zellwerte, keine Zeitstempel, keine Formatierungsänderungen. Es ist eine reine „Shell“-Kopie.
3.2 Methode 2: Kopieren & Modifizieren mit Spire.XLS
Spire.XLS for .NET ist eine professionelle Bibliothek, mit der Sie die Datei während der Duplizierung „öffnen“ können. Das bedeutet, Sie können die Vorlage kopieren und gleichzeitig dynamische Daten schreiben, wie z. B. den aktuellen Zeitstempel oder einen neuen Kundennamen.
using Spire.Xls;

Workbook workbook = new Workbook();
workbook.LoadFromFile("Template.xlsx");

// Inhalt während des Kopiervorgangs ändern
Worksheet sheet = workbook.Worksheets[0];
sheet.Range["A1"].Text = DateTime.Now.ToString(); // Datum hinzufügen
sheet.Range["B2"].Text = "Kundenname";             // Text aktualisieren
sheet.DeleteColumn(5);                                                  // Spalte löschen

workbook.SaveToFile("ModifiedCopy.xlsx");
Am besten geeignet für: Vorlagenbefüllung, Hinzufügen von Metadaten (Datum, Autorenname), Bereinigen sensibler Daten während der Duplizierung.
Einschränkung: Langsamer als File.Copy, da die XML-Struktur der Datei analysiert wird. Erfordert auch die Installation des Spire.XLS NuGet-Pakets.
Das könnte Sie auch interessieren: C# Leitfaden zum Schreiben in Excel
3.3 Vergleich auf einen Blick
| Aspekt | File.Copy | Spire.XLS |
|---|---|---|
| Zellinhalt ändern? | Nein | Ja |
| Zeitstempel hinzufügen? | Nein | Ja |
| Externe Bibliothek erforderlich? | Nein (integriert) | Ja (NuGet) |
| Geschwindigkeit | Sehr schnell | Langsamer |
| Am besten geeignet für | Stapelweise exakte Duplikate | Kopie + intelligente Modifikation |
3.4 Einfacher Entscheidungsleitfaden für Entwickler
- Benötigen Sie nur viele exakte Kopien? → Verwenden Sie File.Copy
- Müssen Sie beim Kopieren Datum, Namen hinzufügen oder Daten bereinigen? → Verwenden Sie Spire.XLS
4. Fazit
Das Duplizieren einer Excel-Datei ist mehr als nur das Drücken von Strg+C und Strg+V. Für alltägliche Benutzer spart die Beherrschung von „Als Kopie öffnen“ oder des Strg + Ziehen-Tricks Zeit und verhindert versehentlichen Datenverlust. Für Entwickler ist die Wahl technisch: Verwenden Sie .NET File.Copy für rohe Geschwindigkeit und Massenoperationen oder wechseln Sie zu Spire.XLS, wenn Ihr Workflow das Hinzufügen von Daten während des Duplizierungsprozesses erfordert. Schauen Sie über die grundlegende Tastenkombination hinaus und wählen Sie die Methode, die tatsächlich zu Ihrer Aufgabe passt.
5. FAQs
F1: Was ist der Unterschied zwischen „Als Kopie öffnen“ und dem einfachen Doppelklick auf die Datei?
Doppelklicken öffnet die Originaldatei direkt. Jede Änderung, die Sie vornehmen, wird im Original gespeichert, es sei denn, Sie führen manuell „Speichern unter“ aus. „Als Kopie öffnen“ öffnet ein temporäres Duplikat; wenn Sie ohne zu speichern schließen, bleibt das Original zu 100 % unverändert.
F2: Werden meine Diagramme, Pivot-Tabellen und Formeln brechen, wenn ich mit diesen Methoden dupliziere?
Nein. Alle manuellen Methoden (Speichern unter, Ziehen, Als Kopie öffnen) erhalten jedes Element perfekt. Bei der Automatisierung erhält File.Copy alles, da es sich um eine Bit-für-Bit-Kopie handelt. Spire.XLS erhält sie ebenfalls, solange Sie LoadFromFile und SaveToFile verwenden, ohne Elemente manuell zu entfernen.
F3: Warum sollte ich C#-Automatisierung gegenüber manuellen Methoden verwenden?
Manuelle Methoden eignen sich hervorragend für 1-5 Dateien. Aber wenn Sie 500 benutzerdefinierte Rechnungen aus einer Vorlage generieren müssen (wobei jeder Kopie ein neues Datum und eine neue Rechnungsnummer hinzugefügt wird), ist manuelle Arbeit unmöglich. Automatisierung übernimmt die Wiederholung und Präzision.
F4: Besteht die Gefahr einer Beschädigung beim Duplizieren einer geöffneten Excel-Datei?
Ja, bei manuellen Methoden – kopieren oder ziehen Sie niemals eine Excel-Datei, während sie aktiv geöffnet ist und ungespeicherte Änderungen aufweist. Bei der Automatisierung können Bibliotheken wie Spire.XLS geöffnete Dateien sicher lesen, aber File.Copy kann einen Fehler „Zugriff verweigert“ auslösen, wenn die Datei von einem anderen Prozess gesperrt ist. Schließen Sie die Datei immer zuerst, um die besten Ergebnisse zu erzielen.
Siehe auch
Как дублировать файл Excel (помимо Ctrl+C и Ctrl+V)
Всем известен классический метод Ctrl+C и Ctrl+V для дублирования файлов Excel. Он работает, но не всегда является самым умным или быстрым способом эффективного дублирования файла Excel. Что, если вы хотите создать резервную копию, не загромождая папку бесконечными версиями «имя файла - Копия»? Что, если вам нужно открыть безопасную дублированную копию Excel, не рискуя изменить оригинал? Или что, если вам нужно массово дублировать файлы Excel, автоматически добавляя временные метки или пользовательские имена?
Эта статья выходит за рамки базовых сочетаний клавиш и рассматривает практические ручные приемы и мощные методы автоматизации для дублирования файлов Excel — методы, которые многие обычные пользователи и даже опытные профессионалы никогда не открывают для себя.
На этой странице:
- Ручные способы дублирования файла Excel
- Зачем автоматизировать?
- Автоматизация для разработчиков
- Заключение
- Часто задаваемые вопросы
1. Ручные способы дублирования файла Excel
1.1 Метод 1: Сохранить как — Создание резервной копии с версиями
Большинство пользователей думают, что «Сохранить как» используется только для сохранения изменений, но на самом деле это самый безопасный способ дублировать файл, который у вас открыт. Вместо создания беспорядочной копии в вашей папке этот метод позволяет переименовать файл и выбрать его точное местоположение во время процесса сохранения.
Шаги:
- Откройте файл Excel, нажмите Файл > Сохранить как.
- Выберите местоположение (OneDrive, Этот компьютер или конкретную папку).
- Введите новое имя для дубликата (например, «Отчет за 1 квартал_Резервная копия» вместо «Отчет за 1 квартал»).
- Нажмите Сохранить. Оригинальный файл остается нетронутым, и вы теперь работаете с новой копией.
Лучше всего подходит для: Используйте этот метод, когда вы собираетесь внести существенные изменения в важный отчет. Он создает архивную версию исходного состояния, не выходя из Excel.
Ограничение: Это работает только тогда, когда файл уже открыт. Вы не можете использовать «Сохранить как» для закрытого файла из Проводника.
1.2 Метод 2: Перетаскивание — Дублирование одного или нескольких файлов
Если вам нужно дублировать несколько файлов Excel одновременно, это самый быстрый встроенный метод в Проводнике Windows или Finder macOS. Вместо открытия меню или многократного использования копирования и вставки вы можете создать несколько дубликатов файлов одним действием перетаскивания, используя модификатор клавиши.
Шаги (Windows):
- Откройте Проводник и найдите файлы Excel, которые вы хотите дублировать.
- Выберите один файл или несколько файлов (удерживайте Ctrl для множественного выбора).
- Удерживайте клавишу Ctrl на клавиатуре.
- Удерживая Ctrl, перетащите выбранные файлы в пустое место в той же папке.
- Сначала отпустите кнопку мыши, затем отпустите Ctrl.
- Копии появятся мгновенно с именами вроде «имя файла - Копия.xlsx».
Шаги (Mac):
- Откройте Finder и найдите файлы Excel.
- Выберите один или несколько файлов.
- Удерживайте клавишу Option.
- Перетащите файлы в пределах той же папки.
- Сначала отпустите кнопку мыши, затем отпустите Option.
- Дубликаты будут созданы немедленно.
Лучше всего подходит для: Быстрого массового дублирования нескольких файлов Excel, например, для создания резервных копий отчетов, наборов данных или шаблонов.
Ограничение: Этот метод не позволяет переименовывать файлы во время перетаскивания. Все дубликаты будут использовать имена по умолчанию, такие как «имя файла - Копия», поэтому вам может потребоваться переименовать их позже, если требуется единообразие имен.
1.3 Метод 3: Открыть как копию — Избегайте случайных правок
Скрытая в диалоговом окне «Открыть» Excel функция позволяет никогда случайно не редактировать исходный файл. Когда вы выбираете «Открыть как копию», Excel открывает временный клон вашей рабочей книги. Если вы закроете без сохранения, копия полностью исчезнет, оставив оригинал нетронутым.
Шаги:
- Откройте Microsoft Excel (не файл напрямую).
- Нажмите Файл > Открыть > Обзор.
- Перейдите к файлу Excel, который вы хотите дублировать.
- Щелкните файл один раз, чтобы выбрать его, затем нажмите стрелку рядом с кнопкой Открыть (не саму кнопку).
- Выберите Открыть как копию из выпадающего меню.
Excel откроет дубликат с именем «Копия [имя исходного файла].xlsx». Исходный файл остается закрытым и полностью нетронутым.
Лучше всего подходит для: Это идеально подходит для просмотра конфиденциального файла, тестирования сложных формул или демонстрации экрана во время совещания — потому что даже если вы внесете изменения и случайно нажмете Ctrl+S, вы сохраните изменения во временной копии, а не в оригинале.
Ограничение: Если вы намеренно хотите сохранить изменения, вы должны использовать Файл > Сохранить как, чтобы сохранить копию в постоянное место. Простое нажатие «Сохранить» не перезапишет оригинал, но копия исчезнет при закрытии Excel, если вы не сохраните ее в другом месте.
1.4 Краткая справочная таблица: Какой ручной метод использовать и когда
| Ситуация | Лучший метод (кроме Ctrl+V) |
|---|---|
| Файл открыт, и вам нужна чистая резервная копия с версиями | Сохранить как |
| Нужна копия в той же папке без использования меню | Ctrl/Option + Перетаскивание |
| Нужно дублировать несколько файлов одновременно (например, 10 резервных копий одним действием) | Ctrl/Option + Перетаскивание (с выбранными несколькими файлами) |
| Нужно открыть файл для просмотра, не изменяя оригинал | Открыть как копию |
2. Зачем автоматизировать?
Ручные приемы хорошо работают для разовых задач. Но если вы обнаруживаете, что дублируете 50 файлов каждый день — или если вы хотите автоматически добавлять временную метку к каждой копии — автоматизация — это ответ. Следующий раздел написан для разработчиков C#, но любой, кто интересуется автоматизацией копирования Excel, может следить за ним.
3. Автоматизация для разработчиков
3.1 Метод 1: Простое копирование файла с помощью .NET File.Copy
Для разработчиков .NET framework предлагает нативный способ дублирования файлов Excel без каких-либо внешних библиотек. Этот метод обрабатывает файл Excel как необработанные двоичные данные, что делает его невероятно быстрым для пакетных операций, таких как ночные резервные копии или архивирование.
using System.IO;

File.Copy("source.xlsx", "destination.xlsx", overwrite: true);
Лучше всего подходит для: Пакетное создание точных дубликатов, автоматическое архивирование, интеграция в серверные службы.
Ограничение: Вы не можете изменять содержимое файла — ни значения ячеек, ни временные метки, ни форматирование. Это чистое копирование «оболочки».
3.2 Метод 2: Копирование и изменение с помощью Spire.XLS
Spire.XLS for .NET — это профессиональная библиотека, которая позволяет «открывать» файл во время дублирования. Это означает, что вы можете скопировать шаблон и одновременно записывать динамические данные, такие как текущая временная метка или новое имя клиента.
using Spire.Xls;

Workbook workbook = new Workbook();
workbook.LoadFromFile("Template.xlsx");

// Изменить содержимое во время процесса копирования
Worksheet sheet = workbook.Worksheets[0];
sheet.Range["A1"].Text = DateTime.Now.ToString(); // Добавить дату
sheet.Range["B2"].Text = "Имя клиента";             // Обновить текст
sheet.DeleteColumn(5);                                                  // Удалить столбец

workbook.SaveToFile("ModifiedCopy.xlsx");
Лучше всего подходит для: Заполнение шаблонов, добавление метаданных (дата, имя автора), очистка конфиденциальных данных во время дублирования.
Ограничение: Медленнее, чем File.Copy, потому что он анализирует XML-структуру файла. Также требуется установка пакета NuGet Spire.XLS.
Вам также может понравиться: Руководство по записи в Excel на C#
3.3 Сравнение в общих чертах
| Аспект | File.Copy | Spire.XLS |
|---|---|---|
| Изменение содержимого ячеек? | Нет | Да |
| Добавление временной метки? | Нет | Да |
| Нужна внешняя библиотека? | Нет (встроенная) | Да (NuGet) |
| Скорость | Очень быстро | Медленнее |
| Лучше всего подходит для | Пакетное создание точных дубликатов | Копирование + интеллектуальное изменение |
3.4 Простое руководство по принятию решений для разработчиков
- Просто нужно много точных копий? → Используйте File.Copy
- Нужно добавить дату, имя или очистить данные при копировании? → Используйте Spire.XLS
4. Заключение
Дублирование файла Excel — это больше, чем просто нажатие Ctrl+C и Ctrl+V. Для обычных пользователей освоение «Открыть как копию» или трюка Ctrl + Перетаскивание экономит время и предотвращает случайную потерю данных. Для разработчиков выбор технический: используйте File.Copy .NET для сырой скорости и пакетных операций или переключитесь на Spire.XLS, когда ваш рабочий процесс требует добавления данных в процессе дублирования. Смотрите дальше базового сочетания клавиш и выбирайте метод, который действительно соответствует вашей задаче.
5. Часто задаваемые вопросы
В1: Какова разница между «Открыть как копию» и простым двойным щелчком по файлу?
Двойной щелчок открывает исходный файл напрямую. Любое изменение, которое вы внесете, сохраняется в оригинале, если вы вручную не выполните «Сохранить как». «Открыть как копию» открывает временный дубликат; если вы закроете без сохранения, оригинал останется на 100% нетронутым.
В2: Сломаются ли мои диаграммы, сводные таблицы и формулы при дублировании этими методами?
Нет. Все ручные методы (Сохранить как, Перетаскивание, Открыть как копию) идеально сохраняют каждый элемент. Для автоматизации File.Copy сохраняет все, поскольку это побитовое копирование. Spire.XLS также сохраняет их, если вы используете LoadFromFile и SaveToFile без ручного удаления элементов.
В3: Зачем использовать автоматизацию C# вместо ручных методов?
Ручные методы отлично подходят для 1-5 файлов. Но если вам нужно сгенерировать 500 индивидуальных счетов-фактур из шаблона (добавляя новую дату и номер счета-фактуры к каждой копии), ручная работа невозможна. Автоматизация обрабатывает повторение и точность.
В4: Существует ли риск повреждения при дублировании открытого файла Excel?
Да, для ручных методов — никогда не копируйте и не перетаскивайте файл Excel, пока он активно открыт и имеет несохраненные изменения. Для автоматизации библиотеки, такие как Spire.XLS, могут безопасно читать открытые файлы, но File.Copy может выдать ошибку «отказано в доступе», если файл заблокирован другим процессом. Всегда закрывайте файл первым для достижения наилучших результатов.
См. также
Contar linhas em arquivos do Excel — Com ou sem abri-los
Contar linhas no Excel é uma tarefa fundamental na análise de dados, relatórios e gerenciamento de planilhas. Seja gerenciando registros de vendas, bancos de dados de clientes ou conjuntos de dados importados, saber o número exato de linhas ajuda a validar dados, monitorar o crescimento da pasta de trabalho e automatizar fluxos de trabalho.
Para planilhas pequenas, contar linhas manualmente é simples. No entanto, processar várias pastas de trabalho, lidar com arquivos protegidos por senha ou analisar dados sem abrir o Excel requer abordagens diferentes. Este guia explora métodos manuais e programáticos para contar linhas, juntamente com cenários avançados, como ignorar cabeçalhos, contar apenas linhas não vazias e lidar com arquivos corrompidos ou protegidos.
Nesta página:
- Parte 1. Contar Linhas em uma Pasta de Trabalho Excel Aberta
- Parte 2. Contar Linhas Sem Abrir Arquivos Excel
- Parte 3. Cenários Avançados de Contagem de Linhas
- Melhor Método para Diferentes Casos de Uso
- Conclusão
- FAQs
1. Parte 1. Contar Linhas em uma Pasta de Trabalho Excel Aberta
Quando você tem um arquivo aberto e pronto, o Excel oferece várias maneiras rápidas de contar linhas. Cada abordagem tem seus próprios pontos fortes, dependendo da situação.
1.1 Usando a Barra de Status do Excel
A barra de status do Excel oferece a maneira mais rápida de contar linhas em um intervalo selecionado. Basta selecionar os dados ou uma coluna, e a barra de status na parte inferior exibe estatísticas como Contagem, Média e Soma. O valor Contagem representa células não vazias na seleção.
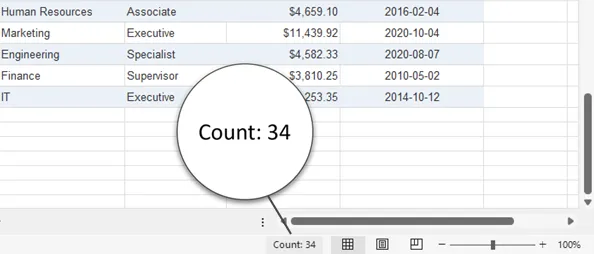
Este método é ideal para verificações rápidas ao revisar dados manualmente. Por exemplo, verificar o número de registros em uma lista de clientes pode ser feito instantaneamente sem fórmulas. No entanto, ele conta apenas as células selecionadas, portanto, conjuntos de dados com linhas em branco ou várias regiões podem gerar resultados imprecisos. A inspeção manual ainda é necessária para garantir a completude.
1.2 Usando a Fórmula CONT.VALORES
A função CONT.VALORES conta todas as células não vazias em um intervalo, incluindo texto, fórmulas e valores lógicos. Por exemplo, =CONT.VALORES(A:A) conta todas as células preenchidas na coluna A. Especificar um intervalo menor, como A2:A1000, oferece mais controle.
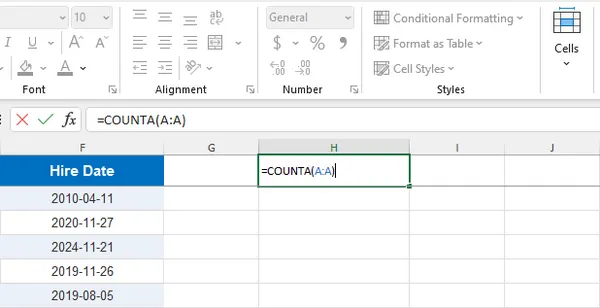
CONT.VALORES é confiável para conjuntos de dados dinâmicos porque atualiza automaticamente quando os dados mudam. É particularmente útil para dashboards, relatórios e tarefas de validação de dados. Os usuários devem observar que fórmulas que retornam strings vazias ainda são contadas, e linhas ocultas permanecem incluídas. Escolher uma coluna que sempre contém dados, como uma coluna de ID, melhora a precisão.
1.3 Usando Ctrl + Teclas de Seta para Encontrar a Última Linha
Atalhos de teclado fornecem um método rápido para localizar a última linha usada em um conjunto de dados. Selecionar uma célula e pressionar Ctrl + Seta para Baixo salta para a última linha não vazia naquela coluna. Essa abordagem é eficiente para grandes conjuntos de dados contínuos, como logs de vendas ou registros de transações.
![]()
Combinar atalhos como Ctrl + Seta para Cima ou Ctrl + Seta para Direita auxilia na navegação em planilhas amplas ou altas. No entanto, o método se torna menos confiável se houver linhas em branco dentro dos dados, pois o Excel para na primeira linha vazia encontrada. É melhor usá-lo para estimativas rápidas em vez de contagens precisas em conjuntos de dados com espaçamento irregular.
1.4 Contando Linhas em uma Tabela do Excel
Tabelas do Excel fornecem gerenciamento estruturado de dados, mantendo automaticamente as contagens de linhas à medida que o conjunto de dados muda. Criar uma tabela (Ctrl + T) permite o uso de referências estruturadas, como =LINHAS(Tabela1), para recuperar dinamicamente os números das linhas.
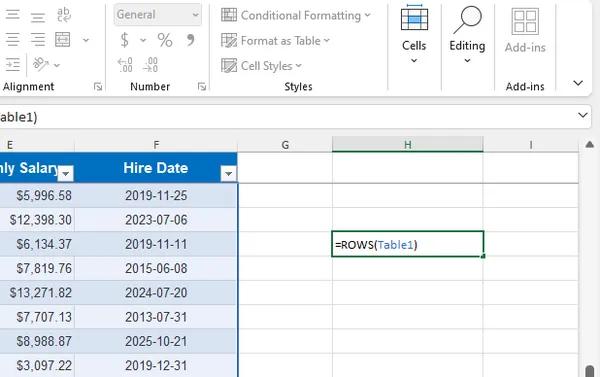
Tabelas são ideais para conjuntos de dados em crescimento, integrando-se perfeitamente com Tabelas Dinâmicas, gráficos e Power Query. Elas melhoram a legibilidade e a confiabilidade das fórmulas. A principal limitação é que os intervalos existentes devem primeiro ser convertidos em tabelas, e os usuários que não estão familiarizados com referências estruturadas podem precisar de uma breve curva de aprendizado.
1.5 Prós e Limitações dos Métodos Manuais
Os métodos manuais de contagem são simples, não requerem codificação e fornecem feedback visual imediato. Eles são eficazes para conjuntos de dados de pequeno a médio porte e verificações ocasionais.
No entanto, eles são menos eficientes para processamento em larga escala, operações em lote ou automação, e podem ser propensos a erros humanos. Métodos avançados são mais adequados quando velocidade, escalabilidade ou precisão são necessárias.
2. Parte 2. Contar Linhas Sem Abrir Arquivos Excel
Para situações em que você precisa de velocidade, automação ou a capacidade de processar muitos arquivos de uma vez, existem técnicas que funcionam diretamente no arquivo sem iniciar o Excel.
2.1 Lendo a Estrutura ZIP Interna do Excel
Arquivos .xlsx modernos são arquivos ZIP contendo documentos XML. Renomear um arquivo para .zip permite a inspeção de seu conteúdo, com os dados da planilha geralmente armazenados em xl/worksheets/sheet1.xml. Analisar esses arquivos XML pode fornecer contagens de linhas sem iniciar o Excel.
Este método é leve e eficiente, mas requer o entendimento da estrutura interna do Excel. Complexidades como células mescladas, strings compartilhadas e linhas ocultas podem tornar a análise manual desafiadora, tornando essa abordagem mais adequada para usuários avançados ou scripts automatizados.
2.2 Usando Scripts do PowerShell
PowerShell pode automatizar a contagem de linhas em ambientes Windows. Ele interage com o Excel por meio de automação COM ou processa arquivos de pasta de trabalho diretamente. Um fluxo de trabalho típico envolve abrir a pasta de trabalho, selecionar uma planilha, ler o intervalo usado e retornar a contagem de linhas.
$excel = New-Object -ComObject Excel.Application
$excel.Visible = $false
$workbook = $excel.Workbooks.Open("C:\Path\To\Sample.xlsx")
$sheet = $workbook.Sheets.Item(1)
$rowCount = $sheet.UsedRange.Rows.Count
Write-Host "Row count: $rowCount"
$workbook.Close($false)
$excel.Quit()
O PowerShell é conveniente para administradores de TI ou fluxos de trabalho automatizados em servidores. Ele suporta processamento em lote e tarefas agendadas, embora a automação baseada em COM possa consumir recursos significativos e a compatibilidade possa variar entre as versões do Excel.
2.3 Usando Spire.XLS para Python
Spire.XLS para Python é uma biblioteca robusta que lê e grava arquivos Excel inteiramente em Python, sem dependência do Microsoft Excel. Ele pode carregar pastas de trabalho sem abrir o Excel e acessar informações da planilha de forma eficiente.
Para começar, instale a biblioteca:
pip install spire.xls
Em seguida, use o seguinte código para contar linhas em uma planilha específica:
from spire.xls import Workbook

# Carregar um arquivo Excel
workbook = Workbook()
workbook.LoadFromFile("Sample.xlsx")

# Obter a contagem de linhas de uma planilha específica
sheet = workbook.Worksheets[0]
row_count =len(sheet.AllocatedRange.Rows)
print(f"Total de linhas na planilha: {row_count}")
Scripts Python são ideais para processamento em lote, automação e integração com bancos de dados ou APIs. Eles podem lidar com várias planilhas, arquivos protegidos por senha, linhas em branco e cabeçalhos. Essa abordagem é eficiente, escalável e confiável.
2.4 Prós e Limitações dos Métodos Avançados
Métodos avançados são adequados para automação, grandes conjuntos de dados e fluxos de trabalho corporativos. Eles oferecem resultados consistentes e reproduzíveis e reduzem o esforço manual.
No entanto, eles exigem habilidades de programação, bibliotecas adicionais e manutenção. Usuários não técnicos podem achar os métodos manuais mais acessíveis, enquanto a automação beneficia equipes que gerenciam extensos dados do Excel regularmente.
3. Parte 3. Cenários Avançados de Contagem de Linhas
Planilhas do mundo real raramente são simples. Veja como lidar com os casos extremos que surgem com mais frequência.
3.1 Contar Linhas em Várias Planilhas
Quando uma pasta de trabalho tem várias planilhas, você geralmente precisa da contagem total de linhas em todas elas. O script a seguir itera sobre cada planilha e acumula os totais:
from spire.xls import Workbook

workbook = Workbook()
workbook.LoadFromFile("Sample.xlsx")

total_rows =0
for sheet in workbook.Worksheets:
    rows = sheet.AllocatedRange.Rows
    total_rows +=len(rows)

print(f"Total de linhas em todas as planilhas: {total_rows}")
Isso é especialmente útil quando os dados são divididos entre planilhas mensais ou regionais e você precisa de um total geral para fins de relatório.
3.2 Contar Apenas Linhas Não Vazias
As contagens de linhas brutas incluem quaisquer linhas em branco que caiam dentro do intervalo usado. Se seus dados tiverem lacunas — talvez devido a exclusões ou formatação — você vai querer filtrá-las:
from spire.xls import Workbook

workbook = Workbook()
workbook.LoadFromFile("Sample.xlsx")

sheet = workbook.Worksheets[0]
rows = sheet.AllocatedRange.Rows
total_rows = len(rows)

blank_rows = sum(1for row in rows if row.IsBlank)
non_empty_rows = total_rows - blank_rows
print(f"Linhas não vazias: {non_empty_rows}")
A propriedade IsBlank retorna True para qualquer linha onde todas as células estejam vazias. Subtrair a contagem de linhas em branco do total lhe dá uma contagem precisa de linhas que realmente contêm dados.
3.3 Ignorar Cabeçalhos ao Contar
Quando você precisa de uma contagem que represente apenas registros de dados, os cabeçalhos devem ser excluídos. Este script pula um número configurável de linhas de cabeçalho antes de contar:
from spire.xls import Workbook

workbook = Workbook()
workbook.LoadFromFile("Sample.xlsx")

sheet = workbook.Worksheets[0]
rows = sheet.AllocatedRange.Rows
HEADER_ROWS = 1
blank_rows = 0

for i, row in enumerate(rows):
    # Pular linhas de cabeçalho
    if i < HEADER_ROWS:
        continue
    if row.IsBlank:
        blank_rows += 1
data_rows = (
    len(rows)
    - HEADER_ROWS
    - blank_rows
)

print(f"Linhas de dados (excluindo cabeçalhos): {data_rows}")
Ajuste HEADER_ROWS para corresponder ao seu arquivo — por exemplo, defina-o como 2 se sua planilha tiver uma linha de título acima dos cabeçalhos das colunas.
3.4 Contar Linhas em Arquivos Protegidos por Senha
A proteção por senha não precisa ser um obstáculo. Spire.XLS suporta o carregamento de pastas de trabalho criptografadas passando a senha como um segundo argumento para LoadFromFile:
from spire.xls import Workbook

workbook = Workbook()
# Carregar pasta de trabalho criptografada com senha
workbook.LoadFromFile("Protected.xlsx", "123456")

sheet = workbook.Worksheets[0]
rows = sheet.AllocatedRange.Rows
print(f"Linhas na planilha protegida: {len(rows)}")
Isso funciona perfeitamente, desde que você tenha a senha correta. É particularmente útil em ambientes corporativos onde arquivos confidenciais são rotineiramente protegidos, mas ainda precisam ser processados programaticamente.
3.5 Lidar com Arquivos Corrompidos
Scripts de processamento em lote inevitavelmente encontrarão um arquivo danificado ou malformado. Envolver a operação de carregamento em um bloco try-except impede que um arquivo ruim trave toda a execução:
try:
    workbook.LoadFromFile(file)
except Exception as e:
    print(f"Falha ao carregar {file}: {e}")
    continue
Na prática, você vai querer registrar a falha e seguir para o próximo arquivo em vez de ignorar silenciosamente o erro. Uma implementação mais completa pode anexar o nome do arquivo a uma lista de arquivos com falha para revisão posterior, dando a você uma trilha de auditoria limpa sem interromper o lote.
4. Melhor Método para Diferentes Casos de Uso
| Caso de Uso | Método Recomendado |
|---|---|
| Inspeção rápida | Barra de Status |
| Conjunto de dados dinâmico | CONT.VALORES |
| Navegação rápida | Ctrl + Teclas de Seta |
| Dados estruturados | Tabela do Excel |
| Processamento em lote | Python + Spire.XLS |
| Automação com Excel instalado | PowerShell |
| Multiplataforma; sem necessidade de Excel | Python + Spire.XLS |
Escolher o método certo depende do volume de arquivos, das necessidades de automação e da expertise técnica.
5. Conclusão
Contar linhas em planilhas Excel varia de métodos manuais simples a abordagens de programação totalmente automatizadas. Métodos manuais são suficientes para tarefas pequenas e interativas, enquanto scripts Python ou PowerShell se destacam no processamento em lote e em cenários corporativos. Técnicas avançadas lidam com cabeçalhos, linhas em branco, pastas de trabalho protegidas e arquivos corrompidos, garantindo resultados precisos em fluxos de trabalho complexos. Selecionar o método certo melhora a eficiência, a confiabilidade e a escalabilidade no gerenciamento de dados.
6. FAQs
O Excel pode contar linhas automaticamente?
Sim. Funções como CONT.VALORES e Tabelas do Excel atualizam automaticamente as contagens de linhas quando os dados mudam.
Qual é o limite máximo de linhas do Excel?
Versões modernas do Excel suportam até 1.048.576 linhas por planilha.
Posso contar linhas sem ter o Microsoft Excel instalado?
Sim. Bibliotecas como Spire.XLS podem processar arquivos Excel de forma independente.
Por que minha contagem de linhas parece incorreta?
Linhas em branco, linhas ocultas, fórmulas ou células mescladas podem afetar os resultados.
Qual método é melhor para automação?
Soluções baseadas em Python são geralmente as mais flexíveis e escaláveis.
Veja Também
엑셀 파일 행 개수 세기 — 파일을 열거나 열지 않고
Excel에서 행을 세는 것은 데이터 분석, 보고 및 스프레드시트 관리의 기본 작업입니다. 판매 기록, 고객 데이터베이스 또는 가져온 데이터 세트를 관리하든 정확한 행 수를 알면 데이터를 검증하고, 통합 문서 성장을 모니터링하고, 워크플로를 자동화하는 데 도움이 됩니다.
작은 스프레드시트의 경우 수동으로 행을 세는 것은 간단합니다. 그러나 여러 통합 문서를 처리하거나, 암호로 보호된 파일을 처리하거나, Excel을 열지 않고 데이터를 분석하려면 다른 접근 방식이 필요합니다. 이 가이드에서는 수동 및 프로그래밍 방식의 행 개수 방법과 헤더 무시, 비어 있지 않은 행만 개수, 손상되거나 보안이 적용된 파일 처리와 같은 고급 시나리오를 살펴봅니다.
이 페이지에서:
- 파트 1. 열려 있는 Excel 통합 문서에서 행 수 세기
- 파트 2. Excel 파일을 열지 않고 행 수 세기
- 파트 3. 고급 행 개수 시나리오
- 다양한 사용 사례에 대한 최적의 방법
- 결론
- 자주 묻는 질문
1. 파트 1. 열려 있는 Excel 통합 문서에서 행 수 세기
파일이 열려 있고 준비되면 Excel에서 행을 빠르게 세는 몇 가지 방법을 제공합니다. 각 접근 방식은 상황에 따라 고유한 강점을 가지고 있습니다.
1.1 Excel 상태 표시줄 사용
Excel 상태 표시줄은 선택한 범위에서 행을 가장 빠르게 세는 방법을 제공합니다. 데이터를 선택하거나 열을 선택하면 하단의 상태 표시줄에 개수, 평균, 합계와 같은 통계가 표시됩니다. 개수 값은 선택 영역의 비어 있지 않은 셀을 나타냅니다.
이 방법은 데이터를 수동으로 검토할 때 빠른 확인에 이상적입니다. 예를 들어, 고객 목록의 레코드 수를 수식 없이 즉시 확인할 수 있습니다. 그러나 선택한 셀만 개수하므로 빈 행이나 여러 영역이 있는 데이터 세트는 부정확한 결과를 낳을 수 있습니다. 완전성을 보장하려면 수동 검사가 필요합니다.
1.2 COUNTA 수식 사용
COUNTA 함수는 텍스트, 수식 및 논리 값을 포함하여 범위의 모든 비어 있지 않은 셀을 개수합니다. 예를 들어, =COUNTA(A:A)는 A 열의 채워진 모든 셀을 개수합니다. A2:A1000과 같이 더 좁은 범위를 지정하면 더 나은 제어가 가능합니다.
COUNTA는 데이터가 변경될 때 자동으로 업데이트되므로 동적 데이터 세트에 안정적입니다. 특히 대시보드, 보고서 및 데이터 유효성 검사 작업에 유용합니다. 빈 문자열을 반환하는 수식도 개수에 포함되며 숨겨진 행도 포함된다는 점에 유의해야 합니다. 항상 데이터가 포함된 열(예: ID 열)을 선택하면 정확도가 향상됩니다.
1.3 Ctrl + 화살표 키를 사용하여 마지막 행 찾기
키보드 단축키는 데이터 세트에서 마지막으로 사용된 행을 찾는 빠른 방법을 제공합니다. 셀을 선택하고 Ctrl + 아래쪽 화살표를 누르면 해당 열의 마지막 비어 있지 않은 행으로 이동합니다. 이 접근 방식은 판매 로그 또는 거래 기록과 같은 대규모 연속 데이터 세트에 효율적입니다.
![]()
Ctrl + 위쪽 화살표 또는 Ctrl + 오른쪽 화살표와 같은 단축키를 결합하면 넓거나 긴 워크시트에서 탐색하는 데 도움이 됩니다. 그러나 데이터 내에 빈 행이 있는 경우 Excel이 처음 만나는 빈 행에서 멈추기 때문에 이 방법의 신뢰성이 떨어집니다. 불규칙한 간격의 데이터 세트에서 정확한 개수보다는 빠른 추정에 사용하는 것이 가장 좋습니다.
1.4 Excel 테이블에서 행 수 세기
Excel 테이블은 데이터의 구조화된 관리를 제공하며 데이터 세트가 변경됨에 따라 행 수를 자동으로 유지합니다. 테이블을 만들면(Ctrl + T) =ROWS(Table1)과 같은 구조화된 참조를 사용하여 동적으로 행 번호를 검색할 수 있습니다.
테이블은 성장하는 데이터 세트에 이상적이며 피벗 테이블, 차트 및 Power Query와 원활하게 통합됩니다. 가독성과 수식의 신뢰성을 향상시킵니다. 주요 제한 사항은 기존 범위를 먼저 테이블로 변환해야 한다는 것이며, 구조화된 참조에 익숙하지 않은 사용자는 짧은 학습 곡선이 필요할 수 있습니다.
1.5 수동 방법의 장점 및 한계
수동 개수 방법은 간단하고 코딩이 필요 없으며 즉각적인 시각적 피드백을 제공합니다. 중소 규모 데이터 세트 및 간헐적인 확인에 효과적입니다.
그러나 대규모 처리, 일괄 작업 또는 자동화에는 덜 효율적이며 인간 오류에 취약할 수 있습니다. 속도, 확장성 또는 정확도가 필요한 경우 고급 방법이 더 적합합니다.
2. 파트 2. Excel 파일을 열지 않고 행 수 세기
속도, 자동화 또는 한 번에 많은 파일을 처리할 수 있는 기능이 필요한 상황에서는 Excel을 전혀 실행하지 않고 파일에서 직접 작동하는 기술이 있습니다.
2.1 Excel의 내부 ZIP 구조 읽기
최신 .xlsx 파일은 XML 문서를 포함하는 ZIP 아카이브입니다. 파일을 .zip으로 이름을 바꾸면 내용을 검사할 수 있으며, 워크시트 데이터는 일반적으로 xl/worksheets/sheet1.xml에 저장됩니다. 이러한 XML 파일을 구문 분석하면 Excel을 실행하지 않고도 행 수를 얻을 수 있습니다.
이 방법은 가볍고 효율적이지만 Excel의 내부 구조에 대한 이해가 필요합니다. 병합된 셀, 공유 문자열 및 숨겨진 행과 같은 복잡성은 수동 구문 분석을 어렵게 만들 수 있으므로 이 접근 방식은 고급 사용자 또는 자동화된 스크립트에 더 적합합니다.
2.2 PowerShell 스크립트 사용
PowerShell은 Windows 환경에서 행 개수를 자동화할 수 있습니다. COM 자동화를 통해 Excel과 상호 작용하거나 워크북 파일을 직접 처리합니다. 일반적인 워크플로는 통합 문서를 열고, 워크시트를 선택하고, 사용된 범위를 읽고, 행 개수를 반환하는 것입니다.
$excel = New-Object -ComObject Excel.Application
$excel.Visible = $false
$workbook = $excel.Workbooks.Open("C:\Path\To\Sample.xlsx")
$sheet = $workbook.Sheets.Item(1)
$rowCount = $sheet.UsedRange.Rows.Count
Write-Host "Row count: $rowCount"
$workbook.Close($false)
$excel.Quit()
PowerShell은 IT 관리자 또는 서버의 자동화된 워크플로에 편리합니다. 일괄 처리 및 예약된 작업을 지원하지만 COM 기반 자동화는 상당한 리소스를 소비할 수 있으며 Excel 버전 간에 호환성이 다를 수 있습니다.
2.3 Python용 Spire.XLS 사용
Python용 Spire.XLS는 Microsoft Excel에 대한 의존성 없이 Python에서 Excel 파일을 완전히 읽고 쓰는 강력한 라이브러리입니다. Excel을 열지 않고 통합 문서를 로드하고 워크시트 정보에 효율적으로 액세스할 수 있습니다.
시작하려면 라이브러리를 설치하십시오:
pip install spire.xls
그런 다음 다음 코드를 사용하여 특정 워크시트의 행 수를 세십시오:
from spire.xls import Workbook

# Excel 파일 로드
workbook = Workbook()
workbook.LoadFromFile("Sample.xlsx")

# 특정 시트의 행 개수 가져오기
sheet = workbook.Worksheets[0]
row_count =len(sheet.AllocatedRange.Rows)
print(f"워크시트의 총 행 수: {row_count}")
Python 스크립트는 일괄 처리, 자동화 및 데이터베이스 또는 API와의 통합에 이상적입니다. 여러 워크시트, 암호로 보호된 파일, 빈 행 및 헤더를 처리할 수 있습니다. 이 접근 방식은 효율적이고 확장 가능하며 안정적입니다.
2.4 고급 방법의 장점 및 한계
고급 방법은 자동화, 대규모 데이터 세트 및 엔터프라이즈 워크플로에 적합합니다. 일관되고 재현 가능한 결과를 제공하고 수동 노력을 줄입니다.
그러나 프로그래밍 기술, 추가 라이브러리 및 유지 관리가 필요합니다. 비기술적인 사용자는 수동 방법을 더 쉽게 접근할 수 있지만, 자동화는 광범위한 Excel 데이터를 정기적으로 관리하는 팀에 도움이 됩니다.
3. 파트 3. 고급 행 개수 시나리오
실제 스프레드시트는 거의 단순하지 않습니다. 가장 자주 발생하는 엣지 케이스를 처리하는 방법은 다음과 같습니다.
3.1 여러 워크시트에 걸쳐 행 수 세기
통합 문서에 여러 시트가 있는 경우 종종 모든 시트에 걸쳐 총 행 수를 알아야 합니다. 다음 스크립트는 각 워크시트를 반복하고 합계를 누적합니다:
from spire.xls import Workbook

workbook = Workbook()
workbook.LoadFromFile("Sample.xlsx")

total_rows =0
for sheet in workbook.Worksheets:
    rows = sheet.AllocatedRange.Rows
    total_rows +=len(rows)

print(f"모든 워크시트에 걸친 총 행 수: {total_rows}")
이는 특히 데이터가 월별 또는 지역별 시트로 분할되어 보고 목적으로 총계를 필요로 할 때 유용합니다.
3.2 비어 있지 않은 행만 개수
원시 행 개수에는 사용된 범위 내에 있는 모든 빈 행이 포함됩니다. 데이터에 간격이 있는 경우(삭제 또는 서식 지정으로 인해 발생할 수 있음) 해당 간격을 필터링하고 싶을 것입니다:
from spire.xls import Workbook

workbook = Workbook()
workbook.LoadFromFile("Sample.xlsx")

sheet = workbook.Worksheets[0]
rows = sheet.AllocatedRange.Rows
total_rows = len(rows)

blank_rows = sum(1for row in rows if row.IsBlank)
non_empty_rows = total_rows - blank_rows
print(f"비어 있지 않은 행: {non_empty_rows}")
IsBlank 속성은 모든 셀이 비어 있는 행에 대해 True를 반환합니다. 빈 개수를 총계에서 빼면 실제로 데이터가 포함된 행의 정확한 개수를 얻을 수 있습니다.
3.3 개수 시 헤더 무시
데이터 레코드만 나타내는 개수가 필요한 경우 헤더를 제외해야 합니다. 이 스크립트는 개수하기 전에 구성 가능한 수의 헤더 행을 건너뜁니다:
from spire.xls import Workbook workbook = Workbook() workbook.LoadFromFile("Sample.xlsx") sheet = workbook.Worksheets[0] rows = sheet.AllocatedRange.Rows HEADER_ROWS = 1 blank_rows = 0 for i, row in enumerate(rows): # 헤더 행 건너뛰기 if i < HEADER_ROWS: continue if row.IsBlank: blank_rows += 1 data_rows = ( len(rows) - HEADER_ROWS - blank_rows ) print(f"데이터 행 (헤더 제외): {data_rows}")
HEADER_ROWS를 파일에 맞게 조정하십시오. 예를 들어 시트에 열 헤더 위에 제목 행이 있는 경우2로 설정하십시오.3.4 암호로 보호된 파일에서 행 수 세기
암호 보호가 장애물이 될 필요는 없습니다. Spire.XLS는
LoadFromFile에 두 번째 인수로 암호를 전달하여 암호화된 통합 문서를 로드하는 것을 지원합니다:from spire.xls import Workbook workbook = Workbook() # 암호로 암호화된 통합 문서 로드 workbook.LoadFromFile("Protected.xlsx", "123456") sheet = workbook.Worksheets[0] rows = sheet.AllocatedRange.Rows print(f"보호된 워크시트의 행: {len(rows)}")
올바른 암호가 있는 한 원활하게 작동합니다. 특히 민감한 파일이 정기적으로 보호되지만 프로그래밍 방식으로 처리해야 하는 엔터프라이즈 환경에서 유용합니다.
3.5 손상된 파일 처리
일괄 처리 스크립트는 필연적으로 손상되거나 잘못된 형식의 파일에 직면하게 됩니다. try-except 블록으로 로드 작업을 래핑하면 하나의 잘못된 파일이 전체 실행을 중단하는 것을 방지할 수 있습니다:
try: workbook.LoadFromFile(file) except Exception as e: print(f"{file} 로드 실패: {e}") continue
실제로는 오류를 조용히 무시하는 대신 실패를 기록하고 다음 파일로 이동하는 것이 좋습니다. 더 완전한 구현은 일괄 처리를 중단하지 않고 나중에 검토할 실패한 파일 목록에 파일 이름을 추가할 수 있습니다. 이렇게 하면 깔끔한 감사 추적이 가능합니다.
4. 다양한 사용 사례에 대한 최적의 방법
| 사용 사례 | 권장 방법 |
|---|---|
| 빠른 검사 | 상태 표시줄 |
| 동적 데이터 세트 | COUNTA |
| 빠른 탐색 | Ctrl + 화살표 키 |
| 구조화된 데이터 | Excel 테이블 |
| 일괄 처리 | Python + Spire.XLS |
| Excel 설치 시 자동화 | PowerShell |
| 크로스 플랫폼; Excel 불필요 | Python + Spire.XLS |
올바른 방법을 선택하는 것은 파일 볼륨, 자동화 요구 사항 및 기술 전문성에 따라 달라집니다.
5. 결론
Excel 범위에서 행을 세는 것은 간단한 수동 방법부터 완전 자동화된 프로그래밍 접근 방식까지 다양합니다. 수동 방법은 작고 대화형 작업에 충분하지만 Python 또는 PowerShell 스크립트는 일괄 처리 및 엔터프라이즈 시나리오에서 뛰어납니다. 고급 기술은 헤더, 빈 행, 보호된 통합 문서 및 손상된 파일을 처리하여 복잡한 워크플로 전반에 걸쳐 정확한 결과를 보장합니다. 올바른 방법을 선택하면 데이터 관리의 효율성, 신뢰성 및 확장성이 향상됩니다.
6. 자주 묻는 질문
Excel에서 행을 자동으로 셀 수 있습니까?
예. COUNTA와 같은 함수와 Excel 테이블은 데이터가 변경될 때 행 수를 자동으로 업데이트합니다.
Excel의 최대 행 제한은 얼마입니까?
최신 Excel 버전은 워크시트당 최대 1,048,576개의 행을 지원합니다.
Microsoft Excel을 설치하지 않고 행을 셀 수 있습니까?
예. Spire.XLS와 같은 라이브러리는 Excel 파일을 독립적으로 처리할 수 있습니다.
내 행 개수가 잘못된 이유는 무엇입니까?
빈 행, 숨겨진 행, 수식 또는 병합된 셀이 결과에 영향을 줄 수 있습니다.
자동화에 가장 좋은 방법은 무엇입니까?
Python 기반 솔루션은 일반적으로 가장 유연하고 확장 가능합니다.
참고 자료
Contare le righe nei file Excel — Con o senza aprirli
Contare le righe in Excel è un'attività fondamentale nell'analisi dei dati, nella reportistica e nella gestione dei fogli di calcolo. Che si tratti di gestire record di vendita, database di clienti o set di dati importati, conoscere il numero esatto di righe aiuta a convalidare i dati, monitorare la crescita della cartella di lavoro e automatizzare i flussi di lavoro.
Per fogli di calcolo di piccole dimensioni, contare le righe manualmente è semplice. Tuttavia, l'elaborazione di più cartelle di lavoro, la gestione di file protetti da password o l'analisi dei dati senza aprire Excel richiedono approcci diversi. Questa guida esplora sia i metodi manuali che quelli programmatici per contare le righe, insieme a scenari avanzati come l'ignorare le intestazioni, contare solo le righe non vuote e gestire file corrotti o protetti.
In questa pagina:
- Parte 1. Conteggio Righe in una Cartella di Lavoro Excel Aperta
- Parte 2. Conteggio Righe Senza Aprire File Excel
- Parte 3. Scenari Avanzati di Conteggio Righe
- Metodo Migliore per Diversi Casi d'Uso
- Conclusione
- FAQ
1. Parte 1. Conteggio Righe in una Cartella di Lavoro Excel Aperta
Quando hai un file aperto e pronto, Excel ti offre diversi modi rapidi per contare le righe. Ogni approccio ha i suoi punti di forza a seconda della situazione.
1.1 Utilizzo della Barra di Stato di Excel
La barra di stato di Excel offre il modo più rapido per contare le righe in un intervallo selezionato. Seleziona semplicemente i dati o una colonna, e la barra di stato in basso visualizzerà statistiche come Conteggio, Media e Somma. Il valore Conteggio rappresenta le celle non vuote nella selezione.
Questo metodo è ideale per controlli rapidi durante la revisione manuale dei dati. Ad esempio, verificare il numero di record in un elenco clienti può essere fatto istantaneamente senza formule. Tuttavia, conta solo le celle selezionate, quindi set di dati con righe vuote o regioni multiple potrebbero fornire risultati imprecisi. L'ispezione manuale rimane necessaria per garantirne la completezza.
1.2 Utilizzo della Formula COUNTA
La funzione COUNTA conta tutte le celle non vuote in un intervallo, inclusi testo, formule e valori logici. Ad esempio, =COUNTA(A:A) conta tutte le celle popolate nella colonna A. Specificare un intervallo più ristretto come A2:A1000 offre un maggiore controllo.
COUNTA è affidabile per set di dati dinamici poiché si aggiorna automaticamente quando i dati cambiano. È particolarmente utile per dashboard, report e attività di convalida dei dati. Gli utenti dovrebbero notare che anche le formule che restituiscono stringhe vuote vengono contate e le righe nascoste rimangono incluse. La scelta di una colonna che contiene sempre dati, come una colonna ID, migliora l'accuratezza.
1.3 Utilizzo di Ctrl + Tasti Freccia per Trovare l'Ultima Riga
Le scorciatoie da tastiera offrono un metodo rapido per localizzare l'ultima riga utilizzata in un set di dati. Selezionando una cella e premendo Ctrl + Freccia Giù si salta all'ultima riga non vuota in quella colonna. Questo approccio è efficiente per grandi set di dati continui, come registri di vendita o record di transazioni.
![]()
La combinazione di scorciatoie come Ctrl + Freccia Su o Ctrl + Freccia Destra aiuta la navigazione in fogli di lavoro ampi o lunghi. Tuttavia, il metodo diventa meno affidabile se esistono righe vuote all'interno dei dati, poiché Excel si ferma alla prima riga vuota incontrata. È meglio usarlo per stime rapide piuttosto che per conteggi precisi in set di dati con spaziatura irregolare.
1.4 Conteggio Righe in una Tabella Excel
Le Tabelle Excel offrono una gestione strutturata dei dati, mantenendo automaticamente i conteggi delle righe al variare del set di dati. La creazione di una tabella (Ctrl + T) consente l'uso di riferimenti strutturati, come =RIGHE(Tabella1), per recuperare dinamicamente i numeri di riga.
Le tabelle sono ideali per set di dati in crescita, integrandosi perfettamente con Tabelle Pivot, grafici e Power Query. Migliorano la leggibilità e l'affidabilità delle formule. Il limite principale è che gli intervalli esistenti devono prima essere convertiti in tabelle, e gli utenti non familiari con i riferimenti strutturati potrebbero richiedere una breve curva di apprendimento.
1.5 Pro e Limitazioni dei Metodi Manuali
I metodi di conteggio manuale sono semplici, non richiedono codice e forniscono un feedback visivo immediato. Sono efficaci per set di dati di piccole e medie dimensioni e controlli occasionali.
Tuttavia, sono meno efficienti per l'elaborazione su larga scala, le operazioni batch o l'automazione, e possono essere soggetti a errori umani. I metodi avanzati sono più adatti quando sono richieste velocità, scalabilità o precisione.
2. Parte 2. Conteggio Righe Senza Aprire File Excel
Per situazioni in cui hai bisogno di velocità, automazione o della capacità di elaborare molti file contemporaneamente, ci sono tecniche che funzionano direttamente sul file senza avviare affatto Excel.
2.1 Lettura della Struttura ZIP Interna di Excel
I moderni file .xlsx sono archivi ZIP contenenti documenti XML. Rinominare un file in .zip consente di ispezionarne il contenuto, con i dati del foglio di lavoro tipicamente memorizzati in xl/worksheets/sheet1.xml. L'analisi di questi file XML può fornire conteggi di righe senza avviare Excel.
Questo metodo è leggero ed efficiente ma richiede la comprensione della struttura interna di Excel. Complessità come celle unite, stringhe condivise e righe nascoste possono rendere difficile l'analisi manuale, rendendo questo approccio più adatto a utenti avanzati o script automatizzati.
2.2 Utilizzo di Script PowerShell
PowerShell può automatizzare il conteggio delle righe negli ambienti Windows. Interagisce con Excel tramite automazione COM o elabora direttamente i file della cartella di lavoro. Un flusso di lavoro tipico prevede l'apertura della cartella di lavoro, la selezione di un foglio di lavoro, la lettura dell'intervallo utilizzato e la restituzione del conteggio delle righe.
$excel = New-Object -ComObject Excel.Application
$excel.Visible = $false
$workbook = $excel.Workbooks.Open("C:\Path\To\Sample.xlsx")
$sheet = $workbook.Sheets.Item(1)
$rowCount = $sheet.UsedRange.Rows.Count
Write-Host "Row count: $rowCount"
$workbook.Close($false)
$excel.Quit()
PowerShell è conveniente per gli amministratori IT o per i flussi di lavoro automatizzati sui server. Supporta l'elaborazione batch e le attività pianificate, sebbene l'automazione basata su COM possa consumare risorse significative e la compatibilità possa variare tra le versioni di Excel.
2.3 Utilizzo di Spire.XLS per Python
Spire.XLS per Python è una libreria robusta che legge e scrive file Excel interamente in Python, senza dipendenza da Microsoft Excel stesso. Può caricare cartelle di lavoro senza aprire Excel e accedere alle informazioni del foglio di lavoro in modo efficiente.
Per iniziare, installa la libreria:
pip install spire.xls
Quindi utilizza il seguente codice per contare le righe in un foglio di lavoro specifico:
from spire.xls import Workbook

# Carica un file Excel
workbook = Workbook()
workbook.LoadFromFile("Sample.xlsx")

# Ottieni il conteggio delle righe di un foglio specifico
sheet = workbook.Worksheets[0]
row_count =len(sheet.AllocatedRange.Rows)
print(f"Righe totali nel foglio di lavoro: {row_count}")
Gli script Python sono ideali per l'elaborazione batch, l'automazione e l'integrazione con database o API. Possono gestire più fogli di lavoro, file protetti da password, righe vuote e intestazioni. Questo approccio è efficiente, scalabile e affidabile.
2.4 Pro e Limitazioni dei Metodi Avanzati
I metodi avanzati sono adatti per l'automazione, grandi set di dati e flussi di lavoro aziendali. Offrono risultati coerenti e riproducibili e riducono lo sforzo manuale.
Tuttavia, richiedono competenze di programmazione, librerie aggiuntive e manutenzione. Gli utenti non tecnici potrebbero trovare i metodi manuali più accessibili, mentre l'automazione avvantaggia i team che gestiscono regolarmente grandi quantità di dati Excel.
3. Parte 3. Scenari Avanzati di Conteggio Righe
I fogli di calcolo del mondo reale raramente sono semplici. Ecco come gestire i casi limite che si presentano più spesso.
3.1 Conteggio Righe in Fogli di Lavoro Multipli
Quando una cartella di lavoro ha più fogli, spesso è necessario il conteggio totale delle righe in tutti. Lo script seguente itera su ogni foglio di lavoro e accumula i totali:
from spire.xls import Workbook

workbook = Workbook()
workbook.LoadFromFile("Sample.xlsx")

total_rows =0
for sheet in workbook.Worksheets:
    rows = sheet.AllocatedRange.Rows
    total_rows +=len(rows)

print(f"Righe totali in tutti i fogli di lavoro: {total_rows}")
Questo è particolarmente utile quando i dati sono suddivisi per fogli mensili o regionali e hai bisogno di un totale generale per scopi di reportistica.
3.2 Conteggio Solo Righe Non Vuote
I conteggi grezzi delle righe includono eventuali righe vuote che rientrano nell'intervallo utilizzato. Se i tuoi dati presentano delle lacune — forse a causa di eliminazioni o formattazione — vorrai filtrarle:
from spire.xls import Workbook

workbook = Workbook()
workbook.LoadFromFile("Sample.xlsx")

sheet = workbook.Worksheets[0]
rows = sheet.AllocatedRange.Rows
total_rows = len(rows)

blank_rows = sum(1for row in rows if row.IsBlank)
non_empty_rows = total_rows - blank_rows
print(f"Righe non vuote: {non_empty_rows}")
La proprietà IsBlank restituisce True per qualsiasi riga in cui ogni cella è vuota. Sottraendo il conteggio delle righe vuote dal totale si ottiene un conteggio preciso delle righe che contengono effettivamente dati.
3.3 Ignorare le Intestazioni Durante il Conteggio
Quando hai bisogno di un conteggio che rappresenti solo i record di dati, le intestazioni devono essere escluse. Questo script salta un numero configurabile di righe di intestazione prima di contare:
from spire.xls import Workbook

workbook = Workbook()
workbook.LoadFromFile("Sample.xlsx")

sheet = workbook.Worksheets[0]
rows = sheet.AllocatedRange.Rows
HEADER_ROWS = 1
blank_rows = 0

for i, row in enumerate(rows):
    # Salta le righe di intestazione
    if i < HEADER_ROWS:
        continue
    if row.IsBlank:
        blank_rows += 1
data_rows = (
    len(rows)
    - HEADER_ROWS
    - blank_rows
)

print(f"Righe di dati (escluse le intestazioni): {data_rows}")
Regola HEADER_ROWS per corrispondere al tuo file — ad esempio, impostalo su 2 se il tuo foglio ha una riga di titolo sopra le intestazioni di colonna.
3.4 Conteggio Righe in File Protetti da Password
La protezione tramite password non deve essere un ostacolo. Spire.XLS supporta il caricamento di cartelle di lavoro crittografate passando la password come secondo argomento a LoadFromFile:
from spire.xls import Workbook

workbook = Workbook()
# Carica cartella di lavoro crittografata con password
workbook.LoadFromFile("Protected.xlsx", "123456")

sheet = workbook.Worksheets[0]
rows = sheet.AllocatedRange.Rows
print(f"Righe nel foglio di lavoro protetto: {len(rows)}")
Questo funziona senza problemi purché tu abbia la password corretta. È particolarmente utile in contesti aziendali in cui i file sensibili sono regolarmente protetti ma devono comunque essere elaborati programmaticamente.
3.5 Gestione di File Corrotti
Gli script di elaborazione batch incontreranno inevitabilmente un file danneggiato o malformato. Racchiudere l'operazione di caricamento in un blocco try-except impedisce che un singolo file errato blocchi l'intera esecuzione:
try:
    workbook.LoadFromFile(file)
except Exception as e:
    print(f"Impossibile caricare {file}: {e}")
    continue
In pratica, vorrai registrare il fallimento e passare al file successivo invece di ignorare silenziosamente l'errore. Un'implementazione più completa potrebbe aggiungere il nome del file a un elenco di file non riusciti per una revisione successiva, fornendo una traccia di controllo pulita senza interrompere il batch.
4. Metodo Migliore per Diversi Casi d'Uso
| Caso d'Uso | Metodo Consigliato |
|---|---|
| Ispezione rapida | Barra di Stato |
| Set di dati dinamico | COUNTA |
| Navigazione veloce | Ctrl + Tasti Freccia |
| Dati strutturati | Tabella Excel |
| Elaborazione batch | Python + Spire.XLS |
| Automazione con Excel installato | PowerShell |
| Multipiattaforma; non è necessario Excel | Python + Spire.XLS |
La scelta del metodo giusto dipende dal volume dei file, dalle esigenze di automazione e dalle competenze tecniche.
5. Conclusione
Il conteggio delle righe in Excel spazia da semplici metodi manuali ad approcci di programmazione completamente automatizzati. I metodi manuali sono sufficienti per attività piccole e interattive, mentre gli script Python o PowerShell eccellono nell'elaborazione batch e negli scenari aziendali. Tecniche avanzate gestiscono intestazioni, righe vuote, cartelle di lavoro protette e file corrotti, garantendo risultati accurati attraverso flussi di lavoro complessi. La scelta del metodo giusto migliora l'efficienza, l'affidabilità e la scalabilità nella gestione dei dati.
6. FAQ
Excel può contare le righe automaticamente?
Sì. Funzioni come COUNTA e le Tabelle Excel aggiornano automaticamente i conteggi delle righe quando i dati cambiano.
Qual è il limite massimo di righe di Excel?
Le versioni moderne di Excel supportano fino a 1.048.576 righe per foglio di lavoro.
Posso contare le righe senza avere Microsoft Excel installato?
Sì. Librerie come Spire.XLS possono elaborare file Excel in modo indipendente.
Perché il mio conteggio delle righe sembra errato?
Righe vuote, righe nascoste, formule o celle unite possono influire sui risultati.
Quale metodo è migliore per l'automazione?
Le soluzioni basate su Python sono generalmente le più flessibili e scalabili.
Vedi Anche
Compter les lignes dans les fichiers Excel — Avec ou sans les ouvrir
Table des matières
Compter les lignes dans Excel est une tâche fondamentale dans l'analyse de données, la génération de rapports et la gestion des feuilles de calcul. Qu'il s'agisse de gérer des enregistrements de ventes, des bases de données clients ou des ensembles de données importés, connaître le nombre exact de lignes permet de valider les données, de surveiller la croissance des classeurs et d'automatiser les flux de travail.
Pour les petites feuilles de calcul, compter les lignes manuellement est simple. Cependant, le traitement de plusieurs classeurs, la gestion de fichiers protégés par mot de passe ou l'analyse de données sans ouvrir Excel nécessitent différentes approches. Ce guide explore les méthodes manuelles et programmatiques pour compter les lignes, ainsi que des scénarios avancés tels que l'ignorance des en-têtes, le comptage des lignes non vides uniquement et la gestion des fichiers corrompus ou sécurisés.
Sur cette page :
- Partie 1. Compter les lignes dans un classeur Excel ouvert
- Partie 2. Compter les lignes sans ouvrir de fichiers Excel
- Partie 3. Scénarios avancés de comptage de lignes
- Meilleure méthode pour différents cas d'utilisation
- Conclusion
- FAQ
1. Partie 1. Compter les lignes dans un classeur Excel ouvert
Lorsque vous avez un fichier ouvert et prêt, Excel vous offre plusieurs moyens rapides de compter les lignes. Chaque approche a ses propres forces selon la situation.
1.1 Utilisation de la barre d'état d'Excel
La barre d'état d'Excel offre le moyen le plus rapide de compter les lignes dans une plage sélectionnée. Sélectionnez simplement les données ou une colonne, et la barre d'état en bas affiche des statistiques telles que Nombre, Moyenne et Somme. La valeur Nombre représente les cellules non vides dans la sélection.
Cette méthode est idéale pour des vérifications rapides lors de l'examen manuel des données. Par exemple, vérifier le nombre d'enregistrements dans une liste de clients peut être fait instantanément sans formules. Cependant, elle ne compte que les cellules sélectionnées, de sorte que les ensembles de données avec des lignes vides ou plusieurs régions peuvent donner des résultats inexacts. Une inspection manuelle reste nécessaire pour assurer l'exhaustivité.
1.2 Utilisation de la formule NBVAL
La fonction NBVAL compte toutes les cellules non vides dans une plage, y compris le texte, les formules et les valeurs logiques. Par exemple, =NBVAL(A:A) compte toutes les cellules remplies dans la colonne A. La spécification d'une plage plus étroite comme A2:A1000 offre plus de contrôle.
NBVAL est fiable pour les ensembles de données dynamiques car il se met à jour automatiquement lorsque les données changent. Il est particulièrement utile pour les tableaux de bord, les rapports et les tâches de validation de données. Les utilisateurs doivent noter que les formules renvoyant des chaînes vides sont toujours comptées, et les lignes masquées restent incluses. Le choix d'une colonne qui contient toujours des données, comme une colonne d'identifiant, améliore la précision.
1.3 Utilisation de Ctrl + touches fléchées pour trouver la dernière ligne
Les raccourcis clavier offrent une méthode rapide pour localiser la dernière ligne utilisée dans un ensemble de données. Sélectionner une cellule et appuyer sur Ctrl + Flèche Bas vous amène à la dernière ligne non vide de cette colonne. Cette approche est efficace pour les grands ensembles de données continus, tels que les journaux de ventes ou les enregistrements de transactions.
![]()
La combinaison de raccourcis comme Ctrl + Flèche Haut ou Ctrl + Flèche Droite facilite la navigation dans des feuilles de calcul larges ou hautes. Cependant, la méthode devient moins fiable s'il y a des lignes vides dans les données, car Excel s'arrête à la première ligne vide rencontrée. Il est préférable de l'utiliser pour des estimations rapides plutôt que pour des comptages précis dans des ensembles de données avec un espacement irrégulier.
1.4 Compter les lignes dans un tableau Excel
Les tableaux Excel offrent une gestion structurée des données, maintenant automatiquement les comptages de lignes à mesure que l'ensemble de données change. La création d'un tableau (Ctrl + T) permet d'utiliser des références structurées, telles que =LIGNES(Tableau1), pour récupérer dynamiquement les numéros de ligne.
Les tableaux sont idéaux pour les ensembles de données en croissance, s'intégrant de manière transparente avec les tableaux croisés dynamiques, les graphiques et Power Query. Ils améliorent la lisibilité et la fiabilité des formules. La principale limitation est que les plages existantes doivent d'abord être converties en tableaux, et les utilisateurs peu familiers avec les références structurées peuvent nécessiter une courte courbe d'apprentissage.
1.5 Avantages et limites des méthodes manuelles
Les méthodes de comptage manuelles sont simples, ne nécessitent aucun codage et fournissent un retour visuel immédiat. Elles sont efficaces pour les ensembles de données de petite à moyenne taille et les vérifications occasionnelles.
Cependant, elles sont moins efficaces pour le traitement à grande échelle, les opérations par lots ou l'automatisation, et peuvent être sujettes aux erreurs humaines. Les méthodes avancées sont mieux adaptées lorsque la vitesse, la scalabilité ou la précision sont requises.
2. Partie 2. Compter les lignes sans ouvrir de fichiers Excel
Pour les situations où vous avez besoin de vitesse, d'automatisation ou de la capacité de traiter de nombreux fichiers à la fois, il existe des techniques qui fonctionnent directement sur le fichier sans lancer Excel du tout.
2.1 Lecture de la structure ZIP interne d'Excel
Les fichiers .xlsx modernes sont des archives ZIP contenant des documents XML. Renommer un fichier en .zip permet d'inspecter son contenu, les données de la feuille de calcul étant généralement stockées dans xl/worksheets/sheet1.xml. L'analyse de ces fichiers XML peut fournir des comptages de lignes sans lancer Excel.
Cette méthode est légère et efficace mais nécessite une compréhension de la structure interne d'Excel. Les complexités telles que les cellules fusionnées, les chaînes partagées et les lignes masquées peuvent rendre l'analyse manuelle difficile, rendant cette approche plus adaptée aux utilisateurs avancés ou aux scripts automatisés.
2.2 Utilisation de scripts PowerShell
PowerShell peut automatiser le comptage des lignes dans les environnements Windows. Il interagit soit avec Excel via l'automatisation COM, soit traite directement les fichiers du classeur. Un flux de travail typique implique l'ouverture du classeur, la sélection d'une feuille de calcul, la lecture de la plage utilisée et le renvoi du nombre de lignes.
$excel = New-Object -ComObject Excel.Application
$excel.Visible = $false
$workbook = $excel.Workbooks.Open("C:\Path\To\Sample.xlsx")
$sheet = $workbook.Sheets.Item(1)
$rowCount = $sheet.UsedRange.Rows.Count
Write-Host "Row count: $rowCount"
$workbook.Close($false)
$excel.Quit()
PowerShell est pratique pour les administrateurs informatiques ou les flux de travail automatisés sur les serveurs. Il prend en charge le traitement par lots et les tâches planifiées, bien que l'automatisation basée sur COM puisse consommer des ressources importantes et que la compatibilité puisse varier selon les versions d'Excel.
2.3 Utilisation de Spire.XLS pour Python
Spire.XLS pour Python est une bibliothèque robuste qui lit et écrit des fichiers Excel entièrement en Python, sans aucune dépendance à Microsoft Excel lui-même. Il peut charger des classeurs sans ouvrir Excel et accéder efficacement aux informations des feuilles de calcul.
Pour commencer, installez la bibliothèque :
pip install spire.xls
Utilisez ensuite le code suivant pour compter les lignes dans une feuille de calcul spécifique :
from spire.xls import Workbook

# Charger un fichier Excel
workbook = Workbook()
workbook.LoadFromFile("Sample.xlsx")

# Obtenir le nombre de lignes d'une feuille spécifique
sheet = workbook.Worksheets[0]
row_count =len(sheet.AllocatedRange.Rows)
print(f"Total rows in the worksheet: {row_count}")
Les scripts Python sont idéaux pour le traitement par lots, l'automatisation et l'intégration avec des bases de données ou des API. Ils peuvent gérer plusieurs feuilles de calcul, des fichiers protégés par mot de passe, des lignes vides et des en-têtes. Cette approche est efficace, évolutive et fiable.
2.4 Avantages et limites des méthodes avancées
Les méthodes avancées conviennent à l'automatisation, aux grands ensembles de données et aux flux de travail d'entreprise. Elles offrent des résultats cohérents et reproductibles et réduisent les efforts manuels.
Cependant, elles nécessitent des compétences en programmation, des bibliothèques supplémentaires et une maintenance. Les utilisateurs non techniques peuvent trouver les méthodes manuelles plus accessibles, tandis que l'automatisation profite aux équipes qui gèrent régulièrement une grande quantité de données Excel.
3. Partie 3. Scénarios avancés de comptage de lignes
Les feuilles de calcul du monde réel sont rarement simples. Voici comment gérer les cas limites qui se présentent le plus souvent.
3.1 Compter les lignes sur plusieurs feuilles de calcul
Lorsqu'un classeur contient plusieurs feuilles, vous avez souvent besoin du nombre total de lignes sur toutes. Le script suivant itère sur chaque feuille de calcul et accumule les totaux :
from spire.xls import Workbook

workbook = Workbook()
workbook.LoadFromFile("Sample.xlsx")

total_rows =0
for sheet in workbook.Worksheets:
    rows = sheet.AllocatedRange.Rows
    total_rows +=len(rows)

print(f"Total rows across all worksheets: {total_rows}")
Ceci est particulièrement utile lorsque les données sont réparties sur des feuilles mensuelles ou régionales et que vous avez besoin d'un total général à des fins de reporting.
3.2 Compter uniquement les lignes non vides
Les comptages de lignes bruts incluent toutes les lignes vides qui se trouvent dans la plage utilisée. Si vos données comportent des lacunes — peut-être dues à des suppressions ou à un formatage — vous voudrez les filtrer :
from spire.xls import Workbook

workbook = Workbook()
workbook.LoadFromFile("Sample.xlsx")

sheet = workbook.Worksheets[0]
rows = sheet.AllocatedRange.Rows
total_rows = len(rows)

blank_rows = sum(1for row in rows if row.IsBlank)
non_empty_rows = total_rows - blank_rows
print(f"Non-empty rows: {non_empty_rows}")
La propriété IsBlank renvoie True pour toute ligne où chaque cellule est vide. Soustraire le nombre de lignes vides du total vous donne un compte précis des lignes qui contiennent réellement des données.
3.3 Ignorer les en-têtes lors du comptage
Lorsque vous avez besoin d'un décompte qui représente uniquement les enregistrements de données, les en-têtes doivent être exclus. Ce script ignore un nombre configurable de lignes d'en-tête avant de compter :
from spire.xls import Workbook

workbook = Workbook()
workbook.LoadFromFile("Sample.xlsx")

sheet = workbook.Worksheets[0]
rows = sheet.AllocatedRange.Rows
HEADER_ROWS = 1
blank_rows = 0

for i, row in enumerate(rows):
    # Ignorer les lignes d'en-tête
    if i < HEADER_ROWS:
        continue
    if row.IsBlank:
        blank_rows += 1
data_rows = (
    len(rows)
    - HEADER_ROWS
    - blank_rows
)

print(f"Data rows (excluding headers): {data_rows}")
Ajustez HEADER_ROWS pour qu'il corresponde à votre fichier — par exemple, définissez-le sur 2 si votre feuille a une ligne de titre au-dessus des en-têtes de colonne.
3.4 Compter les lignes dans les fichiers protégés par mot de passe
La protection par mot de passe ne doit pas être un obstacle. Spire.XLS prend en charge le chargement de classeurs cryptés en passant le mot de passe comme deuxième argument à LoadFromFile :
from spire.xls import Workbook

workbook = Workbook()
# Charger le classeur crypté avec mot de passe
workbook.LoadFromFile("Protected.xlsx", "123456")

sheet = workbook.Worksheets[0]
rows = sheet.AllocatedRange.Rows
print(f"Rows in protected worksheet: {len(rows)}")
Cela fonctionne de manière transparente tant que vous disposez du mot de passe correct. C'est particulièrement utile dans les environnements d'entreprise où les fichiers sensibles sont régulièrement protégés mais doivent toujours être traités par programme.
3.5 Gérer les fichiers corrompus
Les scripts de traitement par lots rencontreront inévitablement un fichier endommagé ou mal formé. L'encapsulation de l'opération de chargement dans un bloc try-except empêche un mauvais fichier de faire planter toute l'exécution :
try:
    workbook.LoadFromFile(file)
except Exception as e:
    print(f"Failed to load {file}: {e}")
    continue
En pratique, vous voudrez enregistrer l'échec et passer au fichier suivant plutôt que d'ignorer silencieusement l'erreur. Une implémentation plus complète pourrait ajouter le nom du fichier à une liste de fichiers échoués pour un examen ultérieur, vous donnant une piste d'audit propre sans arrêter le lot.
4. Meilleure méthode pour différents cas d'utilisation
| Cas d'utilisation | Méthode recommandée |
|---|---|
| Inspection rapide | Barre d'état |
| Ensemble de données dynamique | NBVAL |
| Navigation rapide | Ctrl + touches fléchées |
| Données structurées | Tableau Excel |
| Traitement par lots | Python + Spire.XLS |
| Automatisation avec Excel installé | PowerShell |
| Multiplateforme ; pas besoin d'Excel | Python + Spire.XLS |
Choisir la bonne méthode dépend du volume de fichiers, des besoins d'automatisation et de l'expertise technique.
5. Conclusion
Le comptage des lignes dans Excel va des méthodes manuelles simples aux approches de programmation entièrement automatisées. Les méthodes manuelles sont suffisantes pour les petites tâches interactives, tandis que les scripts Python ou PowerShell excellent dans le traitement par lots et les scénarios d'entreprise. Les techniques avancées gèrent les en-têtes, les lignes vides, les classeurs protégés et les fichiers corrompus, garantissant des résultats précis dans des flux de travail complexes. La sélection de la bonne méthode améliore l'efficacité, la fiabilité et la scalabilité de la gestion des données.
6. FAQ
Excel peut-il compter les lignes automatiquement ?
Oui. Les fonctions comme NBVAL et les tableaux Excel mettent automatiquement à jour les comptages de lignes lorsque les données changent.
Quelle est la limite maximale de lignes d'Excel ?
Les versions modernes d'Excel prennent en charge jusqu'à 1 048 576 lignes par feuille de calcul.
Puis-je compter les lignes sans avoir Microsoft Excel installé ?
Oui. Les bibliothèques comme Spire.XLS peuvent traiter les fichiers Excel indépendamment.
Pourquoi mon comptage de lignes semble-t-il incorrect ?
Les lignes vides, les lignes masquées, les formules ou les cellules fusionnées peuvent affecter les résultats.
Quelle méthode est la meilleure pour l'automatisation ?
Les solutions basées sur Python sont généralement les plus flexibles et évolutives.
Voir aussi
- Comment ajuster automatiquement la largeur des colonnes dans Excel (5 méthodes)
- Comment diviser des feuilles Excel en plusieurs fichiers (3 méthodes)
- 5 méthodes faciles pour figer les lignes et les colonnes dans Excel
- Comment masquer les lignes de grille dans Excel (Affichage, Impression et Exportation PDF)
Contar filas en archivos de Excel — Con o sin abrirlos
Tabla de Contenidos
Contar filas en Excel es una tarea fundamental en el análisis de datos, la generación de informes y la gestión de hojas de cálculo. Ya sea que administre registros de ventas, bases de datos de clientes o conjuntos de datos importados, conocer el número exacto de filas ayuda a validar datos, monitorear el crecimiento del libro de trabajo y automatizar flujos de trabajo.
Para hojas de cálculo pequeñas, contar filas manualmente es sencillo. Sin embargo, procesar varios libros de trabajo, manejar archivos protegidos con contraseña o analizar datos sin abrir Excel requiere diferentes enfoques. Esta guía explora métodos manuales y programáticos para contar filas, junto con escenarios avanzados como ignorar encabezados, contar solo filas no vacías y manejar archivos corruptos o seguros.
En esta página:
- Parte 1. Contar Filas en un Libro de Excel Abierto
- Parte 2. Contar Filas sin Abrir Archivos de Excel
- Parte 3. Escenarios Avanzados de Conteo de Filas
- Mejor Método para Diferentes Casos de Uso
- Conclusión
- Preguntas Frecuentes
1. Parte 1. Contar Filas en un Libro de Excel Abierto
Cuando tiene un archivo abierto y listo, Excel le ofrece varias formas rápidas de contar filas. Cada enfoque tiene sus propias fortalezas dependiendo de la situación.
1.1 Usando la Barra de Estado de Excel
La barra de estado de Excel proporciona la forma más rápida de contar filas en un rango seleccionado. Simplemente seleccione los datos o una columna, y la barra de estado en la parte inferior mostrará estadísticas como Recuento, Promedio y Suma. El valor de Recuento representa las celdas no vacías en la selección.
Este método es ideal para comprobaciones rápidas al revisar datos manualmente. Por ejemplo, verificar el número de registros en una lista de clientes se puede hacer instantáneamente sin fórmulas. Sin embargo, solo cuenta las celdas seleccionadas, por lo que los conjuntos de datos con filas en blanco o regiones múltiples pueden arrojar resultados inexactos. La inspección manual sigue siendo necesaria para garantizar la integridad.
1.2 Usando la Fórmula CONTARA
La función CONTARA cuenta todas las celdas no vacías en un rango, incluyendo texto, fórmulas y valores lógicos. Por ejemplo, =CONTARA(A:A) cuenta todas las celdas pobladas en la columna A. Especificar un rango más pequeño como A2:A1000 proporciona más control.
CONTARA es confiable para conjuntos de datos dinámicos porque se actualiza automáticamente cuando los datos cambian. Es particularmente útil para paneles, informes y tareas de validación de datos. Los usuarios deben tener en cuenta que las fórmulas que devuelven cadenas vacías todavía se cuentan, y las filas ocultas permanecen incluidas. Elegir una columna que siempre contenga datos, como una columna de ID, mejora la precisión.
1.3 Usando Ctrl + Teclas de Flecha para Encontrar la Última Fila
Los atajos de teclado proporcionan un método rápido para localizar la última fila utilizada en un conjunto de datos. Seleccionar una celda y presionar Ctrl + Flecha Abajo salta a la última fila no vacía en esa columna. Este enfoque es eficiente para grandes conjuntos de datos continuos, como registros de ventas o transacciones.
![]()
Combinar atajos como Ctrl + Flecha Arriba o Ctrl + Flecha Derecha ayuda a la navegación en hojas de cálculo amplias o altas. Sin embargo, el método se vuelve menos confiable si existen filas en blanco dentro de los datos, ya que Excel se detiene en la primera fila vacía que encuentra. Es mejor usarlo para estimaciones rápidas en lugar de recuentos precisos en conjuntos de datos con espaciado irregular.
1.4 Contar Filas en una Tabla de Excel
Las Tablas de Excel proporcionan una gestión estructurada de datos, manteniendo automáticamente los recuentos de filas a medida que el conjunto de datos cambia. Crear una tabla (Ctrl + T) permite el uso de referencias estructuradas, como =FILAS(Tabla1), para recuperar dinámicamente los números de fila.
Las tablas son ideales para conjuntos de datos en crecimiento, integrándose perfectamente con Tablas Dinámicas, gráficos y Power Query. Mejoran la legibilidad y la confiabilidad de las fórmulas. La principal limitación es que los rangos existentes deben convertirse primero en tablas, y los usuarios que no están familiarizados con las referencias estructuradas pueden requerir una curva de aprendizaje corta.
1.5 Pros y Limitaciones de los Métodos Manuales
Los métodos de conteo manual son sencillos, no requieren codificación y proporcionan retroalimentación visual inmediata. Son efectivos para conjuntos de datos pequeños a medianos y comprobaciones ocasionales.
Sin embargo, son menos eficientes para el procesamiento a gran escala, las operaciones por lotes o la automatización, y pueden ser propensos a errores humanos. Los métodos avanzados son más adecuados cuando se requiere velocidad, escalabilidad o precisión.
2. Parte 2. Contar Filas sin Abrir Archivos de Excel
Para situaciones en las que necesita velocidad, automatización o la capacidad de procesar muchos archivos a la vez, existen técnicas que funcionan directamente en el archivo sin lanzar Excel en absoluto.
2.1 Leyendo la Estructura ZIP Interna de Excel
Los archivos modernos .xlsx son archivos ZIP que contienen documentos XML. Renombrar un archivo a .zip permite inspeccionar su contenido, con los datos de la hoja de cálculo típicamente almacenados en xl/worksheets/sheet1.xml. Analizar estos archivos XML puede proporcionar recuentos de filas sin lanzar Excel.
Este método es ligero y eficiente, pero requiere comprensión de la estructura interna de Excel. Las complejidades como celdas fusionadas, cadenas compartidas y filas ocultas pueden hacer que el análisis manual sea desafiante, haciendo que este enfoque sea más adecuado para usuarios avanzados o scripts automatizados.
2.2 Usando Scripts de PowerShell
PowerShell puede automatizar el conteo de filas en entornos Windows. Interactúa con Excel a través de la automatización COM o procesa archivos de libro de trabajo directamente. Un flujo de trabajo típico implica abrir el libro de trabajo, seleccionar una hoja de cálculo, leer el rango utilizado y devolver el recuento de filas.
$excel = New-Object -ComObject Excel.Application
$excel.Visible = $false
$workbook = $excel.Workbooks.Open("C:\Path\To\Sample.xlsx")
$sheet = $workbook.Sheets.Item(1)
$rowCount = $sheet.UsedRange.Rows.Count
Write-Host "Row count: $rowCount"
$workbook.Close($false)
$excel.Quit()
PowerShell es conveniente para administradores de TI o flujos de trabajo automatizados en servidores. Admite el procesamiento por lotes y las tareas programadas, aunque la automatización basada en COM puede consumir recursos significativos y la compatibilidad puede variar entre las versiones de Excel.
2.3 Usando Spire.XLS para Python
Spire.XLS para Python es una biblioteca robusta que lee y escribe archivos de Excel completamente en Python, sin dependencia de Microsoft Excel. Puede cargar libros de trabajo sin abrir Excel y acceder a la información de la hoja de cálculo de manera eficiente.
Para empezar, instale la biblioteca:
pip install spire.xls
Luego use el siguiente código para contar filas en una hoja de cálculo específica:
from spire.xls import Workbook

# Cargar un archivo de Excel
workbook = Workbook()
workbook.LoadFromFile("Sample.xlsx")

# Obtener el recuento de filas de una hoja específica
sheet = workbook.Worksheets[0]
row_count =len(sheet.AllocatedRange.Rows)
print(f"Total rows in the worksheet: {row_count}")
Los scripts de Python son ideales para el procesamiento por lotes, la automatización y la integración con bases de datos o APIs. Pueden manejar múltiples hojas de cálculo, archivos protegidos con contraseña, filas en blanco y encabezados. Este enfoque es eficiente, escalable y confiable.
2.4 Pros y Limitaciones de los Métodos Avanzados
Los métodos avanzados son adecuados para la automatización, grandes conjuntos de datos y flujos de trabajo empresariales. Ofrecen resultados consistentes y reproducibles y reducen el esfuerzo manual.
Sin embargo, requieren habilidades de programación, bibliotecas adicionales y mantenimiento. Los usuarios no técnicos pueden encontrar los métodos manuales más accesibles, mientras que la automatización beneficia a los equipos que administran grandes cantidades de datos de Excel regularmente.
3. Parte 3. Escenarios Avanzados de Conteo de Filas
Las hojas de cálculo del mundo real rara vez son simples. Aquí se explica cómo manejar los casos extremos que surgen con más frecuencia.
3.1 Contar Filas en Múltiples Hojas de Cálculo
Cuando un libro de trabajo tiene varias hojas, a menudo necesita el recuento total de filas en todas ellas. El siguiente script itera sobre cada hoja de cálculo y acumula los totales:
from spire.xls import Workbook

workbook = Workbook()
workbook.LoadFromFile("Sample.xlsx")

total_rows =0
for sheet in workbook.Worksheets:
    rows = sheet.AllocatedRange.Rows
    total_rows +=len(rows)

print(f"Total rows across all worksheets: {total_rows}")
Esto es especialmente útil cuando los datos se dividen en hojas mensuales o regionales y necesita un total general para fines de informes.
3.2 Contar Solo Filas No Vacías
Los recuentos de filas brutos incluyen cualquier fila en blanco que caiga dentro del rango utilizado. Si sus datos tienen huecos, quizás debido a eliminaciones o formato, querrá filtrarlos:
from spire.xls import Workbook

workbook = Workbook()
workbook.LoadFromFile("Sample.xlsx")

sheet = workbook.Worksheets[0]
rows = sheet.AllocatedRange.Rows
total_rows = len(rows)

blank_rows = sum(1for row in rows if row.IsBlank)
non_empty_rows = total_rows - blank_rows
print(f"Non-empty rows: {non_empty_rows}")
La propiedad IsBlank devuelve True para cualquier fila donde cada celda esté vacía. Restar el recuento de celdas en blanco del total le da un recuento preciso de filas que realmente contienen datos.
3.3 Ignorar Encabezados al Contar
Cuando necesita un recuento que represente solo registros de datos, los encabezados deben excluirse. Este script omite un número configurable de filas de encabezado antes de contar:
from spire.xls import Workbook

workbook = Workbook()
workbook.LoadFromFile("Sample.xlsx")

sheet = workbook.Worksheets[0]
rows = sheet.AllocatedRange.Rows
HEADER_ROWS = 1
blank_rows = 0

for i, row in enumerate(rows):
    # Skip header rows
    if i < HEADER_ROWS:
        continue
    if row.IsBlank:
        blank_rows += 1
data_rows = (
    len(rows)
    - HEADER_ROWS
    - blank_rows
)

print(f"Data rows (excluding headers): {data_rows}")
Ajuste HEADER_ROWS para que coincida con su archivo; por ejemplo, establézcalo en 2 si su hoja tiene una fila de título encima de los encabezados de columna.
3.4 Contar Filas en Archivos Protegidos con Contraseña
La protección con contraseña no tiene por qué ser un obstáculo. Spire.XLS admite la carga de libros de trabajo cifrados pasando la contraseña como un segundo argumento a LoadFromFile:
from spire.xls import Workbook

workbook = Workbook()
# Load encrypted workbook with password
workbook.LoadFromFile("Protected.xlsx", "123456")

sheet = workbook.Worksheets[0]
rows = sheet.AllocatedRange.Rows
print(f"Rows in protected worksheet: {len(rows)}")
Esto funciona sin problemas siempre que tenga la contraseña correcta. Es particularmente útil en entornos empresariales donde los archivos confidenciales se protegen rutinariamente pero aún necesitan ser procesados programáticamente.
3.5 Manejar Archivos Corruptos
Los scripts de procesamiento por lotes inevitablemente encontrarán un archivo dañado o mal formado. Envolver la operación de carga en un bloque try-except evita que un archivo defectuoso bloquee toda la ejecución:
try:
    workbook.LoadFromFile(file)
except Exception as e:
    print(f"Failed to load {file}: {e}")
    continue
En la práctica, querrá registrar el error y pasar al siguiente archivo en lugar de ignorar silenciosamente el error. Una implementación más completa podría agregar el nombre del archivo a una lista de archivos fallidos para su revisión posterior, brindándole un registro de auditoría limpio sin detener el lote.
4. Mejor Método para Diferentes Casos de Uso
| Caso de Uso | Método Recomendado |
|---|---|
| Inspección rápida | Barra de Estado |
| Conjunto de datos dinámico | CONTARA |
| Navegación rápida | Ctrl + Teclas de Flecha |
| Datos estructurados | Tabla de Excel |
| Procesamiento por lotes | Python + Spire.XLS |
| Automatización con Excel instalado | PowerShell |
| Multiplataforma; sin necesidad de Excel | Python + Spire.XLS |
Elegir el método correcto depende del volumen de archivos, las necesidades de automatización y la experiencia técnica.
5. Conclusión
Contar filas en Excel abarca desde métodos manuales simples hasta enfoques de programación totalmente automatizados. Los métodos manuales son suficientes para tareas pequeñas e interactivas, mientras que los scripts de Python o PowerShell sobresalen en el procesamiento por lotes y escenarios empresariales. Las técnicas avanzadas manejan encabezados, filas en blanco, libros de trabajo protegidos y archivos corruptos, asegurando resultados precisos en flujos de trabajo complejos. Seleccionar el método correcto mejora la eficiencia, la confiabilidad y la escalabilidad en la gestión de datos.
6. Preguntas Frecuentes
¿Puede Excel contar filas automáticamente?
Sí. Funciones como CONTARA y las Tablas de Excel actualizan automáticamente los recuentos de filas cuando cambian los datos.
¿Cuál es el límite máximo de filas de Excel?
Las versiones modernas de Excel admiten hasta 1,048,576 filas por hoja de cálculo.
¿Puedo contar filas sin tener Microsoft Excel instalado?
Sí. Bibliotecas como Spire.XLS pueden procesar archivos de Excel de forma independiente.
¿Por qué mi recuento de filas parece incorrecto?
Las filas en blanco, las filas ocultas, las fórmulas o las celdas fusionadas pueden afectar los resultados.
¿Qué método es mejor para la automatización?
Las soluciones basadas en Python son generalmente las más flexibles y escalables.
Ver También
Zeilen in Excel-Dateien zählen – Mit oder ohne Öffnen
Inhaltsverzeichnis
Das Zählen von Zeilen in Excel ist eine grundlegende Aufgabe in der Datenanalyse, Berichterstellung und Tabellenkalkulationsverwaltung. Ob Sie Verkaufsdatensätze, Kundendatenbanken oder importierte Datensätze verwalten, die genaue Anzahl der Zeilen hilft bei der Datenvalidierung, der Überwachung des Wachstums von Arbeitsmappen und der Automatisierung von Arbeitsabläufen.
Für kleine Tabellen ist das manuelle Zählen von Zeilen einfach. Die Verarbeitung mehrerer Arbeitsmappen, der Umgang mit passwortgeschützten Dateien oder die Analyse von Daten ohne Öffnen von Excel erfordert jedoch unterschiedliche Ansätze. Dieser Leitfaden untersucht sowohl manuelle als auch programmgesteuerte Methoden zum Zählen von Zeilen sowie erweiterte Szenarien wie das Ignorieren von Kopfzeilen, das Zählen nur nicht leerer Zeilen und den Umgang mit beschädigten oder geschützten Dateien.
Auf dieser Seite:
- Teil 1. Zeilen in einer geöffneten Excel-Arbeitsmappe zählen
- Teil 2. Zeilen zählen, ohne Excel-Dateien zu öffnen
- Teil 3. Erweiterte Szenarien zum Zeilenzählen
- Beste Methode für verschiedene Anwendungsfälle
- Fazit
- FAQs
1. Teil 1. Zeilen in einer geöffneten Excel-Arbeitsmappe zählen
Wenn eine Datei geöffnet und bereit ist, bietet Excel mehrere schnelle Möglichkeiten, Zeilen zu zählen. Jeder Ansatz hat seine eigenen Stärken, je nach Situation.
1.1 Verwenden der Excel-Statusleiste
Die Statusleiste von Excel bietet die schnellste Möglichkeit, Zeilen in einem ausgewählten Bereich zu zählen. Wählen Sie einfach die Daten oder eine Spalte aus, und die Statusleiste unten zeigt Statistiken wie Anzahl, Durchschnitt und Summe an. Der Wert Anzahl repräsentiert nicht leere Zellen in der Auswahl.
Diese Methode ist ideal für schnelle Überprüfungen bei manueller Datenprüfung. Beispielsweise kann die Anzahl der Datensätze in einer Kundenliste sofort ohne Formeln überprüft werden. Sie zählt jedoch nur ausgewählte Zellen, sodass Datensätze mit leeren Zeilen oder mehreren Regionen zu ungenauen Ergebnissen führen können. Eine manuelle Überprüfung ist weiterhin erforderlich, um die Vollständigkeit sicherzustellen.
1.2 Verwenden der COUNTA-Formel
Die Funktion COUNTA zählt alle nicht leeren Zellen in einem Bereich, einschließlich Text, Formeln und logischen Werten. Zum Beispiel zählt =COUNTA(A:A) alle gefüllten Zellen in Spalte A. Die Angabe eines engeren Bereichs wie A2:A1000 bietet mehr Kontrolle.
COUNTA ist zuverlässig für dynamische Datensätze, da es sich automatisch aktualisiert, wenn sich Daten ändern. Es ist besonders nützlich für Dashboards, Berichte und Datenvalidierungsaufgaben. Benutzer sollten beachten, dass Formeln, die leere Zeichenfolgen zurückgeben, immer noch gezählt werden und ausgeblendete Zeilen weiterhin enthalten sind. Die Auswahl einer Spalte, die immer Daten enthält, wie z. B. eine ID-Spalte, verbessert die Genauigkeit.
1.3 Verwenden von Strg + Pfeiltasten, um die letzte Zeile zu finden
Tastenkombinationen bieten eine schnelle Methode, um die letzte verwendete Zeile in einem Datensatz zu finden. Wenn Sie eine Zelle auswählen und Strg + Pfeil nach unten drücken, springen Sie zur letzten nicht leeren Zeile in dieser Spalte. Dieser Ansatz ist effizient für große kontinuierliche Datensätze wie Verkaufsprotokolle oder Transaktionsdatensätze.
![]()
Die Kombination von Tastenkombinationen wie Strg + Pfeil nach oben oder Strg + Pfeil nach rechts erleichtert die Navigation in breiten oder hohen Arbeitsblättern. Die Methode wird jedoch weniger zuverlässig, wenn leere Zeilen innerhalb der Daten vorhanden sind, da Excel bei der ersten leeren Zeile stoppt. Sie eignet sich am besten für schnelle Schätzungen und nicht für präzise Zählungen in Datensätzen mit unregelmäßigen Abständen.
1.4 Zeilen in einer Excel-Tabelle zählen
Excel-Tabellen bieten eine strukturierte Datenverwaltung und pflegen automatisch Zeilenzählungen, wenn sich der Datensatz ändert. Durch das Erstellen einer Tabelle (Strg + T) können strukturierte Verweise wie =ZEILEN(Tabelle1) verwendet werden, um Zeilennummern dynamisch abzurufen.
Tabellen sind ideal für wachsende Datensätze und lassen sich nahtlos in PivotTables, Diagramme und Power Query integrieren. Sie verbessern die Lesbarkeit und die Zuverlässigkeit von Formeln. Die Haupteinschränkung besteht darin, dass vorhandene Bereiche zuerst in Tabellen konvertiert werden müssen und Benutzer, die mit strukturierten Verweisen nicht vertraut sind, möglicherweise eine kurze Lernkurve benötigen.
1.5 Vorteile und Einschränkungen manueller Methoden
Manuelle Zählmethoden sind unkompliziert, erfordern keine Programmierung und liefern sofortiges visuelles Feedback. Sie sind effektiv für kleine bis mittelgroße Datensätze und gelegentliche Überprüfungen.
Sie sind jedoch weniger effizient für die groß angelegte Verarbeitung, Stapelverarbeitung oder Automatisierung und können anfällig für menschliche Fehler sein. Fortgeschrittene Methoden eignen sich besser, wenn Geschwindigkeit, Skalierbarkeit oder Präzision erforderlich sind.
2. Teil 2. Zeilen zählen, ohne Excel-Dateien zu öffnen
Für Situationen, in denen Sie Geschwindigkeit, Automatisierung oder die Möglichkeit benötigen, viele Dateien gleichzeitig zu verarbeiten, gibt es Techniken, die direkt auf der Datei arbeiten, ohne Excel überhaupt zu starten.
2.1 Lesen der internen ZIP-Struktur von Excel
Moderne .xlsx-Dateien sind ZIP-Archive, die XML-Dokumente enthalten. Das Umbenennen einer Datei in .zip ermöglicht die Inspektion ihres Inhalts, wobei Arbeitsblattdaten typischerweise in xl/worksheets/sheet1.xml gespeichert sind. Das Parsen dieser XML-Dateien kann Zeilenzahlen liefern, ohne Excel zu starten.
Diese Methode ist leichtgewichtig und effizient, erfordert jedoch Kenntnisse der internen Struktur von Excel. Komplexitäten wie zusammengeführte Zellen, gemeinsame Zeichenfolgen und ausgeblendete Zeilen können das manuelle Parsen erschweren, wodurch dieser Ansatz besser für fortgeschrittene Benutzer oder automatisierte Skripte geeignet ist.
2.2 Verwenden von PowerShell-Skripten
PowerShell kann die Zeilenzählung in Windows-Umgebungen automatisieren. Es interagiert entweder mit Excel über COM-Automatisierung oder verarbeitet Arbeitsmappendateien direkt. Ein typischer Arbeitsablauf umfasst das Öffnen der Arbeitsmappe, das Auswählen eines Arbeitsblatts, das Lesen des verwendeten Bereichs und das Zurückgeben der Zeilenanzahl.
$excel = New-Object -ComObject Excel.Application
$excel.Visible = $false
$workbook = $excel.Workbooks.Open("C:\Pfad\Zu\Beispiel.xlsx")
$sheet = $workbook.Sheets.Item(1)
$rowCount = $sheet.UsedRange.Rows.Count
Write-Host "Zeilenanzahl: $rowCount"
$workbook.Close($false)
$excel.Quit()
PowerShell ist praktisch für IT-Administratoren oder automatisierte Arbeitsabläufe auf Servern. Es unterstützt die Stapelverarbeitung und geplante Aufgaben, obwohl die COM-basierte Automatisierung erhebliche Ressourcen verbrauchen kann und die Kompatibilität je nach Excel-Version variieren kann.
2.3 Verwenden von Spire.XLS für Python
Spire.XLS für Python ist eine robuste Bibliothek, die Excel-Dateien vollständig in Python liest und schreibt, ohne Abhängigkeit von Microsoft Excel selbst. Sie kann Arbeitsmappen laden, ohne Excel zu öffnen, und effizient auf Arbeitsblattinformationen zugreifen.
Um zu beginnen, installieren Sie die Bibliothek:
pip install spire.xls
Verwenden Sie dann den folgenden Code, um Zeilen in einem bestimmten Arbeitsblatt zu zählen:
from spire.xls import Workbook

# Eine Excel-Datei laden
workbook = Workbook()
workbook.LoadFromFile("Beispiel.xlsx")

# Zeilenanzahl eines bestimmten Blattes abrufen
sheet = workbook.Worksheets[0]
row_count =len(sheet.AllocatedRange.Rows)
print(f"Gesamtzahl der Zeilen im Arbeitsblatt: {row_count}")
Python-Skripte sind ideal für die Stapelverarbeitung, Automatisierung und Integration mit Datenbanken oder APIs. Sie können mehrere Arbeitsblätter, passwortgeschützte Dateien, leere Zeilen und Kopfzeilen verarbeiten. Dieser Ansatz ist effizient, skalierbar und zuverlässig.
2.4 Vorteile und Einschränkungen fortgeschrittener Methoden
Fortgeschrittene Methoden eignen sich für Automatisierung, große Datensätze und Unternehmensworkflows. Sie bieten konsistente, reproduzierbare Ergebnisse und reduzieren den manuellen Aufwand.
Sie erfordern jedoch Programmierkenntnisse, zusätzliche Bibliotheken und Wartung. Nicht-technische Benutzer finden manuelle Methoden möglicherweise zugänglicher, während Automatisierung Teams zugutekommt, die regelmäßig umfangreiche Excel-Daten verwalten.
3. Teil 3. Erweiterte Szenarien zum Zeilenzählen
Reale Tabellen sind selten einfach. Hier erfahren Sie, wie Sie die häufigsten Ausnahmefälle behandeln.
3.1 Zeilen über mehrere Arbeitsblätter hinweg zählen
Wenn eine Arbeitsmappe mehrere Blätter hat, benötigen Sie oft die Gesamtzahl der Zeilen über alle hinweg. Das folgende Skript durchläuft jedes Arbeitsblatt und summiert die Gesamtzahlen:
from spire.xls import Workbook

workbook = Workbook()
workbook.LoadFromFile("Beispiel.xlsx")

total_rows =0
for sheet in workbook.Worksheets:
    rows = sheet.AllocatedRange.Rows
    total_rows +=len(rows)

print(f"Gesamtzahl der Zeilen über alle Arbeitsblätter hinweg: {total_rows}")
Dies ist besonders nützlich, wenn Daten über monatliche oder regionale Blätter aufgeteilt sind und Sie eine Gesamtsumme für Berichterstattungszwecke benötigen.
3.2 Nur nicht leere Zeilen zählen
Rohe Zeilenzählungen enthalten alle leeren Zeilen, die sich innerhalb des verwendeten Bereichs befinden. Wenn Ihre Daten Lücken aufweisen – möglicherweise aufgrund von Löschungen oder Formatierungen – möchten Sie diese herausfiltern:
from spire.xls import Workbook

workbook = Workbook()
workbook.LoadFromFile("Beispiel.xlsx")

sheet = workbook.Worksheets[0]
rows = sheet.AllocatedRange.Rows
total_rows = len(rows)

blank_rows = sum(1for row in rows if row.IsBlank)
non_empty_rows = total_rows - blank_rows
print(f"Nicht leere Zeilen: {non_empty_rows}")
Die Eigenschaft IsBlank gibt True für jede Zeile zurück, in der jede Zelle leer ist. Das Subtrahieren der Anzahl leerer Zeilen von der Gesamtzahl ergibt eine genaue Anzahl von Zeilen, die tatsächlich Daten enthalten.
3.3 Kopfzeilen beim Zählen ignorieren
Wenn Sie eine Zählung benötigen, die nur Datenzeilen repräsentiert, müssen Kopfzeilen ausgeschlossen werden. Dieses Skript überspringt eine konfigurierbare Anzahl von Kopfzeilen, bevor es zählt:
from spire.xls import Workbook

workbook = Workbook()
workbook.LoadFromFile("Beispiel.xlsx")

sheet = workbook.Worksheets[0]
rows = sheet.AllocatedRange.Rows
HEADER_ROWS = 1
blank_rows = 0

for i, row in enumerate(rows):
    # Kopfzeilen überspringen
    if i < HEADER_ROWS:
        continue
    if row.IsBlank:
        blank_rows += 1
data_rows = (
    len(rows)
    - HEADER_ROWS
    - blank_rows
)

print(f"Datenzeilen (ohne Kopfzeilen): {data_rows}")
Passen Sie HEADER_ROWS an Ihre Datei an – setzen Sie es beispielsweise auf 2, wenn Ihr Blatt eine Titelzeile über den Spaltenüberschriften hat.
3.4 Zeilen in passwortgeschützten Dateien zählen
Passwortschutz muss kein Hindernis sein. Spire.XLS unterstützt das Laden verschlüsselter Arbeitsmappen, indem das Passwort als zweites Argument an LoadFromFile übergeben wird:
from spire.xls import Workbook

workbook = Workbook()
# Verschlüsselte Arbeitsmappe mit Passwort laden
workbook.LoadFromFile("Geschützt.xlsx", "123456")

sheet = workbook.Worksheets[0]
rows = sheet.AllocatedRange.Rows
print(f"Zeilen im geschützten Arbeitsblatt: {len(rows)}")
Dies funktioniert nahtlos, solange Sie das richtige Passwort haben. Es ist besonders nützlich in Unternehmensumgebungen, in denen sensible Dateien routinemäßig geschützt sind, aber dennoch programmgesteuert verarbeitet werden müssen.
3.5 Beschädigte Dateien behandeln
Stapelverarbeitungsskripte werden unweigerlich auf eine beschädigte oder fehlerhafte Datei stoßen. Das Einwickeln des Ladevorgangs in einen Try-Except-Block verhindert, dass eine fehlerhafte Datei den gesamten Lauf zum Absturz bringt:
try:
    workbook.LoadFromFile(file)
except Exception as e:
    print(f"Fehler beim Laden von {file}: {e}")
    continue
In der Praxis möchten Sie den Fehler protokollieren und mit der nächsten Datei fortfahren, anstatt den Fehler stillschweigend zu ignorieren. Eine vollständigere Implementierung könnte den Dateinamen einer Liste fehlgeschlagener Dateien zur späteren Überprüfung hinzufügen, was Ihnen eine saubere Audit-Spur gibt, ohne den Stapel zu stoppen.
4. Beste Methode für verschiedene Anwendungsfälle
| Anwendungsfall | Empfohlene Methode |
|---|---|
| Schnelle Inspektion | Statusleiste |
| Dynamischer Datensatz | COUNTA |
| Schnelle Navigation | Strg + Pfeiltasten |
| Strukturierte Daten | Excel-Tabelle |
| Stapelverarbeitung | Python + Spire.XLS |
| Automatisierung mit installiertem Excel | PowerShell |
| Plattformübergreifend; kein Excel erforderlich | Python + Spire.XLS |
Die Wahl der richtigen Methode hängt vom Dateivolumen, den Automatisierungsanforderungen und den technischen Kenntnissen ab.
5. Fazit
Das Zählen von Zeilen in Excel reicht von einfachen manuellen Methoden bis hin zu vollständig automatisierten Programmieransätzen. Manuelle Methoden sind für kleine, interaktive Aufgaben ausreichend, während Python- oder PowerShell-Skripte bei der Stapelverarbeitung und in Unternehmensszenarien glänzen. Fortgeschrittene Techniken behandeln Kopfzeilen, leere Zeilen, geschützte Arbeitsmappen und beschädigte Dateien und gewährleisten genaue Ergebnisse über komplexe Arbeitsabläufe hinweg. Die Auswahl der richtigen Methode verbessert die Effizienz, Zuverlässigkeit und Skalierbarkeit im Datenmanagement.
6. FAQs
Kann Excel Zeilen automatisch zählen?
Ja. Funktionen wie COUNTA und Excel-Tabellen aktualisieren Zeilenzählungen automatisch, wenn sich Daten ändern.
Was ist das maximale Zeilenlimit von Excel?
Moderne Excel-Versionen unterstützen bis zu 1.048.576 Zeilen pro Arbeitsblatt.
Kann ich Zeilen ohne installiertes Microsoft Excel zählen?
Ja. Bibliotheken wie Spire.XLS können Excel-Dateien unabhängig verarbeiten.
Warum sieht meine Zeilenzählung falsch aus?
Leere Zeilen, ausgeblendete Zeilen, Formeln oder zusammengeführte Zellen können die Ergebnisse beeinflussen.
Welche Methode ist am besten für die Automatisierung?
Python-basierte Lösungen sind im Allgemeinen am flexibelsten und skalierbarsten.
Siehe auch
Подсчет строк в файлах Excel — с открытием или без
Содержание
Подсчет строк в Excel — это фундаментальная задача при анализе данных, составлении отчетов и управлении электронными таблицами. Независимо от того, управляете ли вы данными о продажах, базами данных клиентов или импортированными наборами данных, знание точного количества строк помогает проверять данные, отслеживать рост рабочей книги и автоматизировать рабочие процессы.
Для небольших электронных таблиц подсчет строк вручную прост. Однако обработка нескольких рабочих книг, работа с файлами, защищенными паролем, или анализ данных без открытия Excel требует различных подходов. В этом руководстве рассматриваются как ручные, так и программные методы подсчета строк, а также расширенные сценарии, такие как игнорирование заголовков, подсчет только непустых строк и обработка поврежденных или защищенных файлов.
На этой странице:
- Часть 1. Подсчет строк в открытом файле Excel
- Часть 2. Подсчет строк без открытия файлов Excel
- Часть 3. Расширенные сценарии подсчета строк
- Лучший метод для различных сценариев использования
- Заключение
- Часто задаваемые вопросы
1. Часть 1. Подсчет строк в открытом файле Excel
Когда файл открыт и готов, Excel предлагает несколько быстрых способов подсчета строк. Каждый подход имеет свои преимущества в зависимости от ситуации.
1.1 Использование строки состояния Excel
Строка состояния Excel предоставляет самый быстрый способ подсчета строк в выбранном диапазоне. Просто выберите данные или столбец, и строка состояния внизу отобразит статистику, такую как Количество, Среднее и Сумма. Значение Количество представляет непустые ячейки в выделенном диапазоне.
Этот метод идеально подходит для быстрой проверки при ручном просмотре данных. Например, количество записей в списке клиентов можно мгновенно проверить без использования формул. Однако он подсчитывает только выбранные ячейки, поэтому наборы данных с пустыми строками или несколькими областями могут дать неточные результаты. Ручная проверка остается необходимой для обеспечения полноты.
1.2 Использование формулы COUNTA
Функция COUNTA подсчитывает все непустые ячейки в диапазоне, включая текст, формулы и логические значения. Например, =COUNTA(A:A) подсчитывает все заполненные ячейки в столбце A. Указание более узкого диапазона, такого как A2:A1000, обеспечивает больший контроль.
COUNTA надежна для динамических наборов данных, поскольку она автоматически обновляется при изменении данных. Она особенно полезна для панелей мониторинга, отчетов и задач проверки данных. Пользователи должны учитывать, что формулы, возвращающие пустые строки, все равно подсчитываются, а скрытые строки остаются включенными. Выбор столбца, который всегда содержит данные, например, столбец идентификатора, повышает точность.
1.3 Использование Ctrl + клавиши со стрелками для поиска последней строки
Сочетания клавиш предоставляют быстрый способ найти последнюю использованную строку в наборе данных. Выбрав ячейку и нажав Ctrl + Стрелка вниз, вы перейдете к последней непустой строке в этом столбце. Этот подход эффективен для больших непрерывных наборов данных, таких как журналы продаж или записи транзакций.
![]()
Комбинирование сочетаний клавиш, таких как Ctrl + Стрелка вверх или Ctrl + Стрелка вправо, помогает перемещаться по широким или высоким рабочим листам. Однако этот метод становится менее надежным, если в данных есть пустые строки, поскольку Excel останавливается на первой пустой строке. Лучше всего использовать его для быстрых оценок, а не для точного подсчета в наборах данных с нерегулярными интервалами.
1.4 Подсчет строк в таблице Excel
Таблицы Excel обеспечивают структурированное управление данными, автоматически поддерживая количество строк при изменении набора данных. Создание таблицы (Ctrl + T) позволяет использовать структурированные ссылки, такие как =ROWS(Table1), для динамического получения номеров строк.
Таблицы идеально подходят для растущих наборов данных, беспрепятственно интегрируясь с сводными таблицами, диаграммами и Power Query. Они повышают читаемость и надежность формул. Основное ограничение заключается в том, что существующие диапазоны должны быть сначала преобразованы в таблицы, а пользователи, незнакомые со структурированными ссылками, могут потребовать короткого периода обучения.
1.5 Преимущества и ограничения ручных методов
Ручные методы подсчета просты, не требуют программирования и обеспечивают немедленную визуальную обратную связь. Они эффективны для небольших и средних наборов данных и периодических проверок.
Однако они менее эффективны для крупномасштабной обработки, пакетных операций или автоматизации и могут быть подвержены человеческим ошибкам. Расширенные методы лучше подходят, когда требуется скорость, масштабируемость или точность.
2. Часть 2. Подсчет строк без открытия файлов Excel
В ситуациях, когда вам нужна скорость, автоматизация или возможность обрабатывать множество файлов одновременно, существуют методы, которые работают непосредственно с файлом, не запуская Excel вообще.
2.1 Чтение внутренней структуры ZIP-архива Excel
Современные файлы .xlsx представляют собой ZIP-архивы, содержащие XML-документы. Переименование файла в .zip позволяет просмотреть его содержимое, при этом данные рабочего листа обычно хранятся в xl/worksheets/sheet1.xml. Парсинг этих XML-файлов может предоставить количество строк без запуска Excel.
Этот метод легкий и эффективный, но требует понимания внутренней структуры Excel. Сложности, такие как объединенные ячейки, общие строки и скрытые строки, могут затруднить ручной парсинг, делая этот подход более подходящим для опытных пользователей или автоматизированных сценариев.
2.2 Использование сценариев PowerShell
PowerShell может автоматизировать подсчет строк в средах Windows. Он либо взаимодействует с Excel через автоматизацию COM, либо напрямую обрабатывает файлы рабочих книг. Типичный рабочий процесс включает открытие рабочей книги, выбор рабочего листа, чтение используемого диапазона и возврат количества строк.
$excel = New-Object -ComObject Excel.Application
$excel.Visible = $false
$workbook = $excel.Workbooks.Open("C:\Path\To\Sample.xlsx")
$sheet = $workbook.Sheets.Item(1)
$rowCount = $sheet.UsedRange.Rows.Count
Write-Host "Row count: $rowCount"
$workbook.Close($false)
$excel.Quit()
PowerShell удобен для ИТ-администраторов или автоматизированных рабочих процессов на серверах. Он поддерживает пакетную обработку и запланированные задачи, хотя автоматизация на основе COM может потреблять значительные ресурсы, а совместимость может различаться в зависимости от версий Excel.
2.3 Использование Spire.XLS для Python
Spire.XLS для Python — это надежная библиотека, которая читает и записывает файлы Excel полностью на Python, без зависимости от Microsoft Excel. Он может загружать рабочие книги без открытия Excel и эффективно получать доступ к информации рабочего листа.
Чтобы начать, установите библиотеку:
pip install spire.xls
Затем используйте следующий код для подсчета строк в определенном рабочем листе:
from spire.xls import Workbook

# Загрузить файл Excel
workbook = Workbook()
workbook.LoadFromFile("Sample.xlsx")

# Получить количество строк определенного листа
sheet = workbook.Worksheets[0]
row_count =len(sheet.AllocatedRange.Rows)
print(f"Total rows in the worksheet: {row_count}")
Сценарии Python идеально подходят для пакетной обработки, автоматизации и интеграции с базами данных или API. Они могут обрабатывать несколько рабочих листов, файлы, защищенные паролем, пустые строки и заголовки. Этот подход эффективен, масштабируем и надежен.
2.4 Преимущества и ограничения расширенных методов
Расширенные методы подходят для автоматизации, больших наборов данных и корпоративных рабочих процессов. Они обеспечивают последовательные, воспроизводимые результаты и сокращают ручной труд.
Однако они требуют навыков программирования, дополнительных библиотек и обслуживания. Нетехнические пользователи могут найти ручные методы более доступными, в то время как автоматизация приносит пользу командам, регулярно управляющим обширными данными Excel.
3. Часть 3. Расширенные сценарии подсчета строк
Реальные электронные таблицы редко бывают простыми. Вот как обрабатывать наиболее распространенные крайние случаи.
3.1 Подсчет строк в нескольких рабочих листах
Когда рабочая книга содержит несколько листов, вам часто требуется общее количество строк по всем ним. Следующий сценарий перебирает каждый рабочий лист и накапливает итоги:
from spire.xls import Workbook

workbook = Workbook()
workbook.LoadFromFile("Sample.xlsx")

total_rows =0
for sheet in workbook.Worksheets:
    rows = sheet.AllocatedRange.Rows
    total_rows +=len(rows)

print(f"Total rows across all worksheets: {total_rows}")
Это особенно полезно, когда данные разделены по месяцам или регионам, и вам нужен общий итог для отчетности.
3.2 Подсчет только непустых строк
Общий подсчет строк включает любые пустые строки, которые находятся в пределах используемого диапазона. Если в ваших данных есть пробелы — возможно, из-за удалений или форматирования — вам нужно будет их отфильтровать:
from spire.xls import Workbook

workbook = Workbook()
workbook.LoadFromFile("Sample.xlsx")

sheet = workbook.Worksheets[0]
rows = sheet.AllocatedRange.Rows
total_rows = len(rows)

blank_rows = sum(1for row in rows if row.IsBlank)
non_empty_rows = total_rows - blank_rows
print(f"Non-empty rows: {non_empty_rows}")
Свойство IsBlank возвращает True для любой строки, где каждая ячейка пуста. Вычитание количества пустых строк из общего числа дает точный подсчет строк, которые фактически содержат данные.
3.3 Игнорирование заголовков при подсчете
Когда вам нужен подсчет, представляющий только записи данных, заголовки необходимо исключить. Этот сценарий пропускает настраиваемое количество строк заголовка перед подсчетом:
from spire.xls import Workbook

workbook = Workbook()
workbook.LoadFromFile("Sample.xlsx")

sheet = workbook.Worksheets[0]
rows = sheet.AllocatedRange.Rows
HEADER_ROWS = 1
blank_rows = 0

for i, row in enumerate(rows):
    # Пропустить строки заголовка
    if i < HEADER_ROWS:
        continue
    if row.IsBlank:
        blank_rows += 1
data_rows = (
    len(rows)
    - HEADER_ROWS
    - blank_rows
)

print(f"Data rows (excluding headers): {data_rows}")
Измените HEADER_ROWS в соответствии с вашим файлом — например, установите значение 2, если в вашем листе есть строка заголовка над заголовками столбцов.
3.4 Подсчет строк в файлах, защищенных паролем
Защита паролем не обязательно должна быть препятствием. Spire.XLS поддерживает загрузку зашифрованных рабочих книг, передавая пароль в качестве второго аргумента в LoadFromFile:
from spire.xls import Workbook

workbook = Workbook()
# Загрузить зашифрованную рабочую книгу с паролем
workbook.LoadFromFile("Protected.xlsx", "123456")

sheet = workbook.Worksheets[0]
rows = sheet.AllocatedRange.Rows
print(f"Rows in protected worksheet: {len(rows)}")
Это работает бесперебойно, если у вас есть правильный пароль. Это особенно полезно в корпоративных условиях, где конфиденциальные файлы обычно защищены, но все же должны обрабатываться программно.
3.5 Обработка поврежденных файлов
Сценарии пакетной обработки неизбежно столкнутся с поврежденным или некорректно сформированным файлом. Обертывание операции загрузки в блок try-except предотвращает сбой всего выполнения из-за одного плохого файла:
try:
    workbook.LoadFromFile(file)
except Exception as e:
    print(f"Failed to load {file}: {e}")
    continue
На практике вы захотите регистрировать сбой и переходить к следующему файлу, а не молча игнорировать ошибку. Более полное решение может добавить имя файла в список неудачных файлов для последующего рассмотрения, предоставляя вам чистый журнал аудита без остановки пакета.
4. Лучший метод для различных сценариев использования
| Сценарий использования | Рекомендуемый метод |
|---|---|
| Быстрая проверка | Строка состояния |
| Динамический набор данных | COUNTA |
| Быстрая навигация | Ctrl + клавиши со стрелками |
| Структурированные данные | Таблица Excel |
| Пакетная обработка | Python + Spire.XLS |
| Автоматизация с установленным Excel | PowerShell |
| Кроссплатформенность; Excel не требуется | Python + Spire.XLS |
Выбор правильного метода зависит от объема файлов, потребностей в автоматизации и технических знаний.
5. Заключение
Подсчет строк в Excel варьируется от простых ручных методов до полностью автоматизированных программных подходов. Ручные методы достаточны для небольших интерактивных задач, в то время как сценарии Python или PowerShell преуспевают в пакетной обработке и корпоративных сценариях. Расширенные методы обрабатывают заголовки, пустые строки, защищенные рабочие книги и поврежденные файлы, обеспечивая точные результаты в сложных рабочих процессах. Выбор правильного метода повышает эффективность, надежность и масштабируемость управления данными.
6. Часто задаваемые вопросы
Может ли Excel автоматически подсчитывать строки?
Да. Функции, такие как COUNTA и таблицы Excel, автоматически обновляют количество строк при изменении данных.
Каков максимальный лимит строк в Excel?
Современные версии Excel поддерживают до 1 048 576 строк на рабочий лист.
Могу ли я подсчитать строки без установленного Microsoft Excel?
Да. Библиотеки, такие как Spire.XLS, могут обрабатывать файлы Excel независимо.
Почему мой подсчет строк выглядит неверным?
Пустые строки, скрытые строки, формулы или объединенные ячейки могут повлиять на результаты.
Какой метод лучше всего подходит для автоматизации?
Решения на основе Python, как правило, являются наиболее гибкими и масштабируемыми.
См. также
Converter Markdown em texto | 4 métodos gratuitos, online e automatizados
Índice

Markdown é o padrão ouro para rascunhar documentos de engenharia e conteúdo web. No entanto, existem muitos cenários — como preparar e-mails de texto puro, gerar relatórios ou integrar conteúdo em sistemas legados — que exigem texto puro. Converter Markdown para texto garante que seu conteúdo permaneça legível, acessível e versátil em todas as plataformas.
Neste guia, exploraremos 4 métodos diretos que escritores e desenvolvedores podem usar para transformar Markdown (.md) em texto limpo e puro (.txt) sem perder estrutura ou clareza.
Resumo Rápido: Melhores Métodos de Markdown para Texto
Markdown pode ser convertido para texto de várias maneiras, dependendo do seu nível de conforto técnico, complexidade do documento e volume de arquivos. Aqui está um resumo rápido dos 4 principais métodos:
| Método e Ferramentas | Vantagem Principal | Ideal Para |
|---|---|---|
| Ferramentas online (MDToText, Picotoolkit) | Conversão instantânea no navegador, sem necessidade de instalação | Conversão única, não sensível |
| Editores de desktop (VS Code, Obsidian) | Funciona offline e oferece mais controle sobre a privacidade | Edição regular e arquivos confidenciais |
| Pandoc CLI | Preserva melhor a estrutura para listas, links e Markdown complexo | Conversão precisa e processamento em lote |
| Scripts Python (Spire.Doc) | Programável e fácil de integrar em fluxos de trabalho automatizados | Grandes conjuntos de arquivos, pipelines de IA e tarefas recorrentes |
Clique em qualquer método acima para pular diretamente para a seção, ou continue lendo para o guia passo a passo completo.
Método 1: Use Conversores Online de Markdown para Texto
Quando você precisa apenas de uma conversão rápida e única, baixar um software de desktop pesado é um exagero. Conversores online gratuitos de Markdown para texto oferecem o fluxo de trabalho mais rápido baseado em navegador para criadores de conteúdo. Você pode remover a formatação e obter texto puro pronto para copiar em segundos, sem nenhuma instalação.
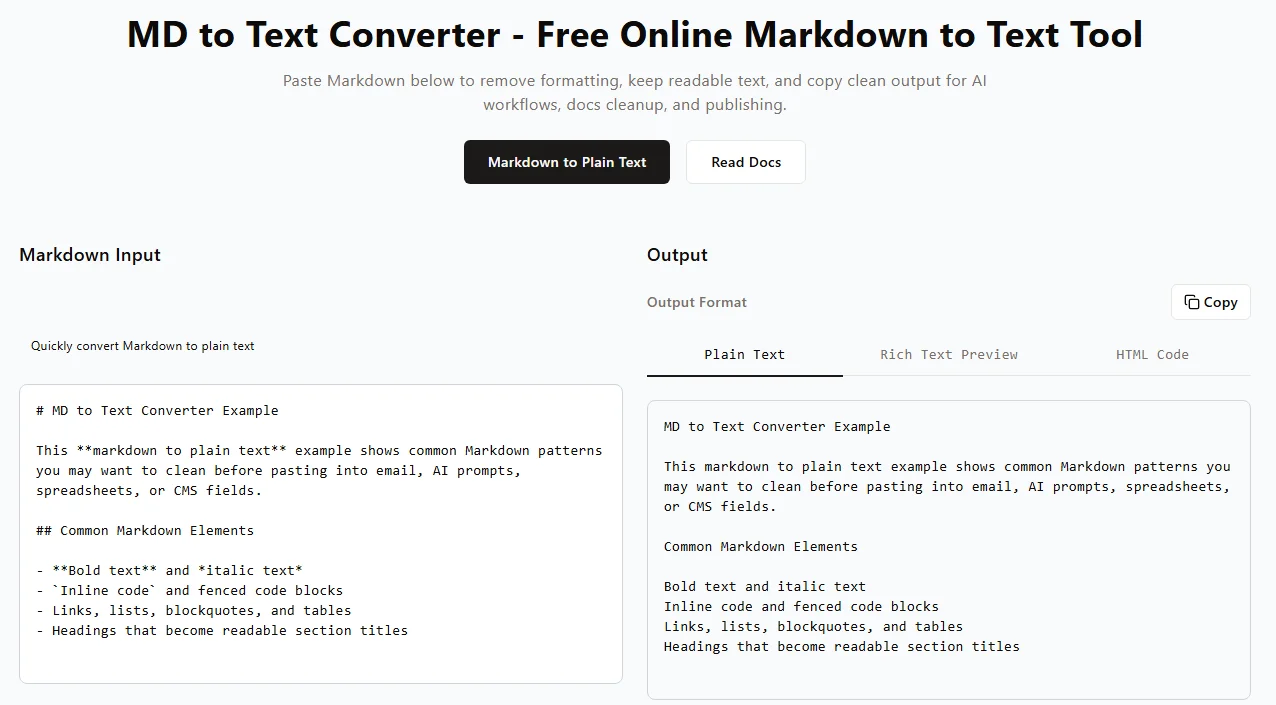
Como Converter Markdown para Texto Online (Passo a Passo)
- Selecione uma ferramenta – Abra um conversor de Markdown confiável baseado em navegador, como mdtotext.com ou Picotoolkit MD to TXT Converter.
- Cole seu conteúdo – Copie o texto Markdown e cole-o diretamente na caixa de entrada da ferramenta (ou carregue seu arquivo .md).
- Remova a formatação – A ferramenta remove automaticamente símbolos de markdown como
#,**e colchetes de link em tempo real. - Copie ou baixe a saída – Revise o texto limpo e sem formatação na janela de saída, depois copie-o para a área de transferência ou baixe o arquivo.
⚠️ Considerações Importantes:
- Privacidade e Segurança de Dados – Evite colar dados confidenciais da empresa, chaves de API ou código-fonte proprietário em conversores online públicos. Sempre use métodos offline para arquivos confidenciais.
- Limitações de Formatação – Elementos avançados como tabelas aninhadas, citações em bloco ou listas de tarefas podem não converter perfeitamente. Sempre revise a saída final antes de publicar.
✅ Prós: Instantâneo, sem configuração, funciona em qualquer dispositivo.
❌ Contras: Não adequado para arquivos em massa, requer internet.
Método 2: Exportar Markdown para Texto via Editores de Desktop
Se você lida com arquivos Markdown confidenciais ou prefere trabalhar offline, usar um editor Markdown de desktop é a melhor escolha. Aplicativos populares como VS Code e Obsidian permitem converter arquivos Markdown localmente, dando a você controle total sobre a privacidade dos seus dados.
Usando VS Code
-
Abra seu arquivo .md no VS Code arrastando e soltando ou clicando em Arquivo → Abrir.
-
Pressione Ctrl + Shift + V (Windows) ou Cmd + Shift + V (Mac) para abrir a janela de visualização de Markdown.
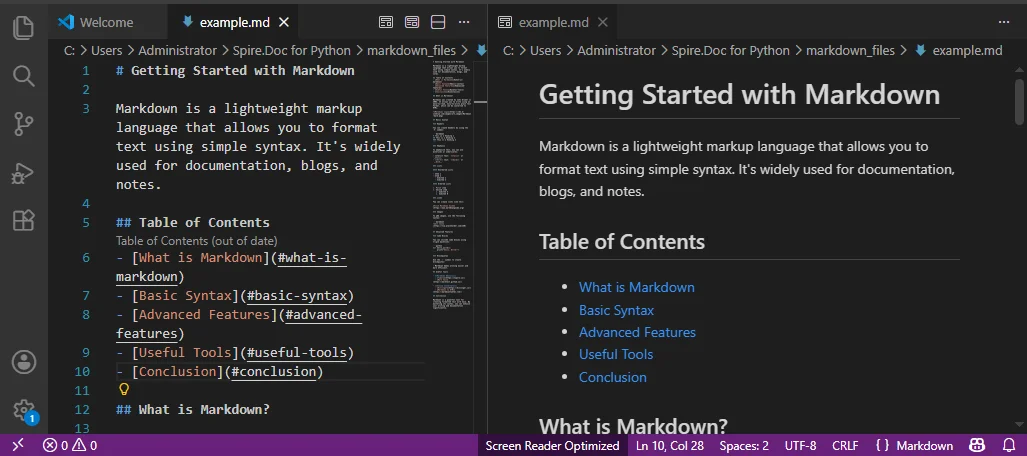
-
Selecione todo o texto na janela de visualização (Ctrl + A ou Cmd + A) e copie-o.
-
Cole o texto limpo em um novo arquivo .txt.
Usando Obsidian
- Abra seu arquivo Markdown no Obsidian.
- Mude para Modo de Leitura (modo de visualização).
- Selecione todo o texto, copie e cole em seu editor de texto padrão.
Dicas Rápidas:
- Role no modo de visualização para verificar como o conteúdo aparece antes de exportar.
✅ Prós: Funciona offline, seguro, suporta Markdown complexo.
❌ Contras: Copiar e colar manual, não ideal para vários arquivos.
Método 3: Converter Markdown para Texto Usando Pandoc CLI
Para redatores técnicos, desenvolvedores e administradores de sistemas, Pandoc é a melhor escolha quando a precisão é crítica. Ele converte com precisão elementos complexos de Markdown — tabelas, listas, links — em texto puro e limpo. Ele também suporta automação e processamento em lote.
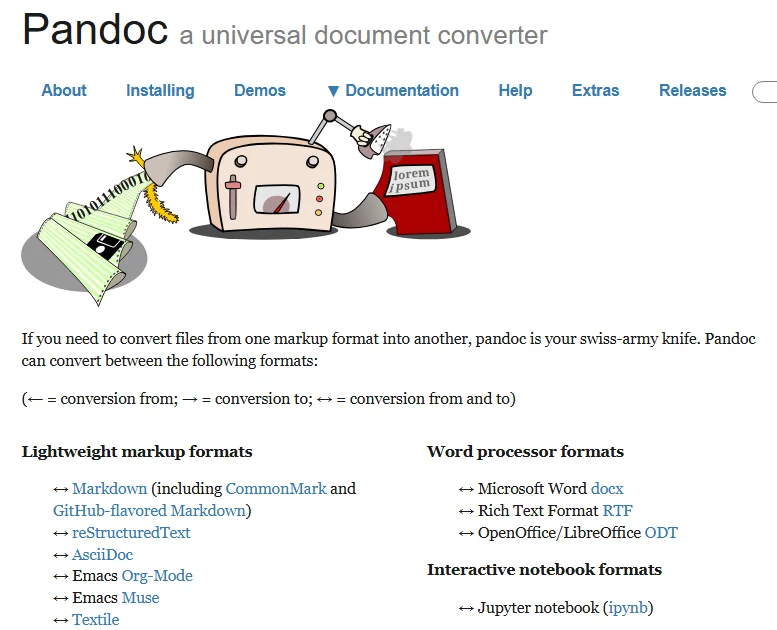
1. Instalar Pandoc
- Mac (via Homebrew):
brew install pandoc - Windows (via Winget):
winget install pandoc
Nota: Certifique-se de que o Pandoc esteja adicionado ao PATH do seu sistema para que ele possa ser executado de qualquer terminal.
2. Converter um Único Arquivo Markdown para Texto
Navegue até a pasta que contém seu arquivo Markdown, então execute o seguinte comando:
pandoc input.md -t plain -o output.txt
-t plain: Instrui o Pandoc a gerar texto puro limpo e legível.-o output.txt: Especifica o nome do arquivo de texto puro resultante.
3. Converter em Lote Vários Arquivos MD para TXT
Se você precisar processar muitos arquivos de uma vez, use estes loops de shell:
Mac/Linux:
for file in *.md; do
  pandoc "$file" -t plain -o "${file%.md}.txt"
done
Windows PowerShell:
Get-ChildItem *.md | ForEach-Object { pandoc $_.FullName -t plain -o "$($_.DirectoryName)\$($_.BaseName).txt" }
Dicas:
- Teste com um único arquivo primeiro antes de executar operações em lote.
- Mantenha seus arquivos Markdown originais em backup.
- Combine com scripts de shell ou automação para conversões em lote recorrentes.
✅ Prós: Alta fidelidade, processamento em lote, preciso para Markdown complexo.
❌ Contras: Requer conhecimento de CLI, configuração do PATH pode ser complicada.
Método 4: Automatizar a Conversão de Arquivos Markdown para Texto com Python
Para desenvolvedores que integram a conversão de Markdown em fluxos de trabalho ou pipelines automatizados, Python é ideal. Usando bibliotecas como Spire.Doc para Python, você pode analisar Markdown programaticamente, limpar texto e alimentá-lo em pipelines personalizados, modelos de IA ou scripts de processamento em lote.
Embora bibliotecas básicas de código aberto possam remover texto, usar Spire.Doc garante que elementos complexos como tabelas de palavras aninhadas, alinhamentos de texto e cabeçalhos sejam gerenciados adequadamente sem a necessidade de escrever blocos regex complexos. Isso o torna uma solução robusta para pré-processamento de dados em nível empresarial.
Passo 1: Instalar Pacotes Necessários
Abra seu terminal e instale a biblioteca Spire.Doc para Python:
pip install Spire.Doc
Passo 2: Automatizar a Conversão de Markdown para TXT com Python
Você pode usar o seguinte script para lidar com arquivos únicos ou adaptá-lo facilmente em um loop para escanear um diretório inteiro:
from spire.doc import *

# Criar um objeto da classe Document
document = Document()

# Carregar um arquivo Markdown
document.LoadFromFile("input.md")

# Salvar o arquivo Markdown em um arquivo .txt
document.SaveToFile("output.txt", FileFormat.Txt)

document.Close()
✅ Prós: Programável, suporta processamento em lote, integra-se com pipelines e fluxos de trabalho de IA.
❌ Contras: Requer conhecimento de Python e dependências de terceiros.
Procurando por rich text? Se você precisar preservar a formatação em um formato de documento profissional em vez de removê-la completamente, confira nosso guia sobre como converter Markdown para Word e Markdown para PDF via Python.
Dicas Profissionais para Melhor Conversão de Markdown para TXT
Ao remover Markdown, alguns elementos estruturais exigem um pouco de supervisão estratégica para garantir que seu texto puro não perca o contexto.
- Hiperlinks:
[Texto](URL)pode se tornar apenas Texto ao remover Markdown. Use Pandoc-t plainpara manter os URLs. - Tabelas: Tabelas complexas podem quebrar em texto puro. Para dados tabulares, considere exportar Markdown para Excel ou CSV em vez disso.
- Blocos de Código: Código com três crases pode se misturar com o texto. Revise manualmente ou adicione indentação/marcadores para preservar a legibilidade.
- Visualização e Backup: Sempre visualize a saída e mantenha um backup do seu Markdown original.
Conclusão: Qual Método Escolher?
Converter Markdown para texto puro é um fluxo de trabalho principal para desenvolvedores, redatores técnicos e engenheiros de dados de IA. O melhor método depende inteiramente do volume dos seus arquivos, das suas necessidades de privacidade de dados e dos seus requisitos de automação:
- Use Ferramentas Online para conversões de texto rápidas, únicas e de baixo risco onde a privacidade não é uma preocupação.
- Use Editores de Desktop para trabalho offline, manual e seguro com dados confidenciais.
- Use Pandoc CLI quando a precisão estrutural (como listas aninhadas) for mais importante ou para conversões em lote.
- Use Automação Python para integração profunda em pipelines de prompt de IA, pré-processamento de dados de LLM ou fluxos de trabalho recorrentes de desenvolvedores.
Ao escolher a abordagem certa para o seu projeto, você pode remover eficientemente a sintaxe Markdown, mantendo seu texto puro limpo, legível e pronto para qualquer plataforma.
FAQs
P1: Como posso converter vários arquivos Markdown para texto de uma vez?
R1: A maneira mais eficiente é usar Pandoc CLI com um loop de shell ou escrever um script de automação Python para processar em lote diretórios inteiros.
P2: Links e imagens serão mantidos ao converter Markdown para texto?
R2: O texto âncora visível e o texto alternativo permanecerão, mas os caminhos de imagem brutos e os URLs geralmente são removidos. Use Pandoc se quiser manter os URLs escritos ao lado do texto.
P3: É seguro usar conversores online de Markdown para texto para arquivos privados?
R3: Não. Conversores online públicos processam seus dados em servidores de terceiros. Para dados confidenciais, registros financeiros ou código interno, sempre opte por métodos offline como VS Code, Pandoc ou Python.
P4: Qual é a maneira mais fácil de converter um único arquivo Markdown para texto?
R4: Para um único arquivo rápido e não sensível, ferramentas online como mdtotext.com são as mais fáceis, pois não exigem configuração ou instalação.