Convert JavaScript to Word with Python Automation
Modern development teams often need to share JavaScript or JSX source code with project managers, clients, auditors, or educators who don't use code editors. However, raw .js and .jsx files are difficult to review outside tools like VS Code or WebStorm, while manually copying code into Word documents frequently breaks indentation, formatting, and readability.
Using Spire.Doc for Python together with Pygments, developers can convert JavaScript to Word in Python with syntax highlighting and customizable document formatting. This automated approach is useful for technical documentation, compliance archiving, educational materials, code reviews, and client deliverables.
In this article, you'll learn how to convert JavaScript and JSX files to Word documents in Python using Spire.Doc for Python, including basic conversion, advanced formatting techniques, batch processing, and PDF export.
Quick Navigation
- Understanding the Conversion Workflow
- Prerequisites
- Basic Implementation of JavaScript to Word Conversion
- Advanced Scenarios
- Common Pitfalls
- Conclusion
- FAQ
1. Understanding the Conversion Workflow
The conversion process uses Pygments to generate syntax-highlighted HTML, then imports this HTML into a Word document using Spire.Doc's HTML import functionality:
- Read source code from
.jsor.jsxfiles - Generate syntax-highlighted HTML using Pygments'
highlight()function - Import the HTML into Word using
AppendHTML()
This approach provides syntax coloring through Pygments' built-in styles, while Spire.Doc handles document structure including margins, headers, footers, and multi-format export. It provides a simple and flexible API for automating the conversion process.
2. Prerequisites
Before converting JavaScript files to Word documents in Python, you need to install Spire.Doc for Python and Pygments:
pip install spire.doc
pip install pygments
Verify the packages are available:
import spire.doc
from pygments import highlight
from pygments.formatters import HtmlFormatter
Alternatively, you can download Spire.Doc for Python and add it to your project.
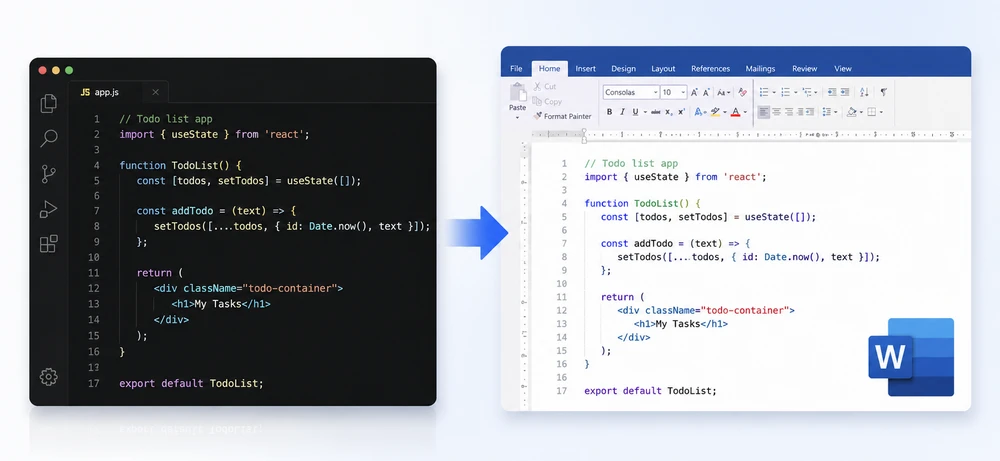
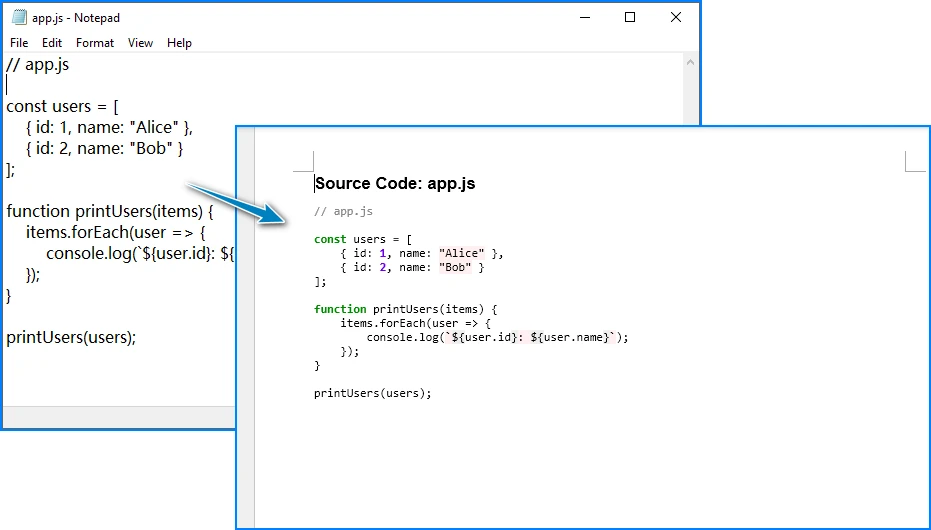
3. Basic Implementation
The following example converts a JavaScript file to a Word document with syntax highlighting:
from spire.doc import *
from pygments import highlight
from pygments.lexers import JavascriptLexer
from pygments.formatters import HtmlFormatter

def convert_js_to_word(input_file: str, output_file: str) -> None:
    """Convert JavaScript file to Word document with syntax highlighting."""

    with open(input_file, "r", encoding="utf-8") as file:
        js_code = file.read()

    document = Document()
    section = document.AddSection()
    section.PageSetup.Margins.All = 50

    title_paragraph = section.AddParagraph()
    title_text = title_paragraph.AppendText(f"Source Code: {input_file}")
    title_text.CharacterFormat.FontName = "Arial"
    title_text.CharacterFormat.FontSize = 14
    title_text.CharacterFormat.Bold = True
    title_paragraph.Format.AfterSpacing = 10

    html_formatter = HtmlFormatter(
        nowrap=True,
        style='colorful',
        noclasses=True
    )

    highlighted_html = highlight(js_code, JavascriptLexer(), html_formatter)

    code_paragraph = section.AddParagraph()
    code_paragraph.AppendHTML(f'<pre style="font-family: Consolas; font-size: 10pt;">{highlighted_html}</pre>')

    document.SaveToFile(output_file, FileFormat.Docx)
    document.Close()

    print(f"Converted {input_file} to {output_file}")

convert_js_to_word("app.js", "JavaScriptCode.docx")
Key Components
- Document – Word document container for sections, paragraphs, and content
- Section – Document section with page setup properties (margins, orientation)
- Paragraph – Text container with formatting options
- AppendHTML() – Imports HTML content into the paragraph, including inline styles for colors and fonts
- highlight() – Pygments function that generates syntax-highlighted output
- HtmlFormatter – Pygments formatter producing HTML with inline styles (use
noclasses=True) - JavascriptLexer – Pygments lexer that identifies JavaScript syntax elements
Spire.Doc can import syntax-highlighted HTML generated by Pygments, allowing JavaScript code formatting and colors to be preserved in Word documents.
4. Advanced Scenarios
Convert JSX Files
For JSX files, it's recommended to use JsxLexer instead of JavascriptLexer to achieve more accurate syntax highlighting for component tags and embedded JSX expressions.
Example JSX input (App.jsx):
``jsx import React, { useState } from 'react';
const TodoList = () => { const [todos, setTodos] = useState([]);
return (
    <div className="todo-container">
        <h1>My Tasks</h1>
    </div>
);
};
export default TodoList;
Use `JsxLexer` when generating syntax-highlighted HTML:

```python
from pygments.lexers import JsxLexer

highlighted_html = highlight(
    jsx_code,
    JsxLexer(),
    html_formatter
)
Then convert the highlighted JSX content to Word using the same AppendHTML() workflow:
convert_js_to_word("App.jsx", "ReactComponent.docx")
The conversion result looks like this:
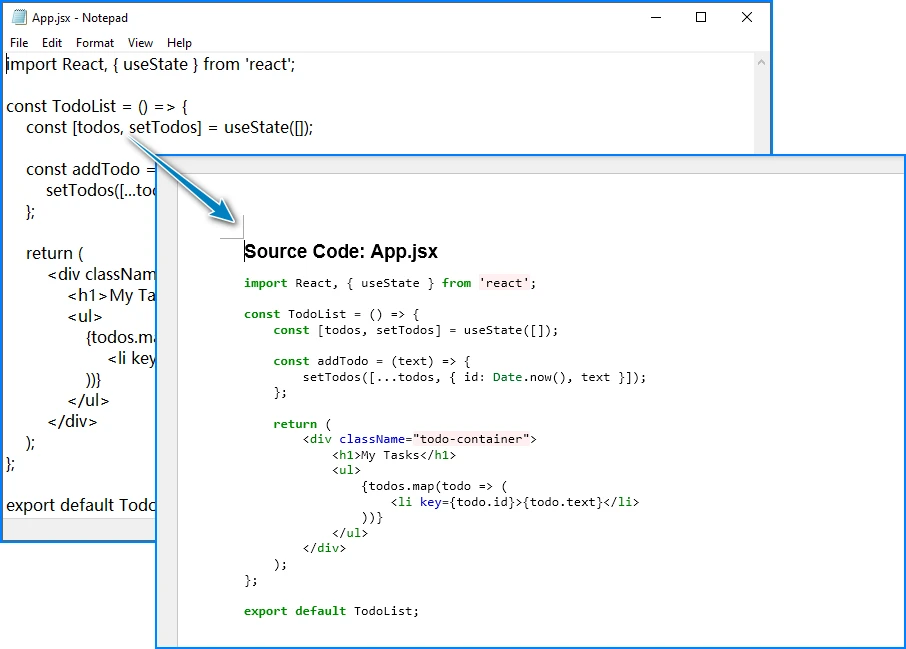
JsxLexer provides improved recognition for JSX tags, attributes, and embedded expressions compared to the standard JavaScript lexer, resulting in more accurate syntax coloring in the generated Word document.
Batch Convert Multiple Files
If you need to convert large numbers of JavaScript or JSX files, you can automate the process by scanning a folder and generating Word documents in batches.
import os
from pathlib import Path

def batch_convert_js_files(source_folder: str, output_folder: str) -> None:
    """Convert all JavaScript files in a folder to Word documents."""

    Path(output_folder).mkdir(parents=True, exist_ok=True)

    js_extensions = ('.js', '.jsx', '.mjs')

    converted_count = 0
    error_count = 0

    for filename in os.listdir(source_folder):
        if filename.lower().endswith(js_extensions):
            input_path = os.path.join(source_folder, filename)

            base_name = os.path.splitext(filename)[0]
            output_path = os.path.join(output_folder, f"{base_name}.docx")

            try:
                convert_js_to_word(input_path, output_path)
                converted_count += 1
            except Exception as e:
                print(f"Error converting {filename}: {str(e)}")
                error_count += 1

    print(f"\nBatch conversion complete:")
    print(f"  Converted: {converted_count} files")
    print(f"  Errors: {error_count} files")

batch_convert_js_files("src/scripts", "output/docs")
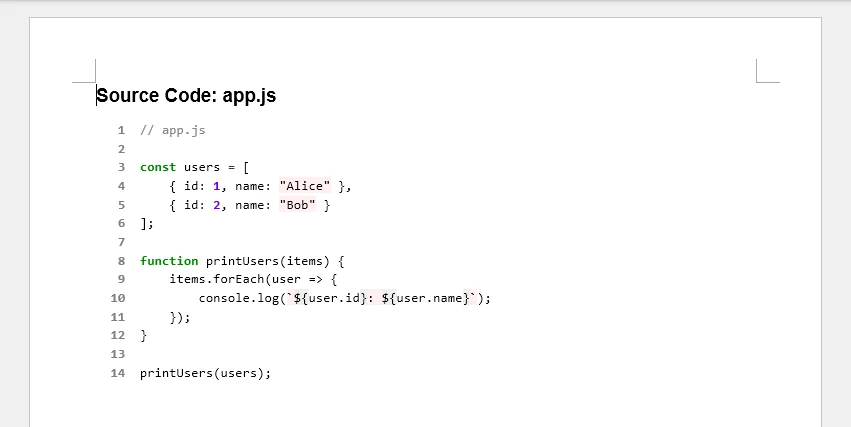
Add Line Numbers
Line numbers can improve readability during code reviews, audits, or technical documentation. Since Word HTML rendering may not fully support Pygments' built-in line number layouts, a practical approach is to prepend custom line numbers after syntax highlighting.
html_formatter = HtmlFormatter(
    nowrap=True,
    noclasses=True,
    style="colorful"
)

highlighted_html = highlight(
    js_code,
    JavascriptLexer(),
    html_formatter
)

highlighted_lines = highlighted_html.splitlines()

numbered_lines = []

for index, line in enumerate(highlighted_lines, start=1):

    numbered_line = (
        f'<span style="color: gray; font-weight: bold;">'
        f'{index:4d}  '
        f'</span>{line}'
    )

    numbered_lines.append(numbered_line)

combined_html = (
    '<pre style="font-family: Consolas; '
    'font-size: 10pt; line-height: 1.4;">'
    + '\n'.join(numbered_lines) +
    '</pre>'
)

paragraph.AppendHTML(combined_html)
The generated Word document with line numbers looks like this:
Add Headers and Footers
Headers and footers help organize generated Word documents by adding titles, page numbers, and document metadata. This is especially useful for formal reports or exported technical documentation.
def add_document_metadata(section: Section, document_title: str) -> None:
"""Add header and footer to document section."""
header = section.HeadersFooters.Header.AddParagraph()
header_text = header.AppendText(document_title)
header_text.CharacterFormat.FontName = "Arial"
header_text.CharacterFormat.FontSize = 10
header_text.CharacterFormat.TextColor = Color.get_Black()
header.Format.HorizontalAlignment = HorizontalAlignment.Left
header.Format.TextAlignment = TextAlignment.Top
header.Format.Borders.Bottom.BorderType = BorderStyle.Single
header.Format.Borders.Bottom.Color = Color.get_Black()
footer = section.HeadersFooters.Footer.AddParagraph()
footer.Format.HorizontalAlignment = HorizontalAlignment.Center
footer.Format.TextAlignment = TextAlignment.Bottom
page_field = footer.AppendField("page", FieldType.FieldPage)
page_field.CharacterFormat.FontName = "Arial"
page_field.CharacterFormat.FontSize = 9
footer.AppendText(" of ")
total_pages_field = footer.AppendField("numPages", FieldType.FieldNumPages)
total_pages_field.CharacterFormat.FontName = "Arial"
total_pages_field.CharacterFormat.FontSize = 9
document = Document()
document.LoadFromFile("CodeWithLines.docx")
section = document.Sections[0]
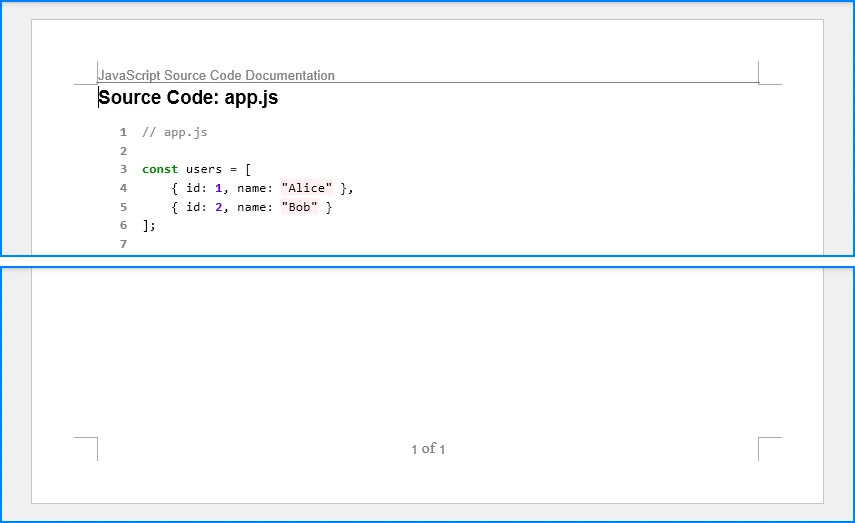
add_document_metadata(section, "JavaScript Source Code Documentation")
document.SaveToFile("CodeWithHeadersFooters.docx", FileFormat.Docx)
The generated Word document with headers and footers looks like this:
For more advanced customization options, refer to our guide on how to add headers and footers to Word documents in Python.
Export to PDF Format
In addition to DOCX output, Spire.Doc can export syntax-highlighted JavaScript code directly to PDF format. This is useful when distributing read-only documentation or sharing code outside Microsoft Word environments.
def convert_js_to_pdf(input_file: str, output_file: str) -> None:
    """Convert JavaScript file directly to PDF."""

    with open(input_file, "r", encoding="utf-8") as file:
        js_code = file.read()

    document = Document()
    section = document.AddSection()
    section.PageSetup.Margins.All = 50

    html_formatter = HtmlFormatter(noclasses=True, style='colorful')
    highlighted_html = highlight(js_code, JavascriptLexer(), html_formatter)

    paragraph = section.AddParagraph()
    paragraph.AppendHTML(f'<pre style="font-family: Consolas; font-size: 10pt;">{highlighted_html}</pre>')

    document.SaveToFile(output_file, FileFormat.PDF)
    document.Close()

convert_js_to_pdf("app.js", "JavaScriptCode.pdf")
For more advanced PDF conversion techniques, including layout control and document formatting, see our detailed guide on converting Word documents to PDF in Python.
Customize Syntax Highlighting Style
Pygments provides multiple built-in color schemes:
def convert_with_custom_style(input_file: str, output_file: str, style_name: str = 'monokai') -> None:
    """Convert JavaScript to Word with custom highlighting style."""

    with open(input_file, "r", encoding="utf-8") as file:
        js_code = file.read()

    document = Document()
    section = document.AddSection()
    section.PageSetup.Margins.All = 50

    html_formatter = HtmlFormatter(
        noclasses=True,
        style=style_name,
        nowrap=True
    )

    highlighted_html = highlight(js_code, JavascriptLexer(), html_formatter)

    paragraph = section.AddParagraph()
    paragraph.AppendHTML(f'<pre style="font-family: Consolas; font-size: 10pt;">{highlighted_html}</pre>')

    document.SaveToFile(output_file, FileFormat.Docx)
    document.Close()

convert_with_custom_style("app.js", "CodeMonokai.docx", style_name='monokai')
Available styles include: 'monokai', 'colorful', 'vim', 'vs', 'tango', 'friendly', 'default'
5. Common Pitfalls
Missing HtmlFormatter Configuration
Problem: Default HtmlFormatter generates CSS classes instead of inline styles, which Word cannot process without external stylesheets.
Solution: Always use noclasses=True:
html_formatter = HtmlFormatter(noclasses=True, style='colorful')
highlighted_html = highlight(js_code, JavascriptLexer(), html_formatter)
Encoding Errors with Special Characters
Problem: Reading files without UTF-8 encoding causes character corruption on some platforms.
Solution: Explicitly specify UTF-8 encoding:
with open(input_file, "r", encoding="utf-8") as file:
    js_code = file.read()
For files with BOM (Byte Order Mark), use utf-8-sig:
with open(input_file, "r", encoding="utf-8-sig") as file:
    js_code = file.read()
Indentation Loss
Problem: Not wrapping highlighted code in <pre> tags causes indentation to disappear.
Solution: Wrap syntax-highlighted HTML in <pre> tags:
highlighted_html = highlight(js_code, JavascriptLexer(), html_formatter)
paragraph.AppendHTML(f'<pre style="font-family: Consolas;">{highlighted_html}</pre>')
ModuleNotFoundError
Problem: Package not installed in current Python environment.
Solution:
pip install spire.doc
For virtual environments, ensure activation before installation:
source venv/bin/activate  # Linux/Mac
venv\Scripts\activate     # Windows
pip install spire.doc
Performance with Large Files
Problem: Very large JavaScript files (10,000+ lines) may cause slow conversion.
Solution: Process files in chunks:
def convert_large_file(input_file: str, output_file: str, chunk_size: int = 500) -> None:
    """Convert large JavaScript file in chunks."""

    with open(input_file, "r", encoding="utf-8") as file:
        lines = file.readlines()

    document = Document()
    section = document.AddSection()
    section.PageSetup.Margins.All = 50

    html_formatter = HtmlFormatter(noclasses=True, style='colorful')

    for i in range(0, len(lines), chunk_size):
        chunk = ''.join(lines[i:i + chunk_size])
        highlighted_html = highlight(chunk, JavascriptLexer(), html_formatter)

        paragraph = section.AddParagraph()
        paragraph.AppendHTML(f'<pre style="font-family: Consolas; font-size: 10pt;">{highlighted_html}</pre>')

    document.SaveToFile(output_file, FileFormat.Docx)
    document.Close()
Conclusion
This article demonstrated how to convert JavaScript and JSX files to Word documents in Python using Spire.Doc for Python and Pygments. By leveraging the highlight() function with HtmlFormatter and Spire.Doc's AppendHTML() method, developers can automate code documentation workflows with syntax highlighting.
Spire.Doc for Python provides document generation capabilities including table creation, image insertion, header/footer management, and multi-format export.
You can apply for a 30-day free license to evaluate all features.
7. FAQ
Can Spire.Doc convert JSX files to Word documents?
Yes. Pygments can highlight many JSX constructs using the JavaScript lexer, including component tags, props, and embedded expressions. However, JSX-specific syntax may not receive dedicated highlighting categories.
Does this solution require Microsoft Word installation?
No. Spire.Doc for Python operates independently without requiring Microsoft Word. The library generates DOCX files directly, making it suitable for server environments and CI/CD pipelines.
Can I convert JavaScript to formats other than DOCX?
Yes. Spire.Doc supports multiple export formats:
document.SaveToFile("output.pdf", FileFormat.PDF)
document.SaveToFile("output.html", FileFormat.Html)
document.SaveToFile("output.rtf", FileFormat.Rtf)
How do I handle TypeScript files (.ts, .tsx)?
Use TypescriptLexer:
from pygments.lexers import TypescriptLexer

highlighted_html = highlight(ts_code, TypescriptLexer(), html_formatter)
Is this approach suitable for enterprise-scale projects?
Yes. Python automation integrates with CI/CD pipelines and batch processing workflows. Local execution avoids security risks from uploading source code to online converters. Consider implementing logging, progress reporting, and error tracking for large deployments.
Can I customize syntax highlighting colors?
Yes. Pygments offers numerous built-in styles:
html_formatter = HtmlFormatter(noclasses=True, style='monokai')
Available styles: 'monokai', 'colorful', 'vim', 'vs', 'tango', 'friendly', 'default'
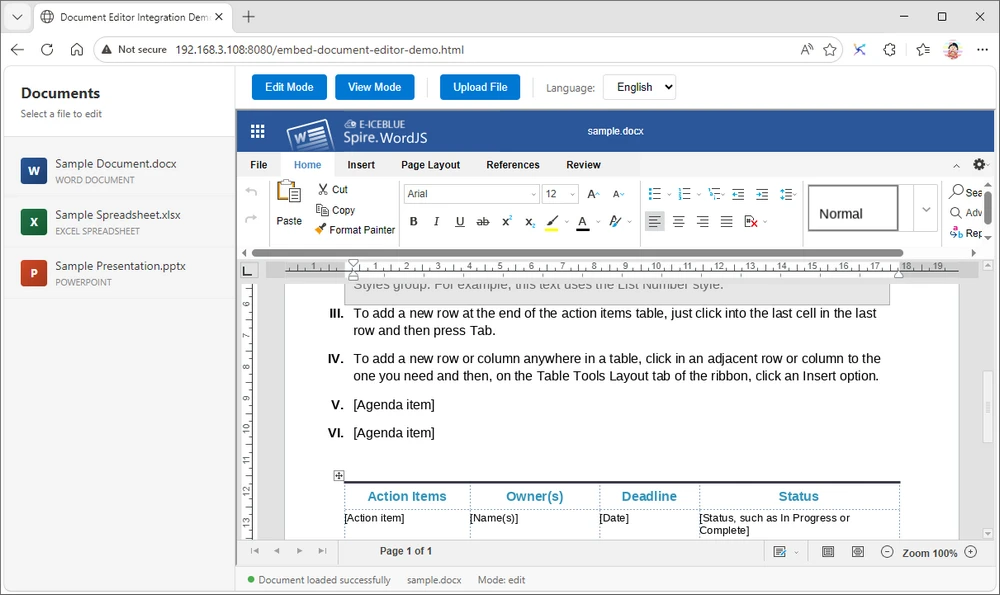
How to Embed an Office Document Editor in an HTML Page
Modern web applications increasingly require built-in document capabilities for viewing and editing Word, Excel, and PowerPoint files directly in the browser. Instead of redirecting users to external applications, developers often need to embed an Office editor in a web page as part of their existing interface.
Building a fully functional online document editor from scratch can be complex, involving document rendering, format compatibility, editing workflows, and responsive UI integration. With Spire.OfficeJS from e-iceblue, developers can quickly integrate a browser-based Office editor into HTML pages using JavaScript without requiring Microsoft Office installations on client devices.
This article demonstrates how to embed a document editor in HTML, including page layout design, editor initialization, and dynamic document loading with practical examples.
Table of Contents
- Why Embed an Office Editor into a Web Page?
- Prerequisites
- Basic Page Layout for Integration
- Embed the Office Editor into a Container
- Load and Switch Documents Dynamically
- Customize Editor Behavior
- Integrating the Editor into Existing Business Systems
- Framework Integration (React, Vue, Angular)
- Common Integration Issues
- Conclusion
- FAQ
Why Embed an Office Editor into a Web Page?
Embedding a document editor as part of your page layout enables seamless workflows and better user experience. Common use cases include:
- Document management systems (DMS) where users view and edit files without leaving the interface
- CRM or ERP platforms with integrated file editing capabilities
- Online collaboration tools requiring real-time document editing
- Internal business dashboards with document preview functionality
Instead of opening documents in a separate application or dedicated page, users can work with documents directly inside the current web interface.
Embedded vs Full-Page Editors
There are two common integration approaches:
| Approach | Description |
|---|---|
| Full-page editor | The entire page is dedicated to document editing |
| Embedded editor | The editor is integrated as part of a larger UI |
This tutorial focuses on the embedded approach, where the document editor works alongside sidebars, file lists, navigation menus, and other application components.
Prerequisites
Before integrating the editor, ensure you have:
Server Setup
-
Download and Extract Spire.OfficeJS
Download the Spire.OfficeJS package and extract it to a local directory.
-
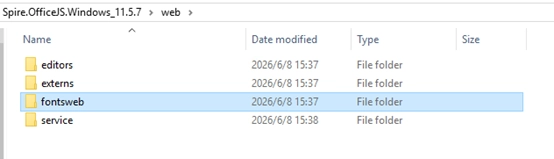
Initialize font
cd Spire.OfficeJS.Windows_11.5.7
run_genallfonts.bat
Before deployment, it is necessary to first execute "run_genallfonts. bat" to initialize the font. After execution, the "fontsweb" folder will appear in the web folder containing the basic font. If you need to add other fonts, please refer to: How to Add Custom Fonts in Spire.OfficeJS for Frontend Editors
-
Start Spire.OfficeJS Backend Service
run_servers.batThis starts the editor service on http://localhost:3000
-
Start Example Server (provides sample documents)
The example server runs on with sample documents available at http://localhost:3000/public/samples/
If you need a complete setup guide for installing and deploying Spire.OfficeJS in JavaScript applications, see: How to Deploy Spire.OfficeJS in JavaScript
Requirements
- Document files accessible from the browser
- Modern browser with WebAssembly support
Note: The code examples below use localhost addresses for local development and testing. In production environments, replace them with your actual server URLs or domain names.
Basic Page Layout for Integration
The first step is to design a layout where the editor occupies only part of the page. Here's a common structure with a sidebar and editor area:
<!DOCTYPE html>
<html>
<head>
  <title>Document Editor Integration</title>
  <style>
    .app-container {
      display: flex;
      height: 100vh;
    }

    .sidebar {
      width: 250px;
      border-right: 1px solid #ddd;
      padding: 10px;
      background: #f5f5f5;
    }

    .editor-container {
      flex: 1;
      position: relative;
    }
  </style>
</head>
<body>
  <div class="app-container">
    <div class="sidebar">
      <h3>Documents</h3>
      <ul>
        <li onclick="openDocument('http://localhost:3000/public/samples/sample.docx', 'docx')">Sample Document.docx</li>
        <li onclick="openDocument('http://localhost:3000/public/samples/sample.xlsx', 'xlsx')">Sample Spreadsheet.xlsx</li>
        <li onclick="openDocument('http://localhost:3000/public/samples/sample.pptx', 'pptx')">Sample Presentation.pptx</li>
      </ul>
    </div>

    <div class="editor-container" id="editor"></div>
  </div>
</body>
</html>
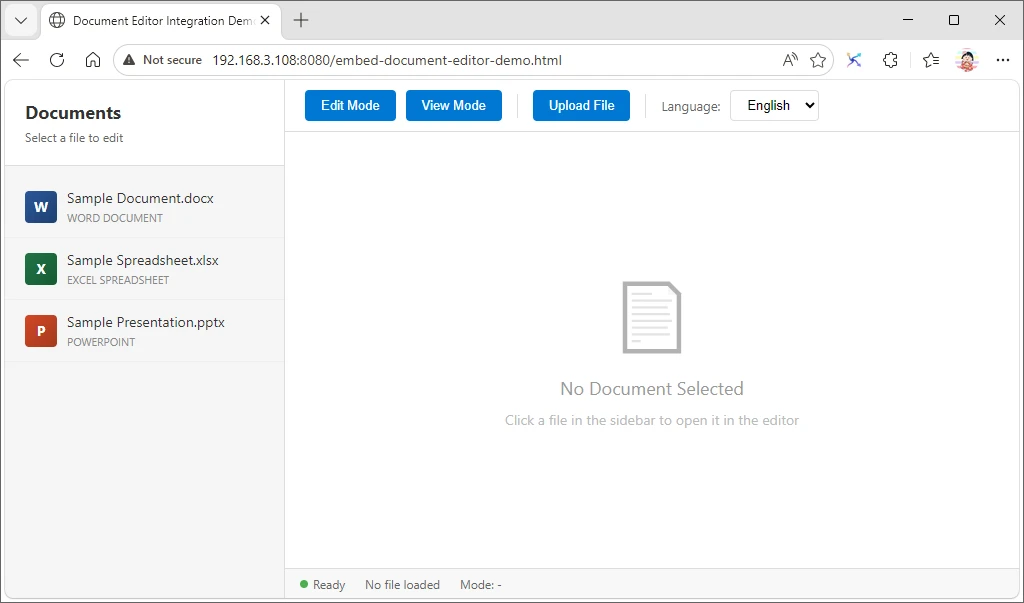
A simple embedded document management interface may look like this before a document is opened:
Layout Explanation
- The sidebar displays a file list with clickable document names
- The editor-container is a flex item that will host the document editor
- The editor fills the remaining space using
flex: 1
This structure reflects a real-world application layout rather than a simple demo page.
Embed the Office Editor into a Container
Load the Spire.OfficeJS script and initialize the editor inside your designated container:
<script src="http://localhost:3000/web/editors/spireapi/SpireCloudEditor.js"></script>

<script>
function initEditor() {
  const config = {
    user: {
      id: 'user1',
      name: 'Demo User'
    },
    fileAttrs: {
      sourceUrl: "http://localhost:3000/public/samples/sample.docx",
      fileInfo: {
        ext: "docx",
        name: "sample.docx"
      }
    },
    editorAttrs: {
      editorType: "document",
      editorMode: "edit",
      editorWidth: "100%",
      editorHeight: "100%",
      platform: "desktop",
      viewLanguage: "en",
      canEdit: true,
      canDownload: true,
      canForcesave: true,
      useWebAssemblyDoc: true,
      useWebAssemblyExcel: true,
      useWebAssemblyPpt: true,
      useWebAssemblyPdf: true,
      serverless: {
        useServerless: true,
        baseUrl: "http://localhost:3000",
        coAuthorUrl: "http://localhost:8000" //Collaborative editing service address
      },
      embedded: {
        saveUrl: "",
        toolbarDocked: 'top'
      },
      events: {
        onDocumentReady: function() {
          console.log('Document is ready');
        },
        onError: function(event) {
          console.error('Editor error:', event);
        },
        onSave: function(data) {
          console.log('Document saved', data);
          if (data && data.data && data.data.length >= 2) {
            downloadFile(data.data[1], data.data[0]);
          }
        }
      }
    }
  };

  new SpireCloudEditor.OpenApi("editor", config);
}

function downloadFile(file, fileName) {
  const a = document.createElement('a');
  const url = URL.createObjectURL(file);
  a.href = url;
  a.download = fileName;
  document.body.appendChild(a);
  a.click();
  document.body.removeChild(a);
  URL.revokeObjectURL(url);
}

initEditor();
</script>
After initialization, the embedded Office editor loads directly inside the target container:
To help you get started quickly, you can download the complete runnable HTML example used in this article:
Download Embedded Editor Example
Note: Start the Spire.OfficeJS service before opening the sample editor. The downloadable demo dynamically detects the current host using window.location.hostname, so it should be opened via an HTTP server. For direct browser file preview, replace it with a fixed host address.
Configuration Breakdown
- user: Required user configuration with customization settings
- fileAttrs: Document source URL and file metadata
- editorAttrs: Editor behavior including mode, dimensions, and language
The editor renders inside the specified container element with ID "editor", allowing it to function as a UI component rather than taking over the entire page.
Load and Switch Documents Dynamically
In real applications, users need to open different files dynamically. You can achieve this by reinitializing the editor with new configurations:
let editorInstance = null;

function openDocument(sourceUrl, ext) {
  const fileName = sourceUrl.split('/').pop();

  if (editorInstance) {
    editorInstance.destroy();
  }

  const container = document.getElementById("editor");
  container.innerHTML = "";

  const config = {
    user: {
      id: 'user1',
      name: 'Demo User'
    },
    fileAttrs: {
      sourceUrl: sourceUrl,
      fileInfo: {
        ext: ext,
        name: fileName
      }
    },
    editorAttrs: {
      editorType: getEditorType(ext),
      editorMode: "edit",
      editorWidth: "100%",
      editorHeight: "100%",
      platform: "desktop",
      viewLanguage: "en",
      canEdit: true,
      canDownload: true,
      canForcesave: true,
      useWebAssemblyDoc: true,
      useWebAssemblyExcel: true,
      useWebAssemblyPpt: true,
      useWebAssemblyPdf: true,
      serverless: {
        useServerless: true,
        baseUrl: "http://localhost:3000",
        coAuthorUrl:"http://localhost:8000" //Collaborative Editing Service Address
      },
      embedded: {
        saveUrl: "",
        toolbarDocked: 'top'
      },
      events: {
        onSave: function(data) {
          if (data && data.data && data.data.length >= 2) {
            downloadFile(data.data[1], data.data[0]);
          }
        }
      }
    }
  };

  editorInstance = new SpireCloudEditor.OpenApi("editor", config);
}

function getEditorType(ext) {
  const extLower = ext.toLowerCase();
  switch (extLower) {
    case 'docx':
    case 'doc':
    case 'rtf':
    case 'txt':
    case 'odt':
      return 'document';
    case 'xlsx':
    case 'xls':
    case 'csv':
    case 'ods':
      return 'spreadsheet';
    case 'pptx':
    case 'ppt':
    case 'odp':
      return 'presentation';
    default:
      return 'document';
  }
}
How It Works
- Clicking a file in the sidebar triggers
openDocumentwith the file URL and extension - The previous editor instance is destroyed and container is cleared
- The editor reloads with the selected document
- No page refresh is required, maintaining application state
This pattern is essential for building interactive document management systems.
Best Practices for Document Switching
When switching between documents dynamically, proper cleanup prevents UI issues:
Error Handling and Loading States
Always use try-catch for error handling and consider adding loading indicators:
let editorInstance = null;

async function openDocument(sourceUrl, ext) {
  try {
    if (editorInstance) {
      editorInstance.destroy();
    }

    const container = document.getElementById("editor");
    container.innerHTML = "";

    const config = { /* ... configuration ... */ };
    editorInstance = new SpireCloudEditor.OpenApi("editor", config);
  } catch (error) {
    console.error('Failed to load document:', error);
  }
}
Key points:
- Always destroy old instances before creating new ones
- Clear the container element to prevent UI conflicts
- Use try-catch for robust error handling
Customize Editor Behavior
You can fine-tune the editor's behavior using configuration options in editorAttrs.
Read-Only Mode
Set the editor to view-only mode:
editorAttrs: {
  editorMode: "view",
  isReadOnly: true
}
Control User Permissions
Restrict specific actions:
editorAttrs: {
  canEdit: false,
  canDownload: false,
  canComment: true,
  canPrint: true
}
Change UI Language
Support internationalization by setting the interface language:
editorAttrs: {
  viewLanguage: "zh"
}
Supported languages include English ("en") and Chinese ("zh").
Configure Save Functionality
In serverless mode, saving is handled through the onSave event callback:
editorAttrs: {
  embedded: {
    saveUrl: "",  // Keep empty in serverless mode
    toolbarDocked: 'top'
  },
  events: {
    onSave: function(data) {
      console.log('Document saved', data);
      if (data && data.data && data.data.length >= 2) {
        // data.data[0] = filename, data.data[1] = file blob
        downloadFile(data.data[1], data.data[0]);
      }
    }
  }
}

function downloadFile(file, fileName) {
  const a = document.createElement('a');
  const url = URL.createObjectURL(file);
  a.href = url;
  a.download = fileName;
  document.body.appendChild(a);
  a.click();
  document.body.removeChild(a);
  URL.revokeObjectURL(url);
}
When users click save, the document is automatically downloaded to their local machine.
Dynamic Protocol Configuration
To support both HTTP and HTTPS environments, use dynamic protocol detection:
const currentHost = window.location.hostname;
const currentProtocol = window.location.protocol;

const baseUrl = `${currentProtocol}//${currentHost}:3000`;
const exampleBaseUrl = `${currentProtocol}//${currentHost}:3000`;
const coAuthorUrl = `${currentProtocol}//${currentHost}:8000`;
This prevents mixed content errors when the page is served over HTTPS.
Upload Local Files
Users can upload local documents for editing:
<input type="file" id="fileInput" accept=".docx,.xlsx,.pptx,.doc,.xls,.ppt"
       onchange="handleFileUpload(event)">
async function handleFileUpload(event) {
  const file = event.target.files[0];
  const fileName = file.name;
  const ext = fileName.split('.').pop().toLowerCase();

  const fileData = await new Promise((resolve) => {
    const reader = new FileReader();
    reader.onload = (e) => resolve(e.target.result);
    reader.readAsArrayBuffer(file);
  });

  const config = {
    user: {
      id: 'user1',
      name: 'Demo User'
    },
    fileAttrs: {
      sourceUrl: 'upload://' + fileName,
      fileInfo: { ext, name: fileName }
    },
    editorAttrs: {
      editorType: getEditorType(ext),
      serverless: {
        useServerless: true,
        baseUrl: baseUrl,
        coAuthorUrl: coAuthorUrl, //Collaborative Editing Service Address
        fileData: fileData  // Pass file data directly
      }
    }
  };

  editorInstance = new SpireCloudEditor.OpenApi("editor", config);
}
Integrating the Editor into Existing Business Systems
In most real-world scenarios, the online document editor is not the entire application. Instead, it functions as one module within a larger business system.
Typical integration patterns include:
- CRM systems with contract editing and proposal generation
- ERP systems with invoice review and report modification
- Document management systems (DMS) with embedded preview and editing workflows
- Customer portals with downloadable and editable forms
- Internal collaboration platforms combining document editing with chat, comments, and version control
Because the browser-based office editor is mounted into a standard DOM container, it can coexist seamlessly with:
- Sidebars and navigation menus
- File trees and folder structures
- Tab systems for multi-document editing
- Chat panels and comment threads
- Dashboards and analytics widgets
This modular architecture allows developers to build rich document-centric applications without sacrificing existing UI patterns or user workflows.
Framework Integration (React, Vue, Angular)
Although the example uses plain JavaScript, the same concept applies to modern frameworks. The key principle remains the same: initialize the editor after the component is mounted and render it into a DOM container.
React
useEffect(() => {
  new SpireCloudEditor.OpenApi("editor-container", config);
}, []);
Vue
mounted() {
  new SpireCloudEditor.OpenApi("editor-container", config);
}
Angular
ngAfterViewInit(): void {
  new SpireCloudEditor.OpenApi("editor-container", config);
}
For complete framework-specific setup and deployment instructions, see the dedicated integration guides:
- How to Integrate Spire.OfficeJS in React
- How to Integrate Spire.OfficeJS in Vue
- How to Integrate Spire.OfficeJS in Angular
Common Integration Issues
Here are common problems developers encounter and their solutions:
Editor Does Not Load
- Cause: Backend service is not running or script URL is incorrect
- Solution: Verify the service is running on port 3000 and use the correct script path:
http://localhost:3000/web/editors/spireapi/SpireCloudEditor.js
Script Loading Failed (CORS Error)
- Cause: Opening HTML file directly using
file://protocol - Solution: Start a local HTTP server (
python -m http.server 8080ornpx http-server -p 8080) and access viahttp://localhost:8080/your-file.html
File Fails to Load
- Cause: Document URL is inaccessible or blocked by CORS
- Solution: Ensure
sourceUrlis publicly accessible via HTTP. Replace placeholder URLs likehttps://example.com/with real accessible document URLs
404 Errors for /doc/*/c/info Endpoints
- Cause: Missing
serverlessconfiguration ineditorAttrs - Solution: Add
serverlessanduseWebAssembly*settings to your configuration
Multiple Editors Overlapping
- Cause: Old editor instance not properly destroyed before creating new one
- Solution: Always call
editorInstance.destroy()before creating a new instance
Blank Editor Container
- Cause: Browser cache issues or missing dependencies
- Solution: Clear browser cache, try incognito mode, or check browser console for errors
Service Connection Refused
- Cause: Required ports are blocked or service is not started
- Solution: Make sure port 3000 is open and the Spire.OfficeJS service is running
Editor Overflows Container
- Cause: Incorrect width/height settings
- Solution: Set
editorWidthandeditorHeightto"100%"and ensure the container has defined dimensions
Conclusion
In this article, we demonstrated how to embed a web-based Office document editor into an existing HTML page using Spire.OfficeJS. By treating the editor as a modular component, developers can integrate document editing capabilities directly into their web applications without redirecting users to separate pages.
The approach enables building rich document management interfaces where editors coexist with navigation, file lists, and other UI components. With proper configuration, the embedded editor provides the same powerful features as a full-page solution while maintaining a seamless user experience.
Spire.OfficeJS supports multiple document formats including Word (DOCX), Excel (XLSX), and PowerPoint (PPTX), making it a comprehensive solution for web-based document processing needs.
If you'd like to test Spire.OfficeJS in a real project environment, you can request a free temporary license here: Apply for a Temporary License
FAQ
How do I embed a document editor in a web page?
You can embed a document editor by initializing SpireCloudEditor.OpenApi inside a specific HTML container element with proper configuration for the document source and editor settings.
Does embedding require Microsoft Office installation?
No. Spire.OfficeJS uses WebAssembly for browser-side document processing while relying on the backend service to provide the editor interface and related resources. No Microsoft Office installation is required on client machines.
Can I integrate the editor into React or Vue applications?
Yes. The editor can be integrated into any JavaScript framework by mounting it into a DOM element during the component's lifecycle, such as useEffect in React or mounted in Vue.
What document formats are supported?
Spire.OfficeJS supports Word documents (DOCX, DOC), Excel spreadsheets (XLSX, XLS), and PowerPoint presentations (PPTX, PPT), as well as PDF viewing.
How do I handle document save operations?
In serverless mode, configure the onSave event callback in editorAttrs.events. When users save, the callback receives the file data which can be automatically downloaded or processed further.
How to Convert PowerPoint to Video in C# (MP4 & WMV)

PowerPoint presentations are widely used for training materials, product demos, online courses, and business reporting. However, sharing raw PPT or PPTX files can be problematic—recipients may not have PowerPoint installed, animations may not play correctly, and manual exporting becomes inefficient for bulk processing.
Converting PowerPoint to video formats like MP4 or WMV solves these challenges by creating universally playable content that preserves formatting and animations. With Spire.Presentation from e-iceblue, developers can automate PowerPoint-to-video conversion programmatically without requiring Microsoft PowerPoint installation.
This article demonstrates how to convert PowerPoint presentations to MP4 and WMV video in C# using Spire.Presentation for .NET, including configuration options for frame rate, slide duration, and transition preservation.
1. Why Convert PowerPoint to Video Programmatically?
Developers often need to convert PowerPoint presentations to video as part of larger business workflows. Compared with manually exporting files in Microsoft PowerPoint, programmatic conversion offers more flexibility and scalability.
Common scenarios include:
- Automatically converting uploaded PPT/PPTX files into MP4 videos in web applications
- Batch-processing training presentations for LMS platforms
- Generating product demo videos from presentation templates
- Converting presentations on servers where Microsoft PowerPoint is not installed
- Standardizing presentation delivery across different devices
Programmatic conversion is especially useful when you need repeatable workflows, server-side processing, or integration with existing document automation systems.
2. Set Up the Environment
Before converting PowerPoint presentations to video, you need to prepare two components:
- Spire.Presentation for .NET – used to load and process PPT/PPTX files
- FFmpeg – used to encode slide frames into MP4 or WMV video files
Spire handles presentation rendering, while FFmpeg generates the final video output. Both are required for successful conversion.
Install Spire.Presentation for .NET
Install the library from NuGet:
Install-Package Spire.Presentation
You can also download Spire.Presentation for .NET package and install it manually.
This package allows your C# application to open PowerPoint presentations, access slides, and export them programmatically.
Install FFmpeg
Spire.Presentation relies on FFmpeg to combine rendered slide frames into a playable video file. If FFmpeg is not installed or the path is configured incorrectly, the export process will fail.
- On Windows
Follow these steps to install FFmpeg:
-
Download the FFmpeg essentials build
-
Extract the package to your local machine
-
Locate the bin folder path
Example:
D:\tools\ffmpeg\bin
This path will be used later when configuring SaveToVideoOption.
- On Linux (CentOS)
Install FFmpeg using the following commands:
sudo yum install epel-release
sudo yum localinstall --nogpgcheck https://download1.rpmfusion.org/free/el/rpmfusion-free-release-7.noarch.rpm
sudo yum install ffmpeg ffmpeg-devel
After installation, you can run the following command to locate the FFmpeg path:
which ffmpeg
Note: Older FFmpeg versions may not fully support certain slide transition effects.
3. Convert PowerPoint to MP4 in C#
Once the environment is configured, you can convert PowerPoint presentations to MP4 using just a few lines of code.
The basic workflow includes:
- Load the PowerPoint file
- Configure video export settings
- Export the presentation as MP4
Basic Conversion Example
The following example converts a PPTX file into an MP4 video:
using Spire.Presentation;

namespace PowerPointToVideo
{
    class Program
    {
        static void Main(string[] args)
        {
            string inputFile = "ProductDemo.pptx";
            string outputFile = "ProductDemo.mp4";

            Presentation presentation = new Presentation();
            presentation.LoadFromFile(inputFile);

            presentation.SaveToVideoOption = new SaveToVideoOption(
                @"D:\tools\ffmpeg\bin"
            );

            presentation.SaveToVideoOption.Fps = 30;
            presentation.SaveToVideoOption.DurationForEachSlide = 2;

            presentation.SaveToFile(outputFile, FileFormat.MP4);

            presentation.Dispose();
        }
    }
}
After running the code:
- The PPTX file is loaded into memory
- Each slide is rendered as individual video frames
- FFmpeg combines the frames into a final MP4 file
- Supported animations, transitions, and embedded videos are preserved during export
Below is a sample PowerPoint presentation along with its converted video output.
Input: PowerPoint Presentation
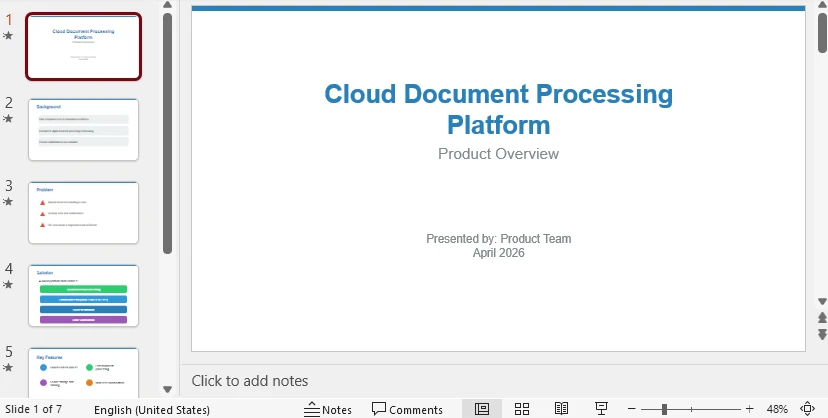
Output: Converted MP4 Video
Click the preview above to watch how PowerPoint slides are converted into an MP4 video while preserving transitions and animations.
How the Core API Works
This example uses several key API methods:
- LoadFromFile() loads the PowerPoint presentation into memory
- SaveToVideoOption configures the FFmpeg path and playback settings
- Fps controls video smoothness
- DurationForEachSlide controls how long each slide appears
- SaveToFile() exports the final video file
- Dispose() releases system resources after conversion
This basic workflow is enough for most standard PowerPoint-to-video conversion tasks. If you need additional formats or customization options, continue to the advanced scenarios below.
If you need a static sharing format, you can also convert PowerPoint presentations to images (JPG/PNG) in C# for easier distribution and web display.
4. More PowerPoint to Video Options in C#
The basic example works for most scenarios, but some applications may require different output formats, custom playback settings, or bulk conversion workflows.
Convert PowerPoint to WMV
While MP4 is the most widely used video format, some legacy enterprise systems and Windows-based environments may still require WMV output.
To export a PowerPoint file as WMV, simply change the output file extension:
using Spire.Presentation;

Presentation presentation = new Presentation();
presentation.LoadFromFile("TrainingSlides.pptx");

presentation.SaveToVideoOption = new SaveToVideoOption(
    @"D:\tools\ffmpeg\bin"
);

presentation.SaveToFile("TrainingVideo.wmv", FileFormat.WMV);

presentation.Dispose();
Customize Video Settings
If your presentation contains complex animations or requires specific playback timing, you can adjust frame rate and slide duration settings.
using Spire.Presentation;

Presentation presentation = new Presentation();
presentation.LoadFromFile("MarketingPitch.pptx");

presentation.SaveToVideoOption = new SaveToVideoOption(
    @"D:\tools\ffmpeg\bin"
);

// Higher FPS for smoother playback
presentation.SaveToVideoOption.Fps = 60;

// Longer display time per slide
presentation.SaveToVideoOption.DurationForEachSlide = 10;

presentation.SaveToFile("MarketingPitch_HD.mp4", FileFormat.MP4);

presentation.Dispose();
Video Settings Reference
| Setting | Default | Maximum | Purpose |
|---|---|---|---|
| Fps | 30 | 60 | Controls playback smoothness |
| DurationForEachSlide | 5 seconds | 5 minutes | Controls slide display duration |
Higher values may increase processing time and temporary storage usage.
Batch Convert Multiple PPTX Files
Batch conversion is useful for LMS platforms, enterprise reporting systems, and document automation workflows that need to process multiple presentations automatically.
using Spire.Presentation;
using System.IO;

string ffmpegPath = @"D:\tools\ffmpeg\bin";
string inputFolder = @"C:\Presentations\";
string outputFolder = @"C:\Videos\";

string[] pptxFiles = Directory.GetFiles(inputFolder, "*.pptx");

foreach (string inputFile in pptxFiles)
{
    string fileName = Path.GetFileNameWithoutExtension(inputFile);
    string outputFile = Path.Combine(outputFolder, fileName + ".mp4");

    Presentation presentation = new Presentation();
    presentation.LoadFromFile(inputFile);

    presentation.SaveToVideoOption = new SaveToVideoOption(ffmpegPath);
    presentation.SaveToVideoOption.Fps = 30;
    presentation.SaveToVideoOption.DurationForEachSlide = 3;

    presentation.SaveToFile(outputFile, FileFormat.MP4);
    presentation.Dispose();
}
This approach helps automate large-scale PowerPoint-to-video conversion workflows without requiring manual exports in Microsoft PowerPoint.
You can edit the PowerPoint presentation in C# before conversion to ensure the resulting video has better layout and animation effects.
5. Supported Transitions and Animations
During PowerPoint-to-video conversion, Spire.Presentation preserves key visual effects to ensure the output video closely matches the original presentation experience.
Slide Transitions
PowerPoint slide transitions are rendered during video generation to maintain smooth visual flow between slides.
The following transitions are supported:
- Fade
- Push
- Wipe (up, down, left, right)
- Reveal
- Cover
- Split
- Dissolve
- Clockwise Clock
These transitions are applied during frame rendering to simulate natural slide progression in the final video.
Animation Effects
Animations are processed and rendered during video generation to simulate PowerPoint playback behavior.
Entrance Animations:
- Fly In
- Float In
- Appear
- Fade
- Split
- Wipe
Exit Animations:
- Fly Out
- Float Out
- Disappear
- Fade
- Split
- Wipe
Animation sequences are processed as a single playback unit to ensure consistent rendering in the final video.
Additional Features
- Embedded Videos
Embedded media inside PowerPoint slides is included in the exported video, making it suitable for presentations with multimedia content.
- Automatic Duration Handling
Slide timing and animation durations are automatically interpreted during conversion to ensure accurate playback in the final video output.
- Cross-Platform Support
The conversion process can run on both Windows and Linux environments, making it suitable for server-side automation and enterprise workflows.
For more information on supported features, refer to the Spire.Presentation for .NET API documentation.
6. Common Pitfalls
When converting PowerPoint presentations to video, there are a few common issues that may affect output quality or runtime execution. Being aware of these helps ensure a smoother conversion process in production environments.
FFmpeg Path Not Found
The video export process depends on FFmpeg for encoding the final MP4 or WMV file.
Ensure that the FFmpeg path is correctly configured and points to the bin directory containing the FFmpeg executable.
On Windows, this typically looks like:
D:\tools\ffmpeg\bin
If the FFmpeg path is incorrect or not accessible, the video export process will fail at runtime.
Insufficient Disk Space
PowerPoint-to-video conversion involves rendering slides into intermediate frames before encoding them into a final video file.
As a result, disk usage may increase significantly depending on:
- Number of slides
- Slide duration
- Frame rate (FPS)
- Presentation resolution and content complexity
For high-quality or long-duration presentations, temporary disk usage can become substantial. It is recommended to ensure sufficient free disk space before processing large batch conversions.
Unsupported or Inconsistent Transitions
Most common PowerPoint transitions are supported during conversion. However, some complex or advanced transition effects may not be rendered exactly the same as in Microsoft PowerPoint.
In such cases, the final video will still preserve slide flow, but the visual effect may appear simplified compared to the original presentation.
It is recommended to test presentations with advanced transitions before using them in production workflows.
Font Rendering Differences
PowerPoint presentations rely on system-installed fonts. If a required font is missing on the environment where conversion is executed, the layout or text appearance in the final video may change.
To ensure consistent rendering:
- Install required fonts on the system
- Use widely available standard fonts when possible
- Verify output on target deployment environments
This is especially important for multilingual presentations or server-side conversion scenarios.
Conclusion
In this article, we demonstrated how to convert PowerPoint presentations to MP4 and WMV video in C# using Spire.Presentation. By leveraging the Spire API, developers can automate video generation with customizable frame rates, slide durations, and transition preservation.
Beyond video conversion, Spire.Presentation can also be used for tasks such as slide editing, media extraction, and presentation generation, making it useful for broader document automation workflows.
If you would like to evaluate the full functionality without limitations, you can apply for a temporary license.
FAQ
Can I convert PowerPoint to MP4 without Microsoft PowerPoint?
Yes. Spire.Presentation performs conversion independently and does not require Microsoft PowerPoint installation.
Are animations preserved in the video?
Yes, many common slide transitions and entrance/exit animations are preserved during conversion.
What video formats are supported?
Currently, MP4 and WMV formats are supported for video export.
Is Spire.Presentation suitable for server-side applications?
Yes. Spire.Presentation supports server environments and is widely used in automated document processing workflows.
How much disk space does video conversion require?
Video generation creates temporary image frames. A presentation with 5 slides at 60 FPS and 5-minute duration may require approximately 25GB of temporary storage.
Convert Excel to PNG: 4 Easy Methods (Free & Batch Solutions)
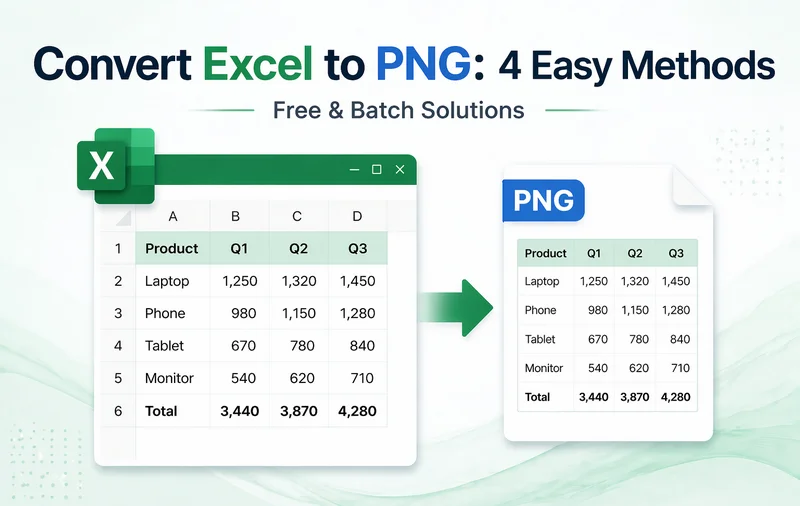
Excel files (.xlsx or .xls) are widely used for organizing and analyzing structured data, but they aren't always the best format for sharing. Formatting can shift across devices and the original workbook can be easily modified by others. Converting Excel to PNG turns your spreadsheet into a static image, making it easier to share, publish, or embed across different platforms without worrying about layout changes.
In this guide, we'll walk you through 4 practical methods to convert Excel to PNG without losing quality - from quick manual options to automated batch conversion using Python-so you can choose the approach that fits your needs.
Excel to PNG Methods Overview
- Method 1 - Copy Excel as Picture (Built-in Way)
- Method 2 - Screenshot Excel to PNG (Using Snipping Tool)
- Method 3 - Convert Excel to PNG Online (No Installation)
- Method 4 - Batch Convert Excel to PNG via Python (Automation)
Why Convert Excel to PNG?
While PDFs are common, PNG images offer unique advantages for digital content and reporting:
- Pixel-Perfect Consistency: Preserves layouts, cell styling, and fonts exactly as they appear in Excel-no broken formulas or shifted columns.
- Universal Accessibility: PNGs can be viewed on any smartphone, tablet, or OS without requiring Microsoft Excel or a specialized viewer.
- Seamless Integration: Ideal for embedding dashboards and charts directly into websites, documentation, or PowerPoint presentations.
- Enhanced Security (Read-Only): Effectively "locks" your data, preventing recipients from altering raw numbers or viewing sensitive hidden formulas.
- High-Quality Transparency: Unlike JPEGs, PNGs support transparency and offer better clarity for UI elements and data visualizations.
Method 1 - Copy Excel as Picture (Built-in Way)
If you want a fast Excel to PNG conversion without installing third-party software, Excel's built-in Copy as Picture feature is an excellent option. It preserves your exact cell formatting and table layout, making it ideal for exporting a selected range for reports and presentations.
Step-by-Step Guide:
-
Select the Excel data
Open your Excel workbook and highlight the cells you want to convert. -
Copy as Picture
On the Home tab, click the arrow next to Copy and choose Copy as Picture.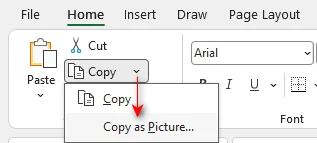
-
Choose image quality
Select As shown on screen and Picture for the best visual quality, then click OK.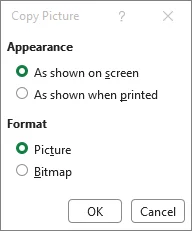
-
Paste the image
Select a blank cell and press Ctrl+V (Windows) or Cmd+V (Mac). -
Save as PNG
Right-click the pasted image → select Save as Picture → choose Portable Network Graphics (*.png) → pick a folder → hit Save.
Pro Tips:
- This method exports only the highlighted cells, not the entire worksheet.
- The exported image typically has a white background.
- To further edit the image, paste it into an image editor such as Microsoft Paint (Windows) or Preview (Mac) instead.
When to Use This Method:
Best for small datasets and one-time conversions where layout fidelity matters.
If you need to save a chart specifically, see our guide on converting Excel charts to images.
Method 2 - Screenshot Excel to PNG (Using Snipping Tool)
Using a snipping tool (like Windows Snipping Tool or macOS Screenshot) is the most flexible way to convert Excel data into a PNG. Unlike Copy as Picture, these tools capture exactly what you see on your screen-including drop-down menus, comments, or even multiple overlapping windows-making it the best choice for creating software tutorials.
Steps:
-
Prepare the View
Adjust your Excel zoom level (e.g., to 150% or higher) for maximum clarity and hide any unwanted elements (like the Ribbon or formula bar). -
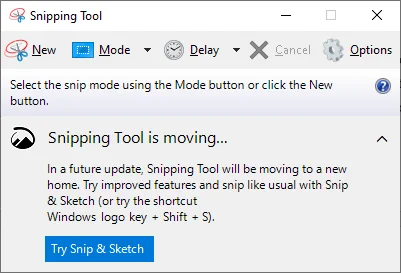
Open the Snipping Tool
Press Windows + Shift + S (Windows) or Cmd + Shift + 4 (Mac). -
Select the Excel Area
Click and drag your cursor to draw a box around the specific cell range. -
Annotate (Optional)
Click the preview window that appears to highlight key data or draw arrows on the image. -
Save as PNG
Click the Save icon to save the capture directly as a PNG file.
Pro Tips:
- The Windows + Shift + S shortcut works on Windows 10 and 11. For older Windows versions, search for Snipping Tool in the Start menu manually.
- Most tools offer a Free-form Snip mode, allowing you to capture non-rectangular areas of your spreadsheet if needed.
When to Use This Method:
Best for documentation, step-by-step guides, or when you need to quickly annotate data before sharing.
Method 3 - Convert Excel to PNG Online (No Installation)
For users without Microsoft Excel or those working on mobile devices, a web-based Excel to PNG converter provides a convenient way to transform spreadsheets into high-quality images. These tools run entirely in the browser and often support transparent backgrounds, which is ideal for web design or watermarking.
Top-Rated Online Converters:
- CloudConvert: Best for High-Resolution. Provides granular control over pixel density (DPI) and alpha channels (transparent background) to ensure crisp, professional PNG output.
- Zamzar: Best for Simplicity. A trusted industry veteran since 2006, offering a clean, three-step conversion process for XLS or XLSX to PNG.
- Cloudxdocs: Best for Complex Layouts. Built on professional-grade APIs, it excels at preserving merged cells and original styling.
How to Convert Excel to PNG Online:
-
Select a Trusted Tool
Navigate to a reputable site like CloudConvert.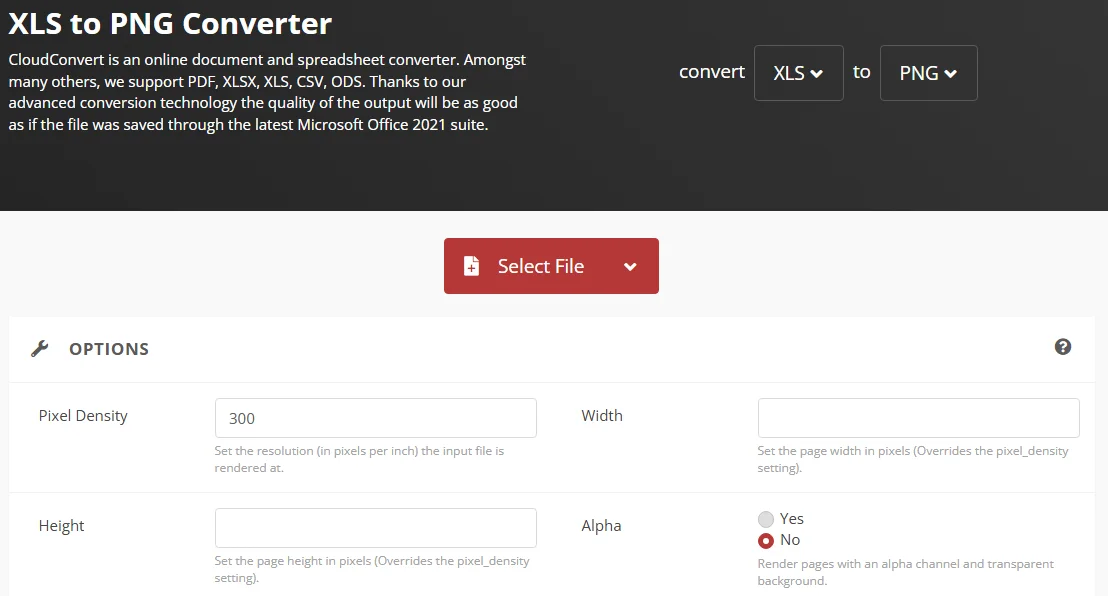
-
Upload Your Document
Click Select File to browse your computer or drag and drop your workbook directly into the browser. -
Configure Image Settings
Choose PNG as the output. If available, set the resolution to 300 DPI for professional printing or high-definition screens. -
Convert & Download
Click Convert. Once complete, download your images (often provided as a ZIP file if your Excel has multiple sheets).
Data Security & Privacy Note:
To protect your privacy, only upload non-sensitive information to public converters. Always prioritize tools that use SSL encryption and offer automatic file deletion within 24 hours. For confidential financial data, we recommend using the Excel Copy as Picture feature or a local snipping tool instead.
When to Use This Method:
- You need Excel to PNG conversion on mobile.
- You want transparent PNG output.
- You're converting whole worksheets or multiple sheets to images at once.
Method 4 - Batch Convert Excel to PNG via Python (Automation)
For developers, data analysts, and teams managing high-volume Excel files, automating Excel to PNG conversion with Python is the most scalable solution. This approach allows you to batch process hundreds of worksheets or workbooks and integrate image exports into reporting pipelines-without needing Microsoft Excel installed.
Key Benefits:
- No Office Dependency: Works on servers and Linux.
- Massive Scale: Convert 100+ files in seconds.
- High Fidelity: Preserves original cell formatting, fonts, and colors.
Prerequisites
Before you start, make sure you have:
- Python 3.7+
- Spire.XLS for Python - an independent library that creates, edits and converts Excel files without requiring Microsoft Office.
Installation:
pip install spire.xls
Python Example - Batch Convert Excel to PNG Images
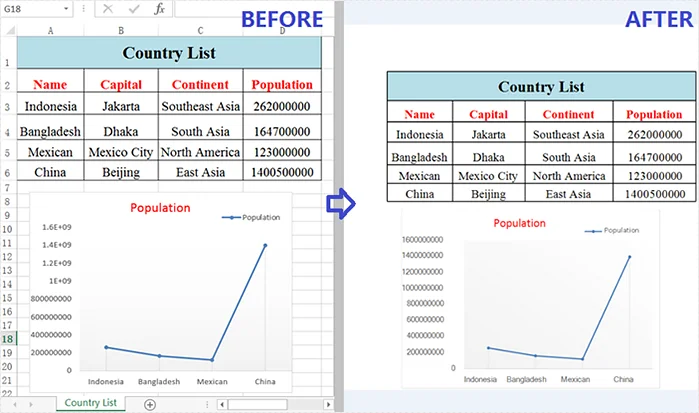
This script automatically saves all worksheets in a workbook as high-resolution PNG images:
from spire.xls import *

# Load the Excel file
workbook = Workbook()
workbook.LoadFromFile("input.xlsx")

# Loop through all worksheets
for i in range(workbook.Worksheets.Count):
    sheet = workbook.Worksheets[i]

    # Save each sheet as an image
    image = sheet.ToImage(sheet.FirstRow, sheet.FirstColumn, sheet.LastRow, sheet.LastColumn)
    image.Save(f"sheet_{i+1}.png")

# Dispose workbook
workbook.Dispose()
Here’s a preview of one of the exported PNG files:
Advanced Customization Options
-
Export a specific range
Instead of the whole sheet, you can specify exactly which rows and columns to capture:sheet.ToImage(5, 1, 10, 4) # Parameters: StartRow, StartColumn, EndRow, EndColumn -
Batch Convert Multiple Files
Use the os library to loop through an entire folder and save every Excel workbook as a PNG automatically:import os # Define the folder path folder_path = r"C:\Files" files = [f for f in os.listdir(folder_path) if f.endswith(".xlsx")] for file in files: wb = Workbook() wb.LoadFromFile(os.path.join(folder_path, file)) # Converts the first worksheet of each file to PNG sheet = wb.Worksheets[0] output_path = os.path.join(folder_path, file.replace(".xlsx", ".png")) sheet.ToImage(sheet.FirstRow, sheet.FirstColumn, sheet.LastRow, sheet.LastColumn).Save(output_path) wb.Dispose()
When to Use This Method:
- You're a developer building an automated workflow.
- You need to convert many Excel files or entire workbooks.
- Manual conversion isn't practical (e.g., scheduled reporting, pipelines, internal tools).
Quick Comparison: Which Excel to PNG Method Should You Choose
To help you decide, here is a quick comparison of all the Excel to PNG methods discussed above:
| Method | Best For | Ease of Use | Output Quality | Software Needed |
|---|---|---|---|---|
| Copy as Picture | Single tables / Small ranges | Very Easy | High | Microsoft Excel |
| Snipping Tools | Tutorials / Quick annotations | Fastest | Medium | None (Built-in) |
| Online Tools | Entire files / Mobile users | Easy | High | Web Browser |
| Python Script | Batch processing / Automation | Advanced | Professional | Python Environment |
Final Verdict:
- For a one-time report: Use Copy as Picture for the cleanest, native look.
- For sharing a quick guide: Use a Snipping Tool to add visual arrows and notes easily.
- For users on the go: Online Converters are the most convenient, mobile-friendly choice.
- For enterprise-level automation: Python is the most scalable solution for processing high-volume files.
Pro Tips for Better PNG Output
- Maximize Clarity: Increase your Excel zoom to 150%-200% before capturing or converting. This prevents blurry text in the final PNG.
- Optimize Visuals: Hide gridlines (View > Uncheck Gridlines) and remove empty rows or columns. A tidy spreadsheet ensures a professional, polished look.
- Check Font Compatibility: When using Python or online converters, stick to standard fonts like Arial or Calibri to ensure the exported image matches what you see on-screen.
- Batch Validation (Python Users): Test your script with a single file first to verify that formatting, fonts, and layout export correctly before running a large batch.
Troubleshooting Common Excel to PNG Issues
- Image is cut off: Check your Print Area settings. If a print area is defined, some converters may only capture that range, ignoring the rest of the sheet.
- Copy function is greyed out: Ensure you are not in Cell Edit Mode (blinking cursor inside a cell). Press Esc to exit editing before copying or exporting.
- Blurry or pixelated images: Avoid stretching or resizing the PNG after saving. For larger images, re-export at a higher zoom level instead of scaling.
- Sheet too large for one PNG: Very large sheets can become unreadable. Split datasets into logical sections or consider an Excel-to-PDF-to-PNG workflow for ultra-wide spreadsheets.
Frequently Asked Questions
Q1: Does converting Excel to PNG affect data quality?
A1: The data itself isn't changed, but it becomes a static image, meaning it can't be edited or recalculated.
Q2: Can I convert multiple Excel sheets to PNG in batch?
A2: Yes, you can use Python or a professional online converter to batch process Excel files or sheets efficiently.
Q3: How do I get a transparent background PNG from Excel?
A3: Excel usually outputs a white background image. To create a transparent PNG, you can:
- Use an online converter that supports alpha channels.
- Paste your Copy as Picture result into tools like remove.bg, then save as PNG with transparency.
Q4: Should I export Excel as PNG or PDF?
A4: It depends on your needs:
- PNG is perfect for embedding into slides, emails, websites, or reports as a visual.
- PDF is better for multi-page documents, official archiving, or high-quality printing, especially when text needs to remain searchable.
See Also
How to Convert PDF Data to a SQL Database Using Python
Converting PDF to database is a common requirement in data-driven applications. Many business documents—such as invoices, reports, and financial records—store structured information in PDF format, but this data is not directly usable for querying or analysis.
To make this data accessible, developers often need to convert PDF to SQL by extracting structured content and inserting it into relational databases like SQL Server, MySQL, or PostgreSQL. Manually handling this process is inefficient and error-prone, especially at scale.
In this guide, we focus on extracting table data from PDFs and building a complete pipeline to transform and insert it into an SQL database in Python with Spire.PDF for Python. This approach reflects the most practical and scalable solution for real-world PDF to database workflows.
Quick Navigation
- Understanding the Workflow
- Prerequisites
- Step 1: Extract Table Data from PDF
- Step 2: Transform and Insert Data into Database
- Complete Pipeline: From PDF Extraction to SQL Storage
- Adapting to Other SQL Databases
- Handling Other Types of PDF Data
- Common Pitfalls When Converting PDF Data to a Database
- Conclusion
- FAQ
Understanding the Workflow
Before diving into the implementation, it's important to understand the overall process of converting PDF data into a database.
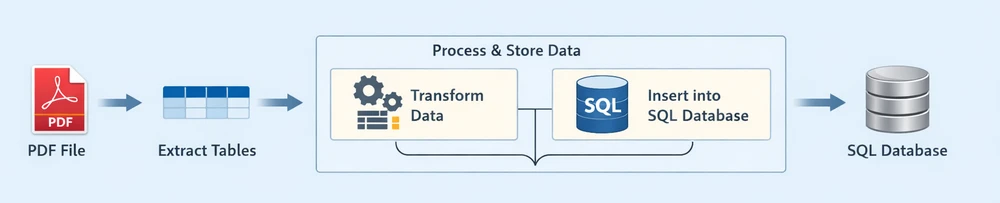
Instead of treating each operation as completely separate, this workflow can be viewed as two main stages:
Each stage plays a distinct role in the pipeline:
-
Extract Tables: Retrieve structured table data from the PDF document
-
Process & Store Data: Clean, structure, and insert the extracted data into a relational database
- Transform Data: Convert raw rows into structured, database-ready records
- Insert into SQL Database: Persist the processed data into an SQL database
This end-to-end pipeline reflects how most real-world systems handle PDF to database workflows—by first extracting usable data, then processing and storing it in a database for querying and analysis.
Prerequisites
Before getting started, make sure you have the following:
-
Python 3.x installed
-
Spire.PDF for Python installed:
pip install Spire.PDFYou can also download Spire.PDF for Python and add it to your project manually.
-
A relational database system (e.g., SQLite, SQL Server, MySQL, or PostgreSQL)
This guide demonstrates the workflow using SQLite for simplicity, while also showing how the same approach can be applied to other SQL databases.
Step 1: Extract Table Data from PDF
In most business documents, such as invoices or reports, data is organized in tables. These tables already follow a row-and-column structure, making them ideal for direct insertion into an SQL database.
Table data in PDFs is typically already structured in rows and columns, making it the most suitable format for database storage.
Extract Tables Using Python
Below is an example of how to extract table data from a PDF file using Spire.PDF:
from spire.pdf import *
from spire.pdf.common import *
# Load PDF document
pdf = PdfDocument()
pdf.LoadFromFile("Quarterly Sales.pdf")
# Method for ligature normalization
def normalize_text(text: str) -> str:
if not text:
return text
ligature_map = {
'\ue000': 'ff', '\ue001': 'ft', '\ue002': 'ffi', '\ue003': 'ffl', '\ue004': 'ti', '\ue005': 'fi',
}
for k, v in ligature_map.items():
text = text.replace(k, v)
return text.strip()
table_data = []
# Iterate through pages
for i in range(pdf.Pages.Count):
# Extract tables from pages
extractor = PdfTableExtractor(pdf)
tables = extractor.ExtractTable(i)
if tables:
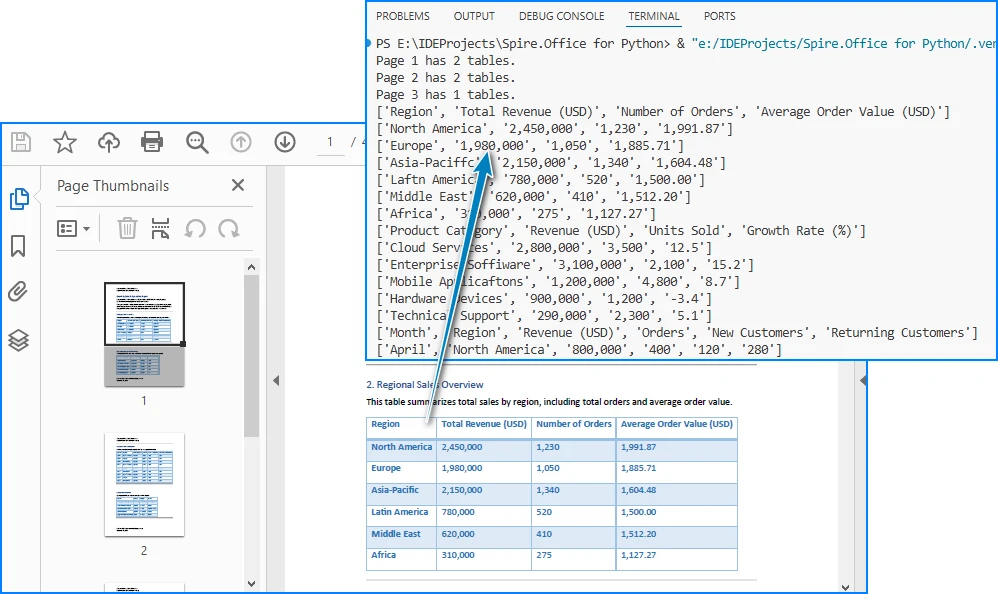
print(f"Page {i} has {len(tables)} tables.")
for table in tables:
rows = []
for row in range(table.GetRowCount()):
row_data = []
for col in range(table.GetColumnCount()):
text = table.GetText(row, col)
text = normalize_text(text)
row_data.append(text.strip() if text else "")
rows.append(row_data)
table_data.extend(rows)
pdf.Close()
# Print extracted data
for row in table_data:
print(row)
Below is a preview of the extracting result:
Code Explanation
- LoadFromFile: Loads the PDF document
- PdfTableExtractor: Identifies tables within each page
- GetText(row, col): Retrieves cell content
- table_data: Stores extracted rows as a list of lists
At this stage, the data is extracted but still unstructured in terms of database usage. Once the table data is extracted, we need to convert it into a structured format for SQL insertion.
Alternatively, you can export the extracted data to a CSV file for validation or batch import. See: Convert PDF Tables to CSV in Python
Step 2: Transform and Insert Data into Database
Raw table data extracted from PDFs often requires cleaning and structuring before it can be inserted into an SQL database.
For simplicity, the following examples demonstrate how to process a single extracted table. In real-world scenarios, PDFs may contain multiple tables, which can be handled using the same logic in a loop.
Transform Data (Single Table Example)
structured_data = []

# Assume first row is header
headers = table_data[0]

for row in table_data[1:]:
    if not any(row):
        continue

    record = {}
    for i in range(len(headers)):
        value = row[i] if i < len(row) else ""
        record[headers[i]] = value

    structured_data.append(record)

# Preview structured data
for item in structured_data:
    print(item)
What This Step Does
- Converts rows into dictionary-based records
- Maps column headers to values
- Filters out empty rows
- Prepares structured data for database insertion
You can also:
- Normalize column names for SQL compatibility
- Convert numeric fields
- Standardize date formats
Transforming raw PDF data into a structured format ensures it can be reliably inserted into a relational database. After transformation, the data is immediately ready for database insertion, which completes the pipeline.
Insert Data into SQLite (Single Table Example)
Using the structured data from a single table, we can dynamically create a database schema and insert records without hardcoding column names.
import sqlite3

# Connect to SQLite database
conn = sqlite3.connect("sales_data.db")
cursor = conn.cursor()

# Create table dynamically based on headers
columns_def = ", ".join([f'"{h}" TEXT' for h in headers])

cursor.execute(f"""
CREATE TABLE IF NOT EXISTS invoices (
    id INTEGER PRIMARY KEY AUTOINCREMENT,
    {columns_def}
)
""")

# Prepare insert statement
placeholders = ", ".join(["?" for _ in headers])
column_names = ", ".join([f'"{h}"' for h in headers])

# Insert data
for record in structured_data:
    values = [record.get(h, "") for h in headers]
    cursor.execute(f"""
    INSERT INTO invoices ({column_names})
    VALUES ({placeholders})
    """, values)

# Commit and close
conn.commit()
conn.close()
Key Points
- Dynamically creates database tables based on extracted headers
- Uses parameterized queries (
?) to prevent SQL injection - Keeps the schema flexible without hardcoding column names
- Column names can be normalized to ensure SQL compatibility
- Batch inserts can improve performance for large datasets
This section demonstrates the core workflow for converting PDF table data into a relational database using a single table example. In the next section, we extend this approach to handle multiple tables automatically.
Complete Pipeline: From PDF Extraction to SQL Storage
Here's a complete runnable example that demonstrates the entire workflow from PDF to database:
from spire.pdf import *
from spire.pdf.common import *
import sqlite3
import re

# ---------------------------
# Utility Functions
# ---------------------------

def normalize_text(text: str) -> str:
    if not text:
        return ""
    ligature_map = {
        '\ue000': 'ff', '\ue001': 'ft', '\ue002': 'ffi',
        '\ue003': 'ffl', '\ue004': 'ti', '\ue005': 'fi',
    }
    for k, v in ligature_map.items():
        text = text.replace(k, v)
    return text.strip()


def normalize_column_name(name: str, index: int) -> str:
    if not name:
        return f"column_{index}"
    name = name.lower()
    name = re.sub(r'[^a-z0-9]+', '_', name).strip('_')
    return name or f"column_{index}"


def deduplicate_columns(columns):
    seen = set()
    result = []
    for col in columns:
        base = col
        count = 1
        while col in seen:
            col = f"{base}_{count}"
            count += 1
        seen.add(col)
        result.append(col)
    return result


# ---------------------------
# Step 1: Extract Tables (STRUCTURED)
# ---------------------------

pdf = PdfDocument()
pdf.LoadFromFile("Quarterly Sales.pdf")

extractor = PdfTableExtractor(pdf)

all_tables = []

for i in range(pdf.Pages.Count):
    tables = extractor.ExtractTable(i)

    if tables:
        for table in tables:
            table_rows = []

            for row in range(table.GetRowCount()):
                row_data = []
                for col in range(table.GetColumnCount()):
                    text = table.GetText(row, col)
                    row_data.append(normalize_text(text))
                table_rows.append(row_data)

            if table_rows:
                all_tables.append(table_rows)

pdf.Close()

if not all_tables:
    raise ValueError("No tables found in PDF.")

# ---------------------------
# Step 2 & 3: Process + Insert Each Table
# ---------------------------

conn = sqlite3.connect("sales_data.db")
cursor = conn.cursor()

for table_index, table in enumerate(all_tables):

    if len(table) < 2:
        continue  # skip invalid tables

    raw_headers = table[0]

    # Normalize headers
    normalized_headers = [
        normalize_column_name(h, i)
        for i, h in enumerate(raw_headers)
    ]
    normalized_headers = deduplicate_columns(normalized_headers)

    # Generate table name
    table_name = f"table_{table_index+1}"

    # Create table
    columns_def = ", ".join([f'"{col}" TEXT' for col in normalized_headers])

    cursor.execute(f"""
    CREATE TABLE IF NOT EXISTS "{table_name}" (
        id INTEGER PRIMARY KEY AUTOINCREMENT,
        {columns_def}
    )
    """)

    # Prepare insert
    placeholders = ", ".join(["?" for _ in normalized_headers])
    column_names = ", ".join([f'"{col}"' for col in normalized_headers])

    insert_sql = f"""
    INSERT INTO "{table_name}" ({column_names})
    VALUES ({placeholders})
    """

    # Insert data
    batch = []
    for row in table[1:]:
        if not any(row):
            continue

        values = [
            row[i] if i < len(row) else ""
            for i in range(len(normalized_headers))
        ]
        batch.append(values)

    if batch:
        cursor.executemany(insert_sql, batch)

    print(f"Inserted {len(batch)} rows into {table_name}")

conn.commit()
conn.close()

print(f"Processed {len(all_tables)} tables from PDF.")
Below is a preview of the insertion result in the database:
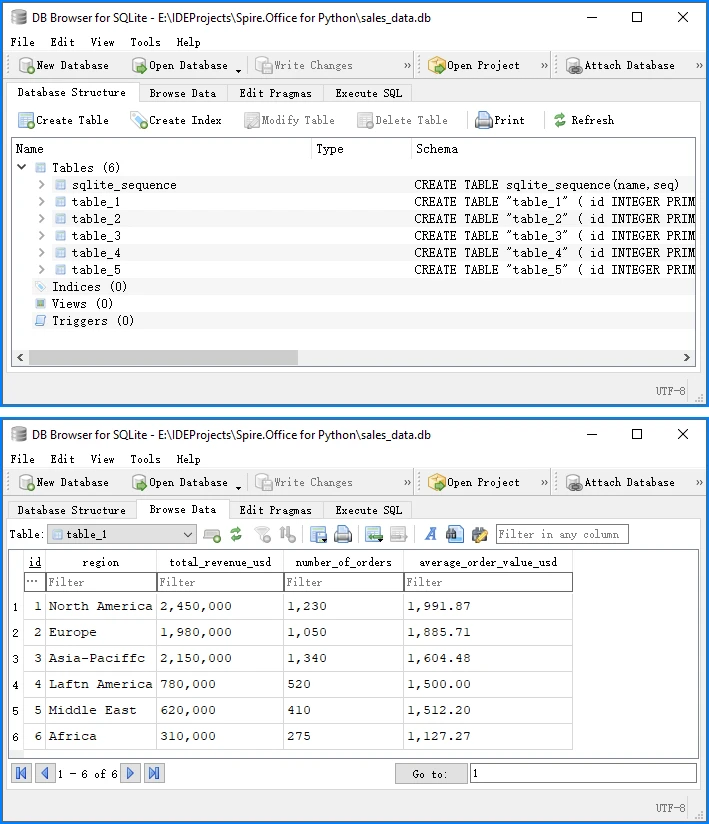
This complete example demonstrates the full PDF to database pipeline:
- Load and extract table data from PDF using Spire.PDF
- Transform raw data into structured records
- Insert into SQLite database with proper schema
SQLite automatically creates a system table called sqlite_sequence when using AUTOINCREMENT to track the current maximum ID. This is expected behavior and does not affect your data. You can run this code directly to convert PDF table data into a database.
Adapting to Other SQL Databases
While this guide uses SQLite for simplicity, the same approach works for other SQL databases. The extraction and transformation steps remain identical—only the database connection and insertion syntax vary slightly.
The following examples assume you are using the normalized column names (headers) generated in the previous step.
SQL Server Example
import pyodbc

# Connect to SQL Server
conn_str = (
    "DRIVER={SQL Server};"
    "SERVER=your_server_name;"
    "DATABASE=your_database_name;"
    "UID=your_username;"
    "PWD=your_password"
)
conn = pyodbc.connect(conn_str)
cursor = conn.cursor()

# Generate dynamic column definitions using normalized headers
columns_def = ", ".join([f"[{h}] NVARCHAR(MAX)" for h in headers])

# Create table dynamically
cursor.execute(f"""
IF NOT EXISTS (SELECT * FROM sys.tables WHERE name = 'invoices')
BEGIN
    CREATE TABLE invoices (
        id INT IDENTITY(1,1) PRIMARY KEY,
        {columns_def}
    )
END
""")

# Prepare insert statement
placeholders = ", ".join(["?" for _ in headers])
column_names = ", ".join([f"[{h}]" for h in headers])

# Insert data
for record in structured_data:
    values = [record.get(h, "") for h in headers]
    cursor.execute(f"""
    INSERT INTO invoices ({column_names})
    VALUES ({placeholders})
    """, values)

# Commit and close
conn.commit()
conn.close()
MySQL Example
import mysql.connector

conn = mysql.connector.connect(
    host="localhost",
    user="your_username",
    password="your_password",
    database="your_database"
)
cursor = conn.cursor()

# Use the same dynamic table creation and insert logic as shown earlier,
# with minor syntax adjustments if needed
PostgreSQL Example
import psycopg2

conn = psycopg2.connect(
    host="localhost",
    database="your_database",
    user="your_username",
    password="your_password"
)
cursor = conn.cursor()

# Use the same dynamic table creation and insert logic as shown earlier,
# with minor syntax adjustments if needed
The core extraction and transformation steps remain the same across different SQL databases, especially when using normalized column names for compatibility.
Handling Other Types of PDF Data
While this guide focuses on table extraction, PDFs often contain other types of data that can also be integrated into a database, depending on your use case.
Text Data (Unstructured → Structured)
In many documents, important information such as invoice numbers, customer names, or dates is embedded in plain text rather than tables.
You can extract raw text using:
from spire.pdf import *

pdf = PdfDocument()
pdf.LoadFromFile("Quarterly Sales.pdf")

for i in range(pdf.Pages.Count):
    page = pdf.Pages.get_Item(i)
    extractor = PdfTextExtractor(page)
    options = PdfTextExtractOptions()
    options.IsExtractAllText = True
    text = extractor.ExtractText(options)
    print(text)
However, raw text cannot be directly inserted into a database. It typically requires parsing into structured fields, for example:
- Using regular expressions to extract key-value pairs
- Identifying patterns such as dates, IDs, or totals
- Converting text into dictionaries or structured records
Once structured, the data can be inserted into a database as part of the same transformation and insertion pipeline described earlier.
For more advanced techniques, you can learn more in the detailed Python PDF text extraction guide.
Images (OCR or File Reference)
Images in PDFs are usually not directly usable as structured data, but they can still be integrated into database workflows in two ways:
Option 1: OCR (Recommended for data extraction) Convert images to text using OCR tools, then process and store the extracted content.
Option 2: File Storage (Recommended for document systems) Store images as:
- File paths in the database
- Binary (BLOB) data if needed
Below is an example of extracting images:
from spire.pdf import *

pdf = PdfDocument()
pdf.LoadFromFile("Quarterly Sales.pdf")

helper = PdfImageHelper()

for i in range(pdf.Pages.Count):
    page = pdf.Pages.get_Item(i)
    images = helper.GetImagesInfo(page)
    for j, img in enumerate(images):
        img.Image.Save(f"image_{i}_{j}.png")
To further process image-based content, you can use OCR to extract text from images with Spire.OCR for Python.
Full PDF Storage (BLOB or File Reference)
In some scenarios, the goal is not to extract structured data, but to store the entire PDF file in a database.
This is commonly used in:
- Document management systems
- Archival systems
- Compliance and auditing workflows
You can store PDFs as:
- BLOB data in the database
- File paths referencing external storage
This approach represents another meaning of "PDF in database", but it is different from structured data extraction.
Key Takeaway
While PDFs can contain multiple types of content, table data remains the most efficient and scalable format for database integration. Other data types typically require additional processing before they can be stored or queried effectively.
Common Pitfalls When Converting PDF Data to a Database
While the process of converting PDF to a database may seem straightforward, several practical challenges can arise.
1. Inconsistent Table Structures
Not all PDFs follow a consistent table format:
- Missing columns
- Merged cells
- Irregular layouts
Solution:
- Validate row lengths
- Normalize structure
- Handle missing values
2. Poor Table Detection
Some PDFs do not define tables properly internally, such as no grid structure or irregular cell sizes.
Solution:
- Test with multiple files
- Use fallback parsing logic
- Preprocess PDFs if needed
3. Data Cleaning Issues
Extracted data may contain:
- Extra spaces
- Line breaks
- Formatting issues
Solution:
- Strip whitespace
- Normalize values
- Validate types
4. Character Encoding Issues (Ligatures & Fonts)
PDF table extraction can introduce unexpected characters due to font encoding and ligatures. For example, common letter combinations such as:
fi,ff,ffi,ffl,ft,ti
may be stored as single glyphs in the PDF. When extracted, they may appear as:
di\ue000erence   → difference
o\ue002ce        → office
\ue005le         → file
These are typically private Unicode characters (e.g., \ue000–\uf8ff) caused by custom font mappings.
Solution:
-
Detect private Unicode characters (
\ue000–\uf8ff) -
Build a mapping table for ligatures, such as:
\ue000 → ff\ue001 → ft\ue002 → ffi\ue003 → ffl\ue004 → ti\ue005 → fi
-
Normalize text before inserting into the database
-
Optionally log unknown characters for further analysis
Handling encoding issues properly ensures data accuracy and prevents subtle corruption in downstream processing.
5. Cross-Page Table Fragmentation
Large tables in PDFs are often split across multiple pages. When extracted, each page may be treated as a separate table, leading to:
- Broken datasets
- Repeated headers
- Incomplete records
Solution:
- Compare column counts between consecutive tables
- Check header consistency or data type patterns in the first row
- Merge tables when structure and schema match
- Skip duplicated header rows when concatenating data
In practice, combining column structure and value pattern detection provides a reliable way to reconstruct full tables across pages.
6. Database Schema Mismatch
Incorrect mapping between extracted data and database columns can cause errors.
Solution:
- Align headers with schema
- Use explicit field mapping
7. Performance Issues with Large Files
Processing large PDFs can be slow.
Solution:
- Use batch processing
- Optimize insert operations
By anticipating these issues, you can build a more reliable PDF to database workflow.
Conclusion
Converting PDF to a database is not a one-step operation, but a structured process involving extracting data and processing it for database storage (including transformation and insertion)
By focusing on table data and using Python, you can efficiently implement a complete PDF to database pipeline, making it easier to automate data integration tasks.
This approach is especially useful for handling invoices, reports, and other structured business documents that need to be stored in SQL Server or other relational databases.
If you want to evaluate the performance of Spire.PDF for Python and remove any limitations, you can apply for a 30-day free trial.
FAQ
What does "PDF to database" mean?
It refers to the process of extracting structured data from PDF files and storing it in a database. This typically involves parsing PDF content, transforming it into structured formats, and inserting it into SQL databases for further querying and analysis.
Can Python convert PDF directly to a database?
No. Python cannot directly convert a PDF into a database in one step. The process usually involves extracting data from the PDF first, transforming it into structured records, and then inserting it into a database using SQL connectors.
How do I convert PDF to SQL using Python?
The typical workflow includes:
- Extracting table or text data from the PDF
- Converting it into structured records (rows and columns)
- Inserting the processed data into an SQL database such as SQLite, MySQL, or SQL Server using Python database libraries
Can I store PDF files directly in a database?
Yes. PDF files can be stored as binary (BLOB) data in a database. However, this approach is mainly used for document storage systems, while structured extraction is preferred for data analysis and querying.
What SQL databases can I use for PDF data integration?
You can use almost any SQL database, including SQLite, SQL Server, MySQL, and PostgreSQL. The overall extraction and transformation process remains the same, while only the database connection and insertion syntax differ slightly.
Convert Databases to PDF in C#: Export & Format SQL Data
Exporting database query results to PDF is a common requirement in applications such as reporting, data archiving, and document generation. In these scenarios, SQL query results need to be transformed into structured, readable documents that can be easily shared or printed.
Because database data is inherently tabular, preserving its structure during the export process is essential for maintaining clarity and usability. Without proper layout control, the resulting document can quickly become difficult to read, especially when dealing with large datasets.
This article demonstrates how to convert databases to PDF in C# using Spire.XLS for .NET, including examples on retrieving query results, organizing them into a structured table, and exporting them as a formatted PDF document.
Table of Contents
- Understanding the Task
- Convert Database to PDF Using C# (Step-by-Step)
- Complete C# Example for Database to PDF Conversion
- Advanced Scenarios
- Common Pitfalls
- Conclusion
- FAQ
1. Understanding the Task
Converting database content to PDF typically involves several key steps:
- Data retrieval: Execute SQL queries and load results into memory
- Data structuring: Organize query results into a consistent tabular format
- PDF export: Generate a document that preserves layout and readability
In practice, this workflow is commonly used for generating reports, creating invoices, or archiving query results, where maintaining a clear and structured presentation of data is essential.
2. Convert Database to PDF Using C# (Step-by-Step)
This section provides a complete workflow for converting database query results into a PDF document, including data retrieval, table structuring, formatting, and export.
2.1 Environment Setup
Before implementing the solution, make sure your development environment is ready:
-
.NET environment
Install Visual Studio or use the .NET CLI with a compatible .NET version (e.g., .NET 6 or later). -
Database access
Prepare a SQL Server database (or any relational database) and ensure you have a valid connection string. For modern .NET applications, use the recommended SQL client library:dotnet add package Microsoft.Data.SqlClientThis package provides the ADO.NET implementation for SQL Server and replaces the legacy
System.Data.SqlClient. -
Spire.XLS for .NET Install Spire.XLS via NuGet to handle table formatting and PDF export:
dotnet add package Spire.XLSYou can also download the Spire.XLS for .NET package and add it to your project manually.
Once configured, you can retrieve data from the database and use Spire.XLS to generate and export PDF documents.
2.2 Read Data from Database
The first step is to execute a SQL query and load the results into a DataTable. This structure preserves the schema and data types of the query result, making it suitable for further transformation.
using System.Data;
using Microsoft.Data.SqlClient;

string connectionString = "Server=localhost\\SQLEXPRESS;Database=SalesDB;User ID=demouser;Password=YourPassword;Encrypt=true;TrustServerCertificate=true;";
string query = @"
    SELECT o.OrderID, c.CustomerName, o.OrderDate, o.TotalAmount
    FROM Orders o
    JOIN Customers c ON o.CustomerID = c.CustomerID
    WHERE YEAR(o.OrderDate) = 2026;
";

DataTable dataTable = new DataTable();

using (SqlConnection conn = new SqlConnection(connectionString))
{
    SqlDataAdapter adapter = new SqlDataAdapter(query, conn);
    adapter.Fill(dataTable);
}
This example uses Microsoft.Data.SqlClient, the modern SQL client library for .NET, which is recommended over the legacy System.Data.SqlClient.
The SqlDataAdapter acts as a bridge between the database and in-memory data. It executes the query and fills the DataTable without requiring explicit connection management for reading operations.
In practical scenarios, this step can be extended to include:
- Parameterized queries to avoid SQL injection
- Stored procedures for complex data retrieval
- Data filtering and aggregation directly in SQL
By preparing clean and structured data at this stage, you reduce the complexity of downstream formatting and improve overall performance.
For a similar scenario involving exporting database query results to Excel instead of PDF, you can also refer to this guide: Export Database to Excel in C#.
2.3 Import Data and Export to PDF with Formatting
After retrieving the data, the next step is to map it into a worksheet, apply formatting, and export it as a PDF document. This approach leverages worksheet-based layout control to ensure the output remains structured and readable.
using Spire.Xls;
using System.Drawing;

// Create workbook and worksheet
Workbook workbook = new Workbook();
Worksheet sheet = workbook.Worksheets[0];

// Import DataTable with headers
sheet.InsertDataTable(dataTable, true, 1, 1);

// Format header row
CellRange headerRange = sheet.Range[1, 1, 1, dataTable.Columns.Count];
headerRange.Style.Font.IsBold = true;
headerRange.Style.Font.Size = 11;
headerRange.Style.Color = Color.LightGray;

// Apply borders to enhance table structure
CellRange dataRange = sheet.AllocatedRange;
dataRange.BorderAround(LineStyleType.Thin);
dataRange.BorderInside(LineStyleType.Thin);

// Align content for consistency
dataRange.Style.HorizontalAlignment = HorizontalAlignType.Center;
dataRange.Style.VerticalAlignment = VerticalAlignType.Center;

// Auto-fit columns for better layout
sheet.AllocatedRange.AutoFitColumns();

// Center the content horizontally in the page
sheet.PageSetup.CenterHorizontally = true;

// Export to PDF
workbook.SaveToFile("SalesReport_2026.pdf", FileFormat.PDF);
This step combines layout control and PDF generation into a single workflow.
Key points to note:
-
Worksheet as layout engine The worksheet acts as a structured canvas where database data is arranged into rows and columns. This ensures the original tabular structure is preserved in the final document.
-
Formatting directly impacts PDF output Adjustments such as column width, font style, and borders are not just visual improvements—they determine how the content is rendered in the PDF. Poor formatting can lead to truncated text or unreadable layouts.
-
Automatic pagination When exporting, the worksheet content is automatically split across pages based on layout and paper size, which is particularly useful for large datasets.
For further layout optimization, you can enhance the table formatting by:
- Enabling text wrapping for long fields
- Applying number/date formats for better readability
If your project requires more flexible PDF structure control, you can also explore converting DataTable to PDF in C# directly using Spire.PDF for .NET, which provides more advanced document-level layout capabilities for complex reporting needs.
3. Complete C# Example for Converting Databases to PDF
Below is the complete implementation that combines database retrieval, data formatting, and PDF export into a single workflow.
using System;
using System.Data;
using Microsoft.Data.SqlClient;
using Spire.Xls;
using System.Drawing;

class Program
{
    static void Main()
    {
        // Step 1: Retrieve data from database
        string connectionString = "Server=localhost\\SQLEXPRESS;Database=SalesDB;User ID=demouser;Password=YourPassword;Encrypt=true;TrustServerCertificate=true;";
        string query = @"
            SELECT o.OrderID, c.CustomerName, o.OrderDate, o.TotalAmount
            FROM Orders o
            JOIN Customers c ON o.CustomerID = c.CustomerID
            WHERE YEAR(o.OrderDate) = 2026;
        ";

        DataTable dataTable = new DataTable();

        using (SqlConnection conn = new SqlConnection(connectionString))
        {
            SqlDataAdapter adapter = new SqlDataAdapter(query, conn);
            adapter.Fill(dataTable);
        }

        // Step 2: Create workbook and import data
        Workbook workbook = new Workbook();
        Worksheet sheet = workbook.Worksheets[0];
        sheet.InsertDataTable(dataTable, true, 1, 1);

        // Step 3: Apply professional formatting
        // Format header row
        CellRange headerRange = sheet.Range[1, 1, 1, dataTable.Columns.Count];
        headerRange.Style.Font.IsBold = true;
        headerRange.Style.Font.Size = 11;
        headerRange.Style.Color = Color.LightGray;

        // Apply borders
        CellRange dataRange = sheet.AllocatedRange;
        dataRange.BorderAround(LineStyleType.Thin);
        dataRange.BorderInside(LineStyleType.Thin);

        // Set alignment
        dataRange.Style.HorizontalAlignment = HorizontalAlignType.Center;
        dataRange.Style.VerticalAlignment = VerticalAlignType.Center;

        // Auto-fit columns
        sheet.AllocatedRange.AutoFitColumns();

        // Center the content horizontally in the pages
        sheet.PageSetup.CenterHorizontally = true;

        // Step 4: Export to PDF
        workbook.SaveToFile("SalesReport_2026.pdf", FileFormat.PDF);

        Console.WriteLine("Database query results successfully exported to PDF.");
    }
}
Below is a preview of the generated PDF:
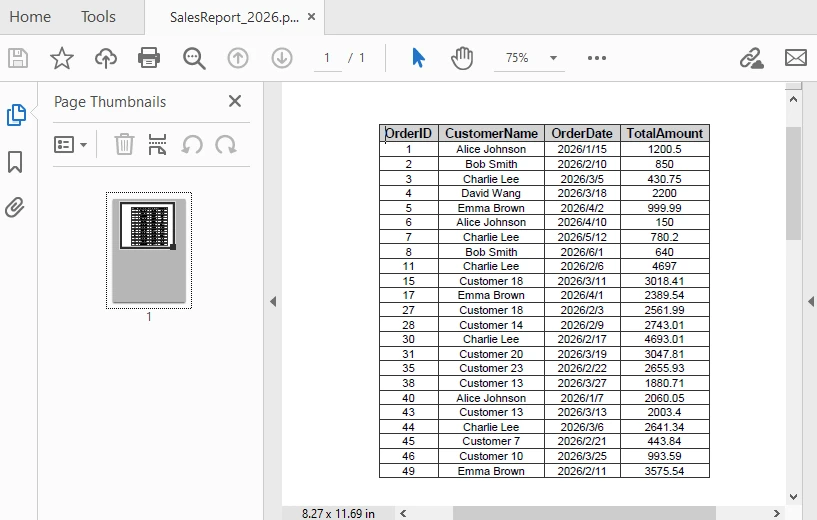
This example demonstrates an end-to-end workflow from SQL query execution to PDF generation.
4. Advanced Scenarios
In real-world applications, exporting database data to PDF often requires more than just basic conversion. You may need to handle batch exports, improve document readability, or adjust layout settings for better presentation. The following examples demonstrate common enhancements for real-world usage.
Export Multiple Query Results
For scenarios such as batch report generation or scheduled tasks, you may need to execute multiple queries and export each result as a separate PDF document:
string[] queries = {
    "SELECT * FROM Orders WHERE Status = 'Pending'",
    "SELECT * FROM Customers WHERE Region = 'North'"
};

for (int i = 0; i < queries.Length; i++)
{
    DataTable dt = ExecuteQuery(queries[i]);
    Workbook wb = new Workbook();
    Worksheet ws = wb.Worksheets[0];
    ws.InsertDataTable(dt, true, 1, 1);
    ws.AllocatedRange.AutoFitColumns();
    wb.SaveToFile($"Report_{i + 1}.pdf", FileFormat.PDF);
}
This approach is useful for automating report generation where multiple datasets need to be exported independently.
Add Title and Metadata
To improve readability and provide context, you can add a title row above the data before exporting to PDF:
// Insert title row
sheet.InsertRow(1);
sheet.Range[1, 1].Text = "Sales Report - 2026";
sheet.Range[1, 1].Style.Font.IsBold = true;
sheet.Range[1, 1].Style.Font.Size = 14;

// Merge title cells
sheet.Range[1, 1, 1, dataTable.Columns.Count].Merge();

// Auto-fit the title row
sheet.AutoFitRow(1);
The following image shows the generated PDF with the title row applied:
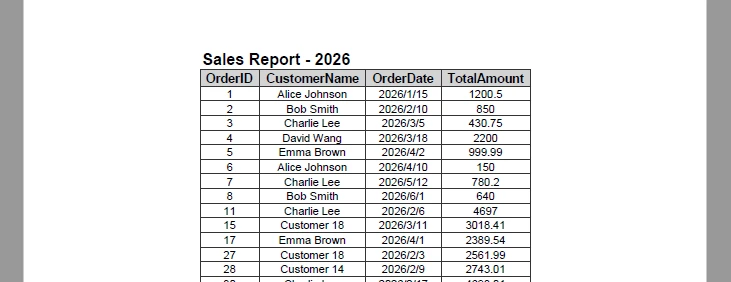
Adding a title helps users quickly understand the context of the document, especially when sharing or printing reports.
Set Page Size, Orientation, and Margins
To ensure the PDF layout fits your data properly, you can configure page size, orientation, and margins before exporting:
// Set the page size and orientation
sheet.PageSetup.PaperSize = PaperSizeType.PaperA4;
sheet.PageSetup.Orientation = PageOrientationType.Portrait;

// Set the page margins
sheet.PageSetup.TopMargin = 0.5f;
sheet.PageSetup.BottomMargin = 0.2f;
sheet.PageSetup.LeftMargin = 0.2f;
sheet.PageSetup.RightMargin = 0.2f;
Adjusting these settings helps prevent content overflow and ensures consistent layout across different reports.
Control Page Layout and Scaling
When working with large tables, you may need to control how content is distributed across pages. By default, content is split automatically, but you can adjust scaling behavior to fit more data within a page.
// Fit content to page width
workbook.ConverterSetting.SheetFitToWidth = true;

// Fit entire sheet into a single page (may reduce readability)
workbook.ConverterSetting.SheetFitToPage = true;
SheetFitToWidthensures the table fits within the page width while allowing vertical paginationSheetFitToPagescales the entire worksheet to fit into a single page
These settings are useful when generating compact reports, but should be used carefully to avoid making text too small.
Add Headers and Footers
Headers and footers are useful for adding contextual information such as report titles, timestamps, or page numbers:
sheet.PageSetup.LeftHeader = "&\"Arial,Bold\"&16 Sales Report - 2026";
sheet.PageSetup.RightHeader = "&\"Arial,Italic\"&10 Generated on &D";
sheet.PageSetup.CenterFooter = "&\"Arial,Regular\"&16 Page &P of &N";
The following image shows the generated PDF with headers and footers applied:
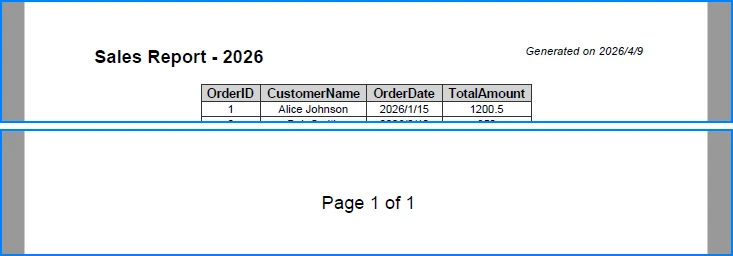
These elements improve document navigation and are especially valuable for multi-page reports.
Encrypt PDFs
To protect sensitive data, you can apply encryption to the exported PDF:
workbook.ConverterSetting.PdfSecurity.Encrypt("openpsd");
Encryption ensures that only authorized users can access the document, which is important for reports containing confidential or business-critical data.
For more related scenarios involving document export and PDF customization, you can also explore Excel to PDF conversion in C#.
5. Common Pitfalls
Database Connection Issues
Ensure the connection string is correct and the database server is accessible. Verify authentication settings (e.g., SQL authentication or integrated security) and confirm that encryption-related parameters match your environment configuration.
Empty Query Results
Check whether the DataTable contains data before proceeding. Empty result sets may lead to blank PDFs or unexpected formatting behavior.
if (dataTable.Rows.Count == 0)
{
    Console.WriteLine("No data found for the specified query.");
    return;
}
In production scenarios, you may also choose to generate a placeholder PDF or log the issue instead of exiting the process.
Column Width Overflow
When working with long text fields, AutoFitColumns() may produce excessively wide columns, which can negatively affect PDF layout.
To improve readability, consider:
- Setting a maximum column width
- Enabling text wrapping for long content
- Manually adjusting key columns based on data type
This is especially important when exporting large datasets with variable-length text.
Missing Font Support
If the exported PDF contains special characters (e.g., non-Latin text) or custom fonts, ensure the required fonts are installed and accessible at runtime.
Missing fonts may cause text rendering issues or fallback substitutions, which can affect document appearance and readability.
Unexpected PDF Layout
If the exported PDF layout appears compressed or improperly scaled, check page setup and scaling options such as SheetFitToWidth or SheetFitToPage.
Improper scaling may cause content to appear too small or distort the original table structure.
Conclusion
This article demonstrated a practical approach to converting database query results to PDF in C#. By combining structured data retrieval with worksheet-based formatting, you can generate clear and professional documents directly from SQL data.
This method is particularly effective for report generation and data presentation scenarios where maintaining table structure and readability is essential.
If you are evaluating Spire.XLS, you can request a free temporary license to remove evaluation limitations during development.
FAQ
Can Spire.XLS export database data to PDF without third-party tools?
Yes. Spire.XLS performs all operations independently and does not require Microsoft Office or any other external tools.
How do I handle large datasets when exporting to PDF?
For large datasets, consider paginating the results or filtering the query to retrieve only necessary data. You can also adjust PDF page settings to optimize output size.
Can I customize the PDF page layout?
Yes. Spire.XLS allows you to configure page settings including orientation, margins, and paper size before exporting to PDF.
Does this method work with databases other than SQL Server?
Yes. The approach works with any database that supports ADO.NET data providers, including MySQL, PostgreSQL, and Oracle. Simply use the appropriate connection class and data adapter.
Should I use Microsoft.Data.SqlClient or System.Data.SqlClient?
For modern .NET applications, it is recommended to use Microsoft.Data.SqlClient. It is actively maintained and provides better support for newer SQL Server features, while System.Data.SqlClient is considered legacy and no longer receives major updates.
Auto Format in Excel: Cells, Tables & Layouts Made Easy
Table of Contents
- What Is Auto Format in Excel and What Can It Do?
- Auto Format Tables in Excel Using Built-in Styles
- How to Auto Format Cells in Excel with Cell Styles
- Auto Format Column Width and Row Height in Excel
- How to Auto Format Excel Using Python Automation Workflows
- Best Practices for Auto Formatting Excel Data
- FAQ
Formatting data manually in Excel can quickly become tedious, especially when you’re working with large datasets or generating recurring reports. Applying styles, adjusting layouts, and keeping everything consistent often takes more time than expected. However, these complex tasks can be simplified with Excel auto formatting features.
Excel includes several built-in ways to automatically aplly formatting and layout adjustments. By using table styles, cell styles, and automatic layout adjustments, you can format data more efficiently and maintain a clean, professional structure.
In this guide, we will explore how to auto format in Excel using these features—and how to scale the process further with automation workflows.
Quick Navigation
- What Is Auto Format in Excel and What Can It Do?
- Auto Format Tables in Excel Using Built-in Styles
- How to Auto Format Cells in Excel with Cell Styles
- Auto Format Column Width and Row Height in Excel
- How to Auto Format Excel Using Python Automation Workflows
- Best Practices for Auto Formatting Excel Data
- FAQ
What Is Auto Format in Excel and What Can It Do?
Auto format in Excel is not a single button in modern versions of Excel, but a combination of features designed to apply formatting automatically. Instead of manually setting fonts, colors, borders, and layout properties, you can use predefined styles and auto-adjustment tools.
These capabilities generally fall into three categories:
Table Formatting
You can quickly convert a data range into a formatted table with a built-in style. This automatically applies:
- Header formatting
- Alternating row colors
- Filtering and sorting controls
This is one of the most efficient ways to structure raw data for analysis or reporting.
Cell Formatting
Excel also provides predefined cell styles that combine multiple formatting properties, such as font, color, and borders. These styles make it easier to format cells consistently without repeating the same steps.
They are especially useful when you need to highlight headings, inputs, or calculated results.
Layout Adjustment
In addition to styling, Excel can automatically adjust layout elements:
- Column width expands to fit content
- Row height adjusts for wrapped or multi-line text
These layout features help ensure that your data remains readable without manual resizing.
Together, these tools cover most everyday formatting needs—but they still rely on manual interaction, which can become inefficient when applied repeatedly.
How to Auto Format Tables in Excel Using Built-in Styles
Using table styles is one of the most straightforward ways to apply formatting automatically.
Steps:
- Select your data range
- Go to the Home tab
- Click Format as Table
- Choose a predefined style
- Confirm the selected range
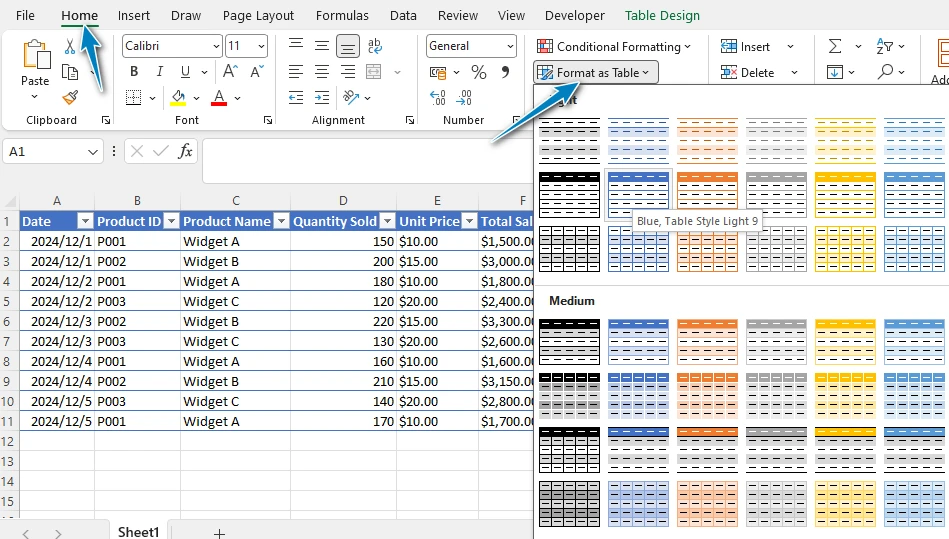
Once applied, Excel immediately transforms the data:
- A consistent visual style is applied
- Headers are clearly distinguished
- Filtering and sorting become available
This approach works particularly well for structured datasets such as reports, lists, or exported data, where clarity and consistency are important.
Compared to manually formatting each column or row, using a table ensures that formatting is applied uniformly across the entire dataset.
How to Auto Format Cells in Excel with Cell Styles
When formatting needs to be applied more selectively, cell styles provide a flexible alternative.
Steps:
- Select the target cells
- Go to the Home tab
- Click Cell Styles
- Choose a predefined style
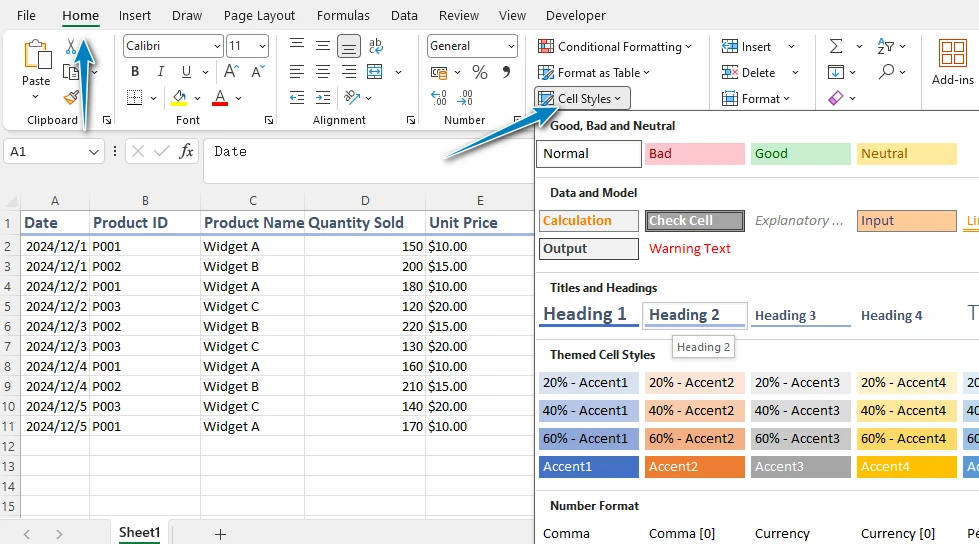
Each style includes a combination of formatting settings, such as font weight, background color, and borders.
This is useful in scenarios where:
- Specific values need to stand out
- Sections of a worksheet need clear visual separation
- Formatting needs to remain consistent across multiple sheets
Unlike table formatting, which is applied to entire datasets, cell styles allow you to focus on individual cells or smaller ranges.
How to Auto Format Column Width and Row Height in Excel
Even well-styled data can be difficult to read if the layout is not properly adjusted. Excel provides automatic options to resize columns and rows based on their content.
Auto Format Column Width
- Double-click the right edge of a column header
- Or go to Home → Format → AutoFit Column Width
Auto Format Row Height
- Double-click the bottom edge of a row
- Or go to Home → Format → AutoFit Row Height
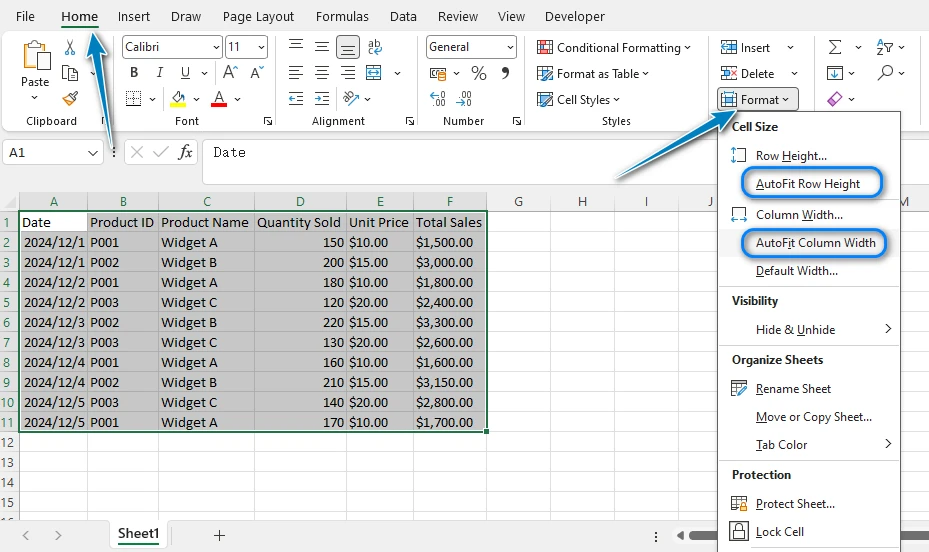
These features are especially helpful when working with:
- Imported data
- Text-heavy cells
- Dynamically generated content
By automatically fitting content, Excel reduces the need for manual adjustments and helps maintain a clean layout.
However, it’s worth noting that very long text can sometimes result in excessively wide columns, so minor adjustments may still be needed.
For more detailed methods, including VBA and programming approaches to automatically adjust column widths, you can check out Advanced Techniques to Auto Format Column Width in Excel.
Limitations of Auto Format in Excel
While Excel’s built-in formatting tools are effective for everyday use, they have limitations when applied at scale.
-
Manual repetition The same formatting steps need to be repeated for each file or dataset
-
Limited scalability Formatting multiple files or large datasets can become time-consuming
-
No automation workflow There is no built-in way to automatically apply formatting when new data is generated
-
Consistency challenges Maintaining the same formatting standards across different files or teams can be difficult
These limitations become more noticeable in workflows such as:
- Generating periodic reports
- Processing large numbers of Excel files
- Standardizing output formats across projects
In these situations, relying solely on manual formatting is often not efficient.
How to Auto Format Excel Using Python (Fully Automated Solution)
When formatting needs to be applied repeatedly or across multiple files, automation becomes a more practical solution.
Instead of manually applying table styles, adjusting column widths, and formatting cells each time, you can define these rules once and reuse them programmatically. This is especially useful for reporting workflows, data pipelines, or batch processing scenarios.
Using Spire.XLS for Python, you can automate many of the same tasks that Excel performs manually.
Setting Up Your Python Environment
Before running the examples, you need to install Spire.XLS for Python. This library allows you to manipulate Excel files without relying on Excel itself.
To install the package via pip, run:
pip install spire.xls
Once installed, you can import it in your scripts and start automating Excel formatting tasks immediately.
Auto Format Excel Cells with Cell Styles in Python
You can use Python to automatically format Excel cells by applying both custom-defined styles and built-in cell styles. This approach gives you flexibility to define your own formatting rules while also leveraging Excel’s predefined styling options.
from spire.xls import *

# Load the workbook
workbook = Workbook()
workbook.LoadFromFile("sample.xlsx")

# Get the first sheet
sheet = workbook.Worksheets.get_Item(0)

# Create and apply a custom style to the header row
style = workbook.Styles.Add("headerStyle")
style.Font.FontName = "Arial"
style.Font.Size = 12
style.Font.Color = Color.get_DarkBlue()
style.Font.IsBold = True
style.Color = Color.get_LightGray()
style.Borders.get_Item(BordersLineType.EdgeBottom).LineStyle = LineStyleType.Thick

# Apply custom style to the first row (header)
sheet.Range.get_Item(1, 1, 1, sheet.LastColumn).Style = style

# Apply built-in cell styles to data rows (alternating style)
start_row = 2
end_row = sheet.LastRow
last_col = sheet.LastColumn

for i in range(start_row, end_row + 1):
    if i % 2 == 0:
        sheet.Range.get_Item(i, 1, i, last_col).BuiltInStyle = BuiltInStyles.Accent1_40
    else:
        sheet.Range.get_Item(i, 1, i, last_col).BuiltInStyle = BuiltInStyles.Accent1_60

# Save the Excel file
workbook.SaveToFile("AutoFormatCells.xlsx", ExcelVersion.Version2016)
workbook.Dispose()
Below is a preview of the formatted Excel file:
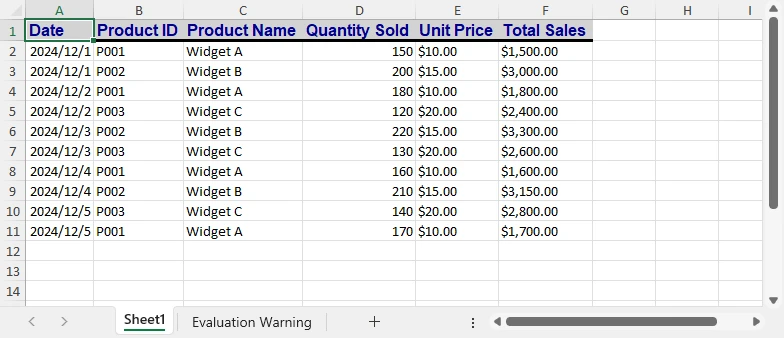
This example demonstrates a common pattern in automated formatting workflows:
- A custom style is applied to highlight the header row
- Built-in styles are used to format data rows with alternating colors
By combining these two approaches, you can create clear, consistent, and visually structured spreadsheets without manual formatting.
If you also need to control how numbers are displayed, such as dates, percentages, or currency formats, you can further customize cell formatting using Python.
Auto Adjust Column Width and Row Height Automatically
# Auto fit column width and row height
sheet.AllocatedRange.AutoFitColumns()
sheet.AllocatedRange.AutoFitRows()
Instead of manually resizing columns and rows, layout adjustments can be handled automatically as part of your workflow.
Apply Table Styles in Excel Using Python
You can automatically format structured data in Excel by creating a table and applying a built-in table style. This approach allows you to convert raw data into a well-formatted table with consistent styling, similar to using the “Format as Table” feature in Excel.
from spire.xls import *

# Load the workbook
workbook = Workbook()
workbook.LoadFromFile("sample.xlsx")

# Get the first sheet
sheet = workbook.Worksheets.get_Item(0)

# Define the data range (used to create the table)
table_range = sheet.AllocatedRange

# Create a table based on the data range
table = sheet.ListObjects.Create("Data", table_range)

# Apply a built-in table style
table.BuiltInTableStyle = TableBuiltInStyles.TableStyleLight2

# Save file
workbook.SaveToFile("AutoFormatTable.xlsx", ExcelVersion.Version2016)
workbook.Dispose()
Below is a preview of the formatted Excel table:
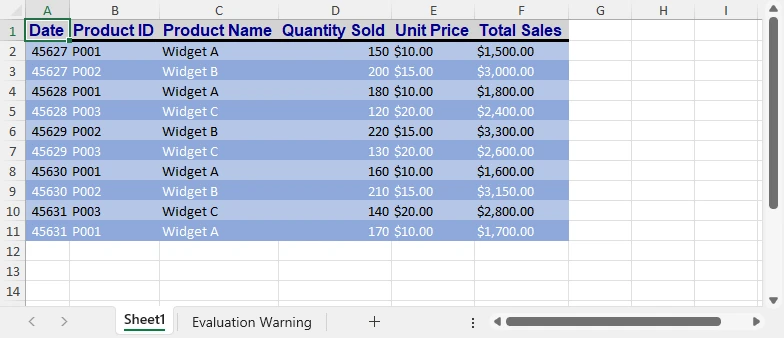
This approach automatically applies:
- A consistent table layout
- Header formatting and row styling
- Built-in filtering and sorting functionality
It is particularly useful when working with structured datasets such as reports, exports, or data pipelines, where consistent formatting needs to be applied across multiple files.
For more advanced scenarios, such as customizing number formats, conditional formatting, or other complex formatting rules, you can explore additional Python techniques in Advanced Excel Formatting with Python.
Best Practices for Auto Formatting Excel Data
To make the most of auto formatting features, it’s important to use them thoughtfully.
-
Keep formatting consistent Use the same styles across similar datasets to maintain a professional appearance
-
Avoid excessive styling Too many colors or formats can reduce readability
-
Choose the right method Use tables for structured data and cell styles for targeted formatting
-
Be mindful of auto-fit behavior Automatically adjusted columns may need fine-tuning for long text
-
Automate repetitive tasks If formatting steps are repeated frequently, consider using a programmatic approach
FAQ About Auto Format in Excel
What is auto format in Excel?
It refers to a set of features that automatically apply formatting styles and layout adjustments to improve the appearance of data.
How to auto format in Excel?
You can use tools like Format as Table, Cell Styles, and AutoFit options to apply formatting quickly without manual adjustments.
How to auto format cells in Excel?
Select the cells and apply a predefined cell style to instantly format them with consistent settings.
How to Auto Format Column Width and Row Height in Excel?
You can automatically adjust both column width and row height using Excel’s AutoFit feature:
- AutoFit Column Width – Select the column(s) and double-click the right boundary of any selected column header, or use the AutoFit Column Width option in the menu.
- AutoFit Row Height – Select the row(s) and double-click the bottom boundary of any selected row header, or use the AutoFit Row Height option in the menu.
This ensures that your cells adjust to fit the content automatically, keeping your spreadsheet neatly organized.
Can Excel formatting be automated?
Yes. By using Python libraries such as Spire.XLS, you can automate formatting tasks and apply them across multiple files efficiently.
Conclusion
Excel offers several practical ways to apply formatting automatically, making it easier to create clean and structured spreadsheets. Whether you’re working with tables, cells, or layout adjustments, these tools can significantly reduce manual effort.
However, as your workload grows, manual formatting becomes harder to maintain. By introducing automation with Python, you can streamline repetitive tasks, ensure consistency, and build more efficient workflows for handling Excel data.
How to Add Macros to Excel in C# – Read & Edit VBA
VBA macros provide a convenient way to automate data processing, formatting, and business logic within Excel, especially for repetitive or rule-based tasks. However, managing macros manually inside Excel becomes inefficient when you need to generate, update, or maintain files at scale.
For .NET developers, a more scalable approach is to programmatically add macros to Excel using C#. By working with Excel VBA in C#, you can write Excel macros, read existing macro code, and modify VBA logic across multiple files without opening Excel and manually editing the VBA code.
In this article, you'll learn how to add, read, and edit Excel VBA macros in C# for automated workflows. Using Spire.XLS for .NET, you can directly manipulate VBA projects embedded in Excel files without requiring Microsoft Excel installation.
Quick Navigation
- How C# Works with Excel Macros
- Environment Setup
- How to Add a Macro to Excel in C#
- Read, Edit, and Remove Macros from Excel in C#
- Common Pitfalls When Working with Excel Macros
- Conclusion
- Frequently Asked Questions
Understanding Excel Macros and How C# Works with Them
An Excel macro is essentially VBA (Visual Basic for Applications) code stored inside a workbook. In macro-enabled files (such as .xlsm), this code is organized within a VBA project, which contains modules and procedures.
In practice, most programmatic macro operations focus on standard modules, which are simple containers for VBA procedures (Sub or Function). When working with C#, you typically do not interact with Excel UI elements like buttons or events. Instead, you directly create modules and inject VBA code.
From a technical perspective, macros are not just executable scripts—they are part of the file structure. This means they can be accessed and modified programmatically, provided that your tool supports VBA project manipulation.
In C#, there are two main approaches to working with Excel macros:
- Using Microsoft Excel Interop to automate Excel
- Using standalone libraries such as Spire.XLS for .NET to manipulate the file directly
The first approach depends on Excel being installed and is typically used to execute macros. The second approach allows you to create, read, edit, and delete VBA code directly inside Excel files, making it more suitable for backend services and automated workflows.
In the following sections, we'll focus on the second approach and demonstrate how to manage Excel macros entirely in C#.
Environment Setup: Install Spire.XLS for .NET
Before working with Excel macros in C#, you need to install Spire.XLS for .NET, which allows you to manage Excel files and manipulate VBA projects without requiring Microsoft Excel.
Install via NuGet
You can install Spire.XLS for .NET using NuGet Package Manager:
Install-Package Spire.XLS
Or via the .NET CLI:
dotnet add package Spire.XLS
You can also download the Spire.XLS for .NET package and add it to your project manually.
Project Requirements
- .NET Framework, .NET Core, .NET Standard, or .NET 5+
- No Microsoft Excel installation required
- Supports Windows, Linux, and macOS environments
The library is runtime-agnostic and can be used in any .NET-supported environment, including web, desktop, and cross-platform applications.
Namespace to Import
After installation, include the following namespaces in your project:
using Spire.Xls;
Once the setup is complete, you can start creating, reading, and modifying Excel VBA macros programmatically.
How to Add a Macro to Excel in C# (Complete Example)
Before writing macro code, it's important to understand how Spire.XLS exposes the VBA structure in Excel:
- Workbook.VbaProject represents the VBA project embedded in the workbook
- IVbaProject.Modules provides access to all VBA modules
- IVbaModule represents an individual module that stores macro code
In addition to modules, the VBA project also supports project-level configuration, such as name, description, password protection, and conditional compilation settings.
The following example shows how to create a VBA project, configure its properties, add a module, and write a macro into an Excel file programmatically.
using Spire.Xls;

Workbook workbook = new Workbook();

// Create VBA project
IVbaProject vbaProject = workbook.VbaProject;

// Configure project-level properties (optional but important in real scenarios)
vbaProject.Name = "ReportGenerator";
vbaProject.Description = "VBA project for generating quarterly reports";
vbaProject.Password = "securepassword";
vbaProject.LockProjectView = false;
vbaProject.HelpFileName = "ReportGeneratorHelp.chm";
vbaProject.ConditionalCompilation = "DEBUG_MODE=1"; // External compile-time flag

// Add a VBA module
IVbaModule vbaModule = vbaProject.Modules.Add("ReportModule", VbaModuleType.Module);

// Write VBA macro code
vbaModule.SourceCode = @"
Sub GenerateQuarterlyReport()
    Dim ws As Worksheet
    Dim i As Integer
    Dim quarter As String

    Set ws = ActiveSheet
    ws.Cells.Clear

    ' Prompt user input
    quarter = InputBox(""Enter quarter (e.g., Q1 2026):"", ""Report Generation"")

    With ws
        .Range(""A1:E1"").Value = Array(""Date"", ""Product"", ""Region"", ""Sales"", ""Status"")

        For i = 1 To 50
            .Cells(i + 1, 1).Value = DateSerial(2026, 1 + Int((i - 1) / 17), 1 + ((i - 1) Mod 17))
            .Cells(i + 1, 2).Value = ""Product "" & (1 + Int((i - 1) / 10))
            .Cells(i + 1, 3).Value = Choose((i Mod 5) + 1, ""North"", ""South"", ""East"", ""West"", ""Central"")
            .Cells(i + 1, 4).Value = Round(Rnd() * 10000, 2)
            .Cells(i + 1, 5).Value = IIf(.Cells(i + 1, 4).Value > 5000, ""Target Met"", ""Below Target"")
        Next i

        .Columns(""A:E"").AutoFit

        ' Conditional compilation example
        #If DEBUG_MODE = 1 Then
            MsgBox ""DEBUG: Report generated (50 rows)"", vbInformation, ""Debug Info""
        #End If
    End With

    MsgBox ""Quarterly report for "" & quarter & "" generated successfully!"", vbInformation, ""Report Status""
End Sub";

// Save as macro-enabled Excel file
workbook.SaveToFile("QuarterlyReportGenerator.xlsm", FileFormat.Version2016);
workbook.Dispose();
Below is a preview of the generated Macro in Excel:
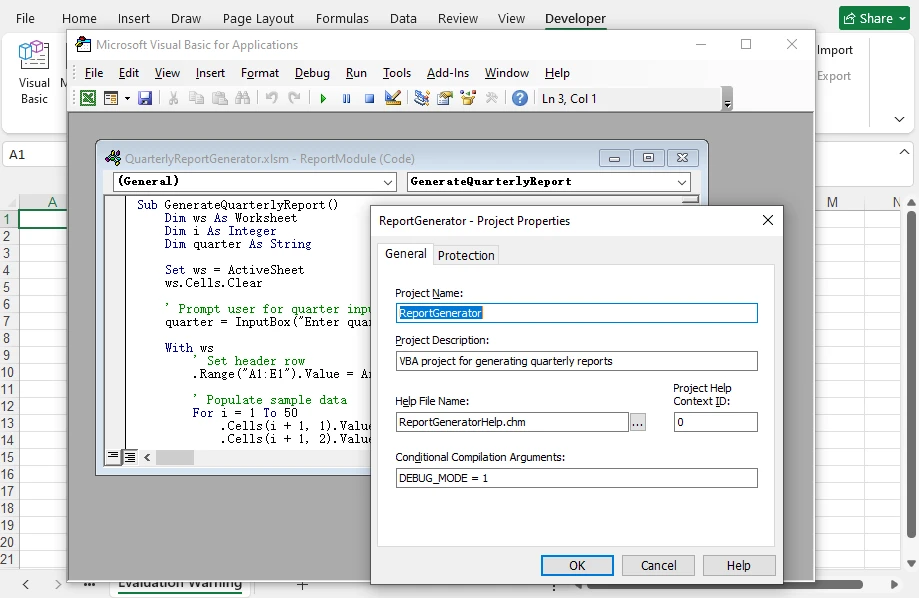
In this workflow, Spire.XLS allows you to construct the full VBA structure—not only modules and macro code, but also project-level metadata and compilation behavior—directly in code. This is conceptually similar to configuring a VBA project in the editor, but fully automated and independent of Excel.
Key API Breakdown
-
workbook.VbaProject
Initializes or retrieves the VBA project within the workbook.
-
vbaProject.Modules.Add(name, type)
Adds a new module to the project as a container for macro code.
-
vbaModule.SourceCode
Defines the full VBA script inside the module.
-
vbaProject.Description
Adds a description to the VBA project.
-
vbaProject.CodePage
Defines the character encoding used in the VBA project.
-
vbaProject.Password / LockProjectView
Controls access and visibility of the VBA project.
-
vbaProject.ConditionalCompilation
Enables compile-time flags (e.g., debug logic) inside VBA using #If.
Workbooks containing macros must be saved in macro-enabled formats such as .xls, .xlsm, .xltm, or .xlsb, as other formats (e.g., .xlsx) do not support VBA. Refer to the FileFormat enumeration to correctly set the output format when saving.
Reading, Editing, and Removing Excel Macros in C#
Once a VBA project exists, you can use Spire.XLS to inspect and modify its contents programmatically, including both module code and project-level metadata.
In real-world scenarios, this allows you to analyze existing macros, update business logic, enforce security settings, or remove legacy VBA code without opening Excel. Whether you're maintaining automated reporting systems or processing third-party Excel files, having full control over VBA projects in code is essential.
Read Macro Code and Project-Level Metadata
To read macros from an Excel file, load the workbook and iterate through all modules in the VBA project.
using Spire.Xls;

Workbook workbook = new Workbook();
workbook.LoadFromFile("QuarterlyReportGenerator.xlsm");

IVbaProject vbaProject = workbook.VbaProject;

string macroInfo = "VBA Project Name: " + vbaProject.Name + Environment.NewLine;
macroInfo += "Code Page: " + vbaProject.CodePage + Environment.NewLine;
macroInfo += "Is Protected: " + vbaProject.IsProtected + Environment.NewLine;

foreach (IVbaModule module in vbaProject.Modules)
{
    macroInfo += Environment.NewLine + "Module: " + module.Name + Environment.NewLine;
    macroInfo += "Source Code:" + Environment.NewLine;
    macroInfo += module.SourceCode + Environment.NewLine;
}

Console.WriteLine(macroInfo);

System.IO.File.WriteAllText("MacroAnalysis.txt", macroInfo);
workbook.Dispose();
Below is a preview of the console output:
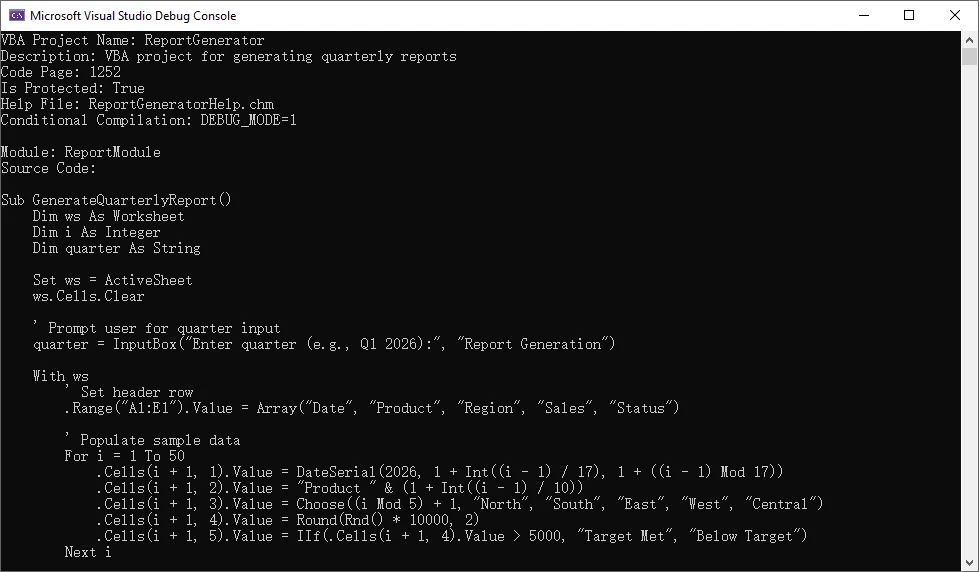
Here, each module exposes its VBA code through the SourceCode property, while the VBA project itself provides metadata such as name, encoding, and protection status.
The property vbaProject.IsProtected in this example indicates whether the VBA project is protected (locked for viewing or editing).
Edit Macro Code and Project-Level Metadata
To edit a macro, access a specific module and update its SourceCode. You can also modify project-level properties if needed. If the VBA project is protected, the correct password must be provided through vbaProject.Password before making such changes.
using Spire.Xls;

Workbook workbook = new Workbook();
workbook.LoadFromFile("QuarterlyReportGenerator.xlsm");

IVbaProject vbaProject = workbook.VbaProject;

// Update macro logic
IVbaModule module = vbaProject.Modules["ReportModule"];  // Or use index if name is unknown
module.SourceCode = module.SourceCode.Replace(
    "\"North\", \"South\", \"East\", \"West\", \"Central\"",
    "\"North America\", \"Europe\", \"Asia Pacific\", \"Latin America\", \"Middle East\"");

// Update project metadata
// For protected VBA projects, passwords are required to modify the project-level metadata
vbaProject.Password = "securepassword";
vbaProject.Description = "Updated report logic with global regions";
vbaProject.Name = "UpdatedReportGenerator";

workbook.SaveToFile("UpdatedReportGenerator.xlsm", FileFormat.Version2016);
workbook.Dispose();
Below is a preview of the updated macro code:
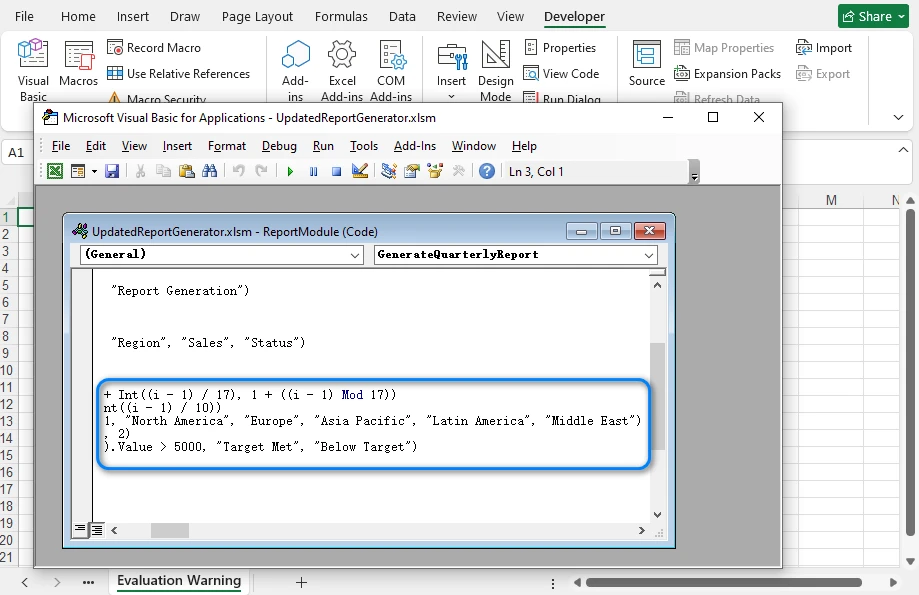
Spire.XLS treats macro code as editable text within a module, so updates are typically done by modifying the existing source and saving the workbook.
If you need to convert legacy .xls files to .xlsm format while preserving macros, see How to Convert XLS to XLSM and Maintain Macros Using C#.
Remove Macros
To remove macros, delete modules from the VBA project. This effectively removes all macro logic from the workbook.
using Spire.Xls;
using Spire.Xls.Core.Spreadsheet;

Workbook workbook = new Workbook();
workbook.LoadFromFile("LegacyReport.xlsm");

IVbaProject vbaProject = workbook.VbaProject;

// Remove specific module by its name
vbaProject.Modules.Remove("ReportModule");

// Or remove a module by its index
vbaProject.Modules.RemoveAt(0);

// Remove all modules
vbaProject.Modules.Clear();

workbook.SaveToFile("CleanReport.xlsm", FileFormat.Version2016);
workbook.Dispose();
After removing all modules, the workbook no longer contains executable VBA code, making it equivalent to a macro-free Excel file.
Alternatively, converting a macro-enabled Excel file to .xlsx will remove all macros, since the .xlsx format does not support VBA code.
Common Pitfalls When Working with Excel Macros
File Format Requirements
Macros require macro-enabled formats such as .xlsm, .xls, or .xlsb. The .xlsx format does not support VBA code. Always save files with the appropriate extension.
Encoding Issues
VBA code uses specific encoding (typically CodePage 1252 for Western languages). When working with international characters, ensure the CodePage is set correctly before writing macro code.
Common CodePage values include:
- 1252 – English / Western European (default in many environments)
- 936 – Simplified Chinese (GBK)
- 950 – Traditional Chinese (Big5)
- 932 – Japanese (Shift-JIS)
- 65001 – UTF-8 (⚠️ limited support in VBA, may cause compatibility issues)
Macro Security Settings
Excel macro security settings may prevent macros from running. When distributing macro-enabled files, consider adding instructions for enabling macros or digitally signing the VBA project.
Excel Version Compatibility
VBA code written for newer Excel versions may not work correctly in older versions. Test macros across target Excel versions to ensure compatibility.
Conclusion
C# provides robust capabilities for managing Excel macros programmatically. By using Spire.XLS for .NET, developers can add, read, edit, and remove VBA code directly inside Excel files without requiring Excel installation.
This approach focuses on managing macro code rather than executing it, making it ideal for automated workflows, backend services, and large-scale document processing.
To test these features without limitations, you can apply for a free temporary license of Spire.XLS for .NET.
Frequently Asked Questions (FAQ)
Can C# add VBA macros without Microsoft Excel?
Yes. Libraries such as Spire.XLS for .NET allow you to manipulate VBA projects directly without requiring Excel installation.
What format is required for Excel macros?
Macros require macro-enabled formats such as .xlsm, .xls, .xlsb, or .xltm (for templates). The .xlsx format does not support VBA code.
Can I edit existing macros in Excel using C#?
Yes. You can access VBA modules and modify their source code programmatically to update business logic or fix issues across multiple files.
Is this approach suitable for server environments?
Yes. Since it does not rely on Microsoft Excel, this approach is ideal for backend services, automated systems, and cloud-based applications.
Can I read macro code from password-protected Excel files?
It depends on the type of protection applied to the Excel file.
- Workbook protection (file password): You must provide the password (e.g., via Workbook.OpenPassword) when loading the file before accessing its contents.
- VBA project protection: Reading macro code is generally allowed, but modifying project-level properties (such as name or description) requires the VBA project password.
Additionally, if the Excel file is digitally signed, any modification to the document (including macros or metadata) will invalidate the signature.
Convert DBF to Excel Reports Easily with Python Command
Table of Contents
Working with legacy database formats like DBF is still common, but these files are not well-suited for modern workflows such as data analysis, reporting, or system integration. In many cases, you may need to convert DBF files to Excel files to make the data easier to use, share, or process. While tools like Excel or online converters can open DBF files, they lack automation, flexibility, and reliability—especially when handling large datasets or repeatable tasks.
Python provides a more scalable solution. It allows you to not only convert DBF files to Excel, but also clean data, standardize structures, and integrate the process into automated workflows.
This guide covers a practical approach to DBF to Excel conversion, including building a reusable command and generating structured Excel outputs for real-world use.
Quick Navigation
- Why Convert DBF to Excel
- Basic DBF to Excel Conversion with Python
- Generate Formatted Excel Outputs from DBF Files
- Batch Conversion and Automatic Formatting
- Command Line Tool for DBF to Excel Conversion
- Comparison of the Methods
- Best Practices and Tips
- Frequently Asked Questions
Why Convert DBF to Excel and the Common Conversion Methods
DBF files store structured data, but they come with several limitations:
- Legacy encoding formats (often causing character issues)
- Limited compatibility with modern tools
- No support for formatting or reporting
Converting DBF to Excel (XLS/XLSX) allows you to:
- Integrate with modern data pipelines
- Improve readability and usability
- Enable structured reporting and analysis
Common DBF to Excel Methods
There are several ways to handle DBF file to Excel file conversion:
- Opening DBF directly in Excel
- Using online converters
- Exporting via legacy database tools
However, these methods have clear limitations:
- ❌ No automation
- ❌ Poor scalability
- ❌ Limited control over output
- ❌ No support for structured reporting
For developers and production workflows, these approaches are not sufficient.
Python enables full control, automation, and extensibility, making it a more practical solution.
Convert DBF to Excel in Python (Basic Conversion)
To perform a basic DBF to Excel conversion in Python, the process is straightforward: read the DBF file into a structured format, then export it as an Excel file (XLSX).
In this workflow:
- The dbf library is used to read and parse DBF files, including legacy formats
- The data is organized and exported using libraries like pandas (with openpyxl as the Excel writing engine)
This approach provides a simple and practical way to convert DBF files to Excel with minimal setup.
Step 1: Install Dependencies
You can install the required libraries using pip:
pip install dbf pandas openpyxl
Step 2: Read the DBF File
import dbf
import pandas as pd

table = dbf.Table("business_demo.dbf")
table.open()

data = [{field: record[field] for field in dbf.field_names(table)} for record in table]

df = pd.DataFrame(data)
This step converts DBF records into a structured, Excel-compatible format.
Step 3: Export DBF to Excel
df.to_excel("output.xlsx", index=False)
At this stage, the DBF data is written to a standard Excel file (XLSX format), completing a basic DBF to XLSX conversion.
Below is an image showing the generated Excel file:
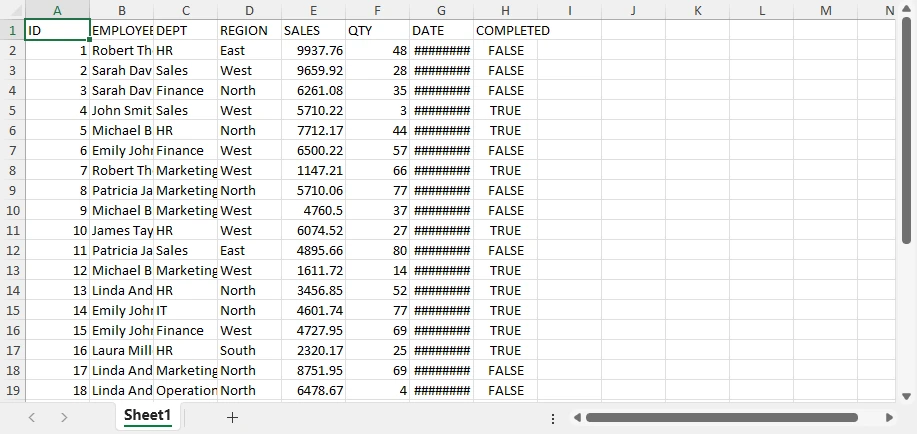
This produces a clean, structured dataset that can be used directly or further processed if needed.
Why This Method Works
This method is commonly used because it keeps the conversion process simple and reliable:
- Converts DBF records into a structured table format
- Preserves field names and data organization
- Works across different DBF variants (dBase, FoxPro, etc.)
- Requires minimal code to complete the conversion
As a result, it is suitable for quick .dbf file to .xlsx file tasks and automated workflows.
While this approach works well for basic conversion, it only generates raw Excel data and does not provide control over formatting, layout, or report structure.
If you are also working with generating Excel files from other data sources, such as CSV, JSON, and XML, you can refer to How to Import Data into Excel Files with Python for detailed instructions.
Limitations of Basic Conversion
While this basic conversion approach is powerful for quick and simple conversions, it has limitations when exporting Excel files:
- No styling or formatting
- No layout control
- No report structure
- Limited usability for business-ready outputs
The result is a raw dataset rather than a polished report.
Generate Professional Excel Reports from DBF Data
Basic DBF to Excel conversion only produces raw datasets. However, in real-world scenarios, Excel files are often used for reporting, presentation, and decision-making. To move beyond simple data export and generate structured, business-ready outputs, you can use Spire.XLS for Python.
A typical production workflow looks like this:
- Read DBF data with dbf
- Write structured Excel data with Spire.XLS
- Apply formatting and layout
- Add charts and other report elements as needed
With this approach, you can progressively enhance your Excel file—from a basic table to a fully formatted report with visual elements.
Step 1: Install Libraries
You can install the libraries using pip:
pip install spire.xls dbf
Step 2: Read DBF Data and Write It to Excel
from spire.xls import *
import dbf

table = dbf.Table("business_demo.dbf")
table.open()

data = [{field: record[field] for field in dbf.field_names(table)} for record in table]
field_names = list(dbf.field_names(table))

workbook = Workbook()
workbook.Worksheets.Clear()
sheet = workbook.Worksheets.Add("Data")

# Write header
for j, col in enumerate(field_names):
    sheet.Range[1, j+1].Value = col

# Write data
for i, record in enumerate(data, start=2):
    for j, col in enumerate(field_names):
        sheet.Range[i, j+1].Value = str(record[col])
At this stage, the DBF file has been converted into a structured Excel dataset.
Step 3: Apply Styles and Save as an Excel File
Once the data is written, you can improve readability by applying styles and layout adjustments.
# Header styling
header = sheet.Range[1, 1, 1, sheet.LastColumn]
header.Style.Font.Bold = True
header.Style.Font.Size = 12
header.Style.Color = Color.get_LightGray()

# Data borders
data_range = sheet.Range[1, 1, sheet.LastRow, sheet.LastColumn]
data_range.BorderAround(LineStyleType.Thin, ExcelColors.Black)
data_range.BorderInside(LineStyleType.Thin, ExcelColors.Black)

# Global font
sheet.AllocatedRange.Style.Font.Name = "Arial"

# Auto-fit columns
sheet.AllocatedRange.AutoFitColumns()

# Save the workbook to a file
workbook.SaveToFile("output.xlsx", ExcelVersion.Version2016)
The generated Excel file looks like this:
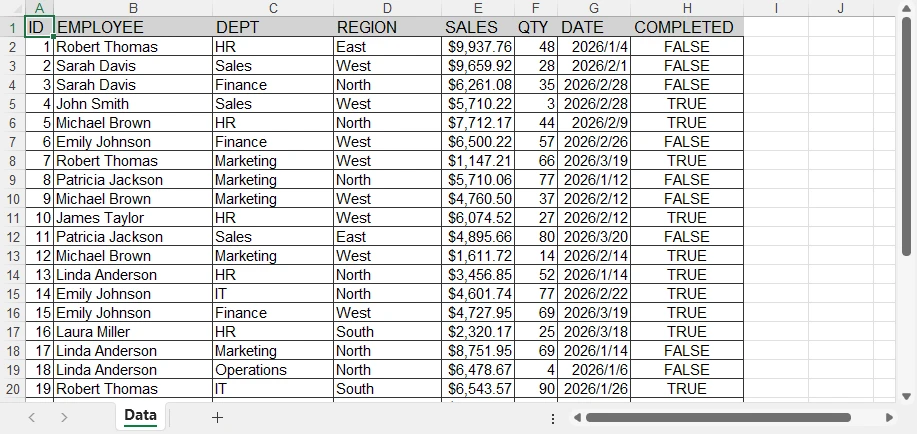
API Notes
Spire.XLS provides a range-based styling model, which allows you to apply formatting to entire regions instead of individual cells.
- Range[row, col] → access a specific cell or region
- Style.Font → control font properties such as size, bold, and family
- BorderAround / BorderInside → add inside and outside borders
- AllocatedRange → refers to the used range in the worksheet, which includes all cells with data
- AutoFitColumns / AutoFitRows → automatically adjust column and row widths within the range
- SaveToFile → save the workbook to a file in the specified format
Note: For SaveToFile method, the second argument specifies the file format. FileFormat.Version97to2003 represents the .xls format, and FileFormat.Version2007 and above represent the .xlsx format.
This approach makes it efficient to format large datasets with minimal code.
At this point, the Excel file is no longer raw data—it has been transformed into a clean, readable table. However, it is still a formatted dataset rather than a full report.
Add Report Elements (Incremental Enhancements)
To further enhance the output, you can add analytical and visual elements.
Example 1: Add a Chart
# Aggregate data by REGION (for charting purposes)
region_sales = defaultdict(float)

for record in data:
    region = record["REGION"]
    sales = float(record["SALES"])
    region_sales[region] += sales

# Create a summary sheet for aggregated data
summary_sheet = workbook.Worksheets.Add("Summary")

# Write summary header
summary_sheet.Range[1, 1].Value = "Region"
summary_sheet.Range[1, 2].Value = "Total Sales"

# Write aggregated results
for i, (region, total) in enumerate(region_sales.items(), start=2):
    summary_sheet.Range[i, 1].Value = region
    summary_sheet.Range[i, 2].Value = total
summary_sheet.Range[2, 2, summary_sheet.LastRow, 2].NumberFormat = "$#,##0.00"

# Create chart based on aggregated data
chart = summary_sheet.Charts.Add()
chart.ChartType = ExcelChartType.ColumnClustered

# Set data range (Region + Total Sales)
chart.DataRange = summary_sheet.Range[
    "A1:B{}".format(len(region_sales) + 1)
]

# Position the chart in the worksheet
chart.LeftColumn = 4
chart.TopRow = 2
chart.RightColumn = 10
chart.BottomRow = 20

# Set chart title
chart.ChartTitle = "Sales by Region"
Below is a preview of the chart added to the Excel sheet:

You can create many other types of charts in Excel worksheets using Spire.XLS, such as pie charts and bar charts. Choose the appropriate chart type based on your data and requirements.
Example 2: Add Conditional Formatting
# Create a conditional format in the specified range
conditions = sheet.ConditionalFormats.Add()
conditions.AddRange(sheet.Range[2, 8, sheet.LastRow, 8])

# Add a rule to the conditional format
condition1 = conditions.AddCondition()
condition1.FormatType = ConditionalFormatType.ContainsText;
condition1.FirstFormula = "TRUE"
condition1.BackColor = Color.FromRgb(144, 200, 172)

# Add another rule to the conditional format
condition2 = conditions.AddCondition()
condition2.FormatType = ConditionalFormatType.ContainsText
condition2.FirstFormula = "FALSE"
condition2.BackColor = Color.FromRgb(255, 199, 206)
Below is a preview of the generated Excel file with conditional formatting applied:
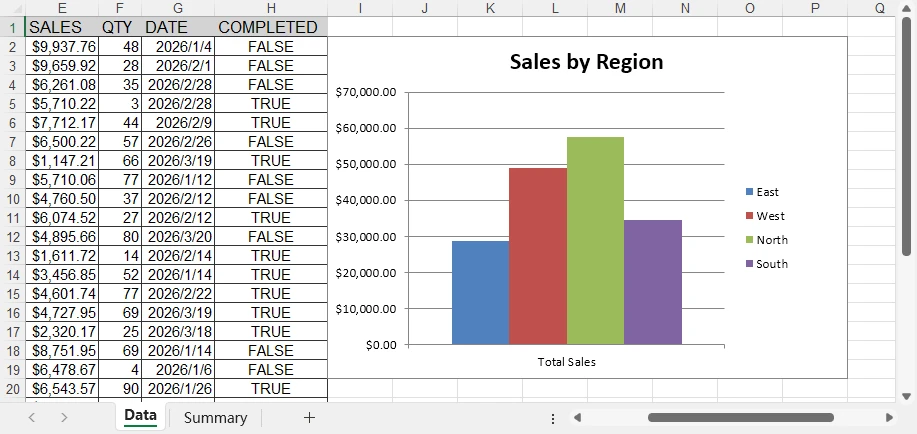
Conditional formatting allows you to achieve many special effects in Excel sheets. You can refer to How to Apply Conditional Formatting to Excel Sheets Using Python for more details.
Why This Matters
These enhancements transform the Excel file from a simple export into a reporting tool.
You can now:
- Present structured data clearly
- Highlight key information
- Visualize trends with charts
By combining structured data handling with advanced Excel features, you can turn legacy DBF files into modern, usable reports. This level of functionality is essential for business workflows, dashboards, and automated reporting systems.
Advanced Conversion: Batch Processing and Automated Formatting
For real-world workflows, DBF to Excel conversion is often not a one-time task. Instead, you may need to process multiple files automatically, especially in scenarios such as data migration or scheduled jobs.
Python makes it easy to scale DBF to Excel conversion from a single file to batch processing.
Batch Convert DBF to Excel Files
If you only need to generate basic Excel files, you can combine the conversion logic with the os module to process all DBF files in a directory.
import os
import dbf
import pandas as pd

input_folder = "dbf_files"
output_folder = "excel_files"

for file in os.listdir(input_folder):
    if file.endswith(".dbf"):
        table = dbf.Table(os.path.join(input_folder, file))
        table.open()

        df = pd.DataFrame([dict(record) for record in table])

        output_file = file.replace(".dbf", ".xlsx")
        df.to_excel(os.path.join(output_folder, output_file), index=False)
This approach enables automated DBF to Excel export across multiple files and is suitable for:
- Legacy system migration
- Data synchronization
- Scheduled ETL workflows
Batch Conversion with Automatic Formatting
When working with business data, simply exporting raw Excel files is often not enough. You may also need consistent formatting and structured output across all generated files.
Using Spire.XLS for Python, you can apply formatting automatically during batch conversion.
import os
import dbf
from spire.xls import *

input_folder = "dbf_files"
output_folder = "formatted_reports"

for file in os.listdir(input_folder):
    if file.endswith(".dbf"):
        table = dbf.Table(os.path.join(input_folder, file))
        table.open()

        data = [{field: record[field] for field in dbf.field_names(table)} for record in table]
        field_names = list(dbf.field_names(table))

        workbook = Workbook()
        workbook.Worksheets.Clear()
        sheet = workbook.Worksheets.Add("Data")

        # Write header
        for j, col in enumerate(field_names):
            sheet.Range[1, j+1].Value = col

        # Write data
        for i, record in enumerate(data, start=2):
            for j, col in enumerate(field_names):
                sheet.Range[i, j+1].Value = str(record[col])

        # Create a table with built-in style
        table_range = sheet.AllocatedRange
        table_obj = sheet.ListObjects.Create("Data", table_range)
        table_obj.BuiltInTableStyle = TableBuiltInStyles.TableStyleMedium13

        # Auto-fit layout
        sheet.AllocatedRange.AutoFitColumns()

        # Save file
        output_file = file.replace(".dbf", ".xlsx")
        workbook.SaveToFile(os.path.join(output_folder, output_file), FileFormat.Version2016)
        workbook.Dispose()
Below is a preview of the built-in table style applied to the data:
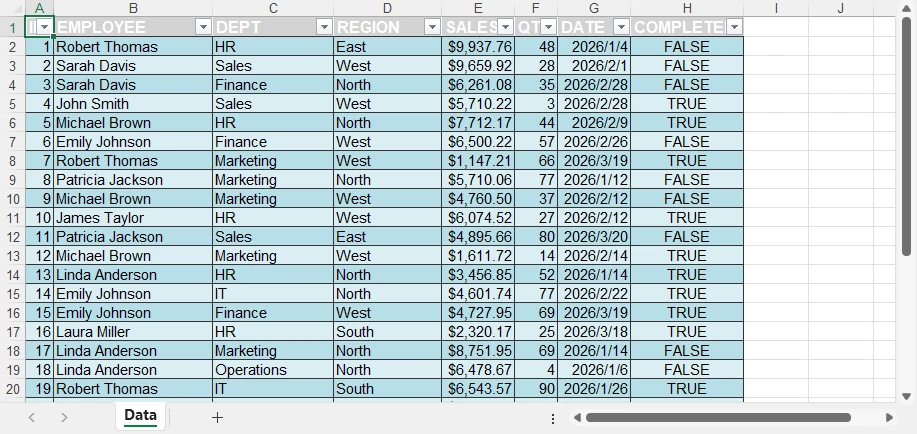
Why This Approach Matters
By combining batch processing with automatic formatting, you can:
- Convert multiple DBF files into Excel in one workflow
- Ensure consistent structure and styling across all outputs
- Reduce manual work when generating reports
- Integrate conversion into automated pipelines
This turns a simple DBF file to Excel conversion task into a scalable and production-ready solution.
With Spire.XLS, you can easily transfer data between Excel files and databases. See Data Transfer Between Excel and Database in Python for more details.
Command Line Tool for DBF to Excel Conversion
In addition to batch processing, you can further improve automation by turning your conversion logic into a reusable command-line tool.
This allows you to run DBF to Excel conversion directly from the terminal, making it suitable for scripts, scheduled tasks, and backend workflows.
Create a Command-Line Interface
You can wrap the conversion logic into a Python script that accepts input and output paths as arguments.
import sys

input_file = sys.argv[1]
output_file = sys.argv[2]
Use the Command
Once your script is ready, you can run it from the command line:
python convert.py data.dbf output.xlsx
This approach lets you reuse the same conversion logic across different environments and integrate the conversion into automated workflows with minimal effort.
Basic Conversion vs Spire.XLS for Python
When converting DBF files to Excel, the choice of approach depends on your goals.
| Capability | Basic Conversion (e.g., pandas and dbf) | Spire.XLS for Python and dbf |
|---|---|---|
| DBF to Excel export | ✅ | ✅ |
| Batch processing | ✅ | ✅ |
| Formatting & styling | ❌ | ✅ |
| Report structure | ❌ | ✅ |
| Charts & visualization | ❌ | ✅ |
When to Use Each Approach
Use basic conversion when:
- You only need to convert DBF to Excel
- The output is used for storage or further processing
- No formatting or reporting is required
Use Spire.XLS for Python and dbf when:
- You need structured Excel reports
- Formatting and layout are important
- You want to include charts or visual elements
Choosing the right approach can significantly improve both efficiency and output quality, especially when moving from simple .dbf file to .xlsx file conversion to automated reporting workflows.
Best Practices for DBF to Excel Conversion
Handle Encoding Carefully
table = dbf.Table("file.dbf", codepage="cp1252")
DBF files may use different encodings depending on their source. Always verify the correct codepage to prevent character corruption.
Validate Data Types
DBF fields do not always map cleanly to Excel formats. Check numeric, date, and boolean values before exporting to ensure accuracy.
Optimize for Large Files
When working with large datasets:
- Process data in chunks
- Avoid loading all records into memory at once
Separate Conversion and Reporting
For better flexibility and maintainability:
- Use a simple approach for DBF to Excel conversion
- Apply formatting and report elements only when needed
Conclusion
Converting DBF files to Excel is often more than just a format change—it’s about making legacy data easier to use, share, and analyze.
With Python, you can start with a simple DBF to Excel conversion and scale up to batch processing and automated workflows. For basic needs, a lightweight approach works well. But when you need structured layouts, consistent formatting, or visual elements, more advanced Excel capabilities become important.
If you’re looking to generate professional, report-ready Excel files, you can try Spire.XLS for Python. A free 30-day license is available to explore its full features in real-world scenarios.
FAQ
How do I convert a DBF file to Excel in Python?
Use a Python-based approach to read DBF data and export it to Excel. For example, you can combine dbf with tools like pandas for a quick DBF file to Excel file conversion.
What is the best way to convert DBF to XLSX?
It depends on your needs:
- For simple conversion → use a basic Python approach
- For formatted reports → use Spire.XLS for Python
Can I import a DBF file into Excel directly?
Yes, but it is not suitable for automation or large datasets. Python provides a more reliable and scalable solution.
Why is my Excel file unformatted?
Basic conversion methods only export raw data without styling. To generate formatted Excel reports, you need a tool that supports layout and styling, such as Spire.XLS for Python.
How do I create a command to convert DBF to Excel?
Wrap your conversion logic into a script and pass input/output paths as arguments. This allows you to run DBF to Excel conversion directly from the command line.
How to Convert Images to OFD in C++ (PNG, JPG, BMP)
Converting images to OFD (Open Fixed-layout Document) format in C++ is a common requirement in enterprise document management systems, especially in China where OFD is widely adopted for official document archiving and distribution. Developers often need to digitize scanned documents, create electronic archives, or generate standardized document formats from image files.
Implementing image to OFD conversion from scratch can be complex, particularly when handling different image formats, page sizing, and OFD specification compliance.
With Spire.PDF for C++ from e-iceblue, developers can easily create OFD documents from images such as PNG, JPG, BMP, TIFF, and EMF using a straightforward API that handles the underlying complexity. This article demonstrates how to perform image to OFD conversion in C++, including practical examples for single and batch processing workflows.
Quick Navigation
- Understanding Image to OFD Conversion
- Prerequisites
- Convert an Image to OFD in C++
- Convert Multiple Images to a Multi-Page OFD in C++
- Fit Images into a Fixed Page Size
- Batch Convert Images to OFD
- Common Pitfalls
- FAQ
1. Understanding Image to OFD Conversion
OFD is an XML-based document format designed for preserving fixed-layout documents, similar to PDF but optimized for Chinese character sets and government document standards. Converting images to OFD involves creating a document structure that embeds the image content while maintaining OFD compliance.
Common use cases for image to OFD conversion include:
- Digitizing scanned invoices and receipts for archiving
- Creating standardized document repositories
- Generating electronic document workflows
- Converting legacy image-based documents to modern formats
The conversion process typically involves creating a PDF document, drawing the image onto pages, and then exporting to OFD format using the appropriate file format specification.
2. Prerequisites
Before converting images to OFD in C++, you need to install Spire.PDF for C++ and configure it in your development environment.
Install via NuGet (Recommended)
The easiest way to add Spire.PDF to a C++ project is through NuGet, which automatically downloads the package and configures the required dependencies.
- Open your project in Visual Studio.
- In Solution Explorer, right-click References.
- Select Manage NuGet Packages.
- Search for Spire.PDF.Cpp.
- Click Install.
After installation, you can include the library in your project:
#include "Spire.Pdf.o.h"
Manual Installation
Alternatively, you can download Spire.PDF for C++ and integrate it manually by configuring the include and lib directories.
For detailed instructions, refer to How to Integrate Spire.PDF for C++ in a C++ Application.
3. Convert an Image to OFD in C++
The following example demonstrates how to convert a single image file to OFD format. This implementation creates a PDF document, loads an image, draws it on a page with proper sizing, and saves the result as an OFD file.
#include "Spire.Pdf.o.h"

using namespace Spire::Pdf;

int main()
{
    // Create a new PDF document
    PdfDocument* ofd = new PdfDocument();

    // Load the image file
    auto image = PdfImage::FromFile(L"Sample.jpg");

    // Calculate page dimensions based on image size
    float pageWidth = image->GetWidth();
    float pageHeight = image->GetHeight();

    // Add a page with custom dimensions matching the image
    auto page = ofd->GetPages()->Add(new SizeF(pageWidth, pageHeight));

    // Draw the image on the page
    page->GetCanvas()->DrawImage(image, 0, 0, pageWidth, pageHeight);

    // Save the document as OFD format
    ofd->SaveToFile(L"ImageToOfd.ofd", FileFormat::OFD);

    // Clean up resources
    delete ofd;

    return 0;
}
The following screenshot shows the generated OFD document created from the source image.
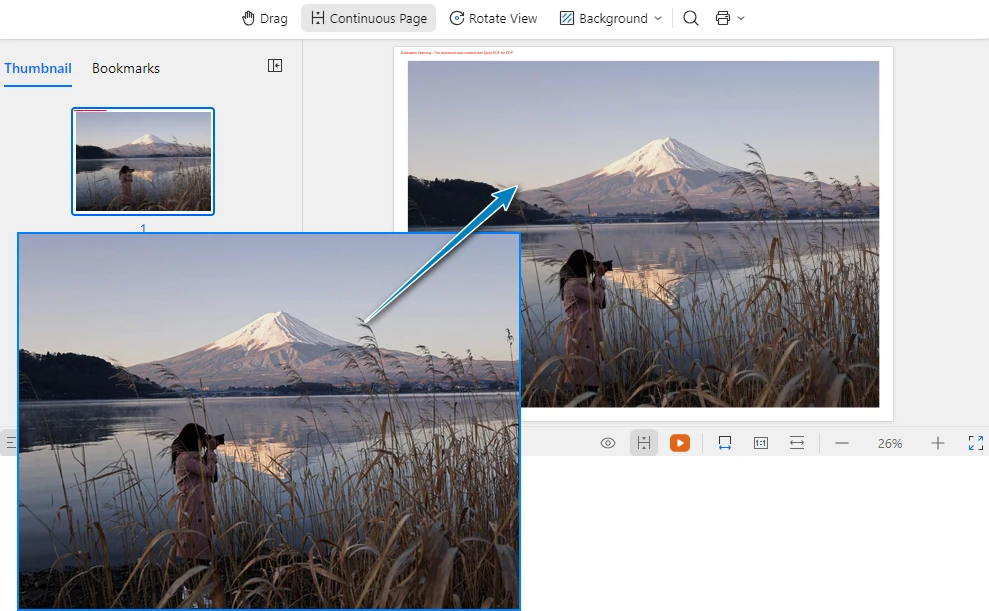
Key Classes and Methods
- PdfDocument – Represents the document container used to create pages and export the final OFD file.
- PdfImage::FromFile() – Loads an image from the specified file path and creates an image object that can be rendered onto a page.
- PdfDocument::GetPages()->Add() – Adds a new page to the document. In this example, the page size is dynamically set based on the image dimensions.
- PdfCanvas::DrawImage() – Draws the image onto the page canvas at the specified position and size.
- SaveToFile() – Saves the document to disk and exports it to OFD format using FileFormat::OFD.
This approach ensures that the image is properly scaled and positioned within the OFD document, maintaining the original image quality and proportions.
Remove Page Margins (Optional)
By default, document pages may include margins, which can introduce unwanted white space around the image. If you want the image to fully occupy the page without any padding, you can set the page margins to zero.
ofd->GetPageSettings()->SetMargins(0.0);
You can also specify custom margins if needed:
ofd->GetPageSettings()->SetMargins(10.0);
Adjusting page margins is useful when generating document layouts that require full-page image rendering.
4. Convert Multiple Images to a Multi-Page OFD in C++
When working with document archives, you often need to combine multiple images into a single OFD file. The following example shows how to create a multi-page OFD document where each page contains a different image.
#include "Spire.Pdf.o.h"
#include <vector>

using namespace Spire::Pdf;

int main()
{
    // Create a new PDF document
    PdfDocument* ofd = new PdfDocument();

    // Define the list of image files to convert
    std::vector<std::wstring> imageFiles = {
        L"Sample1.png",
        L"Sample2.bmp",
        L"Sample3.jpg"
    };

    // Process each image file
    for (size_t i = 0; i < imageFiles.size(); i++)
    {
        // Load the current image
        auto image = PdfImage::FromFile(imageFiles[i].c_str());

        // Get image dimensions
        float pageWidth = image->GetWidth();
        float pageHeight = image->GetHeight();

        // Add a new page for each image
        auto page = ofd->GetPages()->Add(new SizeF(pageWidth, pageHeight));

        // Draw the image on the page
        page->GetCanvas()->DrawImage(image, 0, 0, pageWidth, pageHeight);
    }

    // Save as OFD document
    ofd->SaveToFile(L"multi_page_document.ofd", FileFormat::OFD);

    // Clean up document resource
    delete ofd;

    return 0;
}
The following screenshot shows the generated multi-page OFD document, where each image is placed on a separate page.
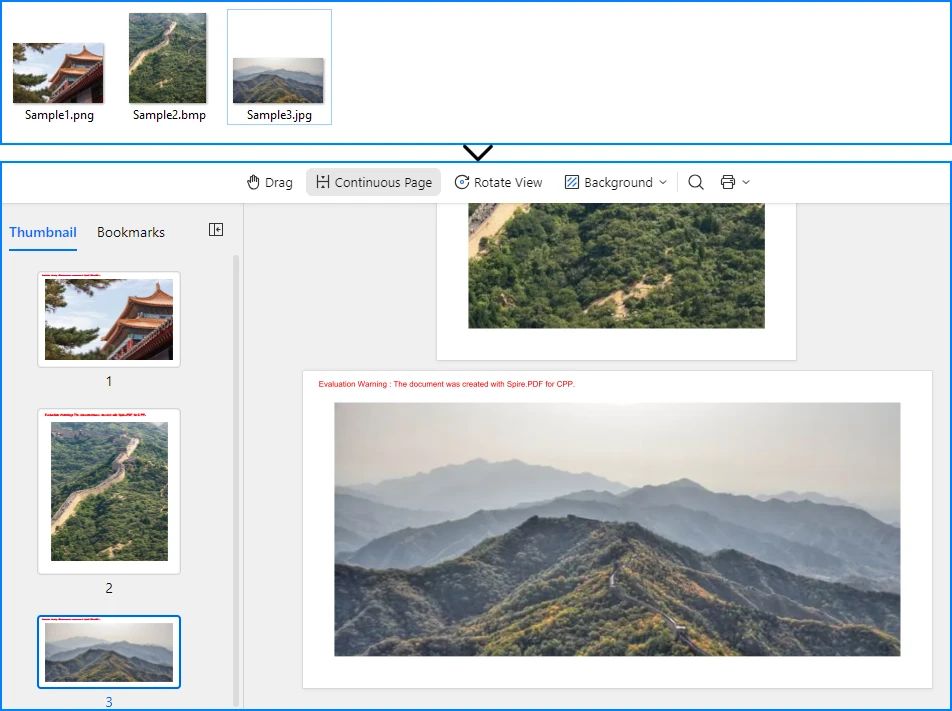
This implementation iterates through a collection of image files, creating a new page for each image and drawing the content with proper sizing. The resulting OFD document preserves the order and layout of all source images in a single file.
If you need to further modify images in a document, such as inserting, replacing, or removing images in existing files, refer to the tutorial on How to Insert, Replace, or Remove Images in a OFD/PDF Using C++
5. Fit Images into a Fixed Page Size
In many real-world document workflows, pages are required to follow a standardized page size instead of matching the original image dimensions. For example, scanned forms, contracts, or reports may need to fit into a fixed layout such as A4 or Letter.
To achieve this, you can create pages with a predefined size and then scale each image proportionally so that it fits within the page boundaries without distortion.
The following example demonstrates how to scale an image to fit within a fixed page size while preserving its aspect ratio.
#define NOMINMAX
#include "Spire.Pdf.o.h"
#include <algorithm>

using namespace Spire::Pdf;

int main()
{
    // Create a new PDF document
    PdfDocument* ofd = new PdfDocument();

    // Add a page with a fixed size (for example, A4)
    PdfPageBase* page = ofd->GetPages()->Add(PdfPageSize::A4);

    // Load the image
    auto image = PdfImage::FromFile(L"Sample.jpg");

    // Get page dimensions
    float pageWidth = page->GetCanvas()->GetClientSize().GetWidth();
    float pageHeight = page->GetCanvas()->GetClientSize().GetHeight();

    // Get image dimensions
    float imgWidth = image->GetWidth();
    float imgHeight = image->GetHeight();

    // Calculate proportional scaling
    float scale = std::min(pageWidth / imgWidth, pageHeight / imgHeight);

    float scaledWidth = imgWidth * scale;
    float scaledHeight = imgHeight * scale;

    // Draw the scaled image on the page
    page->GetCanvas()->DrawImage(image, 0, 0, scaledWidth, scaledHeight);

    // Save as OFD
    ofd->SaveToFile(L"FixedPageSize.ofd", FileFormat::OFD);

    delete ofd;

    return 0;
}
The following screenshot shows how the image is scaled to fit within a fixed page size (A4) while preserving its aspect ratio.
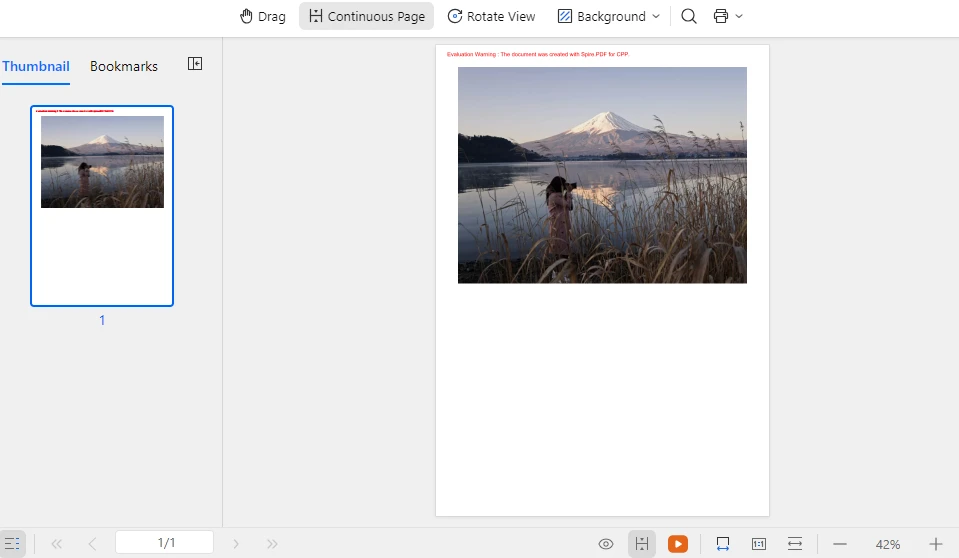
This approach ensures that images of different sizes can be consistently placed within a standardized document layout while maintaining their original proportions and preventing image distortion. The same technique can also be applied when generating multi-page OFD documents from multiple images.
In addition to scaling images to fit a fixed layout, developers may also need to manipulate document pages when generating or modifying documents. Typical operations include creating new pages, deleting pages, resizing page dimensions, or rearranging page order. For more details, refer to: How to Create and Delete Pages in an OFD/PDF document Using C++
6. Batch Convert Images to OFD
For automated document processing workflows, you may need to convert multiple images to separate OFD files. The following example demonstrates batch processing with progress tracking and error handling.
#include "Spire.Pdf.o.h"
#include <vector>
#include <iostream>

using namespace Spire::Pdf;

void ConvertImageToOFD(const std::wstring& inputPath, const std::wstring& outputPath)
{
    // Create a new PDF document
    PdfDocument* ofd = new PdfDocument();

    try
    {
        // Load the image file
        auto image = PdfImage::FromFile(inputPath.c_str());

        // Calculate page dimensions
        float pageWidth = image->GetWidth();
        float pageHeight = image->GetHeight();

        // Add page with image dimensions
        auto page = ofd->GetPages()->Add(new SizeF(pageWidth, pageHeight));

        // Draw image on page
        page->GetCanvas()->DrawImage(image, 0, 0, pageWidth, pageHeight);

        // Save as OFD
        ofd->SaveToFile(outputPath.c_str(), FileFormat::OFD);

        std::wcout << L"Converted: " << inputPath << L" -> " << outputPath << std::endl;

    }
    catch (const std::exception& ex)
    {
        std::wcout << L"Error converting " << inputPath << L": " << ex.what() << std::endl;
    }

    // Clean up document
    delete ofd;
}

int main()
{
    // Define batch conversion tasks
    std::vector<std::pair<std::wstring, std::wstring>> conversionTasks = {
        {L"invoice_0.png", L"invoice_0.ofd"},
        {L"invoice_1.png", L"invoice_1.ofd"},
        {L"invoice_2.png", L"invoice_2.ofd"},
        {L"invoice_3.png", L"invoice_3.ofd"},
        {L"invoice_4.png", L"invoice_4.ofd"}
    };

    // Process all conversion tasks
    for (const auto& task : conversionTasks)
    {
        ConvertImageToOFD(task.first, task.second);
    }

    std::wcout << L"Batch conversion completed." << std::endl;

    return 0;
}
This batch processing approach provides:
- Modular conversion function for reusability
- Error handling for individual file failures
- Progress output for monitoring
- Clean resource management
The implementation processes each image independently, ensuring that a single failure does not interrupt the entire batch operation.
7. Common Pitfalls
Image File Path Issues
Ensure that image file paths are correct and accessible. Use absolute paths or verify the working directory when loading images:
// Use absolute paths for reliability
auto image = PdfImage::FromFile(L"C:\\Documents\\scanned_invoice.png");
Memory Management
Properly clean up PdfDocument and PdfImage objects to prevent memory leaks. Always delete dynamically allocated objects after use:
delete ofd;
Unsupported Image Formats
Spire.PDF supports common image formats including PNG, JPEG, BMP, EMF, and TIFF. Ensure your input files are in supported formats. For unsupported formats, convert them to a supported format first using image processing libraries.
Page Size Considerations
When creating pages based on image dimensions, be aware that extremely large images may result in OFD documents that are difficult to view or print. Consider implementing size limits or scaling for large images:
#define NOMINMAX
#include <algorithm>

// Apply maximum page size constraint
const float MAX_WIDTH = 1000.0f;
const float MAX_HEIGHT = 1400.0f;

float pageWidth  = std::min(static_cast<float>(image->GetWidth()),  MAX_WIDTH);
float pageHeight = std::min(static_cast<float>(image->GetHeight()), MAX_HEIGHT);
File Encoding
When working with file paths containing Chinese characters or special symbols, ensure proper wide string handling (std::wstring) to avoid encoding issues in file operations.
C++ Language Standard
If you encounter compilation issues in some environments, try setting the project to use the C++14 language standard.
For example, in Visual Studio:
- Open Project Properties
- Navigate to C/C++ → Language
- Set C++ Language Standard to ISO C++14 Standard (/std:c++14)
Conclusion
In this article, we demonstrated how to convert images to OFD format in C++ using Spire.PDF. By leveraging the Spire API, developers can implement reliable image to OFD conversion with minimal code, handling single images, multi-page documents, and batch processing workflows. This technique is especially useful for digitizing scanned documents, creating electronic archives, and building automated document processing pipelines.
Spire.PDF for C++ provides comprehensive document processing capabilities beyond OFD conversion, including PDF creation, manipulation, and various export formats. The library simplifies complex document operations while maintaining compliance with industry standards.
If you want to evaluate the full capabilities of Spire.PDF for C++, you can apply for a 30-day free license.
8. FAQ
Do I need any third-party software to convert images to OFD?
No. Spire.PDF performs image to OFD conversion independently and does not require Adobe Acrobat or any other external PDF software.
What image formats are supported for OFD conversion?
Spire.PDF supports common image formats including PNG, JPEG, BMP, EMF, and TIFF. The library handles image loading and rendering automatically during the conversion process.
Is Spire.PDF suitable for high-volume batch processing?
Yes. Spire.PDF is optimized for server environments and can handle batch processing of multiple images efficiently. The library provides proper resource management for continuous operations.
Can I add text or watermarks to images before converting to OFD?
Yes. Spire.PDF allows you to draw additional elements on the page canvas before saving to OFD. For example, you can add text watermarks or image watermarks to the document.
For detailed tutorials, see:
- How to Add Text Watermarks to PDF/OFD Documents in C++
- How to Add Image Watermarks to PDF/OFD Documents in C++
Does the OFD output preserve image quality?
Yes. The OFD conversion maintains the original image quality and resolution. The page dimensions are calculated based on the image size, ensuring no loss of quality during the conversion process.