Merge Word Documents: Preserve or Unify Formatting
Table of Contents
- Why Formatting Breaks When Merging Word Documents
- Method 1. Merge Word Documents Using “Text from File” (Built-in Feature)
- Method 2. Merge Word Documents Using Copy & Paste (Keep Source Formatting)
- Method 3. Merge Word Documents Online (MergeEasy)
- Method 4. Merge Word Documents Using VBA
- Method 5. Merge Word Documents Using Python (Spire.Doc)
- Comparison Table: Which Method Should You Choose?
- Conclusion
- FAQs
Merging Word documents is a common yet surprisingly complex task. Whether you're combining reports, compiling book chapters, or consolidating multiple project files into a final deliverable, the way you merge documents directly impacts formatting, layout consistency, and long-term maintainability.
Although it may look like a simple copy-and-paste operation, Word merging involves style definitions, section structures, and document-level formatting systems — and different methods can produce dramatically different results.
In this guide, we’ll explore five practical ways to merge Word documents—from built-in Word features to VBA and Python—so you can choose the approach that best fits your needs.
Quick Navigation:
- Method 1. Merge Word Documents Using “Text from File” (Built-in Feature)
- Method 2. Merge Word Documents Using Copy & Paste (Keep Source Formatting)
- Method 3. Merge Word Documents Online (MergeEasy)
- Method 4. Merge Word Documents Using VBA
- Method 5. Merge Word Documents Using Python (Spire.Doc)
Why Formatting Breaks When Merging Word Documents
Before exploring the five methods, it’s helpful to understand one key concept: Word does not simply combine text—it combines formatting systems.
When two documents are merged, Word must decide how to handle page setup, styles, numbering, headers, and other layout rules. In most cases, the main document controls the final result - this is why formatting may change after merging.
To simplify things, formatting in Word can be divided into two levels:
| Formatting Type | Controls | Examples | What Happens During Merge |
|---|---|---|---|
| Section-Level Formatting | Layout within a section | Page size, margins, orientation, columns, headers/footers, page numbering | Word does not automatically insert a section break. Inserted content becomes part of the current section. To preserve original layout settings, you must insert a Section Break before merging. |
| Document-Level Formatting | Overall style system | Heading styles, Normal style, theme fonts, theme colors, numbering definitions | If styles share the same name (e.g., “Heading 1”), the main document’s definition overrides the inserted document’s style. |
What This Means in Practice
- Most merging methods prioritize consistency over preserving original appearance.
- The main document’s style definitions typically override conflicting styles.
- Only manual Copy & Paste → Keep Source Formatting attempts to preserve the original visual layout.
With this in mind, let’s examine five different ways to merge Word documents—and when each method makes sense.
Method 1. Merge Word Documents Using “Text from File” (Built-in Feature)
If you want a fast, native way to merge documents directly inside Microsoft Word, Insert → Text from File is the most straightforward option.
How It Works
- Open your main document, place your cursor where you want the content to appear.
- Go to Insert → Object → Text from File.
- Select one or multiple Word files.
- Click Insert.
Word inserts the selected document at the current cursor position. To start on a new page, insert a Page Break or Section Break before merging.
What to Expect
This method works best when all documents are based on the same template. If styles differ, the main document’s definitions will override conflicting styles. For example, if both files contain a style named Heading 1 but with different fonts or spacing, the main document’s version will take precedence.
When to Use It
Use this method when:
- You are compiling reports under a unified corporate template.
- All files share similar formatting rules.
- You need a quick, built-in solution without automation.
It’s simple and reliable—but not ideal when preserving original formatting across different designs.
Method 2. Merge Word Documents Using Copy & Paste (Keep Source Formatting)
If formatting preservation is your highest priority, manual copy and paste remains the most precise method.
How It Works
- Open both the main document and the source document.
- In the source document, press Ctrl + A to select all content, then press Ctrl + C to copy it.
- Switch to the main document and place the cursor where the merged content should begin, typically at the end of the document.
- Go to Layout → Breaks → Section Breaks → Next Page to insert a section break. (This step is essential if you want to preserve the source document’s margins, orientation, or font style.)
- On the new page, right-click and choose Paste Options → Keep Source Formatting.
This ensures both section-level formatting (layout structure) and document-level formatting (fonts, styles, numbering) are preserved as much as possible.
Why This Method Is Different
When you choose Keep Source Formatting, Word creates additional internal style definitions if necessary. Instead of replacing styles, it keeps the source appearance intact—even if that means duplicating style names behind the scenes.
Trade-Off
While formatting is preserved, the document’s internal style structure can become complex. For small projects, this isn’t an issue. For large technical documentation, it can make long-term maintenance harder.
When to Use It
- Legal contracts
- Academic papers from different authors
- Design-sensitive documents
- Small-scale merging tasks
If visual fidelity matters more than structural consistency, this is the safest choice.
Method 3. Merge Word Documents Online (MergeEasy)
If you prefer not to use Word directly, online merging tools provide a convenient alternative. Tools like MergeEasy allow you to upload multiple Word files, reorder them, and download a combined document—all in your browser.
How It Works
- Open your browser and navigate to the online Word document merging tool.
- Upload the Word files you want to combine.
- Arrange the documents in the desired order.
- (Optional) Enable the “Add page breaks between documents” option if you want each file to start on a new page.
- Click Merge Word Document and download the combined document.
What to Expect
Online tools aim to preserve layout reasonably well, but:
- Style conflicts are handled automatically.
- You have limited control over formatting logic.
- Confidential documents may raise privacy concerns.
When to Use It
- Quick merging tasks
- Users without Microsoft Word installed
- Non-sensitive files
- Occasional document combination
Online tools prioritize convenience over deep formatting control.
Method 4. Merge Word Documents Using VBA
For users working heavily inside Microsoft Word, VBA provides automation without external software.
Instead of manually inserting files one by one, you can write a macro to merge documents automatically. The macro inserts each selected document at the end of the main file and separates them using a Section Break (Next Page).
How It Works
- Open the main Word document.
- Press Alt + F11 to open the VBA editor.
- Click Insert → Module, then paste the provided VBA macro into the code window.
- Press F5 (or click Run) to execute the macro.
- Select the Word documents to merge, then click Open.
VBA Code:
Sub MergeWordDocuments()

    Dim mainDoc As Document
    Dim fileDialog As FileDialog
    Dim selectedFile As Variant
    Dim insertRange As Range

    Set mainDoc = ActiveDocument

    ' Open file picker
    Set fileDialog = Application.FileDialog(msoFileDialogFilePicker)

    With fileDialog
        .Title = "Select Word Documents to Merge"
        .Filters.Clear
        .Filters.Add "Word Files", "*.doc; *.docx"
        .AllowMultiSelect = True

        If .Show = -1 Then

            For Each selectedFile In .SelectedItems

                ' Move to end of main document
                Set insertRange = mainDoc.Range
                insertRange.Collapse Direction:=wdCollapseEnd

                ' Insert Section Break (Next Page)
                insertRange.InsertBreak Type:=wdSectionBreakNextPage
                insertRange.Collapse Direction:=wdCollapseEnd

                ' Insert document content
                insertRange.InsertFile FileName:=selectedFile

            Next selectedFile

        End If

    End With

    MsgBox "Documents merged successfully!"

End Sub
What Happens Internally
VBA leverages Word’s internal document object model (DOM), it behaves identically to the Insert → Text from File engine, meaning main document styles dominate. The advantage lies in automation—not in formatting logic.
When to Use It
- Monthly or weekly report consolidation
- Internal corporate workflows
- Template-driven documentation
- Users comfortable with Word macros
VBA is ideal when you need repeatable merging inside the Office ecosystem.
Method 5. Merge Word Documents Using Python (Spire.Doc)
For developers or backend systems, Python provides scalable document merging without relying on Microsoft Word. Using Spire.Doc for Python, you can programmatically insert documents into a main file.
How It Works
- Open your preferred Python IDE or editor.
- Install the library from PyPI: pip install spire.doc
- Create a new Python file (e.g., merge_word_documents.py).
- Paste one of the following code snippets into the file.
- Run the script.
This approach requires basic knowledge of Python. Before executing the script, adjust the input and output file paths according to your local environment.
Example 1. Merge Two Word Documents
from spire.doc import *
from spire.doc.common import *

doc = Document()
doc.LoadFromFile("Main.docx")
doc.InsertTextFromFile("Source.docx", FileFormat.Docx)
doc.SaveToFile("MergedOutput.docx")
doc.Close()
Example 2. Merge Multiple Documents in a Folder
import os
from spire.doc import *
from spire.doc.common import *

folder_path = "Docs/"
files = [f for f in os.listdir(folder_path) if f.endswith(".docx")]

doc = Document()
doc.LoadFromFile(os.path.join(folder_path, files[0]))

for file in files[1:]:
    doc.InsertTextFromFile(os.path.join(folder_path, file), FileFormat.Docx)

doc.SaveToFile("MergedOutput.docx")
doc.Close()
Formatting Behavior
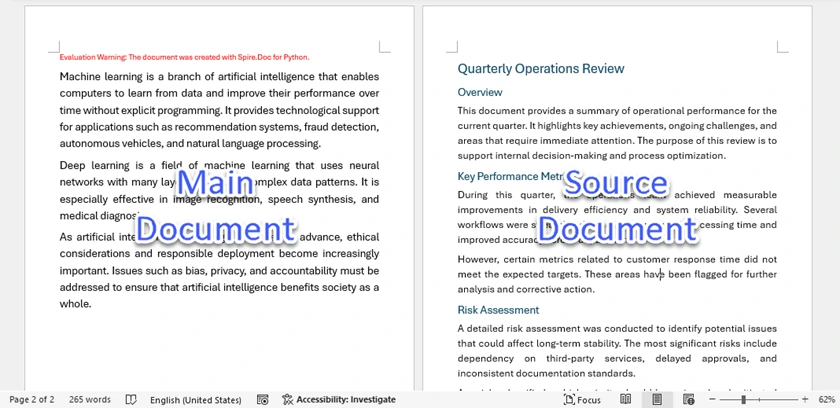
When InsertTextFromFile is executed, the inserted document is appended as a new section in the target file. In practice, this means each merge typically introduces a Next Page section break, starts the inserted content on a new page, and applies the style definitions of the main (destination) document. As a result, formatting conflicts are resolved in favor of the primary document.
This approach helps maintain structural consistency, but it may alter the original appearance of the merged content if the two documents use different style definitions.
Below is a screenshot of the merged document created by Spire.Doc:
When to Use It
- Document generation systems
- SaaS applications
- Backend processing pipelines
- Large-scale batch merging
Strengths of the Python Approach
- Fully automated
- Scalable for batch processing
- No Microsoft Word dependency
- Suitable for server-side systems
After programmatically merging Word documents in Python, you can enhance the output by adding page numbers, adjusting page settings, or exporting the file to PDF format. By combining these features, you can create a fully automated Word document processing workflow.
Comparison Table: Which Method Should You Choose?
| Method | Automation | Match Destination Formatting | Preserve Source Formatting | Best For |
|---|---|---|---|---|
| Text from File | Manual | Yes | No | Quick merge under main document formatting |
| Copy & Paste (Keep Source Formatting) | Manual | No | Yes | Preserve original styles and layout |
| Online Tool (MergeEasy) | Semi-automated | Yes | No | Fast merging without Word, under main doc formatting |
| VBA Macro | Automated (within Word) | Yes | No | Automating repetitive merges in Word environment |
| Python (Spire.Doc) | Fully Automated | Yes | No | Batch processing with unified formatting |
Formatting Behavior Summary
Match Destination Formatting
All merging methods except Copy & Paste → Keep Source Formatting automatically apply the main document’s style definitions to inserted content. This includes Text from File, Online Tools, VBA macros, and Python solutions. In these methods, the destination document’s formatting takes precedence when style conflicts occur.
Preserve Source Formatting
Only Copy & Paste using “Keep Source Formatting” fully retains the original document’s styles, fonts, and layout. Other merging methods do not completely preserve source formatting, as conflicting styles are overridden by the main document.
Conclusion
Merging Word documents is not just about combining content — it’s about controlling formatting logic. If your goal is visual precision, manual “Keep Source Formatting” remains the safest choice. If you need structural consistency, Word’s built-in tools are sufficient. And if automation and scalability matter most, VBA or Python-based solutions provide long-term efficiency.
By understanding how Word handles section-level and document-level formatting, you can eliminate unexpected layout shifts and confidently choose the right merging strategy for your workflow.
FAQs
Q1. Why does formatting change after merging Word documents?
Because Word prioritizes the main document’s style definitions. If two documents share style names (such as “Heading 1”), the main document’s version overrides the inserted one.
Q2. How can I preserve margins and page orientation when merging?
You must insert a Section Break (Next Page) before adding the new document. Without a section break, the inserted content becomes part of the current section and inherits its layout settings.
Q3. Does “Keep Source Formatting” always preserve everything?
It preserves visual appearance in most cases. However, Word may create duplicate internal style definitions, which can make the document structure more complex.
Q4. Can I merge Word documents without Microsoft Word installed?
Yes. You can use online tools or programmatic solutions like Python libraries (e.g., Spire.Doc) to merge documents without relying on Word.
Q5. Which method is best for large-scale automated merging?
Python-based solutions are the most scalable. They allow batch processing, backend integration, and automation without manual interaction.
You May Also Be Interested In
Remove Blank Lines in Word Quickly: Manual & VBA/Python
Table of Contents
- What Do “Blank Lines” Really Mean in Microsoft Word?
- Method 1. Remove Blank Paragraphs Using Find and Replace
- Method 2. Remove Paragraphs Containing Spaces Only
- Method 3. Remove Manual Line Breaks (Shift + Enter Blank Lines)
- Method 4. Remove All Blank Lines Using a VBA Macro
- Method 5. Remove Blank Lines Programmatically Using Spire.Doc
- Comparison of the Five Methods
- Best Practices to Avoid Blank Lines in Future Documents
- Conclusion
- FAQs
Blank lines are one of the most common formatting issues in Microsoft Word documents. They often appear after copying content from websites, converting PDFs to Word, importing Markdown/HTML files, or generating documents programmatically. While they may look harmless, excessive blank lines can break document layout, affect pagination, and cause problems in automation workflows.
This guide explains what “blank lines” really mean in Word and walks through five practical methods to remove them — from quick manual fixes using Find & Replace to automated cleanup with VBA and Spire.Doc for Python.
Quick Navigation
- Method 1. Remove Blank Paragraphs Using Find and Replace
- Method 2. Remove Paragraphs Containing Spaces Only
- Method 3. Remove Manual Line Breaks (Shift + Enter Blank Lines)
- Method 4. Remove All Blank Lines Using a VBA Macro
- Method 5. Remove Blank Lines Programmatically Using Spire.Doc for Python
What Do “Blank Lines” Really Mean in Microsoft Word?
In Microsoft Word, “blank lines” isn’t a strict technical term — it’s more of a visual/layout description. Depending on context, it can refer to a few different things:
| Type | Symbol in Word | Created By | Structural Meaning | Common Causes |
|---|---|---|---|---|
| Blank Paragraph | ¶ | Press Enter | Empty paragraph with no text | Manual editing, formatting habits |
| Paragraph Containing Spaces Only | ¶ + ··· | Space + Enter | Paragraph with invisible whitespace | Pasted content, alignment attempts |
| Manual Line Break | ↓ / ↵ | Shift + Enter | New line within the same paragraph | PDF conversion, web copy, HTML import |
To see these symbols, enable Show/Hide ¶ from the Home tab or press Ctrl + Shift + 8.
Method 1. Remove Blank Paragraphs Using Find and Replace
Blank paragraphs are the most common source of visible empty lines in Word documents. They usually occur when users press Enter multiple times to add spacing. Before moving on to more advanced cleanup methods, it’s best to eliminate these structural empty paragraphs using Word’s built-in Find and Replace tool. This quick manual approach is ideal for documents that require only basic formatting cleanup.
Steps to Remove Blank Paragraphs
- Open your Word document.
- Press Ctrl + H to open the Find and Replace dialog.
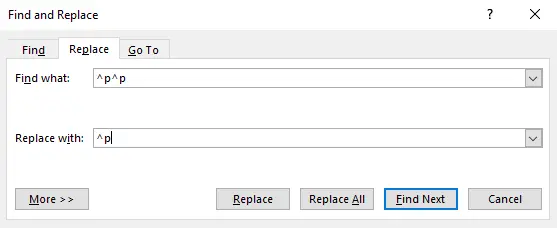
- In the Find what box, enter ^p^p (this searches for double paragraph marks).
- In the Replace with box, enter ^p (this replaces double paragraph marks with a single one).
- Click Replace All to remove the extra blank paragraphs.
- Repeat until Word says 0 replacements.
What Happens Next
After removing true blank paragraphs, some empty lines may still remain because they contain hidden spaces or manual line breaks. The next method focuses on removing paragraphs that appear empty but actually contain whitespace characters.
Method 2. Remove Paragraphs Containing Spaces Only
Some paragraphs look blank but contain invisible spaces, tabs, or non-printing characters. These paragraphs are often introduced when content is pasted from web pages or PDFs. Since Method 1 only removes completely empty paragraphs, this step targets whitespace-only paragraphs using wildcard searches.
Steps to Remove Whitespace-Only Paragraphs
- Open your Word document.
- Press Ctrl + H to open the Find and Replace dialog.
- Click on More >> and check the box for Use wildcards.
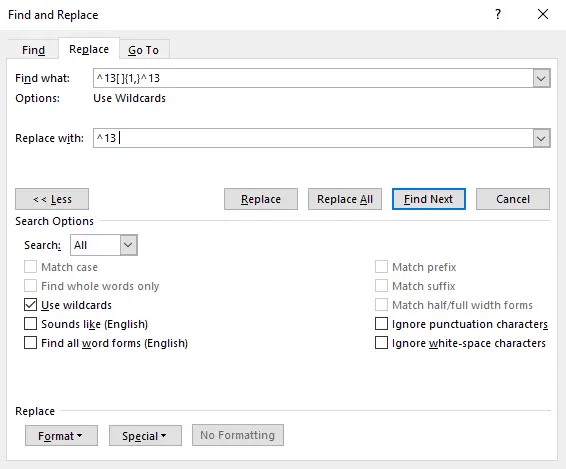
- In the Find what box, enter the pattern ^13[ ]{1,}^13 (this searches for a paragraph followed by one or more spaces and another paragraph).
- In the Replace with box, enter ^13 (this replaces the found pattern with a single paragraph).
- Click Replace All — you may need to click multiple times until the replacement count shows 0.
Learn wildcard search techniques: Word Wildcards for Advanced Search
What Happens Next
At this stage, most empty paragraphs are gone. However, some blank lines may still appear due to manual line breaks inserted with Shift + Enter, which behave differently from real paragraphs. The next method addresses those structural line breaks.
Method 3. Remove Manual Line Breaks (Shift + Enter Blank Lines)
Manual line breaks create new visual lines without starting a new paragraph. They are commonly introduced when copying text from emails, HTML pages, or PDF conversions. Even after cleaning paragraphs and whitespace, these breaks may still create gaps that look like blank lines.
Steps to Remove Manual Line Breaks
- Open your Word document.
- Press Ctrl + H to open the Find and Replace dialog.
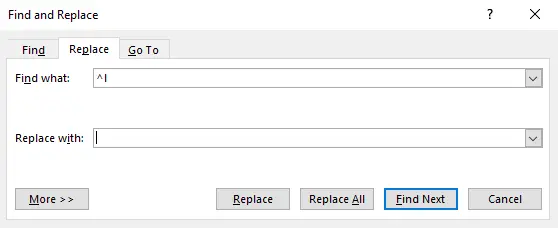
- In the Find what box, enter ^l (this searches for line breaks).
- Leave the Replace with box empty.
- Click Replace All until Word reports zero replacements.
What Happens Next
After completing the first three manual methods, your document structure should be significantly cleaner. If you need to repeat this cleanup frequently or process many documents, automation becomes more efficient. The next method introduces a VBA macro that performs a full cleanup automatically.
Method 4. Remove All Blank Lines Using a VBA Macro
When you need to clean multiple documents or want a one-click solution inside Word, a VBA macro can automate the entire process. This method removes empty paragraphs, whitespace-only paragraphs, and manual line breaks in a single execution.
Steps to Create and Run the Macro
- Open your Word document.
- Press Alt + F11 to open the VBA Editor.
- Click Insert → Module.
- Paste the following VBA code into the module window.
- Press F5 to run the macro or close the editor and run it from View → Macros.
VBA Code:
Sub RemoveAllEmptyLines_Simple()
    ' Delete empty paragraphs
    Dim para As Paragraph
    For Each para In ActiveDocument.Paragraphs
        If Len(Trim(para.Range.Text)) <= 1 Then
            para.Range.Delete
        End If
    Next para

    ' Delete empty manual line breaks (find and replace method)
    With ActiveDocument.Range.Find
        .ClearFormatting
        .Text = "[ ]@^l"
        .Replacement.Text = ""
        .MatchWildcards = True
        .Wrap = wdFindContinue
        .Execute Replace:=wdReplaceAll
    End With

    ' Delete remaining isolated manual line breaks
    With ActiveDocument.Range.Find
        .ClearFormatting
        .Text = "^l"
        .Replacement.Text = ""
        .MatchWildcards = False
        .Wrap = wdFindContinue
        .Execute Replace:=wdReplaceAll
    End With
End Sub
Microsoft VBA reference: Getting Started with VBA in Word
Transition to Next Method
While VBA macros are powerful within Word itself, they still require manual execution and access to the Word application. For developers or automation pipelines, a programmatic solution offers greater flexibility — which leads us to the final method using Spire.Doc for Python.
Method 5. Remove Blank Lines Programmatically Using Spire.Doc for Python
For large-scale automation or server-side processing, Spire.Doc for Python allows you to analyze and clean document structure directly through code. This method is ideal for developers who need to process multiple files automatically without opening Word.
Step 1. Install the Library
pip install spire.doc
Step 2. Create a Python Script
- Open your preferred Python IDE or editor.
- Create a new Python file (e.g., remove_blank_lines.py).
- Paste the following code into the file.
Step 3. Run the Script
Code Example:
from spire.doc import *
from spire.doc.common import *

# Load Word document
doc = Document()
doc.LoadFromFile("Input.docx")

# Get first section
section = doc.Sections[0]

# -----------------------------
# Step 1. Remove manual line breaks
# -----------------------------
for p_index in range(section.Paragraphs.Count):
    paragraph = section.Paragraphs[p_index]

    # Traverse child objects backward
    for i in range(paragraph.ChildObjects.Count - 1, -1, -1):
        obj = paragraph.ChildObjects[i]

        if obj.DocumentObjectType == DocumentObjectType.Break:
            try:
                if hasattr(obj, 'BreakType') and obj.BreakType == BreakType.LineBreak:
                    paragraph.ChildObjects.RemoveAt(i)
            except:
                # If BreakType cannot be accessed, assume line break
                paragraph.ChildObjects.RemoveAt(i)

# -----------------------------
# Step 2. Remove blank paragraphs
# -----------------------------
for i in range(section.Paragraphs.Count - 1, -1, -1):
    paragraph = section.Paragraphs[i]

    has_non_text_content = False

    # Check for non-text content (images, tables, fields, etc.)
    for j in range(paragraph.ChildObjects.Count):
        obj = paragraph.ChildObjects[j]
        if obj.DocumentObjectType != DocumentObjectType.TextRange:
            has_non_text_content = True
            break

    # Remove paragraphs that are empty or whitespace-only
    if not has_non_text_content and (paragraph.Text == "" or paragraph.Text.isspace()):
        section.Paragraphs.RemoveAt(i)

# Save document
doc.SaveToFile("RemoveBlankLines.docx", FileFormat.Docx2019)
doc.Dispose()
Output:
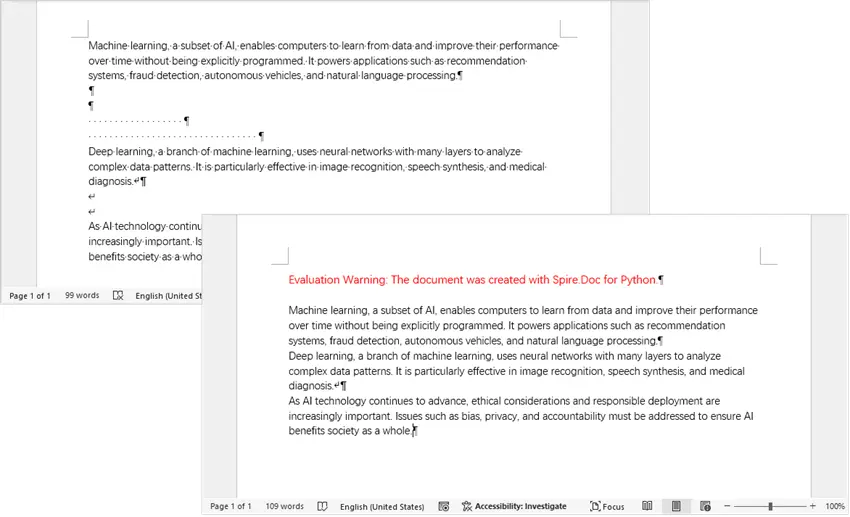
With automation in place, you can now handle blank lines at scale and integrate document cleanup directly into your processing pipelines. Beyond removing empty paragraphs and manual line breaks, Spire.Doc for Python provides a comprehensive set of document manipulation capabilities.
You can create Word documents from scratch, modify existing files, adjust formatting, insert tables or images, and even export documents to other formats such as PDF or HTML. This makes it ideal for building end-to-end document automation workflows while ensuring your content is clean, consistent, and ready for further processing.
Comparison of the Five Methods
| Method | Skill Level | Automation | Best For | Batch Processing |
|---|---|---|---|---|
| Find & Replace (Blank Paragraphs) | Beginner | No | Quick manual cleanup | No |
| Find & Replace (Spaces Only) | Beginner | No | Imported or pasted content | No |
| Find & Replace (Line Breaks) | Beginner | No | PDF/web content normalization | No |
| VBA Macro | Intermediate | Yes | Repeated tasks | Yes |
| Spire.Doc for Python | Advanced | Full | Large-scale automation | Yes |
Best Practices to Avoid Blank Lines in Future Documents
- Use paragraph spacing instead of multiple Enter presses.
- Avoid inserting multiple spaces for visual alignment.
- Normalize imported content immediately after pasting.
- Convert manual line breaks into real paragraphs early.
- Validate document structure before automation workflows.
Conclusion
To remove blank lines in Word, first identify whether they come from empty paragraphs, whitespace-only paragraphs, or manual line breaks. Choosing the right method helps you clean documents efficiently without affecting layout or structure. This guide covered five practical approaches — from quick Find & Replace techniques to automated solutions using VBA and Spire.Doc for Python.
For quick edits, Word’s built-in tools work well. For repeated tasks or batch processing, automation with VBA or Spire.Doc for Python helps streamline cleanup and integrate document formatting into larger workflows.
FAQs
Q1. Why do blank lines appear after converting PDFs to Word?
PDF converters often insert manual line breaks instead of real paragraphs, which look like blank lines.
Q2. What’s the difference between Enter and Shift + Enter?
Enter creates a new paragraph (¶), while Shift + Enter inserts a manual line break (↓/↵) within the same paragraph.
Q3. How can I see hidden blank line structures?
Enable formatting marks using Ctrl + Shift + 8.
Q4. Will removing blank lines affect document layout?
It may change spacing or pagination, so review formatting after cleanup.
Q5. Which method is best for large batches of files?
Automation methods like VBA macros or Spire.Doc for Python are ideal for batch processing.
You May Also Be Interested In
Convert Python Code to Word (Plain or Syntax-Highlighted)
Developers often need to include Python code inside Word documents for technical documentation, tutorials, code reviews, internal reports, or client deliverables. While copying and pasting code manually works for small snippets, automated solutions provide better consistency, formatting control, and scalability — especially when working with long scripts or multiple files.
This tutorial demonstrates multiple practical methods to export Python code into Word documents using Python. Each method has its own strengths depending on whether you prioritize formatting, automation, syntax highlighting, or readability.
On This Page:
- Install Required Libraries
- Export Python Code to Word as Plain Text
- Add Syntax-Highlighted Python Code to Word
- Conclusion
- FAQs
Install Required Libraries
Install the necessary dependencies before running the examples:
pip install spire.doc pygments
Library Overview:
- Spire.Doc for Python — used to create and manipulate Word documents programmatically
- Pygments — used to generate syntax-highlighted code in RTF, HTML, or image formats
- Pathlib (built-in) — used for reading Python files from disk
- textwrap (built-in) — used to wrap long code lines before generating images formatting
Export Python Code to Word as Plain Text
Plain text insertion is the most straightforward method for embedding code in Word. It keeps scripts fully editable and preserves formatting such as indentation and line breaks.
Method 1. Insert Raw Python Code into a Word Document
This method reads a .py file and inserts the code directly into Word while applying a monospace font style.
from pathlib import Path
from spire.doc import *

# Read Python file
code_string = Path("demo.py").read_text(encoding="utf-8")

# Create a Word document
doc = Document()

# Add a section
section = doc.AddSection()
section.PageSetup.Margins.All = 60

# Add a paragraph
paragraph = section.AddParagraph()

# Insert code string to the paragraph
paragraph.AppendText(code_string)

# Create a paragraph style
style = ParagraphStyle(doc)
style.Name = "code"
style.CharacterFormat.FontName = "Consolas"
style.CharacterFormat.FontSize = 12
style.ParagraphFormat.LineSpacing = 12
doc.Styles.Add(style)

# Apply the style to the paragraph
paragraph.ApplyStyle("code")

# Save the document
doc.SaveToFile("Output.docx", FileFormat.Docx2019)
doc.Dispose()
How It Works:
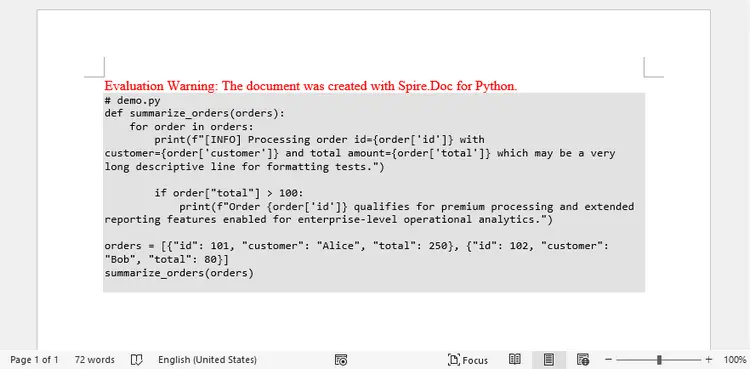
This technique treats Python code as plain text and inserts it directly into a Word paragraph. The script reads the .py file using Path.read_text(), preserving indentation, blank lines, and overall structure.
After inserting the text, a custom paragraph style is created and applied. The use of a monospace font such as Consolas ensures alignment and readability, while fixed line spacing maintains consistent formatting across lines.
Because no intermediate format is used, this is the simplest and fastest approach. However, it does not provide syntax highlighting or semantic styling—Word only displays the code as formatted text.
Output:

You May Also Like: Generate Word Documents Using Python
Method 2. Generate a Word File from Markdown-Wrapped Code
If your workflow already uses Markdown, wrapping Python code inside fenced blocks provides a structured way to convert scripts into Word documents.
from pathlib import Path
from spire.doc import *

# Read Python file
code = Path("demo.py").read_text(encoding="utf-8")

# Convert to Markdown
md_content = f"```python\n{code}\n```"
Path("temp.md").write_text(md_content, encoding="utf-8")

# Load Markdown into Word
doc = Document()
doc.LoadFromFile("temp.md")

# Update page settings
doc.Sections[0].PageSetup.Margins.All = 60

# Save as a DOCX file
doc.SaveToFile("Output.docx", FileFormat.Docx)
doc.Dispose()
How It Works:
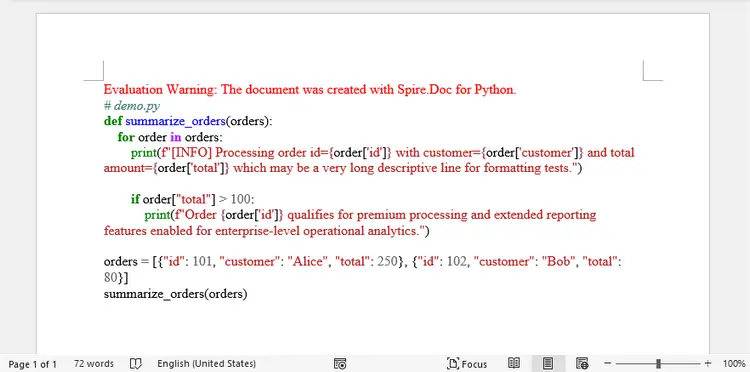
Instead of inserting text directly, this method wraps Python code inside Markdown fenced code blocks. The generated Markdown file is then loaded into Word using Spire.Doc’s Markdown parsing capability.
When Word imports Markdown, it automatically preserves code formatting such as indentation and line breaks. This approach is useful when your documentation workflow already uses Markdown or when code needs to coexist with headings, lists, and descriptive text.
Since Markdown itself does not inherently apply syntax coloring inside Word, the result is still plain code formatting—but the structure is cleaner and easier to manage within technical documentation pipelines.
Output:
Add Syntax-Highlighted Python Code to Word
Syntax highlighting makes code easier to read and understand. By integrating Pygments, Python scripts can be converted into stylized formats before being embedded into Word.
This section explores three approaches — RTF, HTML, and image rendering — each with different strengths depending on your formatting goals.
Method 1. Use RTF for Preformatted Code Blocks
RTF allows syntax-highlighted code to remain fully editable within Word.
from pathlib import Path
from pygments import highlight
from pygments.lexers import PythonLexer
from pygments.formatters import RtfFormatter
from spire.doc import *

# Read Python file
code = Path("demo.py").read_text(encoding="utf-8")

# Set font
formatter = RtfFormatter(fontface ="Consolas")

# Specify the lexer
rtf_text = highlight(code, PythonLexer(), formatter)
rtf_text = rtf_text.replace(r"\f0", r"\f0\fs24") # font size (24 for 12-point font)

# Create a Word document
doc = Document()

# Add a section
section = doc.AddSection()
section.PageSetup.Margins.All = 60

# Add a paragraph
paragraph = section.AddParagraph()

# Insert the syntax-highlighted code as RTF
paragraph.AppendRTF(rtf_text)

# Save the document
doc.SaveToFile("Output.docx", FileFormat.Docx2019)
doc.Dispose()
How It Works:
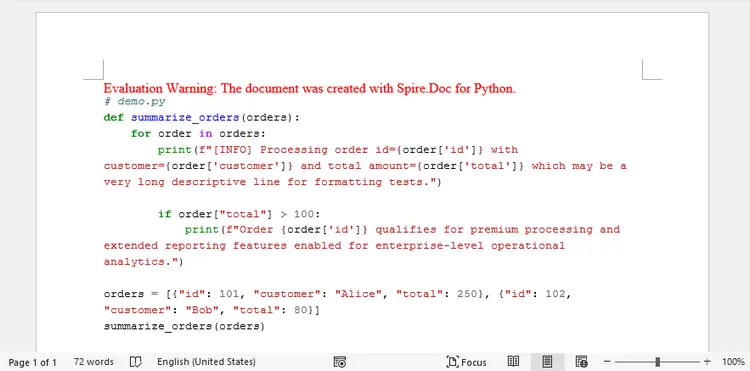
Pygments analyzes Python syntax using a lexer, identifying tokens such as keywords, strings, and comments. The RTF formatter applies styling rules that represent colors and fonts using RTF control words.
The resulting RTF string is inserted directly into Word using AppendRTF(). Because RTF is a native Word-compatible format, the document preserves fonts, colors, and spacing without requiring additional rendering steps.
Font size is controlled by modifying RTF control words (e.g., \fs24), allowing precise control over appearance. This method produces editable, selectable code with syntax highlighting inside Word.
Output:
Method 2. Render Highlighted Code via HTML Formatting
HTML rendering provides visually rich syntax highlighting and automatic text wrapping.
from pathlib import Path
from pygments import highlight
from pygments.lexers import PythonLexer
from pygments.formatters import HtmlFormatter
from spire.doc import *

# Read Python file
code = Path("demo.py").read_text(encoding="utf-8")

# Generate HTML from the Python code with syntax highlighting
html_text = highlight(code, PythonLexer(), HtmlFormatter(full=True))

# Create a Word document
doc = Document()

# Add a section
section = doc.AddSection()
section.PageSetup.Margins.All = 60

# Add a paragraph
paragraph = section.AddParagraph()

# Add the HTML string to the paragraph
paragraph.AppendHTML(html_text)

# Save the document
doc.SaveToFile("Output.docx", FileFormat.Docx2019)
doc.Dispose()
How It Works:
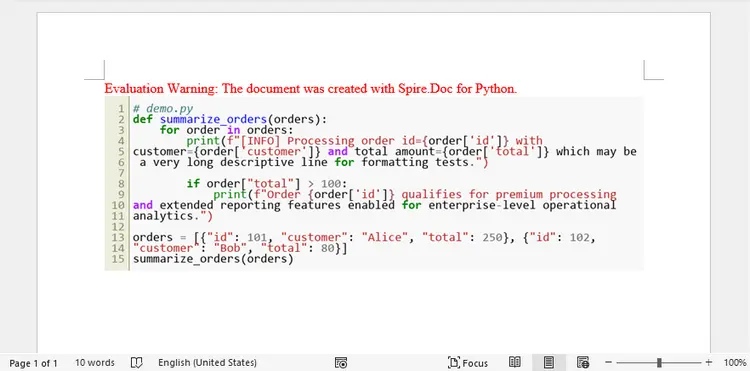
Here, Pygments converts Python code into styled HTML using the HtmlFormatter. The HTML output includes inline styles or CSS rules that represent syntax colors and formatting.
Spire.Doc then interprets the HTML content and renders it into Word. During this process, HTML elements are translated into Word formatting structures, allowing the highlighted code to appear visually similar to web-based code blocks.
This approach is ideal when code originates from web content, static documentation sites, or Markdown-to-HTML workflows.
Output:
You May Also Like: Convert HTML to Word DOC or DOCX in Python
Method 3. Insert Syntax-Highlighted Code as Images
For scenarios where visual consistency matters more than editability, code can be rendered as an image before insertion.
from pathlib import Path
import textwrap
from pygments import highlight
from pygments.lexers import PythonLexer
from pygments.formatters import ImageFormatter
from spire.doc import *

# Read Python file
code = Path("demo.py").read_text(encoding="utf-8")

# Wrap long lines manually
def wrap_code_lines(code_text, max_width=75):
    wrapped_lines = []
    for line in code_text.splitlines():
        if len(line) > max_width:
            wrapped_lines.extend(textwrap.wrap(
                line,
                width=max_width,
                replace_whitespace=False,
                drop_whitespace=False
            ))
        else:
            wrapped_lines.append(line)
    return "\n".join(wrapped_lines)

code = wrap_code_lines(code, max_width=75)

# Step 3: Generate image
formatter = ImageFormatter(
    font_name="Consolas",
    font_size=18,
    scale=2,
    image_pad=10,
    line_pad=2,
    background_color="#ffffff"
)

img_bytes = highlight(code, PythonLexer(), formatter)

with open("code.png", "wb") as f:
    f.write(img_bytes)

# Create a Word document
doc = Document()
section = doc.AddSection()
section.PageSetup.Margins.All = 60

# Insert into Word
paragraph = section.AddParagraph()
picture = paragraph.AppendPicture("code.png")

# Ensure image fits page width
page_width = (
    section.PageSetup.PageSize.Width
    - section.PageSetup.Margins.Left
    - section.PageSetup.Margins.Right
)
picture.Width = page_width

# Save the document
doc.SaveToFile("Output.docx", FileFormat.Docx2019)
doc.Dispose()
How It Works:
This method renders Python code as an image instead of editable text. Pygments generates a syntax-highlighted bitmap using the ImageFormatter, allowing full visual control over fonts, colors, padding, and DPI.
Since image rendering does not automatically wrap long lines, the script manually wraps lengthy code lines using Python’s textwrap module before generating the image. This prevents oversized images that exceed page width.
After inserting the image into Word, its width is dynamically resized to fit the printable page area. Because the code is embedded as a graphic, it preserves exact visual appearance across platforms and prevents formatting inconsistencies—but the text is no longer editable.
Output:
Conclusion
Converting Python code to Word documents can be achieved through several approaches depending on your goals. Plain text methods provide simplicity and flexibility, while RTF and HTML techniques offer powerful syntax highlighting with selectable text. Image-based code blocks deliver consistent visual formatting but require careful line wrapping and scaling.
For most documentation workflows:
- Use plain text for editable technical content
- Use HTML or RTF for syntax-highlighted documentation
- Use images when formatting consistency is critical
FAQs
Which method is best for tutorials?
HTML or RTF methods provide clear syntax highlighting with selectable text.
How can I preserve indentation and blank lines?
Read the .py file using .read_text() without stripping or modifying lines.
Why do image-based code blocks become too small?
Word scales images to fit page width. Increasing the image formatter’s scale or adjusting the wrapping width can improve readability.
Can readers copy code from Word?
Yes — except when code is inserted as an image.
Do I need Markdown for conversion?
No. Markdown is optional but useful when working with documentation pipelines.
Can I export the generated document as a PDF file?
Yes. When saving the document, simply specify PDF as the output format in the Document.SaveToFile() method.
Get a Free License
To fully experience the capabilities of Spire.Doc for Python without any evaluation limitations, you can request a 30-day trial license.
7 Smart Ways to Insert Code Blocks in Word Documents
Table of Contents
- Method 1: Copy Code from an IDE (Syntax Highlighting)
- Method 2: Apply a Custom Code Style in Word
- Method 3: Box Code Using 1-Cell Tables
- Method 4: Add Code Snippets to Word as Images
- Method 5: Embed Code as a Document Object
- Method 6: Format Code Blocks Using Word Add-ins
- Method 7: Automate Code Insertion via Python
- Comparison: Choosing the Right Method
- Final Thoughts
- FAQs
Including code snippets in Word documents is a common need for developers, technical writers, and educators. However, achieving readable, visually appealing, and maintainable code blocks in Word can be tricky.
Some users simply copy and paste from an IDE, which can disrupt formatting, while others manually style text or use screenshots, which may be time-consuming. For documents that require consistency, editing, or automation, choosing the right method can save hours of work.
In this guide, we cover seven smart ways to insert code blocks in Word — from quick manual approaches to fully automated workflows using Python and Spire.Doc — so you can select the method that best fits your needs.
Method Overview
- Method 1: Copy Code from an IDE (Syntax Highlighting)
- Method 2: Apply a Custom Code Style in Word
- Method 3: Box Code Using 1-Cell Tables
- Method 4: Add Code Snippets to Word as Images
- Method 5: Embed Code as a Document Object
- Method 6: Format Code Blocks Using Word Add-ins
- Method 7: Automate Code Insertion via Python
Method 1: Copy Code from an IDE (Syntax Highlighting)
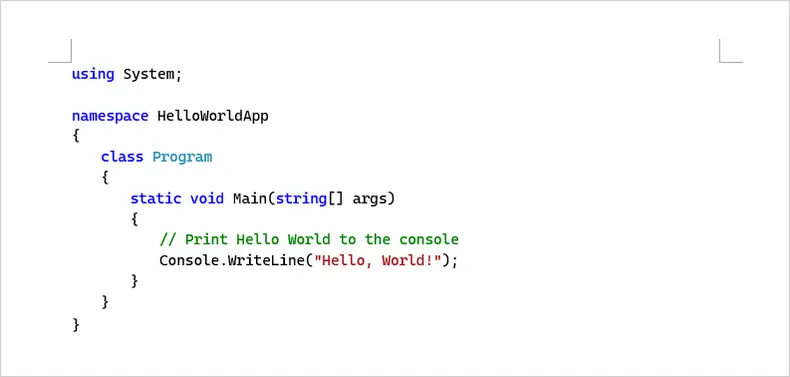
This method involves copying code directly from an IDE (such as VS Code, Visual Studio, or IntelliJ IDEA) and pasting it into a Word document. Most modern IDEs preserve syntax highlighting and basic formatting automatically when copying code.
When to Use This Method:
This approach is well suited for short code examples in tutorials, technical guides, or reports where the document is largely read-only. It works best when the code does not require frequent updates after being added to Word.
How to Copy Code from an IDE into Word:
- Open the code file in your IDE and select the desired lines.
- Copy the selection using the standard copy command.
- Paste the code into Word and choose Keep Source Formatting.
You may adjust font size or line spacing to better match the surrounding content.
Pros:
- Fast and convenient
- Preserves syntax highlighting
- No additional tools required
Cons:
- Formatting may vary across Word versions
- Not ideal for large or frequently updated code blocks
Best for: Short code examples in tutorials or one-off documents
Method 2: Apply a Custom Code Style in Word
This method uses Word’s built-in styles to create a dedicated “Code” style for formatting code snippets consistently. You can control font, size, color, line spacing, and background shading, ensuring all code blocks look uniform throughout your document.
When to Use This Method:
Ideal for documents that require multiple code examples with consistent formatting, especially when edits or updates are expected. It works well for tutorials, guides, or reports that will be maintained over time.
How to Apply a Custom Code Style:
- Select your code in Word.
- Open the Styles pane and create a new style named “Code.”
- Set the font to a monospace type (e.g., Consolas, Courier New), adjust font size and line spacing, and optionally add a light background color (found under Format > Borders).
- Apply this style to all code blocks for consistent formatting.

Pros:
- Consistent and professional appearance
- Fully editable and searchable
- Easily reusable across the document
Cons:
- Requires initial setup
- Less visually striking than IDE syntax highlighting
- Needs manual style application for each new code block
Best for: Medium to long documents with multiple, editable code examples
Method 3: Box Code Using 1-Cell Tables
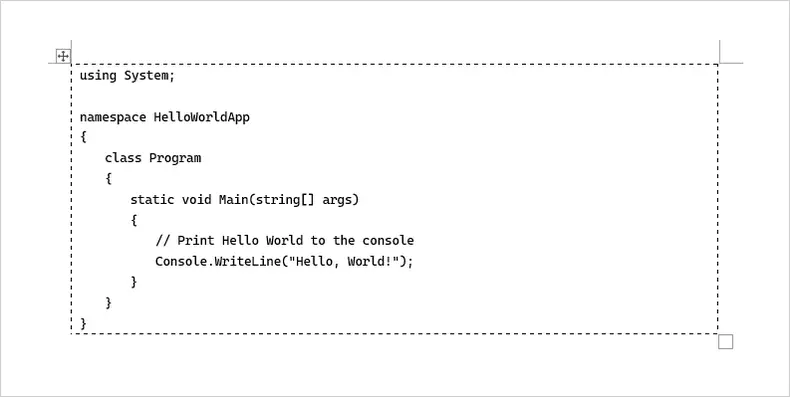
This approach involves placing each code snippet inside a single-cell table. The table acts as a container, helping the code stand out and preventing text from flowing around it.
When to Use This Method:
Useful for short commands or snippets where visual separation from surrounding text is important. It’s also handy for documents that may be printed or exported to PDF.
How to Box Code in a Table:
- Insert a 1×1 table in Word.
- Paste your code into the table cell.
- Apply monospace font and optionally set a light background shading.
- Adjust cell padding or remove borders as needed.
Pros:
- Clear visual separation
- Layout stays stable across pages and exports
- Works without additional tools
Cons:
- Editing long code inside a table can be cumbersome
- Adding many code blocks can clutter the document
- Table borders may require fine-tuning for aesthetics
Best for: Short commands or snippets needing a clear, isolated layout
Method 4: Add Code Snippets to Word as Images
This method converts code into an image, ensuring that formatting, colors, and alignment appear exactly as intended in Word.
When to Use This Method:
Perfect for documents where visual fidelity is critical and code does not need to be edited. Examples include marketing materials, reports for external clients, or PDFs intended for distribution.
How to Insert Code as an Image:
- Use a screenshot tool or IDE export feature to create an image of your code.
- Insert the image into Word using Insert → Pictures.
- Resize as needed and optionally add a border.
Pros:
- Formatting and colors are preserved exactly
- Looks professional and polished
- Safe for printed or shared PDFs
Cons:
- Code is not editable
- Not searchable or copyable
- Accessibility issues for screen readers
Best for: Final presentation documents where editing code is not required
Method 5: Embed Code as a Document Object
This method embeds code inside the Word document as a separate object rather than inline text. Instead of pasting code directly into the document body, you insert a small embedded document that contains the code. This keeps the code visually isolated and prevents Word from interfering with formatting.
When to Use This Method:
This method works well when you want to visually separate code from surrounding content or when the code should remain unchanged and read-only. It is particularly useful for reports, specifications, or documents where code is included for reference rather than active editing.
How to Embed Code as an Object in Word:
- Go to the Insert tab in Word.
- Click the Object drop-down arrow and select Object.
- On the Create New tab, choose OpenDocument Text as the object type.
- Click OK. A new document window will open.
- Paste or type your code into the new document.
- Close the embedded document window.
Once closed, the code appears in your original Word document as an embedded object. You can move it or resize it as needed.
Pros:
- Keeps code clearly separated from main document text
- Prevents Word from altering formatting
- Object can be resized or repositioned easily
- Suitable for read-only code blocks
Cons:
- Code cannot be edited directly inline
- Not ideal for long or frequently updated code
Best for: Embedding stable, read-only code snippets in reports or documentation where layout control matters more than editability
Method 6: Format Code Blocks Using Word Add-ins
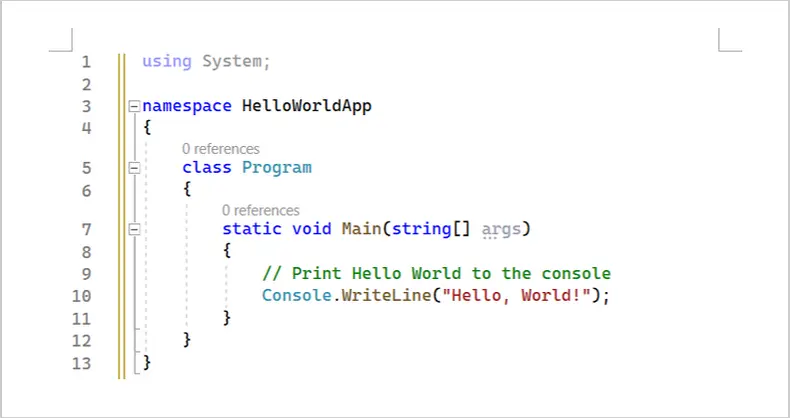
This approach uses a dedicated Word add-in to format and highlight code snippets directly inside your document. One popular add-in available in the Office Add-ins store is Easy Syntax Highlighter (free), which supports many programming languages and themes.
When to Use This Method:
Use this method when you want syntax highlighting and code formatting applied automatically without pasting images or styling manually. It’s especially useful for larger sets of snippets in documentation where consistent highlighting is important.
How to Use the Easy Syntax Highlighter Add-in:
- In Word, go to the Insert tab and choose Get Add-ins (or Office Add-ins).
- Search for Easy Syntax Highlighter and install it.
- After installing, select the block of code you want formatted.
- Use the add-in’s ribbon or pane to choose a language and apply highlighting.
- The selected code will be formatted with syntax colors and styles.
(An alternative add-in you can mention is Easy Code Formatter, which also formats selected text as code using built-in themes.)
Pros:
- Applies syntax highlighting directly in Word
- Supports many languages and themes
- Makes repeated insertion much easier than manual styling
Cons:
- Requires installing an add-in
- Some features/themes may require configuration
Best for: Medium to large documents where consistency and formatting speed matter
Method 7: Automate Code Insertion via Python
For large documents or repeated code insertions, you can automate the process using Python. This method leverages Spire.Doc for Python to create Word documents and Pygments to apply syntax highlighting automatically. It works for Python, C#, Java, and many other languages, making it a universal solution for technical documentation.
When to Use This Method:
Use this method when you have many code snippets, need consistent syntax highlighting, or want to generate documents automatically (for reports, tutorials, or manuals). It’s ideal for situations where manual copy-paste or add-ins are impractical.
How to Automate Code Insertion:
-
Install the required libraries if you haven’t already:
pip install spire.doc pygments -
Prepare your code as a string.
-
Use Pygments to convert the code into RTF with syntax highlighting, specifying the appropriate lexer for the language, or use guess_lexer to automatically detect it.
-
Use Spire.Doc to create a Word document, add a paragraph, and insert the RTF string.
-
Save the document as DOCX.
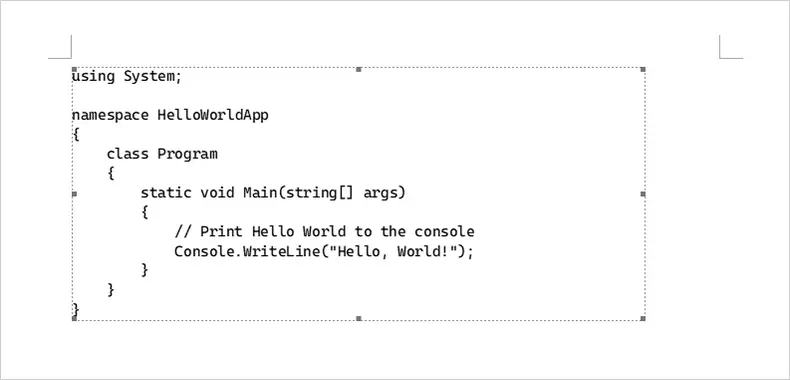
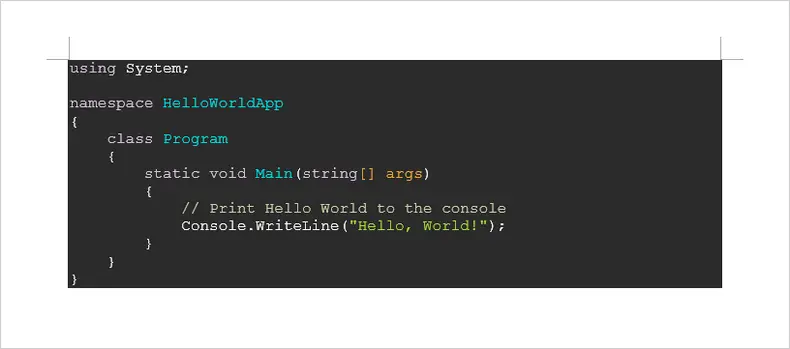
Here’s an example using Python code:
from pygments import highlight
from pygments.lexers import CSharpLexer, guess_lexer
from pygments.formatters import RtfFormatter
from spire.doc import *

# Define the code to insert (C#, Java, Python, etc.)
code = """
using System;

namespace HelloWorldApp
{
    class Program
    {
        static void Main(string[] args)
        {
            // Print Hello World to the console
            Console.WriteLine("Hello, World!");
        }
    }
}
"""

# Set font name
formatter = RtfFormatter(fontface="Consolas")

# Option 1: Specify the lexer explicitly (recommended when language is known)
rtf_text = highlight(code, CSharpLexer(), formatter)
rtf_text = rtf_text.replace(r"\f0", r"\f0\fs21")  # font size

# Option 2: Automatically detect the programming language
# This is useful when processing mixed or unknown code snippets
# lexer = guess_lexer(code)
# rtf_text = highlight(code, lexer, formatter)

# Load a Word document
doc = Document()
doc.LoadFromFile("Input.docx")

# Add a paragraph
section = doc.Sections.get_Item(0)
para = section.AddParagraph()

# Insert the syntax-highlighted code as RTF
para.AppendRTF(rtf_text)

# Save the document
doc.SaveToFile("InsertCode.docx", FileFormat.Docx2016)
doc.Close()
After running the script, the resulting Word document contains fully formatted and syntax-highlighted code, editable and consistent, regardless of the programming language used.

Pros:
- Fully automated and scalable for multiple code blocks
- Works for Python, C#, Java, and many other languages
- Consistent syntax highlighting and editable Word output
Cons:
- Requires Python environment and libraries
- Slight setup and learning curve for first-time users
Best for: Generating large technical documents, tutorials, or reports with multiple code snippets where automation and consistency are priorities
Beyond inserting syntax-highlighted code blocks via RTF, Spire.Doc for Python also supports adding code snippets to Word documents using HTML or images, which can be useful when the formatting is already prepared elsewhere. In addition, Markdown files that contain code blocks can be converted into Word documents, preserving structure and readability.
Once the document is generated, it can be exported directly to PDF, making this approach suitable for end-to-end documentation workflows that start from code and finish with a distributable file format.
Comparison: Choosing the Right Method
| Method | Ease of Use | Setup / Tools Required | Scalability | Best For |
|---|---|---|---|---|
| Copy from IDE | ★★★★★ | None | Low | Short, one-off code examples |
| Custom Word Style | ★★★★☆ | Manual style setup | Medium | Documents with repeated code blocks |
| 1-Cell Table | ★★★★☆ | Word only | Low | Boxed code with layout control |
| Code as Images | ★★★★☆ | Screenshot tool or IDE export | Low | Read-only or design-focused docs |
| Document Object | ★★★☆☆ | Word object support | Low | Embedded, isolated code blocks |
| Word Add-ins | ★★★★☆ | Add-in installation | Medium | Quick formatting without coding |
| Programmatic (Python) | ★★☆☆☆ | Python + Libraries | High | Large or frequently updated docs |
Final Thoughts
There’s no one-size-fits-all approach to inserting code into Word. For quick, one-off snippets, manual copy or tables may suffice. If your document will be edited frequently or contains multiple snippets, using custom Word styles or a snippet add-in ensures consistency. For large-scale or automated workflows, Python with Spire.Doc and Pygments offers maximum efficiency and control.
By understanding the strengths and limitations of each method, you can produce documents that are professional, readable, and maintainable, while minimizing the frustration often associated with formatting code in Word.
FAQs
Q1: Can I copy code from any IDE into Word and keep formatting?
Most modern IDEs, including VS Code, Visual Studio, and IntelliJ IDEA, preserve basic formatting and syntax highlighting when copying. Some differences may occur depending on Word themes and fonts.
Q2: Can I include multiple programming languages in a single Word document?
Yes. Methods 1–6 work for any language as long as you choose the correct formatting. Method 7 (Python + Pygments) supports many languages, and guess_lexer can detect the language automatically.
Q3: Is the automated Python method difficult to set up?
It requires installing Python and the required libraries (Spire.Doc and pygments), but the workflow is simple once set up and saves time for large or repeated code insertions.
Q4: Which method is best for final, presentation-ready documents?
If visual fidelity is critical and editing isn’t needed, inserting the code as an image (Method 4) ensures perfect formatting.
You May Also Be Interested In
How to Convert a TIFF File to PDF: 4 Practical Methods
Table of Contents
TIFF (Tagged Image File Format) is widely used for scanned documents, engineering drawings, medical images, and long-term archiving because of its high image quality and support for multi-page files. However, TIFF files are not always easy to share, preview, or manage. Many devices and applications don’t display TIFF files properly, and large multi-page TIFFs can be inconvenient to distribute or print.
PDF, by contrast, is a universally supported format that preserves layout, works consistently across platforms, and is ideal for sharing, printing, and archiving. Converting TIFF files to PDF helps improve compatibility and simplifies document workflows.
In this article, we’ll explore four practical methods to convert a TIFF file to PDF, ranging from simple manual tools to a professional, automated solution, so you can choose the approach that best fits your needs.
Method Overview:
- Method 1: Convert TIFF to PDF Using Adobe Acrobat
- Method 2: Convert TIFF to PDF Using Print to PDF
- Method 3: Convert TIFF to PDF Using Online Tools
- Method 4: Convert TIFF to PDF Programmatically Using Spire.PDF
Method 1: Convert TIFF to PDF Using Adobe Acrobat
Best for: Users who already have Adobe Acrobat Pro and need high-quality, reliable output.
Adobe Acrobat Pro offers a straightforward way to convert image files, including TIFF, into PDF documents. It supports both single-page and multi-page TIFF files and preserves image quality well.
Step-by-Step Instructions
-
Open Adobe Acrobat Pro.
-
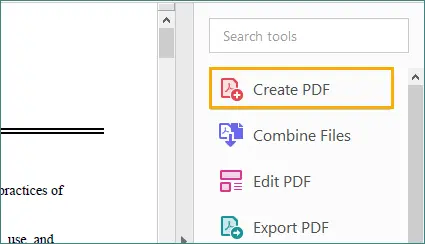
On the right-hand panel, click on the "Create PDF" option.
-
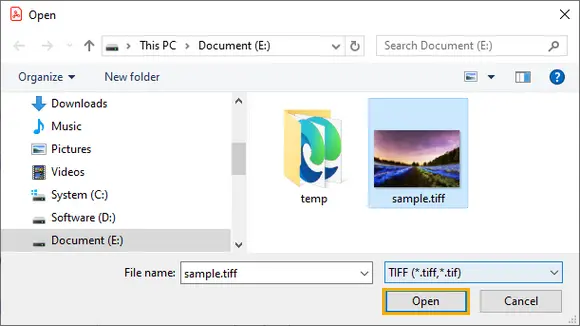
Select the TIFF file you want to convert and click "Open".
-
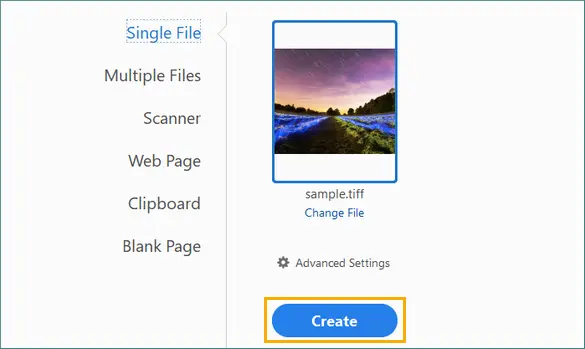
Click “Create” to convert the TIFF into a PDF document.
-
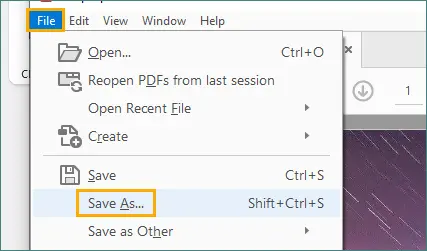
After the conversion is complete, go to “File” in the top menu and select “Save As” to save the generated PDF to your preferred location.
Advantages
- High output quality
- Reliable support for multi-page TIFF files
- No technical knowledge required
Limitations
- Requires a paid subscription
- Manual process only
- Not suitable for large-scale or repeated conversions
Adobe Acrobat is ideal for professionals who already rely on Adobe tools, but it may be excessive for users who only need occasional conversions.
Method 2: Convert TIFF to PDF Using Print to PDF
Best for: Windows users who need a quick, free solution.
Most modern Windows systems include Microsoft Print to PDF, which allows you to convert a TIFF file to PDF using the standard printing workflow.
Step-by-Step Instructions
-
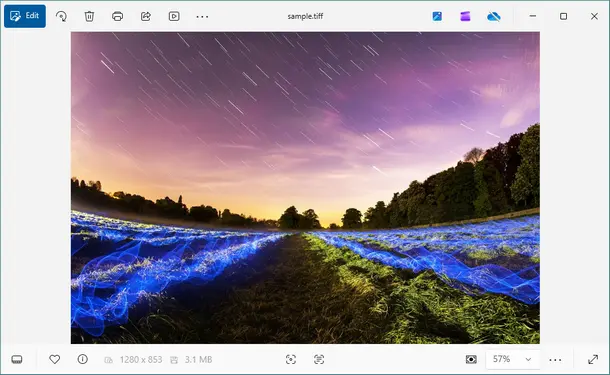
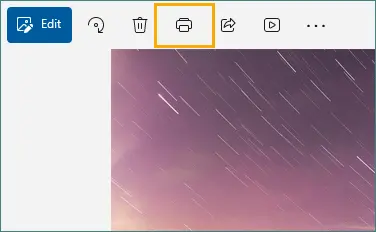
Open the TIFF file in Windows Photos or another image viewer.
-
Press Ctrl + P or choose Print from the menu.
-
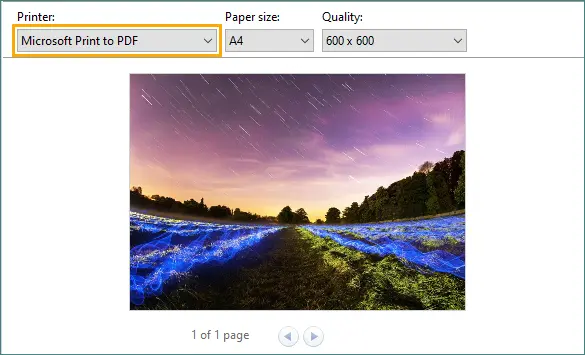
Select Microsoft Print to PDF as the printer.
-
Adjust basic print settings if needed.
-
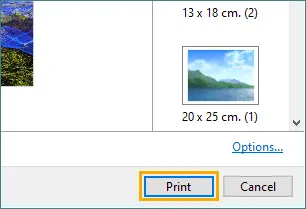
Click Print and save the resulting PDF file.
Advantages
- Built into Windows
- Free and easy to use
- No additional software required
Limitations
- Limited control over page size and resolution
- Output quality depends on print settings
- Not designed for batch processing
- Multi-page TIFF support may be inconsistent
This method works well for simple, one-off tasks but lacks precision and flexibility.
Method 3: Convert TIFF to PDF Using Online Tools
Best for: Occasional users who don’t want to install software and are working with non-sensitive files.
Online TIFF-to-PDF converters allow you to upload files through a web browser and download the converted PDF.
Step-by-Step Instructions
-
Open a web browser and visit an online TIFF-to-PDF conversion website (for example, tiff2pdf).

-
Upload the TIFF file. In most cases, the conversion starts automatically; some websites may require you to confirm the action.
-
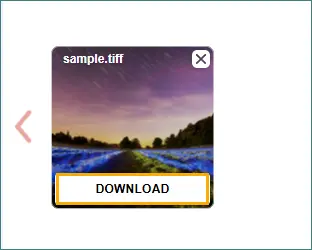
Download the converted PDF file once the process is complete.
Advantages
- No installation required
- Works on any operating system
- Simple and fast for small files
Limitations
- File size and usage restrictions
- Requires an internet connection
- Potential privacy and security risks
- Limited control over output formatting
Note: Online tools are not recommended for confidential or regulated documents, such as legal contracts, financial records, or medical files.
Method 4: Convert TIFF to PDF Programmatically Using Spire.PDF
Best for: Automation, batch processing, and professional document workflows.
When TIFF-to-PDF conversion needs to be accurate, repeatable, and scalable, a programmatic approach is the most reliable solution. Spire.PDF for Python is a professional PDF library that allows precise control over how TIFF images are rendered into PDF documents.
This method is especially useful for:
- Multi-page scanned TIFF files
- Archival systems
- Server-side or scheduled conversion tasks
Example: Convert a Multi-Page TIFF to PDF with Spire.PDF for Python
from spire.pdf.common import *
from spire.pdf import *
from PIL import Image

# Create a PdfDocument object
doc = PdfDocument()

# Remove page margins
doc.PageSettings.SetMargins(0.0)

# Load the TIFF image
tiff_image = Image.open("TIFF.tiff")

# Loop through all pages in the TIFF
for i in range(tiff_image.n_frames):
    tiff_image.seek(i)
    frame = tiff_image.copy()
    frame.save(f"temp_{i}.png")

    image = PdfImage.FromFile(f"temp_{i}.png")
    width = image.PhysicalDimension.Width
    height = image.PhysicalDimension.Height

    page = doc.Pages.Add(SizeF(width, height))
    page.Canvas.DrawImage(image, 0.0, 0.0, width, height)

# Save the PDF
doc.SaveToFile("TiffToPdf.pdf", FileFormat.PDF)
doc.Dispose()
Step-by-Step Explaination
- Load the TIFF file into the application.
- Detect whether the TIFF contains multiple pages.
- Process each TIFF page individually.
- Create a new PDF page that matches the exact dimensions of the image.
- Draw the TIFF image onto the PDF page without margins or scaling.
- Repeat the process for all TIFF pages.
- Save the final PDF document.
Read further: Convert PDF to TIFF and TIFF to PDF Using Python
Advantages
- Accurate support for multi-page TIFF files
- Exact page size matching and layout control
- Suitable for automation and batch processing
- Professional-grade PDF output
Limitations
- Requires a Python environment
- Typically managed by IT teams or technical staff
Even for non-developers, this approach is valuable as a long-term, scalable solution that ensures consistent results.
In addition to TIFF-to-PDF conversion, Spire.PDF supports a wide range of PDF-related operations, such as creating PDFs from other image formats, adding text and watermarks, and merging orsplitting documents. These capabilities make it easy to extend the same workflow to other document-processing scenarios using the same library.
How to Choose the Right Method
| Key Factor | Adobe Acrobat | Print to PDF | Online Tools | Spire.PDF for Python |
|---|---|---|---|---|
| Ease of use | ★★★ | ★★★ | ★★★ | ★★☆ |
| Multi-page TIFF support | ★★★ | ★★★ | ★★★ | ★★★ |
| Output quality & layout control | ★★★ | ★★☆ | ★★☆ | ★★★ |
| Automation & batch processing | ☆☆☆ | ☆☆☆ | ☆☆☆ | ★★★ |
| Data privacy & security | ★★★ | ★★★ | ★☆☆ | ★★★ |
Final Thoughts
There are many ways to convert TIFF files to PDF, and the best method depends on how often you perform the task and how much control you need. Manual tools like Adobe Acrobat and Print to PDF are convenient for occasional use, while online tools offer quick results without installation.
For organizations and users who need accuracy, multi-page support, and automation, Spire.PDF for Python provides a reliable and professional solution that scales with your workflow.
FAQs
Q1. Can I combine multiple TIFF files into a single PDF?
Yes. Many tools allow you to merge multiple TIFF files into one PDF. Adobe Acrobat supports combining files manually, while Spire.PDF for Python can automate the process by adding pages from multiple TIFF files into a single PDF document.
Q2. Is Print to PDF suitable for large TIFF files?
Not ideal. It works best for small or simple files and offers limited control over output quality and layout.
Q3. Are online TIFF-to-PDF converters safe?
They can be convenient, but they are not recommended for sensitive or confidential documents, since files are uploaded to third-party servers.
Q4. Is Spire.PDF for Python only for developers?
While it requires basic scripting, it’s often used as part of automated systems managed by IT teams rather than end users.
You May Also Be Interested In
How to Hide Gridlines in Excel (View, Print, and PDF Export)
Microsoft Excel's gridlines—those faint lines separating cells—are fundamental to spreadsheet navigation, but sometimes they detract from a clean, professional presentation. Whether you're preparing a financial report, creating a dashboard, or designing a printable form, knowing how to control gridline visibility is essential.
In this article, we’ll explore four practical and reliable ways to hide gridlines in Excel, covering on-screen viewing, printing, PDF export, and automated processing using C#. Each method serves a different purpose, allowing you to choose the approach that best fits your workflow.
Method Overview:
- Method 1: Hide Gridlines in Excel View
- Method 2: Hide Gridlines When Printing an Excel Sheet
- Method 3: Hide Gridlines Before Exporting Excel to PDF
- Method 4: Hide Gridlines Programmatically Using C#
Method 1: Hide Gridlines in Excel View
The simplest way to hide gridlines is directly from Excel’s ribbon interface. This method affects only what you see on screen. It does not change how the worksheet prints or how it appears when exported to PDF.
Step-by-step Instructions
- Open your Excel worksheet.
- Go to the View tab on the ribbon.
- In the Show group, uncheck Gridlines.
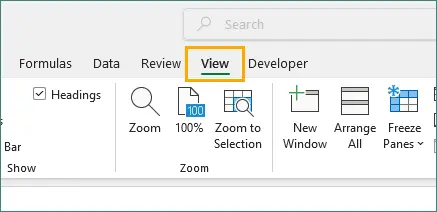
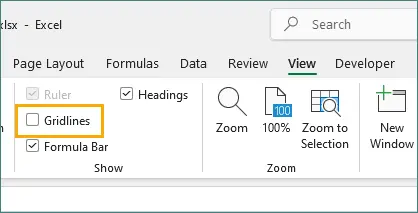
Once unchecked, gridlines immediately disappear from the worksheet view.
Important Note
Gridline visibility is configured per worksheet, not per workbook. If your file contains multiple sheets, you’ll need to repeat this action for each worksheet where gridlines should be hidden.
When to Use This Method
- Cleaning up the workspace for better focus.
- Preparing screenshots or screen recordings.
- Reviewing dashboards or summary sheets.
- Temporarily improving readability without affecting printed or exported output.
Method 2: Hide Gridlines When Printing an Excel Sheet
Excel treats printing gridlines separately from on-screen display. By default, gridlines don’t print, but if they appear in your printed output, you can disable them explicitly.
Standard Approach
- Open your Excel file.
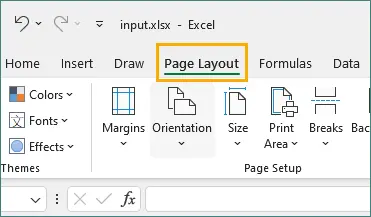
- Switch to the Page Layout tab.
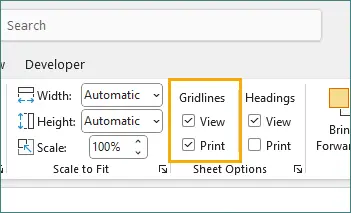
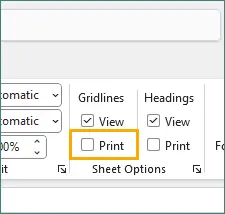
- In the Sheet Options group, locate Gridlines.
- Uncheck the Print option.
- Preview the result using File → Print .
This ensures gridlines won’t appear on paper or in print-based outputs.
Why This Matters
Printed Excel documents—such as invoices, reports, or forms—often require a polished, uncluttered look. Removing gridlines keeps the reader’s attention on the data itself, especially when borders, shading, or conditional formatting are already applied.
Pro Tip: Use Custom Views for Frequent Printing
If you frequently need to print without gridlines, consider creating a custom view:
- Go to View → Workbook Views → Custom Views .
- Click Add and name your view (for example, Print View).
- Configure all print settings, including hiding gridlines.
- Save the view and switch to it whenever needed.
Method 3: Hide Gridlines Before Exporting Excel to PDF
When exporting Excel to PDF, the output generally follows your print settings, which makes explicit configuration important.
Standard PDF Export Workflow
- Hide gridlines for printing (see Method 2).
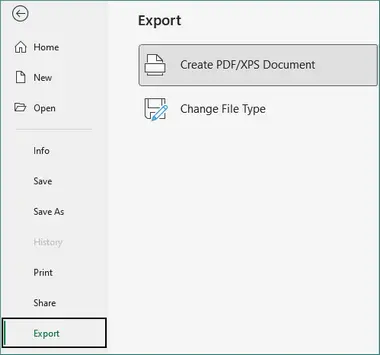
- Go to File → Export → Create PDF/XPS Document .
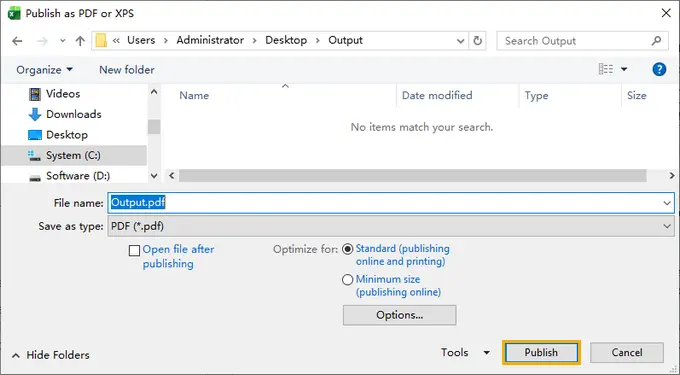
- Specify the output file path and name, then click Publish .
When This Method is Essential
- Sharing Excel data as PDF files.
- Creating read-only or client-facing documents.
- Archiving finalized reports.
- Maintaining consistent formatting across platforms.
Key takeaway: Excel’s PDF export relies on print settings. If gridlines are enabled for printing, they will appear in the PDF—even if they’re hidden in the worksheet view.
Method 4: Hide Gridlines Programmatically Using C#
When dealing with multiple Excel files or automated workflows, manually adjusting gridline settings isn’t efficient. In such cases, C# .NET automation provides a scalable and reliable solution. Using Spire.XLS for .NET, you can disable gridlines programmatically before saving or exporting files.
Example: Hide Gridlines for Worksheet Viewing
using Spire.Xls;

namespace HideGridlines
{
    class Program
    {
        static void Main(string[] args)
        {
            // Load an Excel file
            Workbook workbook = new Workbook();
            workbook.LoadFromFile(@"E:\Files\Test.xlsx");

            // Get the first worksheet
            Worksheet worksheet = workbook.Worksheets[0];

            // Hide gridlines in the specified worksheet
            worksheet.GridLinesVisible = false;

            // Save the document
            workbook.SaveToFile("HideGridlines.xlsx", ExcelVersion.Version2016);
        }
    }
}
Example: Hide Gridlines for Printing and PDF Export
using Spire.Xls;

namespace DisableGridlines
{
    class Program
    {
        static void Main(string[] args)
        {
            // Load an Excel file
            Workbook workbook = new Workbook();
            workbook.LoadFromFile("Input.xlsx");

            // Get the first worksheet
            Worksheet worksheet = workbook.Worksheets[0];

            // Get the PageSetup object
            PageSetup pageSetup = worksheet.PageSetup;

            // Disable gridlines for printing or saving to PDF
            pageSetup.IsPrintGridlines = false;

            // Print the workbook
            workbook.PrintDocument.Print();

            // Save as PDF
            // worksheet.SaveToPdf("ToPDF.pdf");
        }
    }
}
When to Use This Method
- Batch processing Excel files.
- Automating Excel-to-PDF conversions.
- Enforcing consistent formatting standards.
- Integrating Excel operations into backend systems.
In addition to hiding gridlines, programmatic Excel processing allows developers to manage a range of formatting tasks through code, including adding or removing cell borders, applying conditional formatting rules, and standardizing worksheet layouts. These capabilities help create clean, consistent Excel workflows that scale reliably across multiple files and use cases.
Conclusion
Mastering gridline control in Excel enhances both the visual quality and professional presentation of your spreadsheets. While gridlines are helpful during data entry and analysis, hiding them at the right time can dramatically improve how your work is perceived.
- Use View settings for quick, on-screen cleanup.
- Rely on print options for physical documents and PDFs.
- Choose .NET automation for scalable, repeatable workflows.
By applying the appropriate method for each scenario, you can ensure your Excel workbooks look exactly as intended—whether viewed on screen, printed on paper, or distributed as PDF files. Gridline control is a small detail, but one that makes a meaningful difference in professional Excel usage.
FAQs
Q1. Why are gridlines still visible after I hide them?
Gridlines may still appear if you only disabled them in View mode. To remove gridlines from printed or exported files, you must also disable them in print settings under the Page Layout tab.
Q2. Can I hide gridlines in one worksheet but keep them in others?
Yes. Gridline visibility is controlled per worksheet, not per workbook. You can hide gridlines on selected sheets while leaving others unchanged.
Q3. Will hiding gridlines remove cell borders?
No. Gridlines and cell borders are different. Hiding gridlines does not affect any manually applied borders, which will remain visible.
Q4. Do gridlines reappear when exporting Excel to PDF?
They can. Excel’s PDF export is based on print settings. If gridlines are enabled for printing, they will appear in the PDF even if they’re hidden in the worksheet view.
Q5. Can I hide gridlines in Excel using code?
Yes. Gridlines can be controlled programmatically. For C# workflows, libraries such as Spire.XLS for .NET allow you to disable gridlines before saving or exporting files.
You May Also Be Interested In
5 Ways to Wrap Text in Excel — From One Click to Python Automation
Table of Contents
- Method 1: The Ribbon Button (The One-Click Wonder)
- Method 2: The Format Cells Dialog Box (For Precise Control)
- Method 3: Keyboard Shortcuts (For Speed Users)
- Method 4: Manual Line Breaks (For Exact Line Breaks)
- Method 5: Python Scripts (For Bulk Processing & Automation)
- Choose the Right Method
- FAQs
- Conclusion
Have you ever printed an Excel report only to find your data cutting off mid-sentence or spilling into adjacent columns? This common formatting issue doesn't just look unprofessional—it compromises readability and can lead to misunderstandings of your data. Text wrapping is the essential solution, allowing content to stay neatly contained within a cell by breaking it into multiple lines.
Whether you're a casual user formatting a single spreadsheet or a data professional processing hundreds of files, different wrapping methods offer varying levels of efficiency. This guide provides five distinct approaches, from the simple one-click button to Python automation, giving you the right tool for every text-wrapping challenge you'll encounter in Excel.
Method overview:
- Method 1: The Ribbon Button (The One-Click Wonder)
- Method 2: The Format Cells Dialog Box (For Precise Control)
- Method 3: Keyboard Shortcuts (For Speed Users)
- Method 4: Manual Line Breaks (For Exact Line Breaks)
- Method 5: Python Scripts (For Bulk Processing & Automation)
Method 1: The Ribbon Button (The One-Click Wonder)
Best for: Everyday formatting tasks and quick adjustments
When you need immediate results without navigating through menus, Excel's ribbon button provides the fastest solution. Located prominently in the Home tab, this single click can transform chaotic data into organized content.
Step-by-Step Instructions:
- Select the cell(s), row, or column you want to format.
- Go to the Home tab on the ribbon.
- In the Alignment group, click the Wrap Text button (angled text with curved arrow).
- If text remains cut off, double-click below the row number to auto-fit the row height.
Pro Tip: Combine with the Format Painter (paintbrush icon) to quickly copy wrapping to other cells.
Method 2: The Format Cells Dialog Box (For Precise Control)
Best for: Comprehensive formatting sessions and alignment perfection
When you need more than just text wrapping—when you want to simultaneously control vertical alignment, text orientation, and other properties—the Format Cells dialog box offers complete control.
Step-by-Step Instructions:
- Select your target cells.
- Press Ctrl + 1 or right-click and choose Format Cells.
- Navigate to the Alignment tab.
- Under Text control, check the Wrap text checkbox.
- Set complementary options like vertical alignment, then click OK.
- Adjust the row height or auto-fit the row height.

Strategic Advantage: This method lets you establish a complete formatting profile in one operation, perfect for creating templates or standardized reports.
Method 3: Keyboard Shortcuts (For Speed Users)
Best for: Power users who prioritize efficiency and minimal mouse use
If you measure productivity in keystrokes saved, Excel's keyboard shortcuts will become your best friend. While there's no single-key shortcut for text wrapping, a simple three-key sequence accomplishes the task faster than any mouse-based method.
Step-by-Step Instructions:
- Select your target cells using keyboard navigation if preferred.
- Press and release Alt to activate ribbon keyboard navigation.
- Press H to select the Home tab.
- Press W to toggle Wrap Text on your selected cells.
Memory Aid: Think "Home, Wrap." With minimal practice, this sequence becomes muscle memory.
Method 4: Manual Line Breaks (For Exact Line Breaks)
Best for: Content where specific phrasing must remain together or break at logical points
Automatic text wrapping follows Excel's algorithms, but sometimes you need to decide exactly where lines break. For addresses, multi-part names, or lists within a single cell, manual control is indispensable.
Step-by-Step Instructions:
- Double-click the cell (or press F2) to enter edit mode.
- Click your cursor at the exact spot where you want the new line.
- Press Alt + Enter (Windows) or Option + Command + Enter (Mac).
- Press Enter to exit the cell.
Practical Application: Perfect for formatting addresses (123 Main Street on one line, Springfield, IL 62704 on the next) or creating within-cell lists.
Method 5: Python Scripts (For Bulk Processing & Automation)
Best for: Developers, data analysts, and anyone processing multiple files programmatically
When you graduate from individual spreadsheets to batch processing, manual methods hit their limits. Python with the Spire.XLS library transforms this tedious task into an automated, scalable solution.
pip install spire.xls
- Create a Python script with this core code:
from spire.xls import *
workbook = Workbook()
workbook.LoadFromFile("input.xlsx")
sheet = workbook.Worksheets[0]
sheet.Range["B3"].Style.WrapText = True# Wrap specific cell
workbook.SaveToFile("output.xlsx", ExcelVersion.Version2016)
workbook.Dispose()
- Customize the range (e.g., "A1:C10" for a block) and run the script.
Automation Advantage: Process dozens of files in seconds with 100% consistency. Add loops for multiple ranges or conditionals to wrap only cells meeting specific criteria.
Once you’ve mastered text wrapping with Spire.XLS, you can extend your automation further by programmatically autofitting rows and columns or applying conditional formatting rules to build polished, fully automated Excel reports.
Choose the Right Method
Selecting the right text wrapping approach depends on three factors: volume, frequency, and complexity.
Quick Decision Guide:
| Scenario | Recommended Method | Time Estimate |
|---|---|---|
| Formatting 1-5 cells occasionally | Method 1 (Ribbon) or Method 3 (Shortcut) | 10-30 seconds |
| Creating templates with precise alignment | Method 2 (Format Cells) | 1-2 minutes |
| Entering addresses, lists, or structured content | Method 4 (Manual Breaks) | 30-60 seconds per cell |
| Processing 10+ files monthly | Method 5 (Python) | 2 hours initial setup, then seconds per file |
| Dynamic reports with variable content lengths | Method 5 (Python) with conditional logic | 3-4 hours setup, automated thereafter |
FAQs
Q1: Why is my wrapped text still not fully visible after applying text wrapping?
A: This usually happens because the row height hasn't adjusted automatically. Simply double-click the boundary below the row number to auto-fit the row height. In some cases, you may need to manually drag the row border to make it taller.
Q2: Can I wrap text in multiple cells at once?
A: Absolutely. Select all the cells you want to format (by dragging, holding Ctrl for non-adjacent cells, or clicking the corner button to select the entire sheet), then apply any of the first four methods. For processing entire workbooks or multiple files, Method 5 (Python) is most efficient.
Q3: What's the difference between text wrapping and "Shrink to Fit"?
A: Text wrapping breaks long text into multiple lines within the same cell, increasing row height. "Shrink to Fit" (found in Format Cells > Alignment) reduces the font size to make the text fit in a single line without changing cell dimensions. Use wrapping when you want to maintain readability; use shrinking only for limited space situations.
Q4:Does text wrapping work with Excel Online or Google Sheets?
A: Yes, with slight variations. Excel Online has a Wrap Text button in its Home tab similar to desktop Excel. Google Sheets also has a text wrapping button (icon with angled text and arrow) in its toolbar. The Alt+Enter shortcut for manual breaks works in both platforms on Windows, and Python automation can be adapted for Google Sheets using the Google Sheets API.
Conclusion
From the simplicity of a single click to the power of Python automation, these five methods cover every text wrapping need you'll encounter in Excel. Each approach has its ideal use case—whether you’re making quick edits, perfecting a report's presentation, or processing data at scale. Mastering multiple methods ensures you're never stuck with overflowing cells again.
Remember that proper text formatting is more than cosmetic—it's fundamental to clear data communication. Start with the method that best fits your current task, and gradually expand your toolkit as your Excel needs evolve. With these techniques, you can ensure your spreadsheets always present information with maximum clarity and professionalism.
You May Also Be Interested In
How to Integrate Spire.OfficeJS into a Vue Application
Spire.OfficeJS is a WebAssembly-based Office document editor that enables users to open, view, and edit Word, Excel, and PowerPoint documents directly in the browser. In this tutorial, we will walk through how to integrate Spire.OfficeJS into a Vue 3 application (Vue 3 + Vite), and build a fully client-side web application that supports online Office document editing—without relying on server-side document conversion.
By the end of this guide, you will have a runnable Vue project that allows users to upload Office documents and edit them directly in the browser using Spire.OfficeJS.
On this page:
- What Is Spire.OfficeJS
- How Spire.OfficeJS Works
- Preparation
- Integrating Spire.OfficeJS
- FAQs
- Conclusion
- Sample Project Download
What Is Spire.OfficeJS
Spire.OfficeJS is a web-based online Office document editing component that consists of four modules: Spire.WordJS, Spire.ExcelJS, Spire.PresentationJS, and Spire.PDFJS. It provides viewing and real-time editing capabilities for documents such as Word files, Excel spreadsheets, and PowerPoint presentations.
Spire.OfficeJS runs directly in the browser and can be deployed in any web project without installing plugins or relying on client-side software.
Key Features
- Pure front-end rendering: Based on WebAssembly, allowing document editing without server-side conversion.
- Rich editing capabilities: Supports document editing, comments, annotations, review, and saving.
- Multi-format support: DOC, DOCX, XLS, XLSX, PPT, PPTX, PDF (view), and more.
- High integrability: Can be flexibly embedded into Vue, React, Angular, or pure HTML projects.
- High customizability: Supports toolbar configuration, user permissions, save callbacks, plugin extensions, and more.
Spire.OfficeJS is suitable for enterprise systems, document management systems (DMS), collaboration platforms, online learning systems, and form-based applications.
How Spire.OfficeJS Works
Spire.OfficeJS is built on WebAssembly-based Office rendering engines that execute directly in the browser. The simplified workflow is:
- A user uploads an Office document via the browser.
- The file is read as binary data (Uint8Array).
- The binary data is passed directly to the WebAssembly runtime.
- The document is parsed, rendered, and edited client-side.
- Save actions trigger callbacks for custom persistence logic.
Unlike traditional server-based Office editors, no server-side document conversion or rendering is required, significantly reducing infrastructure complexity and latency.
Preparation
Install Node.js
Download and install Node.js 22.12.0 or later from the official Node.js website. Node.js 22+ is recommended to ensure compatibility with Vite, modern ES module tooling, and WebAssembly-related workflows.
Verify the installation:
node -v
npm -v
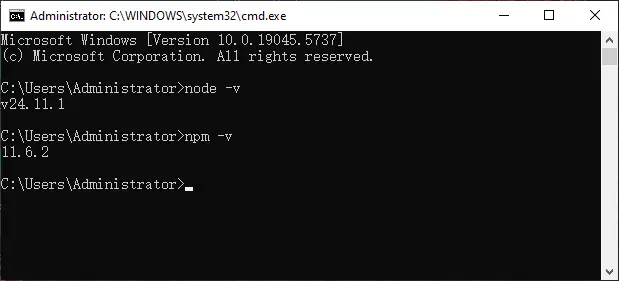
Create a Vue 3 Project
Step 1: Create a project folder
Create a new folder to store the project files.
Step 2: Enter the folder via Command Line
cd /d d:\demo
Step 3: Initialize a Vue 3 project
npm init vue@latest
Rename the project to vue-spire and skip optional features to create a minimal Vue 3 project.
Step 4: Start the development server
cd vue-spire
npm run dev
Integrating Spire.OfficeJS
Step 1: Download the product package
Download Spire.OfficeJSproduct package from our website. On Windows, after extracting the package, you will see a run_genallfonts.bat file. Double-click to run this script. On Linux, use the command sh run_genallfonts.sh start to run the run_genallfonts.sh file in the extracted product package folder. After the script completes, a fontsweb folder will appear inside the web folder.
Step 2: Copy static resources to the Public directory
In your Vue project:
- Open the project in VS Code.
- Create a folder: public/spire.cloud .
- Copy the entire web folder into it. This allows the editor resources to be accessed via /spire.cloud/web/....
Step 3: Install required dependencies
Install Pinia and Vue Router manually to keep the project setup explicit and easy to follow.
npm install pinia
npm install vue-router@4

Step 4: Create the project structure
Create the following structure under src :
src/
├── router/
│   ├── index.js
├── stores/
│   ├── file.js
├── views/
│   ├── FileUpload.vue
│   └── Spire.OfficeJS.vue
Step 5: Setup application
- main.js — Application initialization
- App.vue — Root component
- Router index.js — Page navigation
- Pinia Store (file.js) — File state management
- FileUpload.vue — File upload page
- Spire.OfficeJs.vue — Online editor integration
This file initializes the Vue application and registers Pinia and Vue Router. Pinia is used to manage shared document data, while Vue Router controls page navigation between the file upload view and the document editor view.
import { createApp } from 'vue'
// Import Pinia
import { createPinia } from 'pinia'
import App from './App.vue'
import router from './router'

const app = createApp(App)

// Create Pinia instance
const pinia = createPinia()

// Register Pinia and Router to the Vue application
app.use(pinia)
app.use(router)
app.mount('#app')
App.vue serves as the root container of the application. It renders different pages dynamically using RouterView, allowing the file upload page and the document editor to be loaded as separate routes without reloading the application.
<script setup>
import { RouterView } from 'vue-router'
</script>

<template>
    <RouterView/>
</template>
The router defines the navigation flow of the application. The root route (/) is used for file upload, while /document loads the Spire.OfficeJS editor. This separation allows users to upload a document first and then open it in the editor with shared state preserved.
import { createRouter, createWebHistory } from 'vue-router'
import FileUpload from '../views/FileUpload.vue'
import SpireOfficeJs from '../views/Spire.OfficeJS.vue'

const router = createRouter({
    history: createWebHistory(),
    routes: [
        {
            path: '/',
            name: 'upload',
            component: FileUpload
        },
        {
            path: '/document',
            name: 'document',
            component: SpireOfficeJs
        },
        {
            path: '/:pathMatch(.*)*',
            redirect: '/'
        }
    ]
})
The Pinia store is responsible for sharing file metadata and binary data between different views. The uploaded file is converted into a Uint8Array and stored here so that it can be passed directly to Spire.OfficeJS in serverless mode.
import { ref } from 'vue'
// Import defineStore from Pinia to define a state management store
import { defineStore } from 'pinia'

// Define a file state management store
export const useFileStore = defineStore('file', () => {
  // Store the uploaded file object (File type)
  let file = ref(null)
  // Store the file binary data (Uint8Array format) for editor loading
  let fileUint8Data = ref(null);

  // Set the file object
  function setFileData(data) {
    file.value = data;
  }
  // Set the file binary data
  function setFileUint8Data(data) {
    fileUint8Data.value = data;
  }
  // Export state and methods for component usage
  return { file, fileUint8Data, setFileData, setFileUint8Data }
})
FileUpload.vue is responsible for handling user-selected Office documents before they are passed to the editor. It reads the uploaded file using the browser File API and converts it into a Uint8Array, which is required by Spire.OfficeJS in serverless mode.
<template>
    <main>
        <button @click="btnClick">Choose Your File</button>
        <label>
            <input id="input" type="file" @change="handleFileChange" style="display: none;" />
        </label>
    </main>
</template>

<script setup>
import { useRouter } from 'vue-router'
import { useFileStore } from '../stores/file'

// Router instance: redirect to /document after successful upload
const router = useRouter()
// Pinia Store: store the user-uploaded file and binary data
const fileStore = useFileStore()

// Handle file upload
async function handleFileChange(event) {
    // Get the file selected by the user through the input change event
    const selectedFile = event.target.files?.[0]
    if (!selectedFile) {
        return
    }

    // Save the original File object and binary data for the editor to read
    fileStore.setFileData(selectedFile)
    const buffer = await selectedFile.arrayBuffer()
    fileStore.setFileUint8Data(new Uint8Array(buffer))

    // Redirect to the document editing page after successful upload
    router.push('/document')
}
function btnClick() {
    var btn = document.querySelector('#input');
    btn.click()
}
</script>
Spire.OfficeJs.vue is the core integration component where the Spire.OfficeJS editor is initialized and rendered. It dynamically loads the Spire.OfficeJS runtime, configures editor behavior, and passes the document binary data to the WebAssembly engine using serverless mode.
<template>
    <div class="form">
        <div id="iframeEditor">
        </div>
    </div>
</template>

<script setup>
import { ref, onMounted, onUnmounted } from 'vue';
import { storeToRefs } from 'pinia';
import { useFileStore } from '../stores/file.js'
import { useRouter } from 'vue-router';

const fileStore = useFileStore()
// Data stored in Pinia
const { file, fileUint8Data } = storeToRefs(fileStore)
const router = useRouter()
const config = ref({});
const isOpened = ref(false);
const editorInstance = ref(null);
const apiInstance = ref(null);
const originUrl = window.location.origin

onMounted(() => {
    // Redirect back to upload page if no file exists
    if (!file.value) {
        router.replace('/');
        return;
    }
    // Load editor script dynamically
    loadScript();
    window.addEventListener('resize', OnWindowReSize);
})

onUnmounted(() => {
    window.removeEventListener('resize', OnWindowReSize);
})

// Initialize the configuration object required by the editor
function initConfig() {
    if (!file.value) {
        throw new Error('File not found, please upload again');
    }

    if (!fileUint8Data.value) {
        throw new Error('File data not found, please upload again');
    }

    config.value = {
        "fileAttrs": {
            "fileInfo": {
                "name": file.value.name,
                "ext": getFileExtension(),
                "primary": String(new Date().getTime()),
                "creator": "Jonn",
                "createTime": "2022-04-18 11:30:43"
            },
            "sourceUrl": originUrl + "/files/__ffff_192.168.2.134/" + file.value.name,
            "createUrl": originUrl + "/open",
            "mergeFolderUrl": "",
            "fileChoiceUrl": "",
            "templates": {}

        },
        "user": {
            "id": "uid-1",
            "name": "Jonn",
            "canSave": true,
        },
        "editorAttrs": {
            "editorMode": "edit",
            "editorWidth": "100%",
            "editorHeight": "100%",
            "editorType": "document",
            "platform": "desktop", // desktop / mobile / embedded
            "viewLanguage": "en", // en / zh
            "isReadOnly": false,
            "canChat": true,
            "canComment": true,
            "canReview": true,
            "canDownload": true,
            "canEdit": true,
            "canForcesave": true,
            "embedded": {
                "saveUrl": "",
                "embedUrl": "",
                "shareUrl": "",
                "toolbarDocked": "top"
            },
            "useWebAssemblyDoc": true,
            "useWebAssemblyExcel": true,
            "useWebAssemblyPpt": true,
            "spireDocJsLicense": "",
            "spireXlsJsLicense": "",
            "spirePresentationJsLicense": "",
            "spirePdfJsLicense": "",
            "serverless": {
                "useServerless": true,
                "baseUrl": originUrl,
                "fileData": fileUint8Data.value,
            },
            "events": {
                "onSave": onFileSave
            },
            "plugins": {
                "pluginsData": []
            }
        }
    };
}

// Create and render the SpireCloudEditor instance
function initEditor() {
    let iframeId = 'iframeEditor';

    initConfig();
    isOpened.value = true;
    editorInstance.value = new SpireCloudEditor.OpenApi(iframeId, config.value); // Create editor instance
    window.Api = apiInstance.value = editorInstance.value.GetOpenApi(); // Expose OpenApi for debugging/saving
    OnWindowReSize();
}

// Get the uploaded file extension for fileInfo.ext
function getFileExtension() {
    const filename = file.value.name.split(/[\\/]/).pop();
    // Get the substring after the last dot
    return filename.substring(filename.lastIndexOf('.') + 1).toLowerCase() || '';
}

// Adjust editor container size to fit the window
function OnWindowReSize() {
    let wrapEl = document.getElementsByClassName("form");
    if (wrapEl.length) {
        wrapEl[0].style.height = screen.availHeight + "px";
        window.scrollTo(0, -1);
        wrapEl[0].style.height = window.innerHeight + "px";
    }
}

// Dynamically load the SpireCloudEditor script to avoid duplicate injection
function loadScript() {
    if (window.SpireCloudEditor) {
        initEditor()
        return
    }
    const script = document.createElement('script');
    script.setAttribute('src', '/spire.cloud/web/editors/spireapi/SpireCloudEditor.js');
    script.onload = () => initEditor()
    document.head.appendChild(script);
}

// Save callback for the Spire editor, can be connected to custom save logic
function onFileSave(data) {
    console.log('save data', data)
}

</script>

<style>
.form,
iframe,
body {
    min-height: 100vh !important;
    min-width: 100vh !important;
}
</style>
Step 6: Run the project
Start the development server:
npm run dev
Open the browser and navigate to: http://localhost:5173/
Upload a document and start editing it directly in the browser.
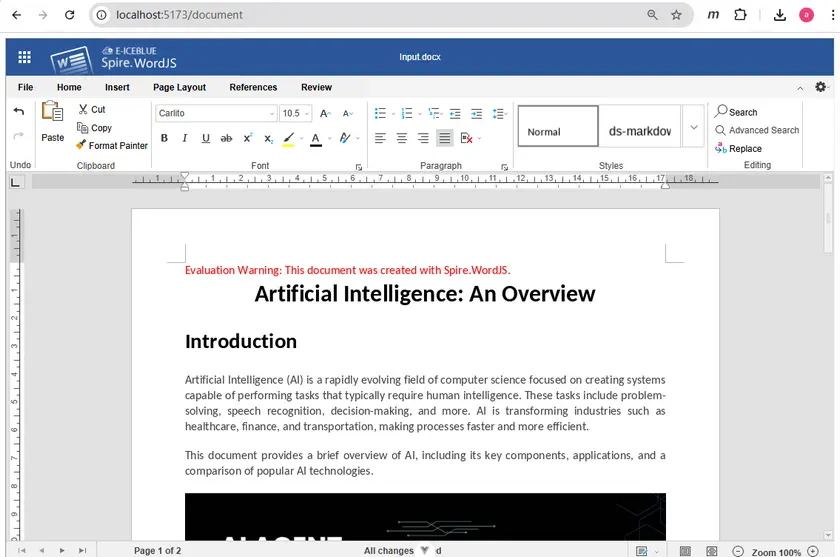
FAQs
Q1. Why does the editor load a blank page?
This usually occurs when static resource paths are incorrect or required WebAssembly files are missing. Ensure the web directory is correctly placed under public/spire.cloud and that SpireCloudEditor.js is accessible.
Q2. Why doesn’t the document open after uploading?
The editor requires the file to be passed as a Uint8Array. Verify that the file data is correctly read, stored in Pinia, and assigned to serverless.fileData.
Q3. Can Spire.OfficeJS run without a backend server?
Yes. When serverless.useServerless is enabled, all document loading, rendering, and editing are performed entirely in the browser using WebAssembly.
Q4. Which file formats are supported by Spire.OfficeJS?
Spire.OfficeJS supports Word (.doc, .docx), Excel (.xls, .xlsx), PowerPoint (.ppt, .pptx), and PDF (.pdf) files.
Q5. How can I save the edited document?
Use the onSave event to capture the edited document data and implement custom logic to upload, store, or download the file.
Conclusion
By following this tutorial, you have successfully integrated Spire.OfficeJS into a Vue 3 application and built a fully client-side Office document editor powered by WebAssembly. This approach eliminates server-side document conversion while providing a rich, responsive editing experience directly in the browser.
Demo Download
How to Add Notes to PowerPoint: Manual and Automated Methods
Adding notes to your PowerPoint slides is a simple yet powerful way to enhance your presentations. Whether you are preparing for a live talk, creating teaching materials, or sharing slides with colleagues, speaker notes help you stay organized, remember key points, and deliver your message with confidence.
In this article, we will cover two practical ways to add notes to PowerPoint: manually using PowerPoint Desktop and programmatically using Python with Spire.Presentation.
What Are PowerPoint Notes?
Speaker notes are additional text linked to each slide that only the presenter can see during a presentation. They help you:
- Remember key points without cluttering the slides
- Provide handouts with extra details
- Collaborate with teammates by adding comments or instructions
Notes complement slide content rather than duplicate it, keeping your presentation clear and engaging.
Method 1: Add Notes Using PowerPoint Desktop
The most common way to add notes is manually in PowerPoint Desktop. This method is intuitive, beginner-friendly, and works for both Windows and Mac users.
Step-by-Step Guide
-
Open your presentation in PowerPoint Desktop.
-
Switch to Normal View if it isn’t already enabled. You can do this from the View tab or the bottom-right icons.

-
At the bottom of each slide, you will see a Notes pane. If the pane is hidden, click Notes at the bottom of the window to reveal it.
-
Click inside the Notes pane and type your speaker notes. You can include bullet points, short paragraphs, or reminders.
-
Save your presentation once you finish adding notes.
Tips and Best Practices
- Keep notes concise: Avoid writing full paragraphs. Focus on key points and cues.
- Use bullet points: Helps you scan notes quickly during a presentation.
- Align with slide content: Make sure notes correspond to the slide visuals for smoother delivery.
- Formatting: You can apply basic formatting such as bold, italics, or font size adjustments to emphasize important points.
Advantages
- Works offline, no additional tools needed.
- Allows full formatting flexibility for notes.
- Beginner-friendly and widely supported across all PowerPoint versions.
Optional Tip
During presentations, you can use Presenter View (Alt + F5) to view these notes privately while your audience sees only the slides. This feature is invaluable when presenting in live settings or online meetings.
Method 2: Add Notes Programmatically Using Python
For developers, educators, or enterprises working with multiple presentations, adding notes manually can be time-consuming. Using Python with Spire.Presentation allows you to automate the addition of speaker notes to one or more slides, saving time and maintaining consistency.
Why Automate Notes?
- Bulk updates: Quickly add or modify notes across many slides or presentations.
- Consistency: Standardize notes format, style, and bullet points.
- Integration: Works with other Python workflows, such as data processing or automated report generation.
Step-by-Step Guide
Below is an example Python workflow using Spire.Presentation:
from spire.presentation.common import *
from spire.presentation import *

# Create a Presentation object
ppt = Presentation()

# Load an existing PowerPoint presentation
ppt.LoadFromFile("input.pptx")

# Get the first slide
slide = ppt.Slides[0]

# Add a notes slide
notesSlide = slide.AddNotesSlide()

# Add paragraphs to the notes slide
paragraph = TextParagraph()
paragraph.Text = "Summary Slide:"
paragraph.FirstTextRange.IsBold = TriState.TTrue
notesSlide.NotesTextFrame.Paragraphs.Append(paragraph)

paragraph = TextParagraph()
paragraph.Text = "Recap the three main points"
notesSlide.NotesTextFrame.Paragraphs.Append(paragraph)

paragraph = TextParagraph()
paragraph.Text = "Reinforce the core message"
notesSlide.NotesTextFrame.Paragraphs.Append(paragraph)

paragraph = TextParagraph()
paragraph.Text = "Prepare for the conclusion"
notesSlide.NotesTextFrame.Paragraphs.Append(paragraph)

# Apply numbering style to specific paragraphs
for i in range(2, notesSlide.NotesTextFrame.Paragraphs.Count):
    notesSlide.NotesTextFrame.Paragraphs[i].BulletType = TextBulletType.Numbered
    notesSlide.NotesTextFrame.Paragraphs[i].BulletStyle = NumberedBulletStyle.BulletArabicPeriod

# Save the resulting presentation
ppt.SaveToFile("AddSpeakerNotes.pptx", FileFormat.Pptx2016)
ppt.Dispose()
Output:

Explanation of the Code
- Load Presentation: ppt.LoadFromFile("input.pptx") opens an existing PowerPoint file.
- Access Slide: slide = ppt.Slides[0] retrieves the first slide.
- Add Notes Slide: slide.AddNotesSlide() creates a dedicated notes area for the slide.
- Add Paragraphs: Each TextParagraph object is added to the
NotesTextFrame. - Format Bullets: Numbered bullet style is applied to all paragraphs except the first one.
- Save File: ppt.SaveToFile() saves the updated presentation with the new notes.
Read further: Add, Read or Delete Speaker Notes in PowerPoint Using Python
Advantages
- Automates repetitive tasks, saving time on large presentations.
- Maintains a consistent format across all slides.
- Can be integrated into data pipelines, report generation systems, or batch processing scripts.
- Works for both existing presentations and newly created files.
Use Cases
- Educational institutions preparing lecture slides with standardized notes.
- Companies generating recurring reports or training materials.
- Developers creating tools for PowerPoint automation.
For more advanced usage, such as editing slide content, managing layouts, or working with multiple slides, refer to the Spire.Presentation documentation. It provides detailed API references and examples for different PowerPoint automation scenarios.
Comparison of the Two Methods
| Feature | PowerPoint Desktop | Python + Spire.Presentation |
|---|---|---|
| Ease of use | Easy | Medium |
| Editing flexibility | High | Medium |
| Automation | × | √ |
| Ideal users | General users | Developers / Enterprises |
| Scalability | Low | High |
Best Practices for Speaker Notes
Regardless of the method, good notes share common characteristics:
- Short and actionable: Avoid long paragraphs.
- Use bullet points: Makes scanning easy.
- Highlight key points: Bold or underline important items.
- Match slide content: Notes should complement, not duplicate, visuals.
- Review and rehearse: Ensure your notes help, not hinder, your delivery.
Conclusion
Adding notes to PowerPoint is a simple way to make presentations more effective and organized. For most users, PowerPoint Desktop is the easiest way to add and manage notes. It allows full formatting, offline editing, and seamless integration with Presenter View.
For developers or anyone handling multiple presentations, Python + Spire.Presentation provides a powerful, automated way to add notes programmatically. This method is especially useful for bulk updates, maintaining consistency, and integrating with automated workflows.
By combining clear slide visuals with thoughtful speaker notes, you can deliver presentations confidently, keep your audience engaged, and ensure that important points are never missed.
FAQs
Q1. Can the audience see my notes?
No. Speaker notes are visible only to the presenter in Presenter View.
Q2. Can notes be printed with slides?
Yes. PowerPoint allows printing of slides with notes pages for handouts.
Q3. Will Python-added notes appear in Presenter View?
Yes. Notes added programmatically using Spire.Presentation appear exactly like manually added notes in Presenter View.
Q4. Can I edit notes later after programmatic addition?
Yes. After generating the presentation with Python, you can open it in PowerPoint Desktop or PowerPoint Online and make edits as needed.
You May Also Be Interested In
How to Delete Blank Pages in PDF (Manual & Automation)
Table of Contents
Blank pages are a common issue in PDF documents. They often appear when exporting files from Word or Excel, scanning paper documents, or generating reports programmatically. Although blank pages may seem harmless, they can negatively affect document quality, increase file size, waste printing resources, and make documents look unprofessional.
Depending on your situation, removing blank pages from a PDF can be done either manually or automatically. Manual methods are suitable for small documents and one-time tasks, while automated solutions are more efficient for batch processing, recurring workflows, or system-level integrations.
In this article, we’ll explore both approaches in detail. First, we’ll walk through three manual methods for deleting blank pages from PDFs. Then, we’ll demonstrate how to automatically detect and remove blank pages using Python, with a complete and practical solution based on Spire.PDF for Python.
What Is a “Blank Page” in a PDF?
A “blank page” in a PDF is not always truly empty from a technical standpoint. While it may look blank visually, it can still contain invisible objects, empty containers, or white images.
In practice, a blank PDF page may:
- Contain no text objects
- Contain no images
- Appear visually blank but still include invisible elements
- Include layout artifacts created during conversion
This distinction is especially important when automating the removal process, as simple text-based checks are often insufficient.
Part 1: Manually Delete Blank Pages from a PDF
Manual methods are best suited for small files where accuracy and visual confirmation are important. They require no programming knowledge and allow users to selectively remove pages after reviewing the document.
Method 1: Delete Blank Pages Using Adobe Acrobat
Adobe Acrobat provides a professional and highly accurate way to manage PDF pages. Its thumbnail-based interface allows users to visually inspect all pages and remove blank ones precisely.
Steps
-
Open the PDF file in Adobe Acrobat.
-
Open Page Thumbnails panel.
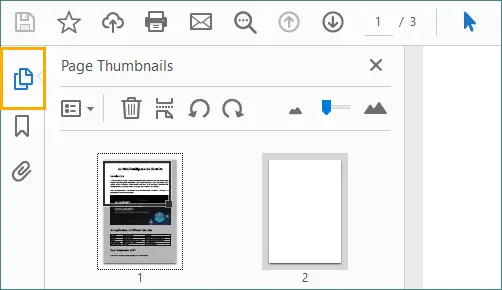
-
Select the blank page you want to remove, then click the “Trash” icon.
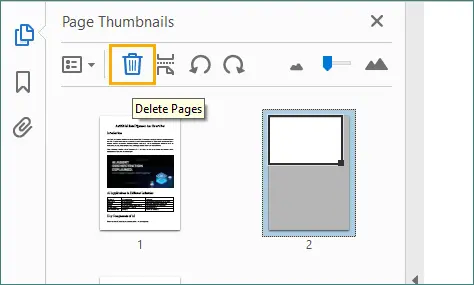 Alternatively, right-click the selected page and choose “Delete Pages…” , which allows you to delete the current page or a range of consecutive pages.
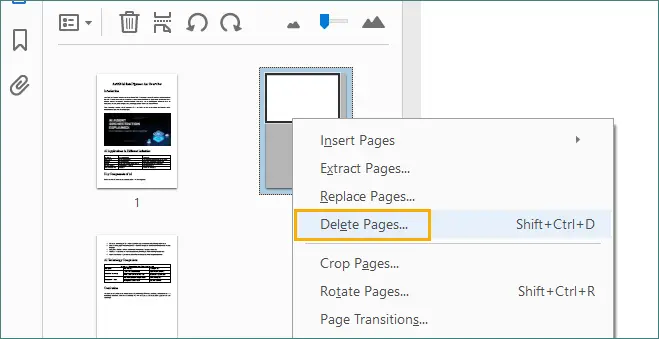
-
Save the updated PDF.
Pros
- High accuracy with visual confirmation.
- Handles complex layouts and large PDFs well.
- Suitable for professional and client-facing documents.
Cons
- Requires a paid Adobe Acrobat license.
- Time-consuming for large numbers of files.
Method 2: Delete Blank Pages Using Online PDF Tools
Online PDF tools offer a quick solution for deleting blank pages without installing software. Most platforms allow users to upload a PDF, preview pages, and remove unwanted ones directly in the browser.
Steps
-
Open an online PDF editing website (for example, PDF24).
-
Click “Choose files” or drag and drop your PDF file to upload it.

-
Enter preview or page management mode, then select and delete the blank pages.

-
Apply the changes by clicking “Create PDF” (or a similar confirmation button).
-
Download the cleaned PDF file.
Pros
- No software installation required.
- Works on any operating system.
- Convenient for one-time or occasional tasks.
Cons
- File size and usage limitations.
- Privacy and security concerns.
- Not suitable for confidential or sensitive documents.
Method 3: Delete Blank Pages via PDF Preview (macOS)
macOS includes a built-in application called Preview, which supports basic PDF editing features such as page deletion. It’s a simple and free option for macOS users.
Steps
-
Open the PDF file with Preview.
-
Enable the thumbnail sidebar by selecting View → Thumbnails.
-
Select the blank pages in the thumbnail panel.
-
Press the Delete key.
-
Save the modified PDF.
Pros
- Free and pre-installed on macOS.
- Offline and easy to use.
- No third-party tools required.
Cons
- macOS-only solution.
- Manual process that doesn’t scale.
- Limited advanced PDF features.
When Manual Methods Are Not Enough
Manual methods become inefficient when:
- Processing many PDF files.
- Cleaning automatically generated reports.
- Performing recurring document maintenance.
- Integrating PDF cleanup into applications or services.
In these scenarios, automation is the most practical and reliable approach.
Part 2: Automatically Delete Blank Pages in PDF Using Python
Automation allows you to remove blank pages consistently and efficiently without human intervention. Python is particularly well-suited for this task due to its simplicity, cross-platform support, and extensive library ecosystem.
Why Use Python for PDF Automation?
With Python, you can:
- Process PDFs programmatically.
- Handle large files and batch operations.
- Integrate PDF cleanup into backend systems.
- Ensure consistent detection logic across documents.
Automation significantly reduces manual effort and minimizes the risk of human error.
Introduction to Spire.PDF for Python
Spire.PDF for Python is a robust library for creating, editing, and processing PDF documents. It provides fine-grained control over PDF structure and content, making it ideal for tasks such as blank page detection and removal.
For this solution, Spire.PDF offers:
- Page-level access
- Built-in blank page detection
- PDF-to-image conversion
- Safe page removal
Python Code: Automatically Detect and Remove Blank Pages from PDF
Below is a complete Python example using Spire.PDF for Python and Pillow (PIL).
import io
from spire.pdf import PdfDocument
from PIL import Image

# Custom function: Check if the image is blank (all pixels are white)
def is_blank_image(image):
    # Convert the image to RGB mode
    img = image.convert("RGB")
    # Define a white pixel
    white_pixel = (255, 255, 255)
    # Check whether all pixels are white
    return all(pixel == white_pixel for pixel in img.getdata())

# Load the PDF document
doc = PdfDocument()
doc.LoadFromFile("Input.pdf")

# Iterate through pages in reverse order
# This avoids index shifting issues when deleting pages
for i in range(doc.Pages.Count - 1, -1, -1):
    page = doc.Pages[i]

    # First check: built-in blank page detection
    if page.IsBlank():
        doc.Pages.RemoveAt(i)
    else:
        # Second check: convert the page to an image
        with doc.SaveAsImage(i) as image_data:
            image_bytes = image_data.ToArray()
            pil_image = Image.open(io.BytesIO(image_bytes))

            # Check whether the image is visually blank
            if is_blank_image(pil_image):
                doc.Pages.RemoveAt(i)

# Save the cleaned PDF file
doc.SaveToFile("RemoveBlankPages.pdf")
doc.Close()
How Blank Page Detection Works in This Solution
To improve accuracy, this approach uses two complementary detection methods:
-
Logical detection: The script first checks whether a page is logically empty using page.IsBlank(). This detects pages with no text or image objects.
-
Visual detection: If a page is not logically blank, it is converted to an image and analyzed pixel by pixel. If all pixels are white, the page is considered visually blank.
This combined strategy ensures that both technically empty pages and visually blank pages with hidden content are removed.
Extending the Automation Solution
This script can be easily extended to:
- Process all PDFs in a directory
- Run as a scheduled cleanup task
- Integrate into document management systems
- Log removed pages for auditing or debugging
With minor adjustments, it can support enterprise-scale PDF workflows. For more advanced PDF operations, refer to the Spire.PDF Programming Guide to further expand and customize your automation logic.
Manual vs Automated Blank Page Removal
| Aspect | Manual Methods | Python Automation |
|---|---|---|
| Ease of use | High | Medium |
| Accuracy | High | High |
| Batch processing | x | √ |
| Scalability | x | √ |
| Best use case | Small PDFs | Large or recurring tasks |
Best Practices for Removing Blank Pages from PDFs
- Always keep a backup of original files.
- Test detection logic on sample documents.
- Be cautious with scanned PDFs.
- Combine automation with manual review for critical files.
Final Thoughts
Removing blank pages from PDFs is a small but important step toward producing clean, professional documents. Manual methods work well for quick edits and small files, but they don’t scale efficiently.
For larger or recurring tasks, automation is the clear solution. By using Spire.PDF for Python and combining logical and visual detection techniques, you can reliably remove both technically and visually blank pages. This approach saves time, improves consistency, and integrates seamlessly into modern document workflows.
FAQs
Q1: Why do blank or unwanted pages appear in PDF files?
Blank or extra pages often appear due to formatting issues during document conversion, incorrect page breaks, scanning artifacts, or exporting files from Word, Excel, or reporting tools.
Q2: Can I delete pages from a PDF without using paid software?
Yes. You can delete pages using free options such as built-in tools like macOS Preview, online PDF editors, or free desktop PDF readers that support basic page management.
Q3: Will deleting pages affect the content or layout of the remaining PDF?
Deleting pages does not change the layout or formatting of the remaining pages. However, it’s recommended to review the final document to ensure page numbering, bookmarks, or references still make sense.
Q4: Is it safe to delete pages from a PDF?
Yes, as long as you keep a backup of the original file. Deleting pages is a non-destructive operation when saved as a new file, making it easy to restore the original if needed.