5 лучших способов конвертировать Word Doc в TXT
Содержание
- Word и TXT: ключевые различия
- Способ 1: Использование метода "Сохранить как" в Microsoft Word
- Способ 2: Использование метода копирования и вставки в Блокноте
- Способ 3: Бесплатные онлайн-конвертеры Word в TXT
- Способ 4: Использование Windows PowerShell для массового преобразования
- Способ 5: Использование Python с Free Spire.Doc
- Распространенные проблемы при преобразовании в TXT
- Часто задаваемые вопросы (FAQ)
Преобразование Word DOC в TXT (простой текст) — обычная задача для профессионалов, студентов и разработчиков. Файлы TXT легкие, универсально совместимые и не содержат форматирования, что делает их идеальными для извлечения данных, обмена между платформами и интеграции с программными приложениями.
Если вам нужно удалить форматирование из документа Word, извлечь текст для анализа или обеспечить совместимость со старыми системами, это подробное руководство проведет вас через лучшие методы преобразования файла Word в TXT, включая бесплатные инструменты, онлайн-конвертеры, сочетания клавиш для копирования и вставки и даже программные решения.
Обзор содержания:
- Word и TXT: ключевые различия
- Способ 1: Использование метода "Сохранить как" в Microsoft Word
- Способ 2: Использование метода копирования и вставки в Блокноте
- Способ 3: Бесплатные онлайн-конвертеры Word в TXT
- Способ 4: Использование Windows PowerShell для массового преобразования
- Способ 5: Использование Python с Free Spire.Doc
- Распространенные проблемы при преобразовании в TXT
- Часто задаваемые вопросы (FAQ)
Word и TXT: ключевые различия
Чтобы освоить процесс преобразования Doc в TXT или Docx в TXT, вы должны сначала понять фундаментальные различия между исходным и целевым форматами. Вот краткий обзор:
| Документ Word (.doc / .docx) | Простой текстовый файл (.txt) |
|---|---|
| Поддерживает шрифты, цвета, полужирный/курсив, интервалы | Никакого форматирования — только необработанный текст |
| Включает изображения, таблицы, диаграммы, макросы | Нет медиа или интерактивных элементов |
| Больший размер файла (из-за встроенных данных) | Сверхлегкий размер файла |
| Проприетарный формат (Microsoft) | Универсальный, открытый формат (читаемый любым устройством/программным обеспечением) |
| Риск проблем совместимости со старыми системами | Совместим почти со всеми ОС/программным обеспечением (Windows, Mac, Linux, мобильные устройства) |
Зачем конвертировать? Преобразование Word в TXT удаляет "избыточное форматирование" файлов Word, оставляя чистые данные, которые могут быть обработаны любой компьютерной системой.
Способ 1: Использование метода "Сохранить как" в Microsoft Word
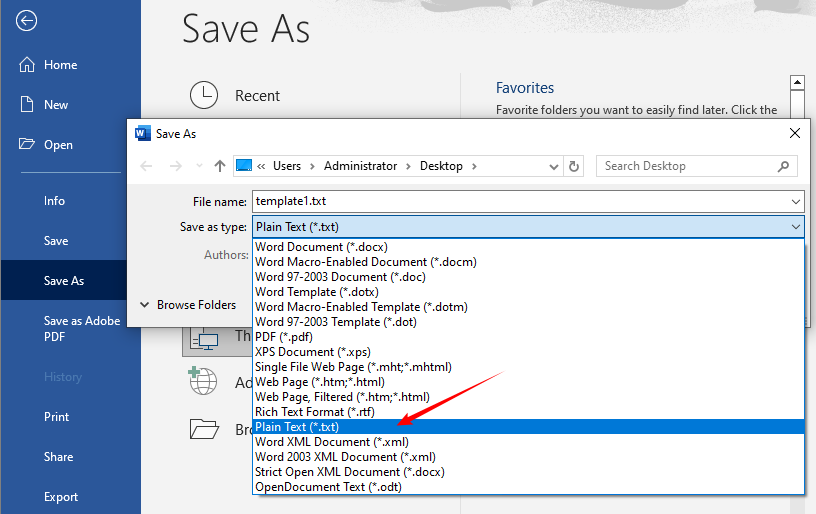
Встроенная функция Microsoft Word "Сохранить как" — это самый простой способ преобразовать один документ Word в TXT. Этот метод работает как для файлов DOC, так и для DOCX и идеально подходит для пользователей, у которых уже установлен Word.
- Откройте ваш документ Word в Microsoft Word.
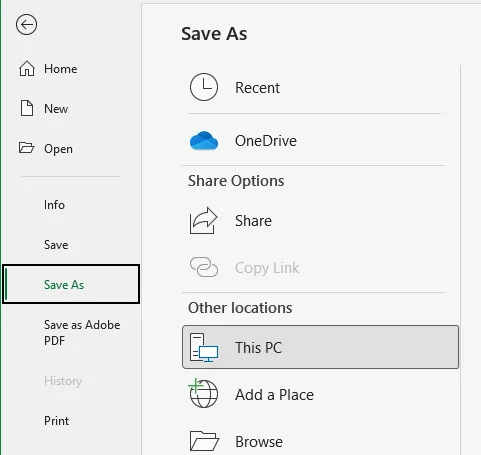
- Нажмите на вкладку Файл (вверху слева) → выберите Сохранить как.
- Выберите место для сохранения вашего файла TXT (например, Рабочий стол).
- В выпадающем списке Тип файла выберите Простой текст (*.txt).
- Нажмите Сохранить— появится диалоговое окно Преобразование файла.
- Необязательно: выберите здесь кодировку UTF-8 для поддержки неанглийских символов, эмодзи и специальных знаков. Оставьте остальные настройки по умолчанию.
- Перейдите в место сохранения и откройте файл TXT в текстовом редакторе (Блокнот, VS Code) для проверки.
Если вам нужно сохранить базовую структуру, преобразуйте Word в RTF (форматированный текст) вместо формата TXT.
Способ 2: Использование метода копирования и вставки в Блокноте
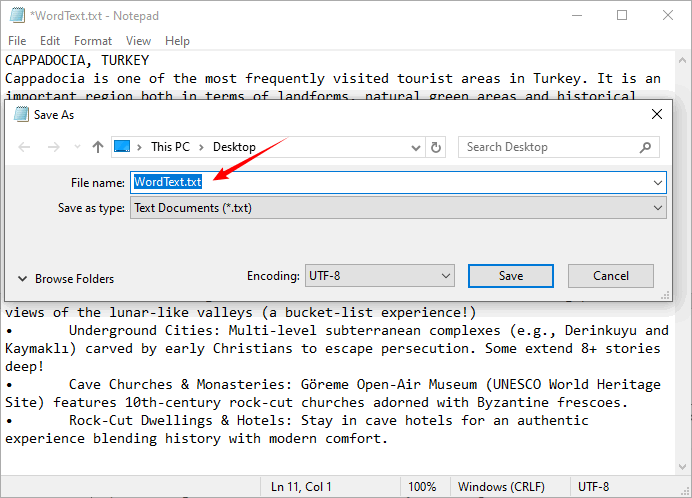
Если вы не хотите сохранять совершенно новый файл или вам нужно работать только с частью документа, простой метод копирования и вставки работает идеально. Этот метод не требует никаких дополнительных инструментов, кроме стандартного программного обеспечения для обработки текста/слов.
- Откройте ваш документ Word и выделите нужный текст (Ctrl + A для всего документа).
- Скопируйте текст: Ctrl + C.
- Откройте Блокнот (найдите его в меню "Пуск" Windows).
- Вставьте текст: Ctrl + V.
- Перейдите в Файл → Сохранить → назовите файл и убедитесь, что расширение .txt → нажмите Сохранить.
Совет: этот метод отлично подходит для быстрого извлечения текста, но избегайте его для больших документов (это может вызвать незначительные проблемы с разрывами строк).
Способ 3: Бесплатные онлайн-конвертеры Word в TXT
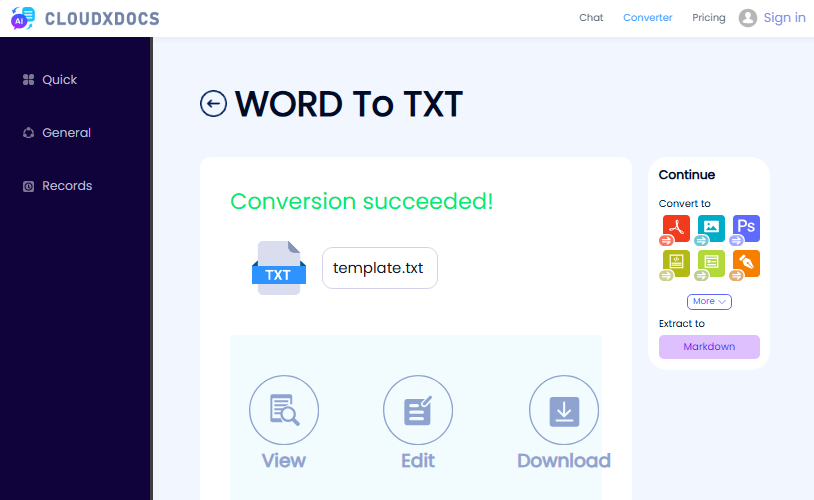
Онлайн-инструменты — это быстрый способ конвертировать DOC в TXT онлайн без установки какого-либо программного обеспечения. Они быстрые, бесплатные и работают на любом устройстве с подключением к Интернету. Для безопасности придерживайтесь авторитетных сайтов, таких как CLOUDXDOCS и Zamzar.
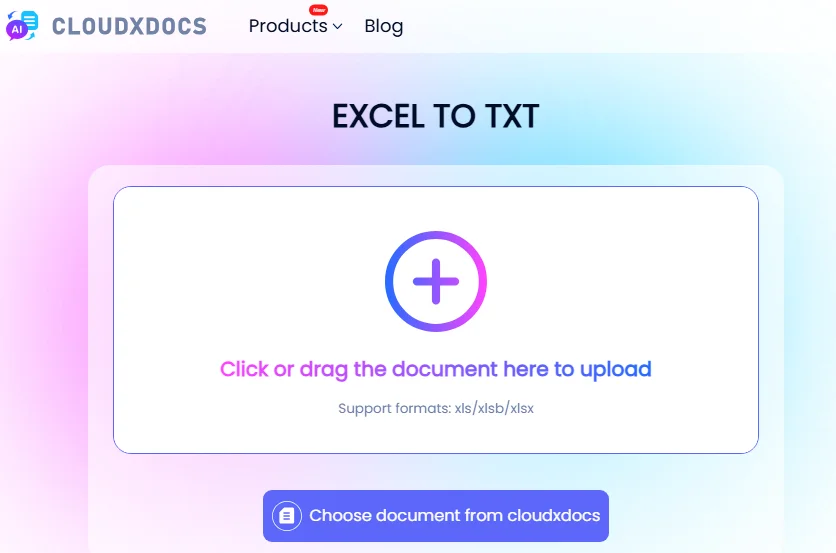
- Перейдите на страницу конвертера Doc в TXT (например, конвертер CLOUDXDOCS Word в TXT).
- Загрузите ваш документ Word (поддерживает DOC, DOCX, DOT, DOCM).
- Дождитесь окончания преобразования.
- Нажмите Скачать, чтобы сохранить файл TXT на ваше устройство.
Предупреждение о безопасности: избегайте загрузки личных, финансовых или конфиденциальных юридических документов в бесплатные онлайн-инструменты. Для таких файлов придерживайтесь настольных методов.
Хотя преобразование Word в TXT удаляет форматирование для совместимости и извлечения данных, в конечном итоге вам может понадобиться вернуть этот простой текст в отформатированный документ — вот как преобразовать TXT в Word, когда вы будете готовы восстановить структуру.
Способ 4: Использование Windows PowerShell для массового преобразования
Если у вас есть десятки или сотни файлов Word для преобразования, ручное преобразование утомительно. Windows PowerShell — это бесплатный встроенный инструмент, который позволяет вам массово конвертировать Word в TXT за секунды — опыт программирования не требуется. Этот метод использует встроенную автоматизацию Word для обработки всех файлов в папке.
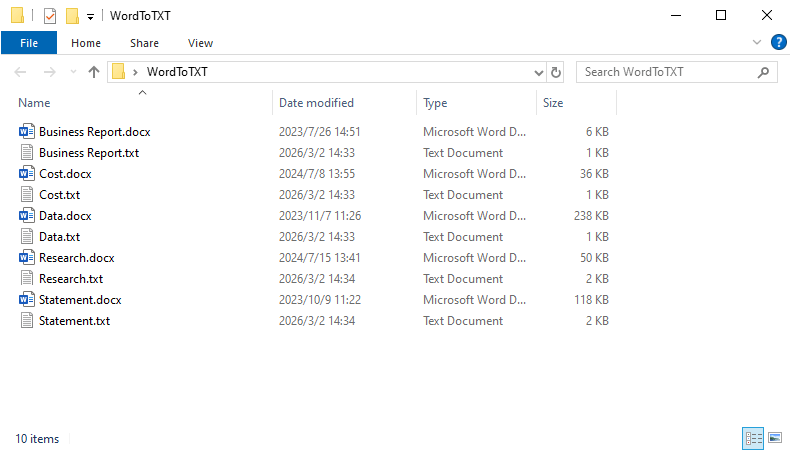
- Создайте новую папку на рабочем столе и назовите ее WordToTXT — переместите все ваши файлы Word DOC/DOCX в эту папку.
- Найдите Windows PowerShell в меню "Пуск" → откройте его от имени администратора.
- Вставьте следующую команду и нажмите Enter (замените YourUsername на ваше фактическое имя пользователя Windows):
cd "C:\Users\YourUsername\Desktop\WordToTXT"
- Вставьте следующий скрипт и нажмите Enter, чтобы начать массовое преобразование:
$word = New-Object -ComObject Word.Application
$word.Visible = $false
$files = Get-ChildItem -Filter *.doc*
foreach ($file in $files) {
    $doc = $word.Documents.Open($file.FullName)
    $txtPath = [System.IO.Path]::ChangeExtension($file.FullName, '.txt')
    $doc.SaveAs($txtPath, 7) # 7 = wdFormatUnicodeText
    $doc.Close()
}
$word.Quit()
[System.Runtime.Interopservices.Marshal]::ReleaseComObject($word) | Out-Null
- После завершения работы скрипта проверьте папку WordToTXT — все ваши файлы Word теперь будут иметь соответствующий файл TXT.
Примечание: убедитесь, что на вашей системе установлен Microsoft Word; в противном случае скрипт не будет работать. Также не забудьте закрыть все окна Word перед запуском скрипта, чтобы избежать ошибок. Скрипт автоматически закроет COM-объект Word, чтобы освободить ресурсы.
Способ 5: Использование Python с Free Spire.Doc
Если вы разработчик или вам нужно автоматизировать преобразование Word в TXT, Python с библиотекой Free Spire.Doc — это мощное и удобное решение. Эта библиотека поддерживает форматы DOC и DOCX и упрощает процесс преобразования с минимальным количеством кода.
Зачем использовать Python для преобразования?
- Автоматизация: планируйте преобразования для ежедневных отчетов.
- Пакетная обработка: конвертируйте тысячи файлов за минуты.
- Интеграция: передавайте извлеченный текст непосредственно в индекс поисковой системы или в модель машинного обучения.
Код Python для преобразования Word в TXT
Используйте следующий код Python для преобразования файлов Doc или Docx в TXT:
from spire.doc import *
from spire.doc.common import *

# Create a Document object to load the Word file
document = Document()

# Load a Word file (DOC or DOCX) from your local disk
document.LoadFromFile("Input.docx")

# Save the Word file as a TXT file
document.SaveToFile("result.txt", FileFormat.Txt)

# Close the document to release resources
document.Close()
Результат преобразования:
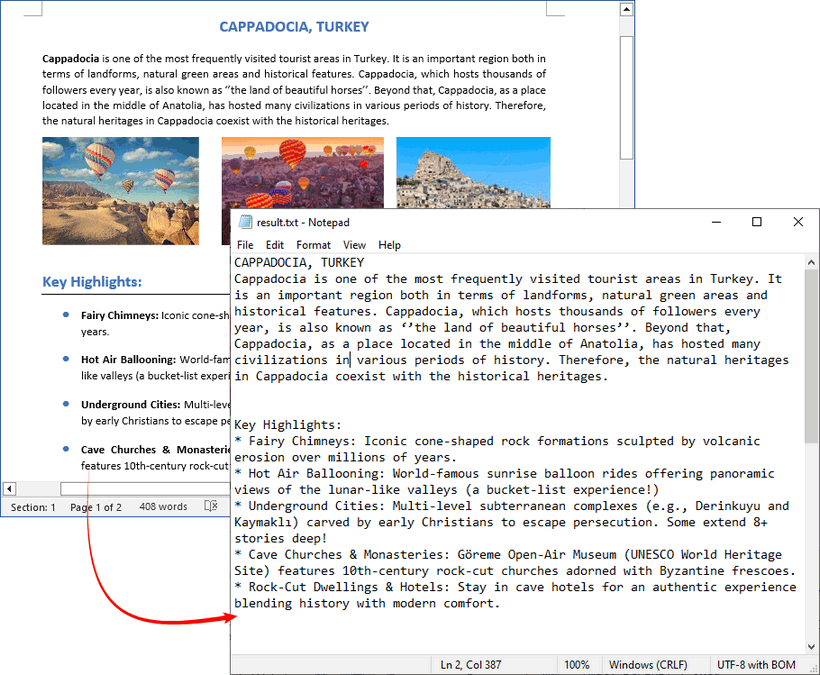
Файлы TXT не могут хранить изображения, поэтому извлеките изображения из вашего документа Word перед преобразованием, если вам нужно их сохранить.
Распространенные проблемы при преобразовании в TXT
Даже простое преобразование DOC в TXT может столкнуться с трудностями. Вот как их исправить.
- Потеря форматирования: файлы TXT не поддерживают никакого форматирования. Маркированные списки могут превратиться в звездочки/тире, таблицы будут выглядеть как беспорядочные строки текста, а полужирный/курсив исчезнет.
- Решение: исправление не требуется. Это особенность TXT, а не ошибка.
- Проблемы с кодировкой символов: иногда специальные символы (например, фигурные кавычки, длинные тире или символы) могут превратиться в бессмыслицу (например, —). Это проблема с кодировкой.
- Решение: при сохранении в Word (Способ 1) диалоговое окно "Преобразование файла" позволяет выбрать кодировку. Попробуйте "UTF-8", так как он поддерживает самый широкий диапазон символов.
- Разрывы строк: длинные абзацы в Word могут неправильно переноситься в Блокноте — это проблема отображения в текстовом редакторе, а не ошибка преобразования.
- Решение: включите перенос по словам в вашем текстовом редакторе (Блокнот: Формат → Перенос по словам).
Часто задаваемые вопросы (FAQ)
В1: Могу ли я преобразовать защищенный паролем документ Word в TXT?
О: Большинство инструментов (включая Word и библиотеки Python) требуют, чтобы вы сначала разблокировали документ. Вы должны снять защиту паролем в Microsoft Word перед попыткой преобразования.
В2: Уменьшает ли преобразование в TXT размер файла?
О: Значительно. 10-мегабайтный документ Word с изображениями может стать 50-килобайтным текстовым файлом, так как все двоичные данные (изображения) отбрасываются.
В3: В чем разница между сохранением в формате TXT и сохранением в формате RTF?
О: RTF (Rich Text Format) сохраняет базовое форматирование, такое как полужирный шрифт и курсив, в то время как TXT — нет. Если вам нужно форматирование, сохраняйте в формате RTF. Если вам нужны чистые данные, сохраняйте в формате TXT.
В4: Как преобразование обрабатывает гиперссылки?
О: В большинстве случаев видимый текст гиперссылки сохраняется, но основной URL-адрес теряется. Если вам нужно сохранить фактические URL-адреса, вы должны использовать специальный инструмент или скрипт Python, который специально извлекает адреса гиперссылок.
Заключение
Преобразование Word DOC в TXT — это простой процесс, который значительно повышает совместимость и простоту. Для обычных пользователей, работающих с отдельными файлами, функция "Сохранить как" в Word или онлайн-конвертеры являются надежными вариантами, в то время как копирование и вставка хорошо подходят для быстрого извлечения небольших фрагментов текста. Для массовых преобразований Windows PowerShell предлагает эффективное решение, а разработчики могут легко интегрировать преобразование Word в TXT в свои рабочие процессы с помощью Python и Free Spire.Doc.
Выберите метод, который наилучшим образом соответствует вашему уровню технического комфорта, масштабу и требованиям безопасности (храните конфиденциальные файлы в автономном режиме). С этими опциями проприетарные форматы Word больше не будут блокировать ваши данные, гарантируя, что ваш текст останется универсально доступным и совместимым с любым устройством или системой сейчас и в будущем.
Смотрите также
- Как объединить документы Word: сохранить или унифицировать форматирование
- Легко конвертируйте текст в PDF: 4 быстрых и профессиональных метода
- Конвертируйте Word в PNG: 3 практических способа, которые вы действительно можете использовать
- C#/VB.NET: преобразование текста в Word или Word в текст
- Как преобразовать TXT в Word или Word в TXT с помощью кода Java
Como converter Excel para TXT (4 métodos fáceis)
Índice
- Compreendendo as diferenças entre formatos de texto comuns
- Método 1: Copiar dados do Excel e colar em um editor de texto (rápido e simples)
- Método 2: Salvar Excel como texto usando o Microsoft Excel (nativo e confiável)
- Método 3: Converter Excel para TXT usando ferramentas online gratuitas (nenhum software necessário)
- Método 4: Converter Excel para TXT em lote com C# (processo automatizado)
- Comparação: Qual método de Excel para TXT é o certo para você
- Dicas práticas para conversão de Excel para texto
- Problemas comuns e soluções
Arquivos Excel (.xlsx ou .xls) são amplamente utilizados para organizar e analisar grandes conjuntos de dados, mas podem ser difíceis de compartilhar ou usar em sistemas que aceitam apenas formatos de texto simples. Converter Excel para TXT aumenta a compatibilidade, facilitando o compartilhamento e a automação do processamento. Neste artigo, vamos guiá-lo através de 4 métodos simples para ajudá-lo a alcançar facilmente a conversão de Excel para Texto — quer você esteja procurando por uma solução rápida e manual ou por um processo em lote automatizado.
- Compreendendo as diferenças entre formatos de texto comuns
- Método 1: Copiar dados do Excel e colar em um editor de texto (rápido e simples)
- Método 2: Salvar Excel como texto usando o Microsoft Excel (nativo e confiável)
- Método 3: Converter Excel para TXT usando ferramentas online gratuitas (nenhum software necessário)
- Método 4: Converter Excel para TXT em lote com C# (processo automatizado)
- Comparação: Qual método de Excel para TXT é o certo para você
- Dicas práticas para conversão de Excel para texto
- Problemas comuns e soluções
Compreendendo as diferenças entre formatos de texto comuns
Ao converter arquivos do Excel para texto, selecionar o formato de texto correto é crucial para garantir a compatibilidade e a integridade dos dados. Abaixo estão vários formatos de texto comuns usados para esta conversão:
- Texto Delimitado por Tabulação (.txt): Usa tabulações (\t) como delimitadores, adequado para a maioria das aplicações Windows.
- Texto Unicode (.txt): Usa codificação Unicode (por exemplo, UTF-16), ideal para lidar com dados multilíngues, especialmente caracteres não latinos como chinês e árabe.
- CSV (Valores Separados por Vírgula) (.csv): Um formato de texto que usa vírgulas como delimitadores, comumente usado para troca de dados entre bancos de dados e planilhas.
Cada formato tem seus pontos fortes. Compreender essas opções pode ajudá-lo a escolher o formato certo para suas necessidades.
Método 1: Copiar dados do Excel e colar em um editor de texto (rápido e simples)
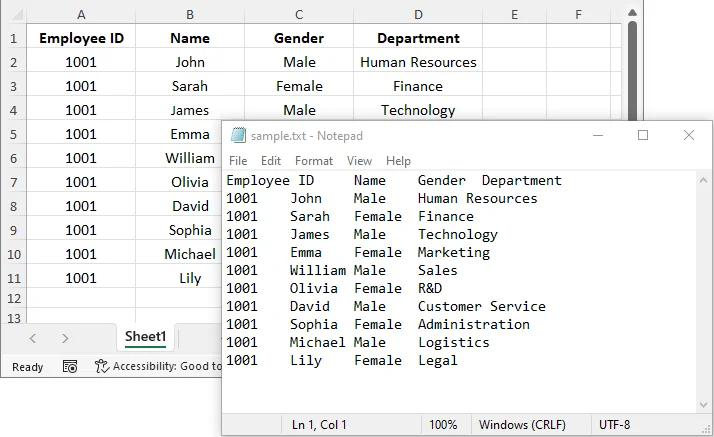
Copiar dados do Excel e colá-los em um editor de texto é uma das maneiras mais fáceis de converter Excel para TXT. Este método é ideal quando você precisa apenas de um intervalo específico de células do Excel convertido em texto, não de planilhas inteiras.
Passos rápidos de conversão:
-
Destaque o intervalo de dados que você deseja converter em sua planilha do Excel.
-
Pressione Ctrl+C (Windows) ou Cmd+C (Mac) para copiar.
-
Abra um editor de texto (Bloco de Notas, TextEdit, etc.).
-
Pressione Ctrl+V (Windows) ou Cmd+V (Mac) para colar.
-
Salve o arquivo como .txt.
Notas importantes:
- Os dados colados em editores de texto normalmente usam delimitadores de tabulação, então as colunas são separadas por tabulações.
- Grandes conjuntos de dados podem ter problemas de formatação ou truncamento, dependendo da capacidade da área de transferência do seu sistema. Considere dividir grandes conjuntos de dados em partes menores, se necessário.
Quando usar: Melhor para conversões pequenas e únicas, ou quando você precisa apenas de parte da planilha.
Método 2: Salvar Excel como texto usando o Microsoft Excel (nativo e confiável)
O Microsoft Excel oferece um recurso integrado Salvar como para salvar diretamente um arquivo do Excel como texto, que é confiável e amplamente utilizado.
Guia passo a passo:
-
Inicie o Microsoft Excel. Clique em Arquivo > Abrir, depois navegue e selecione seu arquivo do Excel.
-
Navegue até a planilha que deseja converter e clique em Arquivo > Salvar como.
-
Escolha o formato de texto preferido:
- No menu suspenso Salvar como tipo, selecione o formato de texto ou CSV desejado, como Texto (delimitado por tabulação) (.txt)", Texto Unicode (.txt) ou CSV (delimitado por vírgula) (.csv) (CSV também é um formato de texto simples).
- Se você escolher Texto (delimitado por tabulação), os dados serão separados por tabulações; se você selecionar CSV, será separado por vírgulas. Para documentos multilíngues, escolha Texto Unicode.
-
Selecione onde você gostaria de salvar o arquivo de texto e clique em Salvar.
Considerações:
- Este método salva apenas a planilha ativa. Se sua pasta de trabalho tiver várias planilhas, repita o processo para cada uma.
- O Excel irá avisá-lo que alguns recursos podem ser perdidos (por exemplo, formatação, fórmulas). Isso é esperado, pois os arquivos TXT contêm apenas texto bruto.
Quando usar: Este método é perfeito para usuários que têm o Excel instalado e desejam uma solução confiável e direta para conversões de uma única planilha.
Você também pode gostar: Como converter arquivos TXT para planilhas do Excel rapidamente
Método 3: Converter Excel para TXT usando ferramentas online gratuitas (nenhum software necessário)
Para usuários sem Excel ou aqueles que preferem uma solução compatível com dispositivos móveis, muitas ferramentas online gratuitas oferecem a flexibilidade de converter arquivos do Excel para TXT de qualquer dispositivo com conexão à internet.
Conversores online de Excel para TXT recomendados:
- CloudConvert: Suporta uma ampla gama de conversões de arquivos, incluindo Excel para TXT.
- Convertio: Uma ferramenta popular e fácil de usar para converter XLS/XLSX para TXT.
- Cloudxdocs: Rápido e confiável, suporta conversão de Excel para TXT e muito mais.
Passos para converter Excel para TXT online:
-
Acesse o site do conversor online escolhido (por exemplo, Cloudxdocs).
-
Carregue o arquivo do Excel que você deseja converter ou arraste e solte-o na área designada.
-
A ferramenta processará e converterá automaticamente seu arquivo do Excel.
-
Baixe o arquivo TXT para o seu dispositivo assim que a conversão for concluída.
Aviso de segurança:
Tenha cuidado ao carregar arquivos contendo dados confidenciais ou proprietários para conversores online públicos, pois eles podem armazenar ou processar seus dados em servidores de terceiros. Para dados comerciais confidenciais, sempre use métodos offline ou soluções de nível empresarial com proteção de dados adequada.
Quando usar: Melhor para uso pessoal ou dados não confidenciais que precisam de conversão rápida sem instalação de software.
Método 4: Converter Excel para TXT em lote com C# (processo automatizado)
Para desenvolvedores ou equipes que procuram converter vários arquivos do Excel de uma vez, o C# oferece uma solução eficiente através de bibliotecas como Spire.XLS for .NET. Este método é adequado para conversões em lote, automação e integração em fluxos de trabalho de processamento de dados maiores.
O que é o Spire.XLS for .NET?
O Spire.XLS for .NET é uma biblioteca .NET para criar, modificar e converter arquivos Excel XLSX ou XLS em vários formatos, incluindo TXT e PDF — sem a necessidade do Microsoft Excel.

Requisitos de instalação:
Antes de prosseguir, instale a biblioteca necessária via NuGet ou baixe-a do site oficial:
Install-Package Spire.XLS
Exemplo de código:
Depois que a biblioteca estiver instalada, adicione o seguinte código ao seu projeto C# para converter arquivos do Excel em arquivos de texto em lote:
using Spire.Xls;
using System;
using System.IO;
using System.Text;

namespace ExcelToTXT
{
    class Program
    {
        static void Main(string[] args)
        {
            // Specify the directory containing the Excel files
            string inputDirectory = @"C:\ExcelFiles\";

            // Get all Excel files in the directory
            string[] excelFiles = Directory.GetFiles(inputDirectory, "*.xlsx");

            foreach (var file in excelFiles)
            {
                // Create a Workbook instance
                Workbook workbook = new Workbook();

                // Load the Excel file
                workbook.LoadFromFile(file);

                // Access the first sheet
                Worksheet sheet = workbook.Worksheets[0];

                // Generate output file name based on the input file name
                string outputFileName = Path.Combine(inputDirectory, Path.GetFileNameWithoutExtension(file) + ".txt");

                // Save the worksheet as a comma-delimited text file
                sheet.SaveToFile(outputFileName, ",", Encoding.UTF8);

                Console.WriteLine($"Converted {file} to {outputFileName}");
            }
        }
    }
}
Este script carrega vários arquivos do Excel de um diretório especificado e converte a primeira planilha de cada arquivo em um arquivo de texto. Os arquivos de saída são salvos com o mesmo nome da planilha original do Excel, mas com a extensão .txt.
Opções de personalização de código:
-
Manipulando arquivos .xls:
Se você precisar processar arquivos .xls em vez de .xlsx, basta modificar o filtro de extensão de arquivo:
string[] excelFiles = Directory.GetFiles(inputDirectory, "*.xls"); -
Convertendo todas as planilhas:
Para converter todas as planilhas, use um loop para iterar sobre cada planilha:
foreach (Worksheet sheet in workbook.Worksheets) { string outputFileName = Path.Combine(inputDirectory, Path.GetFileNameWithoutExtension(file) + "_" + sheet.Name + ".txt"); sheet.SaveToFile(outputFileName, ",", Encoding.UTF8); } -
Alterando o delimitador:
O código usa uma vírgula como delimitador. Você pode alterá-lo para outros delimitadores, como tabulação ou pipe:
sheet.SaveToFile(outputFileName, "\t", Encoding.UTF8); // Para delimitado por tabulação sheet.SaveToFile(outputFileName, "|", Encoding.UTF8); // Para delimitado por pipe -
Convertendo um intervalo de células específico:
Se você deseja converter apenas um intervalo específico de células (por exemplo, A1:D10), pode definir a área de impressão:
sheet.PageSetup.PrintArea = "A1:D10";  // Defina o intervalo
sheet.SaveToFile(outputFileName, ",", Encoding.UTF8);  // Converta o intervalo para txt
Quando usar: Este método é ideal para desenvolvedores, engenheiros de dados ou equipes que precisam automatizar a conversão de vários arquivos do Excel em processos em lote.
Comparação: Qual método de Excel para TXT é o certo para você?
Abaixo está uma tabela de comparação que contrasta os quatro métodos de conversão de Excel para TXT com base em fatores como facilidade de uso, processamento em lote, opções de personalização, segurança e requisitos de habilidade:
| Método | Facilidade de uso | Processamento em lote | Personalização | Segurança | Habilidade técnica necessária |
|---|---|---|---|---|---|
| Copiar e colar | Fácil | Não | Sem personalização | Alta | Baixa |
| Recurso Salvar como do Excel | Fácil | Não | Alta | Alta | Baixa |
| Conversores online | Fácil | Não | Baixa | Baixa | Baixa |
| Automação em C# | Moderada | Sim | Excelente | Alta | Alta (conhecimento de C# necessário) |
Guia rápido para escolher o método de conversão certo
- Para conversão de dados rápida e em pequena escala → Copiar e colar
- Para conversão confiável de uma única planilha → Recurso Salvar como do Excel
- Para conversão rápida sem instalação de software → Conversores online
- Para conversão em massa ou necessidades de automação → Automação em C#
Dicas práticas para conversão de Excel para texto
- Faça backup de seus arquivos originais do Excel: antes de iniciar qualquer conversão, certifique-se de ter um backup do seu arquivo original para evitar a perda de dados críticos.
- Escolha o delimitador correto: certifique-se de escolher o delimitador correto com base no uso pretendido. Por exemplo, use delimitado por tabulação para melhor legibilidade em editores de texto ou delimitado por vírgula para compatibilidade com ferramentas de importação de dados.
- Evite arquivos grandes com ferramentas online: muitos conversores online têm limites de tamanho (normalmente 50 MB-100 MB). Para arquivos grandes, considere usar métodos offline ou processamento em lote por meio de automação em C#.
- Verifique os dados convertidos: após a conversão, sempre abra o arquivo de texto e verifique a integridade dos dados, especialmente para conjuntos de dados importantes.
Problemas comuns e soluções
- Caracteres especiais estão sendo exibidos incorretamente: use a codificação Unicode para preservar caracteres especiais como chinês, árabe ou outros alfabetos não latinos. Isso pode ser feito facilmente ao exportar através do Excel ou conversão automatizada em C#.
- Linhas em branco extras no arquivo TXT: se aparecerem linhas em branco, você pode removê-las usando Localizar e substituir em um editor de texto como o Notepad++ para excluir quebras de linha extras.
- Fórmulas aparecendo em vez de valores: para evitar isso, copie as células e cole-as apenas como valores antes de converter. Isso garante que os valores calculados (não as fórmulas) sejam salvos no arquivo TXT.
- Várias planilhas não estão sendo convertidas: se você estiver salvando manualmente do Excel, apenas uma planilha será salva por vez. Use a automação em C# para converter várias planilhas em lote.
perguntas frequentes
Q1: Posso converter Excel para TXT no meu dispositivo móvel?
A1: Sim, ferramentas online como o Cloudxdocs permitem que você converta arquivos do Excel em dispositivos móveis. No entanto, tenha cuidado ao carregar dados confidenciais para sites públicos.
Q2: Por que meus dados do Excel parecem corrompidos após a conversão?
A2: Geralmente, isso é um problema de codificação de caracteres. Ao lidar com caracteres não ASCII, certifique-se de selecionar o formato de texto com codificação Unicode para garantir a conversão adequada.
Q3: Posso converter Excel para TXT com delimitadores específicos?
A3: Sim, você pode personalizar o delimitador ao converter Excel para TXT, dependendo do método ou ferramenta que você usa. Por exemplo, você pode usar o recurso Salvar como do Excel para salvar o Excel como CSV (delimitado por vírgula) e depois alterar a extensão do arquivo para .txt ou automatizar o processo em C# para ter mais controle sobre os delimitadores.
Q4: Qual é a diferença entre os formatos de arquivo CSV e TXT?
A4: Ambos são formatos baseados em texto, mas os arquivos CSV separam os dados com vírgulas, tornando-os ideais para dados tabulares. Os arquivos TXT podem usar uma variedade de delimitadores (por exemplo, tabulações, espaços ou pipes) e são frequentemente usados para armazenamento de dados mais simples ou flexível.
Q5: Posso converter várias planilhas para TXT de uma vez no Excel?
A5: O recurso integrado "Salvar como" do Excel converte apenas a planilha ativa. Para converter várias planilhas, você precisa repetir o processo ou automatizar a conversão usando C#.
Palavras Finais
Isso é tudo que você precisa saber sobre a conversão de Excel para TXT! Se você tiver alguma dúvida, dica ou truque para converter arquivos do Excel, sinta-se à vontade para compartilhá-los com nossa comunidade — adoraríamos ouvir de você e aprender juntos!
Veja também
Excel을 TXT로 변환하는 방법 (4가지 간편한 방법)
목차
Excel 파일(.xlsx 또는 .xls)은 대용량 데이터 세트를 구성하고 분석하는 데 널리 사용되지만 일반 텍스트 형식만 허용하는 시스템에서는 공유하거나 사용하기 어려울 수 있습니다. Excel을 TXT로 변환하면 호환성이 향상되어 공유 및 자동화 처리가 더 쉬워집니다. 이 기사에서는 빠른 수동 솔루션을 찾고 있든 자동화된 일괄 처리 프로세스를 찾고 있든 Excel을 텍스트로 쉽게 변환하는 데 도움이 되는 4가지 간단한 방법을 안내합니다.
- 일반적인 텍스트 형식 간의 차이점 이해
- 방법 1: Excel 데이터를 복사하여 텍스트 편집기에 붙여넣기 (빠르고 간단)
- 방법 2: Microsoft Excel을 사용하여 Excel을 텍스트로 저장 (기본적이고 신뢰할 수 있음)
- 방법 3: 무료 온라인 도구를 사용하여 Excel을 TXT로 변환 (소프트웨어 필요 없음)
- 방법 4: C#을 사용하여 Excel을 TXT로 일괄 변환 (자동화된 프로세스)
- 비교: 어떤 Excel to TXT 방법이 당신에게 적합한가
- Excel을 텍스트로 변환하기 위한 실용적인 팁
- 일반적인 문제 및 해결 방법
일반적인 텍스트 형식 간의 차이점 이해
Excel 파일을 텍스트로 변환할 때 데이터 호환성과 무결성을 보장하려면 올바른 텍스트 형식을 선택하는 것이 중요합니다. 다음은 이 변환에 사용되는 몇 가지 일반적인 텍스트 형식입니다.
- 탭으로 구분된 텍스트(.txt): 탭(\t)을 구분 기호로 사용하며 대부분의 Windows 응용 프로그램에 적합합니다.
- 유니코드 텍스트(.txt): 유니코드 인코딩(예: UTF-16)을 사용하며, 특히 중국어 및 아랍어와 같은 비라틴 문자와 같은 다국어 데이터를 처리하는 데 이상적입니다.
- CSV(쉼표로 구분된 값)(.csv): 쉼표를 구분 기호로 사용하는 텍스트 형식으로, 데이터베이스와 스프레드시트 간의 데이터 교환에 일반적으로 사용됩니다.
각 형식에는 장점이 있습니다. 이러한 옵션을 이해하면 필요에 맞는 올바른 형식을 선택하는 데 도움이 될 수 있습니다.
방법 1: Excel 데이터를 복사하여 텍스트 편집기에 붙여넣기 (빠르고 간단)
Excel 데이터를 복사하여 텍스트 편집기에 붙여넣는 것은 Excel을 TXT로 변환하는 가장 쉬운 방법 중 하나입니다. 이 방법은 전체 워크시트가 아닌 특정 범위의 Excel 셀만 텍스트로 변환해야 할 때 이상적입니다.
빠른 변환 단계:
-
Excel 스프레드시트에서 변환하려는 데이터 범위를 강조 표시합니다.
-
복사하려면 Ctrl+C(Windows) 또는 Cmd+C(Mac)를 누릅니다.
-
텍스트 편집기(메모장, TextEdit 등)를 엽니다.
-
붙여넣으려면 Ctrl+V(Windows) 또는 Cmd+V(Mac)를 누릅니다.
-
.txt로 파일을 저장합니다.
중요 참고 사항:
- 텍스트 편집기에 붙여넣은 데이터는 일반적으로 탭 구분 기호를 사용하므로 열은 탭으로 구분됩니다.
- 대용량 데이터 세트는 시스템의 클립보드 용량에 따라 서식 문제나 잘림이 발생할 수 있습니다. 필요한 경우 대용량 데이터 세트를 더 작은 청크로 분할하는 것을 고려하십시오.
사용 시기: 작고 일회성인 변환이나 스프레드시트의 일부만 필요할 때 가장 좋습니다.
방법 2: Microsoft Excel을 사용하여 Excel을 텍스트로 저장 (기본적이고 신뢰할 수 있음)
Microsoft Excel은 Excel 파일을 텍스트로 직접 저장하는 기본 제공 다른 이름으로 저장 기능을 제공하며, 이는 신뢰할 수 있고 널리 사용됩니다.
단계별 가이드:
-
Microsoft Excel을 시작합니다. 파일 > 열기를 클릭한 다음 Excel 파일을 찾아 선택합니다.
-
변환하려는 시트로 이동하여 파일 > 다른 이름으로 저장을 클릭합니다.
-
기본 텍스트 형식을 선택합니다.
- 파일 형식 드롭다운 메뉴에서 텍스트(탭으로 구분)(.txt)", 유니코드 텍스트(.txt) 또는 CSV(쉼표로 구분)(.csv)(CSV도 일반 텍스트 형식임)와 같은 원하는 텍스트 또는 CSV 형식을 선택합니다.
- 텍스트(탭으로 구분)를 선택하면 데이터가 탭으로 구분됩니다. CSV를 선택하면 쉼표로 구분됩니다. 다국어 문서의 경우 유니코드 텍스트를 선택하십시오.
-
텍스트 파일을 저장할 위치를 선택하고 저장을 클릭합니다.
고려 사항:
- 이 방법은 활성 워크시트만 저장합니다. 통합 문서에 여러 시트가 있는 경우 각 시트에 대해 프로세스를 반복합니다.
- Excel은 일부 기능(예: 서식, 수식)이 손실될 수 있음을 경고합니다. TXT 파일에는 원시 텍스트만 포함되므로 이는 예상된 결과입니다.
사용 시기: 이 방법은 Excel이 설치되어 있고 단일 시트 변환을 위한 신뢰할 수 있고 간단한 솔루션을 원하는 사용자에게 적합합니다.
관심 있을 만한 다른 글: TXT 파일을 Excel 스프레드시트로 빠르게 변환하는 방법
방법 3: 무료 온라인 도구를 사용하여 Excel을 TXT로 변환 (소프트웨어 필요 없음)
Excel이 없거나 모바일 친화적인 솔루션을 선호하는 사용자를 위해 많은 무료 온라인 도구는 인터넷에 연결된 모든 장치에서 Excel 파일을 TXT로 변환할 수 있는 유연성을 제공합니다.
추천 온라인 Excel to TXT 변환기:
- CloudConvert: Excel to TXT를 포함한 광범위한 파일 변환을 지원합니다.
- Convertio: XLS/XLSX를 TXT로 변환하는 사용자 친화적이고 인기 있는 도구입니다.
- Cloudxdocs: 빠르고 안정적이며 Excel to TXT 변환 등을 지원합니다.
온라인에서 Excel을 TXT로 변환하는 단계:
-
선택한 온라인 변환기 웹사이트(예: Cloudxdocs)로 이동합니다.
-
변환하려는 Excel 파일을 업로드하거나 지정된 영역으로 끌어다 놓습니다.
-
이 도구는 Excel 파일을 자동으로 처리하고 변환합니다.
-
변환이 완료되면 TXT 파일을 장치에 다운로드합니다.
보안 경고:
민감하거나 독점적인 데이터가 포함된 파일을 공용 온라인 변환기에 업로드할 때는 주의하십시오. 타사 서버에 데이터를 저장하거나 처리할 수 있습니다. 기밀 비즈니스 데이터의 경우 항상 오프라인 방법이나 적절한 데이터 보호 기능이 있는 엔터프라이즈급 솔루션을 사용하십시오.
사용 시기: 소프트웨어 설치 없이 빠른 변환이 필요한 개인용 또는 민감하지 않은 데이터에 가장 적합합니다.
방법 4: C#을 사용하여 Excel을 TXT로 일괄 변환 (자동화된 프로세스)
한 번에 여러 Excel 파일을 변환하려는 개발자나 팀을 위해 C#은 Spire.XLS for .NET과 같은 라이브러리를 통해 효율적인 솔루션을 제공합니다. 이 방법은 일괄 변환, 자동화 및 대규모 데이터 처리 워크플로에 통합하는 데 적합합니다.
Spire.XLS for .NET이란 무엇입니까?
Spire.XLS for .NET은 Microsoft Excel 없이 TXT 및 PDF를 포함한 여러 형식으로 Excel XLSX 또는 XLS 파일을 생성, 수정 및 변환하기 위한 .NET 라이브러리입니다.
설치 요구 사항:
진행하기 전에 NuGet을 통해 필요한 라이브러리를 설치하거나 공식 웹사이트에서 다운로드하십시오.
Install-Package Spire.XLS
코드 예제:
라이브러리가 설치되면 다음 코드를 C# 프로젝트에 추가하여 Excel 파일을 텍스트 파일로 일괄 변환합니다.
using Spire.Xls;
using System;
using System.IO;
using System.Text;

namespace ExcelToTXT
{
    class Program
    {
        static void Main(string[] args)
        {
            // Specify the directory containing the Excel files
            string inputDirectory = @"C:\ExcelFiles\";

            // Get all Excel files in the directory
            string[] excelFiles = Directory.GetFiles(inputDirectory, "*.xlsx");

            foreach (var file in excelFiles)
            {
                // Create a Workbook instance
                Workbook workbook = new Workbook();

                // Load the Excel file
                workbook.LoadFromFile(file);

                // Access the first sheet
                Worksheet sheet = workbook.Worksheets[0];

                // Generate output file name based on the input file name
                string outputFileName = Path.Combine(inputDirectory, Path.GetFileNameWithoutExtension(file) + ".txt");

                // Save the worksheet as a comma-delimited text file
                sheet.SaveToFile(outputFileName, ",", Encoding.UTF8);

                Console.WriteLine($"Converted {file} to {outputFileName}");
            }
        }
    }
}
이 스크립트는 지정된 디렉토리에서 여러 Excel 파일을 로드하고 각 파일의 첫 번째 시트를 텍스트 파일로 변환합니다. 출력 파일은 원본 Excel 시트와 동일한 이름이지만 .txt 확장자로 저장됩니다.
코드 사용자 지정 옵션:
-
.xls 파일 처리:
.xlsx 대신 .xls 파일을 처리해야 하는 경우 파일 확장자 필터를 수정하기만 하면 됩니다.
string[] excelFiles = Directory.GetFiles(inputDirectory, "*.xls"); -
모든 시트 변환:
모든 시트를 변환하려면 루프를 사용하여 각 워크시트를 반복합니다.
foreach (Worksheet sheet in workbook.Worksheets) { string outputFileName = Path.Combine(inputDirectory, Path.GetFileNameWithoutExtension(file) + "_" + sheet.Name + ".txt"); sheet.SaveToFile(outputFileName, ",", Encoding.UTF8); } -
구분 기호 변경:
코드는 쉼표를 구분 기호로 사용합니다. 탭이나 파이프와 같은 다른 구분 기호로 변경할 수 있습니다.
sheet.SaveToFile(outputFileName, "\t", Encoding.UTF8); // For tab-delimited sheet.SaveToFile(outputFileName, "|", Encoding.UTF8); // For pipe-delimited -
특정 셀 범위 변환:
특정 셀 범위(예: A1:D10)만 변환하려면 인쇄 영역을 설정할 수 있습니다.
sheet.PageSetup.PrintArea = "A1:D10";  // Define the range
sheet.SaveToFile(outputFileName, ",", Encoding.UTF8);  // Convert the range to txt
사용 시기: 이 방법은 일괄 처리에서 여러 Excel 파일의 변환을 자동화해야 하는 개발자, 데이터 엔지니어 또는 팀에 이상적입니다.
비교: 어떤 Excel to TXT 방법이 당신에게 적합합니까?
다음은 사용 용이성, 일괄 처리, 사용자 지정 옵션, 보안 및 기술 요구 사항과 같은 요소를 기반으로 네 가지 Excel to TXT 변환 방법을 비교하는 비교표입니다.
| 방법 | 사용 용이성 | 일괄 처리 | 사용자 지정 | 보안 | 필요한 기술 |
|---|---|---|---|---|---|
| 복사 및 붙여넣기 | 쉬움 | 아니요 | 사용자 지정 없음 | 높음 | 낮음 |
| Excel 다른 이름으로 저장 기능 | 쉬움 | 아니요 | 높음 | 높음 | 낮음 |
| 온라인 변환기 | 쉬움 | 아니요 | 낮음 | 낮음 | 낮음 |
| C# 자동화 | 보통 | 예 | 우수 | 높음 | 높음(C# 지식 필요) |
올바른 변환 방법을 선택하기 위한 빠른 가이드
- 빠르고 소규모 데이터 변환의 경우 → 복사 및 붙여넣기
- 신뢰할 수 있는 단일 시트 변환의 경우 → Excel 다른 이름으로 저장 기능
- 소프트웨어 설치 없이 빠른 변환의 경우 → 온라인 변환기
- 대량 변환 또는 자동화 요구의 경우 → C# 자동화
Excel을 텍스트로 변환하기 위한 실용적인 팁
- 원본 Excel 파일 백업: 변환을 시작하기 전에 중요한 데이터 손실을 방지하기 위해 원본 파일의 백업이 있는지 확인하십시오.
- 올바른 구분 기호 선택: 용도에 따라 올바른 구분 기호를 선택해야 합니다. 예를 들어 텍스트 편집기에서 가독성을 높이려면 탭으로 구분된 것을 사용하고 데이터 가져오기 도구와의 호환성을 위해 쉼표로 구분된 것을 사용하십시오.
- 온라인 도구로 대용량 파일 피하기: 많은 온라인 변환기에는 크기 제한(일반적으로 50MB-100MB)이 있습니다. 대용량 파일의 경우 오프라인 방법을 사용하거나 C# 자동화를 통해 일괄 처리를 고려하십시오.
- 변환된 데이터 확인: 변환 후에는 항상 텍스트 파일을 열고 특히 중요한 데이터 세트의 경우 데이터 무결성을 확인하십시오.
일반적인 문제 및 해결 방법
- 특수 문자가 잘못 표시됨: 중국어, 아랍어 또는 기타 비라틴 알파벳과 같은 특수 문자를 보존하려면 유니코드 인코딩을 사용하십시오. 이는 Excel 또는 자동화된 C# 변환을 통해 내보낼 때 쉽게 수행할 수 있습니다.
- TXT 파일의 추가 빈 줄: 빈 행이 나타나면 Notepad++와 같은 텍스트 편집기에서 찾기 및 바꾸기를 사용하여 추가 줄 바꿈을 삭제하여 제거할 수 있습니다.
- 값 대신 수식 표시: 이를 방지하려면 셀을 복사하고 변환하기 전에 값으로만 붙여넣으십시오. 이렇게 하면 계산된 값(수식 아님)이 TXT 파일에 저장됩니다.
- 여러 시트가 변환되지 않음: Excel에서 수동으로 저장하는 경우 한 번에 하나의 시트만 저장됩니다. C# 자동화를 사용하여 여러 시트를 일괄 변환하십시오.
자주 묻는 질문
Q1: 모바일 장치에서 Excel을 TXT로 변환할 수 있습니까?
A1: 예, Cloudxdocs와 같은 온라인 도구를 사용하면 모바일 장치에서 Excel 파일을 변환할 수 있습니다. 그러나 민감한 데이터를 공용 웹사이트에 업로드할 때는 주의하십시오.
Q2: 변환 후 Excel 데이터가 왜곡되어 보이는 이유는 무엇입니까?
A2: 이것은 일반적으로 문자 인코딩 문제입니다. 비 ASCII 문자를 처리할 때는 적절한 변환을 위해 유니코드 인코딩 텍스트 형식을 선택해야 합니다.
Q3: 특정 구분 기호를 사용하여 Excel을 TXT로 변환할 수 있습니까?
A3: 예, 사용하는 방법이나 도구에 따라 Excel을 TXT로 변환할 때 구분 기호를 사용자 지정할 수 있습니다. 예를 들어 Excel의 다른 이름으로 저장 기능을 사용하여 Excel을 CSV(쉼표로 구분)로 저장한 다음 파일 확장자를 .txt로 변경하거나 C#에서 프로세스를 자동화하여 구분 기호를 더 많이 제어할 수 있습니다.
Q4: CSV와 TXT 파일 형식의 차이점은 무엇입니까?
A4: 둘 다 텍스트 기반 형식이지만 CSV 파일은 데이터를 쉼표로 구분하므로 표 형식 데이터에 이상적입니다. TXT 파일은 다양한 구분 기호(예: 탭, 공백 또는 파이프)를 사용할 수 있으며 종종 더 간단하거나 유연한 데이터 저장에 사용됩니다.
Q5: Excel에서 여러 시트를 한 번에 TXT로 변환할 수 있습니까?
A5: Excel의 기본 제공 "다른 이름으로 저장" 기능은 활성 시트만 변환합니다. 여러 시트를 변환하려면 프로세스를 반복하거나 C#을 사용하여 변환을 자동화해야 합니다.
마지막 말
Excel을 TXT로 변환하는 것에 대해 알아야 할 모든 것입니다! Excel 파일 변환에 대한 질문, 팁 또는 요령이 있으면 커뮤니티와 자유롭게 공유하십시오. 여러분의 의견을 듣고 함께 배우고 싶습니다!
참고 항목
Come convertire Excel in TXT (4 metodi semplici)
Indice
- Comprendere le differenze tra i formati di testo comuni
- Metodo 1: Copia i dati di Excel e incollali in un editor di testo (semplice e veloce)
- Metodo 2: Salva Excel come testo utilizzando Microsoft Excel (nativo e affidabile)
- Metodo 3: Converti Excel in TXT utilizzando strumenti online gratuiti (nessun software richiesto)
- Metodo 4: Converti in batch Excel in TXT con C# (processo automatizzato)
- Confronto: quale metodo da Excel a TXT è giusto per te
- Consigli pratici per la conversione da Excel a testo
- Problemi comuni e soluzioni
I file Excel (.xlsx o .xls) sono ampiamente utilizzati per organizzare e analizzare grandi set di dati, ma possono essere difficili da condividere o utilizzare in sistemi che accettano solo formati di testo semplice. La conversione di Excel in TXT aumenta la compatibilità, semplificando la condivisione e l'automazione dell'elaborazione. In questo articolo, ti guideremo attraverso 4 semplici metodi per aiutarti a ottenere facilmente la conversione da Excel a testo, sia che tu stia cercando una soluzione rapida e manuale o un processo batch automatizzato.
- Comprendere le differenze tra i formati di testo comuni
- Metodo 1: Copia i dati di Excel e incollali in un editor di testo (semplice e veloce)
- Metodo 2: Salva Excel come testo utilizzando Microsoft Excel (nativo e affidabile)
- Metodo 3: Converti Excel in TXT utilizzando strumenti online gratuiti (nessun software richiesto)
- Metodo 4: Converti in batch Excel in TXT con C# (processo automatizzato)
- Confronto: quale metodo da Excel a TXT è giusto per te
- Consigli pratici per la conversione da Excel a testo
- Problemi comuni e soluzioni
Comprendere le differenze tra i formati di testo comuni
Quando si convertono file Excel in testo, la selezione del formato di testo corretto è fondamentale per garantire la compatibilità e l'integrità dei dati. Di seguito sono riportati diversi formati di testo comuni utilizzati per questa conversione:
- Testo delimitato da tabulazioni (.txt): utilizza le tabulazioni (\t) come delimitatori, adatto per la maggior parte delle applicazioni Windows.
- Testo Unicode (.txt): utilizza la codifica Unicode (ad es. UTF-16), ideale per la gestione di dati multilingue, in particolare caratteri non latini come cinese e arabo.
- CSV (Comma-Separated Values) (.csv): un formato di testo che utilizza le virgole come delimitatori, comunemente utilizzato per lo scambio di dati tra database e fogli di calcolo.
Ogni formato ha i suoi punti di forza. Comprendere queste opzioni può aiutarti a scegliere il formato giusto per le tue esigenze.
Metodo 1: Copia i dati di Excel e incollali in un editor di testo (semplice e veloce)
Copiare i dati di Excel e incollarli in un editor di testo è uno dei modi più semplici per convertire Excel in TXT. Questo metodo è ideale quando è necessario convertire in testo solo un intervallo specifico di celle di Excel, non interi fogli di lavoro.
Passaggi rapidi per la conversione:
-
Evidenzia l'intervallo di dati che desideri convertire nel tuo foglio di calcolo Excel.
-
Premi Ctrl+C (Windows) o Cmd+C (Mac) per copiare.
-
Apri un editor di testo (Blocco note, TextEdit, ecc.).
-
Premi Ctrl+V (Windows) o Cmd+V (Mac) per incollare.
-
Salva il file come .txt.
Note importanti:
- I dati incollati negli editor di testo utilizzano in genere delimitatori di tabulazione, quindi le colonne sono separate da tabulazioni.
- Set di dati di grandi dimensioni potrebbero riscontrare problemi di formattazione o troncamento a seconda della capacità degli appunti del sistema. Considera la possibilità di dividere set di dati di grandi dimensioni in blocchi più piccoli, se necessario.
Quando usarlo: ideale per conversioni piccole e una tantum o quando è necessaria solo una parte del foglio di calcolo.
Metodo 2: Salva Excel come testo utilizzando Microsoft Excel (nativo e affidabile)
Microsoft Excel offre una funzione Salva con nome integrata per salvare direttamente un file Excel come testo, che è affidabile e ampiamente utilizzata.
Guida passo passo:
-
Avvia Microsoft Excel. Fai clic su File > Apri, quindi sfoglia e seleziona il tuo file Excel.
-
Vai al foglio che desideri convertire e fai clic su File > Salva con nome.
-
Scegli il formato di testo preferito:
- Dal menu a discesa Tipo file, seleziona il formato di testo o CSV desiderato, come Testo (delimitato da tabulazioni) (.txt)", Testo Unicode (.txt) o CSV (delimitato da virgole) (.csv) (anche CSV è un formato di testo semplice).
- Se scegli Testo (delimitato da tabulazioni), i dati saranno separati da tabulazioni; se selezioni CSV, saranno separati da virgole. Per i documenti multilingue, scegli Testo Unicode.
-
Seleziona dove desideri salvare il file di testo e fai clic su Salva.
Considerazioni:
- Questo metodo salva solo il foglio di lavoro attivo. Se la cartella di lavoro contiene più fogli, ripeti il processo per ciascuno di essi.
- Excel ti avviserà che alcune funzionalità potrebbero andare perse (ad es. formattazione, formule). Ciò è previsto, poiché i file TXT contengono solo testo non elaborato.
Quando usarlo: questo metodo è perfetto per gli utenti che hanno installato Excel e desiderano una soluzione affidabile e semplice per le conversioni di un singolo foglio.
Potrebbe piacerti anche: Come convertire rapidamente file TXT in fogli di calcolo Excel
Metodo 3: Converti Excel in TXT utilizzando strumenti online gratuiti (nessun software richiesto)
Per gli utenti senza Excel o per coloro che preferiscono una soluzione ottimizzata per i dispositivi mobili, molti strumenti online gratuiti offrono la flessibilità di convertire file Excel in TXT da qualsiasi dispositivo con una connessione Internet.
Convertitori online consigliati da Excel a TXT:
- CloudConvert: supporta un'ampia gamma di conversioni di file, tra cui da Excel a TXT.
- Convertio: uno strumento intuitivo e popolare per la conversione di XLS/XLSX in TXT.
- Cloudxdocs: veloce e affidabile, supporta la conversione da Excel a TXT e altro ancora.
Passaggi per convertire Excel in TXT online:
-
Vai al sito web del convertitore online scelto (ad es. Cloudxdocs).
-
Carica il file Excel che desideri convertire o trascinalo nell'area designata.
-
Lo strumento elaborerà e convertirà automaticamente il tuo file Excel.
-
Scarica il file TXT sul tuo dispositivo una volta completata la conversione.
Avviso di sicurezza:
Fai attenzione a caricare file contenenti dati sensibili o proprietari su convertitori online pubblici, poiché potrebbero archiviare o elaborare i tuoi dati su server di terze parti. Per i dati aziendali riservati, utilizza sempre metodi offline o soluzioni di livello aziendale con un'adeguata protezione dei dati.
Quando usarlo: ideale per uso personale o dati non sensibili che richiedono una conversione rapida senza installazione di software.
Metodo 4: Converti in batch Excel in TXT con C# (processo automatizzato)
Per sviluppatori o team che desiderano convertire più file Excel contemporaneamente, C# fornisce una soluzione efficiente tramite librerie come Spire.XLS for .NET. Questo metodo è adatto per conversioni batch, automazione e integrazione in flussi di lavoro di elaborazione dati più ampi.
Cos'è Spire.XLS for .NET?
Spire.XLS for .NET è una libreria .NET per la creazione, la modifica e la conversione di file Excel XLSX o XLS in più formati, tra cui TXT e PDF, senza la necessità di Microsoft Excel.
Requisiti di installazione:
Prima di procedere, installa la libreria necessaria tramite NuGet o scaricala dal sito Web ufficiale:
Install-Package Spire.XLS
Esempio di codice:
Una volta installata la libreria, aggiungi il seguente codice al tuo progetto C# per convertire in batch i file Excel in file di testo:
using Spire.Xls;
using System;
using System.IO;
using System.Text;

namespace ExcelToTXT
{
    class Program
    {
        static void Main(string[] args)
        {
            // Specify the directory containing the Excel files
            string inputDirectory = @"C:\ExcelFiles\";

            // Get all Excel files in the directory
            string[] excelFiles = Directory.GetFiles(inputDirectory, "*.xlsx");

            foreach (var file in excelFiles)
            {
                // Create a Workbook instance
                Workbook workbook = new Workbook();

                // Load the Excel file
                workbook.LoadFromFile(file);

                // Access the first sheet
                Worksheet sheet = workbook.Worksheets[0];

                // Generate output file name based on the input file name
                string outputFileName = Path.Combine(inputDirectory, Path.GetFileNameWithoutExtension(file) + ".txt");

                // Save the worksheet as a comma-delimited text file
                sheet.SaveToFile(outputFileName, ",", Encoding.UTF8);

                Console.WriteLine($"Converted {file} to {outputFileName}");
            }
        }
    }
}
Questo script carica più file Excel da una directory specificata e converte il primo foglio di ogni file in un file di testo. I file di output vengono salvati con lo stesso nome del foglio Excel originale ma con estensione .txt.
Opzioni di personalizzazione del codice:
-
Gestione dei file .xls:
Se devi elaborare file .xls anziché .xlsx, modifica semplicemente il filtro dell'estensione del file:
string[] excelFiles = Directory.GetFiles(inputDirectory, "*.xls"); -
Conversione di tutti i fogli:
Per convertire tutti i fogli, utilizza un ciclo per scorrere ogni foglio di lavoro:
foreach (Worksheet sheet in workbook.Worksheets) { string outputFileName = Path.Combine(inputDirectory, Path.GetFileNameWithoutExtension(file) + "_" + sheet.Name + ".txt"); sheet.SaveToFile(outputFileName, ",", Encoding.UTF8); } -
Modifica del delimitatore:
Il codice utilizza una virgola come delimitatore. Puoi cambiarlo con altri delimitatori come tabulazione o pipe:
sheet.SaveToFile(outputFileName, "\t", Encoding.UTF8); // Per delimitato da tabulazioni sheet.SaveToFile(outputFileName, "|", Encoding.UTF8); // Per delimitato da pipe -
Conversione di un intervallo di celle specifico:
Se desideri convertire solo un intervallo specifico di celle (ad es. A1:D10), puoi impostare l'area di stampa:
sheet.PageSetup.PrintArea = "A1:D10";  // Definisci l'intervallo
sheet.SaveToFile(outputFileName, ",", Encoding.UTF8);  // Converti l'intervallo in txt
Quando usarlo: questo metodo è ideale per sviluppatori, ingegneri dei dati o team che devono automatizzare la conversione di più file Excel in processi batch.
Confronto: quale metodo da Excel a TXT è giusto per te?
Di seguito è riportata una tabella di confronto che contrappone i quattro metodi di conversione da Excel a TXT in base a fattori quali facilità d'uso, elaborazione batch, opzioni di personalizzazione, sicurezza e requisiti di competenza:
| Metodo | Facilità d'uso | Elaborazione batch | Personalizzazione | Sicurezza | Competenza tecnica richiesta |
|---|---|---|---|---|---|
| Copia e incolla | Facile | No | Nessuna personalizzazione | Alta | Bassa |
| Funzione Salva con nome di Excel | Facile | No | Alta | Alta | Bassa |
| Convertitori online | Facile | No | Bassa | Bassa | Bassa |
| Automazione C# | Moderata | Sì | Eccellente | Alta | Alta (richiesta conoscenza di C#) |
Guida rapida per scegliere il metodo di conversione giusto
- Per una conversione rapida e su piccola scala dei dati → Copia e incolla
- Per una conversione affidabile di un singolo foglio → Funzione Salva con nome di Excel
- Per una conversione rapida senza installazione di software → Convertitori online
- Per esigenze di conversione o automazione di massa → Automazione C#
Consigli pratici per la conversione da Excel a testo
- Esegui il backup dei tuoi file Excel originali: prima di iniziare qualsiasi conversione, assicurati di avere un backup del tuo file originale per evitare di perdere dati critici.
- Scegli il delimitatore corretto: assicurati di scegliere il delimitatore corretto in base all'uso previsto. Ad esempio, utilizza il formato delimitato da tabulazioni per una migliore leggibilità negli editor di testo o il formato delimitato da virgole per la compatibilità con gli strumenti di importazione dei dati.
- Evita file di grandi dimensioni con strumenti online: molti convertitori online hanno limiti di dimensione (in genere 50 MB-100 MB). Per file di grandi dimensioni, considera l'utilizzo di metodi offline o l'elaborazione batch tramite l'automazione C#.
- Verifica i dati convertiti: dopo la conversione, apri sempre il file di testo e controlla l'integrità dei dati, soprattutto per i set di dati importanti.
Problemi comuni e soluzioni
- I caratteri speciali non vengono visualizzati correttamente: utilizza la codifica Unicode per preservare caratteri speciali come cinese, arabo o altri alfabeti non latini. Questo può essere fatto facilmente durante l'esportazione tramite Excel o la conversione C# automatizzata.
- Linee vuote extra nel file TXT: se vengono visualizzate righe vuote, puoi rimuoverle utilizzando Trova e sostituisci in un editor di testo come Notepad++ per eliminare le interruzioni di riga extra.
- Le formule vengono visualizzate al posto dei valori: per evitare ciò, copia le celle e incollale solo come valori prima della conversione. Ciò garantisce che i valori calcolati (non le formule) vengano salvati nel file TXT.
- Più fogli non vengono convertiti: se salvi manualmente da Excel, verrà salvato un solo foglio alla volta. Utilizza l'automazione C# per convertire più fogli in batch.
Domande frequenti
D1: Posso convertire Excel in TXT sul mio dispositivo mobile?
R1: Sì, strumenti online come Cloudxdocs ti consentono di convertire file Excel su dispositivi mobili. Tuttavia, fai attenzione quando carichi dati sensibili su siti Web pubblici.
D2: Perché i miei dati Excel appaiono confusi dopo la conversione?
R2: Di solito si tratta di un problema di codifica dei caratteri. Quando si ha a che fare con caratteri non ASCII, assicurarsi di selezionare il formato di testo con codifica Unicode per garantire una corretta conversione.
D3: Posso convertire Excel in TXT con delimitatori specifici?
R3: Sì, puoi personalizzare il delimitatore durante la conversione di Excel in TXT, a seconda del metodo o dello strumento che utilizzi. Ad esempio, puoi utilizzare la funzione Salva con nome di Excel per salvare il file Excel come CSV (delimitato da virgole) e quindi modificare l'estensione del file in .txt o automatizzare il processo in C# per un maggiore controllo sui delimitatori.
D4: Qual è la differenza tra i formati di file CSV e TXT?
R4: Entrambi sono formati basati su testo, ma i file CSV separano i dati con virgole, rendendoli ideali per i dati tabulari. I file TXT possono utilizzare una varietà di delimitatori (ad es. tabulazioni, spazi o pipe) e vengono spesso utilizzati per un'archiviazione dei dati più semplice o flessibile.
D5: Posso convertire più fogli in TXT contemporaneamente in Excel?
R5: La funzione "Salva con nome" integrata di Excel converte solo il foglio attivo. Per convertire più fogli, è necessario ripetere il processo o automatizzare la conversione utilizzando C#.
Parole finali
Questo è tutto ciò che devi sapere sulla conversione di Excel in TXT! Se hai domande, suggerimenti o trucchi per la conversione di file Excel, sentiti libero di condividerli con la nostra comunità: ci piacerebbe sentirti e imparare insieme!
Vedi anche
Comment convertir Excel en TXT (4 méthodes simples)
Table des matières
- Comprendre les différences entre les formats de texte courants
- Méthode 1 : Copier les données Excel et les coller dans un éditeur de texte (rapide et simple)
- Méthode 2 : Enregistrer Excel en tant que texte à l'aide de Microsoft Excel (natif et fiable)
- Méthode 3 : Convertir Excel en TXT à l'aide d'outils en ligne gratuits (aucun logiciel requis)
- Méthode 4 : Convertir par lots Excel en TXT avec C# (processus automatisé)
- Comparaison : Quelle méthode de conversion d'Excel en TXT vous convient le mieux
- Conseils pratiques pour la conversion d'Excel en texte
- Problèmes courants et solutions
Les fichiers Excel (.xlsx ou .xls) sont largement utilisés pour organiser et analyser de grands ensembles de données, mais ils peuvent être difficiles à partager ou à utiliser dans des systèmes qui n'acceptent que les formats de texte brut. La conversion d'Excel en TXT augmente la compatibilité, ce qui facilite le partage et l'automatisation du traitement. Dans cet article, nous vous présenterons 4 méthodes simples pour vous aider à réaliser facilement la conversion d'Excel en texte — que vous recherchiez une solution manuelle rapide ou un processus de traitement par lots automatisé.
- Comprendre les différences entre les formats de texte courants
- Méthode 1 : Copier les données Excel et les coller dans un éditeur de texte (rapide et simple)
- Méthode 2 : Enregistrer Excel en tant que texte à l'aide de Microsoft Excel (natif et fiable)
- Méthode 3 : Convertir Excel en TXT à l'aide d'outils en ligne gratuits (aucun logiciel requis)
- Méthode 4 : Convertir par lots Excel en TXT avec C# (processus automatisé)
- Comparaison : Quelle méthode de conversion d'Excel en TXT vous convient le mieux
- Conseils pratiques pour la conversion d'Excel en texte
- Problèmes courants et solutions
Comprendre les différences entre les formats de texte courants
Lors de la conversion de fichiers Excel en texte, il est crucial de sélectionner le bon format de texte pour garantir la compatibilité et l'intégrité des données. Vous trouverez ci-dessous plusieurs formats de texte courants utilisés pour cette conversion :
- Texte délimité par des tabulations (.txt) : Utilise des tabulations (\t) comme délimiteurs, convient à la plupart des applications Windows.
- Texte Unicode (.txt) : Utilise l'encodage Unicode (par exemple, UTF-16), idéal pour gérer des données multilingues, en particulier les caractères non latins comme le chinois et l'arabe.
- CSV (Comma-Separated Values) (.csv) : Un format de texte qui utilise des virgules comme délimiteurs, couramment utilisé pour l'échange de données entre les bases de données et les feuilles de calcul.
Chaque format a ses points forts. Comprendre ces options peut vous aider à choisir le format adapté à vos besoins.
Méthode 1 : Copier les données Excel et les coller dans un éditeur de texte (rapide et simple)
Copier des données Excel et les coller dans un éditeur de texte est l'un des moyens les plus simples de convertir Excel en TXT. Cette méthode est idéale lorsque vous n'avez besoin de convertir en texte qu'une plage spécifique de cellules Excel, et non des feuilles de calcul entières.
Étapes de conversion rapide :
-
Mettez en surbrillance la plage de données que vous souhaitez convertir dans votre feuille de calcul Excel.
-
Appuyez sur Ctrl+C (Windows) ou Cmd+C (Mac) pour copier.
-
Ouvrez un éditeur de texte (Bloc-notes, TextEdit, etc.).
-
Appuyez sur Ctrl+V (Windows) ou Cmd+V (Mac) pour coller.
-
Enregistrez le fichier en tant que .txt.
Remarques importantes :
- Les données collées dans les éditeurs de texte utilisent généralement des tabulations comme délimiteurs, les colonnes sont donc séparées par des tabulations.
- Les grands ensembles de données peuvent rencontrer des problèmes de formatage ou de troncature en fonction de la capacité du presse-papiers de votre système. Envisagez de diviser les grands ensembles de données en plus petits morceaux si nécessaire.
Quand l'utiliser : Idéal pour les conversions ponctuelles de petite taille, ou lorsque vous n'avez besoin que d'une partie de la feuille de calcul.
Méthode 2 : Enregistrer Excel en tant que texte à l'aide de Microsoft Excel (natif et fiable)
Microsoft Excel offre une fonctionnalité intégrée "Enregistrer sous" pour enregistrer directement un fichier Excel en tant que texte, ce qui est fiable et largement utilisé.
Guide étape par étape :
-
Lancez Microsoft Excel. Cliquez sur Fichier > Ouvrir, puis parcourez et sélectionnez votre fichier Excel.
-
Accédez à la feuille que vous souhaitez convertir et cliquez sur Fichier > Enregistrer sous.
-
Choisissez le format de texte préféré :
- Dans le menu déroulant Type de fichier, sélectionnez le format de texte ou CSV souhaité, tel que Texte (délimité par des tabulations) (.txt)", Texte Unicode (.txt), ou CSV (délimité par des virgules) (.csv) (CSV est également un format de texte brut).
- Si vous choisissez Texte (délimité par des tabulations), les données seront séparées par des tabulations ; si vous sélectionnez CSV, elles seront séparées par des virgules. Pour les documents multilingues, choisissez Texte Unicode.
-
Sélectionnez l'emplacement où vous souhaitez enregistrer le fichier texte et cliquez sur Enregistrer.
Considérations :
- Cette méthode n'enregistre que la feuille de calcul active. Si votre classeur comporte plusieurs feuilles, répétez le processus pour chacune d'elles.
- Excel vous avertira que certaines fonctionnalités pourraient être perdues (par exemple, le formatage, les formules). C'est normal, car les fichiers TXT ne contiennent que du texte brut.
Quand l'utiliser : Cette méthode est parfaite pour les utilisateurs qui ont installé Excel et qui souhaitent une solution fiable et simple pour les conversions d'une seule feuille.
Vous pourriez aussi aimer : Comment convertir rapidement des fichiers TXT en feuilles de calcul Excel
Méthode 3 : Convertir Excel en TXT à l'aide d'outils en ligne gratuits (aucun logiciel requis)
Pour les utilisateurs sans Excel ou ceux qui préfèrent une solution adaptée aux mobiles, de nombreux outils en ligne gratuits offrent la flexibilité de convertir des fichiers Excel en TXT depuis n'importe quel appareil disposant d'une connexion Internet.
Convertisseurs Excel en TXT en ligne recommandés :
- CloudConvert : Prend en charge une large gamme de conversions de fichiers, y compris Excel en TXT.
- Convertio : Un outil convivial et populaire pour convertir XLS/XLSX en TXT.
- Cloudxdocs : Rapide et fiable, il prend en charge la conversion d'Excel en TXT et plus encore.
Étapes pour convertir Excel en TXT en ligne :
-
Rendez-vous sur le site web du convertisseur en ligne de votre choix (par exemple, Cloudxdocs).
-
Téléchargez le fichier Excel que vous souhaitez convertir ou faites-le glisser et déposez-le dans la zone désignée.
-
L'outil traitera et convertira automatiquement votre fichier Excel.
-
Téléchargez le fichier TXT sur votre appareil une fois la conversion terminée.
Avertissement de sécurité :
Soyez prudent lorsque vous téléchargez des fichiers contenant des données sensibles ou propriétaires sur des convertisseurs en ligne publics, car ils peuvent stocker ou traiter vos données sur des serveurs tiers. Pour les données commerciales confidentielles, utilisez toujours des méthodes hors ligne ou des solutions de niveau entreprise avec une protection des données appropriée.
Quand l'utiliser : Idéal pour un usage personnel ou des données non sensibles qui nécessitent une conversion rapide sans installation de logiciel.
Méthode 4 : Convertir par lots Excel en TXT avec C# (processus automatisé)
Pour les développeurs ou les équipes qui cherchent à convertir plusieurs fichiers Excel à la fois, C# offre une solution efficace grâce à des bibliothèques comme Spire.XLS for .NET. Cette méthode est bien adaptée aux conversions par lots, à l'automatisation et à l'intégration dans des flux de travail de traitement de données plus importants.
Qu'est-ce que Spire.XLS for .NET ?
Spire.XLS for .NET est une bibliothèque .NET permettant de créer, de modifier et de convertir des fichiers Excel XLSX ou XLS en plusieurs formats, notamment TXT et PDF — sans avoir besoin de Microsoft Excel.
Prérequis d'installation :
Avant de continuer, installez la bibliothèque nécessaire via NuGet ou téléchargez-la depuis le site officiel :
Install-Package Spire.XLS
Exemple de code :
Une fois la bibliothèque installée, ajoutez le code suivant à votre projet C# pour convertir par lots des fichiers Excel en fichiers texte :
using Spire.Xls;
using System;
using System.IO;
using System.Text;

namespace ExcelToTXT
{
    class Program
    {
        static void Main(string[] args)
        {
            // Specify the directory containing the Excel files
            string inputDirectory = @"C:\ExcelFiles\";

            // Get all Excel files in the directory
            string[] excelFiles = Directory.GetFiles(inputDirectory, "*.xlsx");

            foreach (var file in excelFiles)
            {
                // Create a Workbook instance
                Workbook workbook = new Workbook();

                // Load the Excel file
                workbook.LoadFromFile(file);

                // Access the first sheet
                Worksheet sheet = workbook.Worksheets[0];

                // Generate output file name based on the input file name
                string outputFileName = Path.Combine(inputDirectory, Path.GetFileNameWithoutExtension(file) + ".txt");

                // Save the worksheet as a comma-delimited text file
                sheet.SaveToFile(outputFileName, ",", Encoding.UTF8);

                Console.WriteLine($"Converted {file} to {outputFileName}");
            }
        }
    }
}
Ce script charge plusieurs fichiers Excel à partir d'un répertoire spécifié et convertit la première feuille de chaque fichier en un fichier texte. Les fichiers de sortie sont enregistrés avec le même nom que la feuille Excel d'origine mais avec une extension .txt.
Options de personnalisation du code :
-
Gestion des fichiers .xls :
Si vous devez traiter des fichiers .xls au lieu de .xlsx, modifiez simplement le filtre d'extension de fichier :
string[] excelFiles = Directory.GetFiles(inputDirectory, "*.xls"); -
Conversion de toutes les feuilles :
Pour convertir toutes les feuilles, utilisez une boucle pour parcourir chaque feuille de calcul :
foreach (Worksheet sheet in workbook.Worksheets) { string outputFileName = Path.Combine(inputDirectory, Path.GetFileNameWithoutExtension(file) + "_" + sheet.Name + ".txt"); sheet.SaveToFile(outputFileName, ",", Encoding.UTF8); } -
Changer le délimiteur :
Le code utilise une virgule comme délimiteur. Vous pouvez le remplacer par d'autres délimiteurs comme la tabulation ou le pipe :
sheet.SaveToFile(outputFileName, "\t", Encoding.UTF8); // For tab-delimited sheet.SaveToFile(outputFileName, "|", Encoding.UTF8); // For pipe-delimited -
Conversion d'une plage de cellules spécifique :
Si vous ne souhaitez convertir qu'une plage de cellules spécifique (par exemple, A1:D10), vous pouvez définir la zone d'impression :
sheet.PageSetup.PrintArea = "A1:D10";  // Define the range
sheet.SaveToFile(outputFileName, ",", Encoding.UTF8);  // Convert the range to txt
Quand l'utiliser : Cette méthode est idéale pour les développeurs, les ingénieurs de données ou les équipes qui ont besoin d'automatiser la conversion de plusieurs fichiers Excel dans des processus par lots.
Comparaison : Quelle méthode de conversion d'Excel en TXT vous convient le mieux ?
Vous trouverez ci-dessous un tableau comparatif qui oppose les quatre méthodes de conversion d'Excel en TXT en fonction de facteurs tels que la facilité d'utilisation, le traitement par lots, les options de personnalisation, la sécurité et les compétences requises :
| Méthode | Facilité d'utilisation | Traitement par lots | Personnalisation | Sécurité | Compétence technique requise |
|---|---|---|---|---|---|
| Copier & Coller | Facile | Non | Aucune personnalisation | Élevée | Faible |
| Fonctionnalité Enregistrer sous d'Excel | Facile | Non | Élevée | Élevée | Faible |
| Convertisseurs en ligne | Facile | Non | Faible | Faible | Faible |
| Automatisation C# | Modérée | Oui | Excellente | Élevée | Élevée (connaissances en C# requises) |
Guide rapide pour choisir la bonne méthode de conversion
- Pour une conversion de données rapide et à petite échelle → Copier & Coller
- Pour une conversion fiable d'une seule feuille → Fonctionnalité Enregistrer sous d'Excel
- Pour une conversion rapide sans installation de logiciel → Convertisseurs en ligne
- Pour les besoins de conversion en masse ou d'automatisation → Automatisation C#
Conseils pratiques pour la conversion d'Excel en texte
- Sauvegardez vos fichiers Excel d'origine : Avant de commencer toute conversion, assurez-vous d'avoir une sauvegarde de votre fichier d'origine pour éviter de perdre des données critiques.
- Choisissez le bon délimiteur : Assurez-vous de choisir le bon délimiteur en fonction de l'utilisation prévue. Par exemple, utilisez la délimitation par tabulation pour une meilleure lisibilité dans les éditeurs de texte ou la délimitation par virgule pour la compatibilité avec les outils d'importation de données.
- Évitez les fichiers volumineux avec les outils en ligne : De nombreux convertisseurs en ligne ont des limites de taille (généralement 50 Mo-100 Mo). Pour les fichiers volumineux, envisagez d'utiliser des méthodes hors ligne ou un traitement par lots via l'automatisation C#.
- Vérifiez les données converties : Après la conversion, ouvrez toujours le fichier texte et vérifiez l'intégrité des données, en particulier pour les ensembles de données importants.
Problèmes courants et solutions
- Les caractères spéciaux s'affichent incorrectement : Utilisez l'encodage Unicode pour préserver les caractères spéciaux comme le chinois, l'arabe ou d'autres alphabets non latins. Cela peut être fait facilement lors de l'exportation via Excel ou la conversion automatisée en C#.
- Lignes vides supplémentaires dans le fichier TXT : Si des lignes vides apparaissent, vous pouvez les supprimer en utilisant Rechercher & Remplacer dans un éditeur de texte comme Notepad++ pour supprimer les sauts de ligne supplémentaires.
- Les formules s'affichent au lieu des valeurs : Pour éviter cela, copiez les cellules et collez-les en tant que valeurs uniquement avant de convertir. Cela garantit que les valeurs calculées (et non les formules) sont enregistrées dans le fichier TXT.
- Plusieurs feuilles ne se convertissent pas : Si vous enregistrez manuellement depuis Excel, une seule feuille sera enregistrée à la fois. Utilisez l'automatisation C# pour convertir plusieurs feuilles par lots.
Foire aux questions
Q1 : Puis-je convertir Excel en TXT sur mon appareil mobile ?
R1 : Oui, des outils en ligne comme Cloudxdocs vous permettent de convertir des fichiers Excel sur des appareils mobiles. Cependant, soyez prudent lorsque vous téléchargez des données sensibles sur des sites web publics.
Q2 : Pourquoi mes données Excel semblent-elles brouillées après la conversion ?
R2 : Il s'agit généralement d'un problème d'encodage de caractères. Lorsque vous traitez des caractères non-ASCII, assurez-vous de sélectionner le format de texte avec encodage Unicode pour garantir une conversion correcte.
Q3 : Puis-je convertir Excel en TXT avec des délimiteurs spécifiques ?
R3 : Oui, vous pouvez personnaliser le délimiteur lors de la conversion d'Excel en TXT, en fonction de la méthode ou de l'outil que vous utilisez. Par exemple, vous pouvez utiliser la fonction "Enregistrer sous" d'Excel pour enregistrer le fichier Excel au format CSV (délimité par des virgules), puis changer l'extension du fichier en .txt ou automatiser le processus en C# pour plus de contrôle sur les délimiteurs.
Q4 : Quelle est la différence entre les formats de fichiers CSV et TXT ?
R4 : Les deux sont des formats basés sur du texte, mais les fichiers CSV séparent les données par des virgules, ce qui les rend idéaux pour les données tabulaires. Les fichiers TXT peuvent utiliser une variété de délimiteurs (par exemple, des tabulations, des espaces ou des pipes) et sont souvent utilisés pour un stockage de données plus simple ou plus flexible.
Q5 : Puis-je convertir plusieurs feuilles en TXT à la fois dans Excel ?
R5 : La fonction intégrée "Enregistrer sous" d'Excel ne convertit que la feuille active. Pour convertir plusieurs feuilles, vous devez soit répéter le processus, soit automatiser la conversion à l'aide de C#.
Mots de la fin
C'est tout ce que vous devez savoir sur la conversion d'Excel en TXT ! Si vous avez des questions, des conseils ou des astuces personnelles pour convertir des fichiers Excel, n'hésitez pas à les partager avec notre communauté — nous serions ravis d'avoir de vos nouvelles et d'apprendre ensemble !
Voir aussi
Cómo convertir Excel a TXT (4 métodos sencillos)
Tabla de Contenidos
- Comprender las Diferencias Entre los Formatos de Texto Comunes
- Método 1: Copiar Datos de Excel y Pegarlos en un Editor de Texto (Rápido y Sencillo)
- Método 2: Guardar Excel como Texto Usando Microsoft Excel (Nativo y Confiable)
- Método 3: Convertir Excel a TXT Usando Herramientas Gratuitas en Línea (No se Necesita Software)
- Método 4: Convertir por Lotes de Excel a TXT con C# (Proceso Automatizado)
- Comparación: ¿Qué Método de Excel a TXT es el Adecuado para Ti?
- Consejos Prácticos para la Conversión de Excel a Texto
- Problemas Comunes y Soluciones
Los archivos de Excel (.xlsx o .xls) se utilizan ampliamente para organizar y analizar grandes conjuntos de datos, pero pueden ser difíciles de compartir o usar en sistemas que solo aceptan formatos de texto sin formato. Convertir Excel a TXT aumenta la compatibilidad, lo que facilita compartir y automatizar el procesamiento. En este artículo, te guiaremos a través de 4 métodos sencillos para ayudarte a lograr fácilmente la conversión de Excel a Texto, ya sea que estés buscando una solución rápida y manual o un proceso por lotes automatizado.
- Comprender las Diferencias Entre los Formatos de Texto Comunes
- Método 1: Copiar Datos de Excel y Pegarlos en un Editor de Texto (Rápido y Sencillo)
- Método 2: Guardar Excel como Texto Usando Microsoft Excel (Nativo y Confiable)
- Método 3: Convertir Excel a TXT Usando Herramientas Gratuitas en Línea (No se Necesita Software)
- Método 4: Convertir por Lotes de Excel a TXT con C# (Proceso Automatizado)
- Comparación: ¿Qué Método de Excel a TXT es el Adecuado para Ti?
- Consejos Prácticos para la Conversión de Excel a Texto
- Problemas Comunes y Soluciones
Comprender las Diferencias Entre los Formatos de Texto Comunes
Al convertir archivos de Excel a texto, seleccionar el formato de texto correcto es crucial para garantizar la compatibilidad e integridad de los datos. A continuación se presentan varios formatos de texto comunes utilizados para esta conversión:
- Texto Delimitado por Tabulaciones (.txt): Utiliza tabulaciones (\t) como delimitadores, adecuado para la mayoría de las aplicaciones de Windows.
- Texto Unicode (.txt): Utiliza codificación Unicode (por ejemplo, UTF-16), ideal para manejar datos multilingües, especialmente caracteres no latinos como el chino y el árabe.
- CSV (Valores Separados por Comas) (.csv): Un formato de texto que utiliza comas como delimitadores, comúnmente utilizado para el intercambio de datos entre bases de datos y hojas de cálculo.
Cada formato tiene sus fortalezas. Comprender estas opciones puede ayudarte a elegir el formato adecuado para tus necesidades.
Método 1: Copiar Datos de Excel y Pegarlos en un Editor de Texto (Rápido y Sencillo)
Copiar datos de Excel y pegarlos en un editor de texto es una de las formas más fáciles de convertir Excel a TXT. Este método es ideal cuando solo necesitas convertir a texto un rango específico de celdas de Excel, no hojas de trabajo completas.
Pasos Rápidos de Conversión:
-
Resalta el rango de datos que deseas convertir en tu hoja de cálculo de Excel.
-
Presiona Ctrl+C (Windows) o Cmd+C (Mac) para copiar.
-
Abre un editor de texto (Notepad, TextEdit, etc.).
-
Presiona Ctrl+V (Windows) o Cmd+V (Mac) para pegar.
-
Guarda el archivo como .txt.
Notas Importantes:
- Los datos pegados en editores de texto suelen utilizar delimitadores de tabulación, por lo que las columnas están separadas por tabulaciones.
- Los conjuntos de datos grandes pueden experimentar problemas de formato o truncamiento según la capacidad del portapapeles de tu sistema. Considera dividir los conjuntos de datos grandes en trozos más pequeños si es necesario.
Cuándo Usar: Ideal para conversiones pequeñas y únicas, o cuando solo necesitas una parte de la hoja de cálculo.
Método 2: Guardar Excel como Texto Usando Microsoft Excel (Nativo y Confiable)
Microsoft Excel ofrece una función integrada de Guardar Como para guardar directamente un archivo de Excel como texto, que es confiable y ampliamente utilizada.
Guía Paso a Paso:
-
Inicia Microsoft Excel. Haz clic en Archivo > Abrir, luego busca y selecciona tu archivo de Excel.
-
Navega a la hoja que deseas convertir y haz clic en Archivo > Guardar Como.
-
Elige el formato de texto preferido:
- En el menú desplegable Guardar como tipo, selecciona el formato de texto o CSV deseado, como Texto (delimitado por tabulaciones) (.txt)", Texto Unicode (.txt), o CSV (delimitado por comas) (.csv) (CSV también es un formato de texto sin formato).
- Si eliges Texto (delimitado por tabulaciones), los datos se separarán por tabulaciones; si seleccionas CSV, se separarán por comas. Para documentos multilingües, elige Texto Unicode.
-
Selecciona dónde te gustaría guardar el archivo de texto y haz clic en Guardar.
Consideraciones:
- Este método guarda solo la hoja de trabajo activa. Si tu libro de trabajo tiene varias hojas, repite el proceso para cada una.
- Excel te advertirá que algunas características podrían perderse (por ejemplo, formato, fórmulas). Esto es de esperar, ya que los archivos TXT solo contienen texto sin formato.
Cuándo Usar: Este método es perfecto para usuarios que tienen Excel instalado y desean una solución confiable y directa para conversiones de una sola hoja.
También te podría gustar: Cómo Convertir Archivos TXT a Hojas de Cálculo de Excel Rápidamente
Método 3: Convertir Excel a TXT Usando Herramientas Gratuitas en Línea (No se Necesita Software)
Para los usuarios sin Excel o aquellos que prefieren una solución compatible con dispositivos móviles, muchas herramientas gratuitas en línea ofrecen la flexibilidad de convertir archivos de Excel a TXT desde cualquier dispositivo con conexión a internet.
Conversores de Excel a TXT en Línea Recomendados:
- CloudConvert: Admite una amplia gama de conversiones de archivos, incluyendo de Excel a TXT.
- Convertio: Una herramienta popular y fácil de usar para convertir XLS/XLSX a TXT.
- Cloudxdocs: Rápido y confiable, admite la conversión de Excel a TXT y más.
Pasos para Convertir Excel a TXT en Línea:
-
Ve al sitio web del conversor en línea que hayas elegido (por ejemplo, Cloudxdocs).
-
Sube el archivo de Excel que deseas convertir o arrástralo y suéltalo en el área designada.
-
La herramienta procesará y convertirá automáticamente tu archivo de Excel.
-
Descarga el archivo TXT a tu dispositivo una vez que se complete la conversión.
Advertencia de Seguridad:
Ten cuidado al subir archivos que contengan datos sensibles o propietarios a conversores en línea públicos, ya que pueden almacenar o procesar tus datos en servidores de terceros. Para datos comerciales confidenciales, utiliza siempre métodos sin conexión o soluciones de nivel empresarial con la protección de datos adecuada.
Cuándo Usar: Ideal para uso personal o datos no sensibles que necesitan una conversión rápida sin instalación de software.
Método 4: Convertir por Lotes de Excel a TXT con C# (Proceso Automatizado)
Para desarrolladores o equipos que buscan convertir varios archivos de Excel a la vez, C# proporciona una solución eficiente a través de bibliotecas como Spire.XLS for .NET. Este método es muy adecuado para conversiones por lotes, automatización e integración en flujos de trabajo de procesamiento de datos más grandes.
¿Qué es Spire.XLS for .NET?
Spire.XLS for .NET es una biblioteca .NET para crear, modificar y convertir archivos Excel XLSX o XLS a múltiples formatos, incluyendo TXT y PDF, sin necesidad de Microsoft Excel.
Requisitos de Instalación:
Antes de continuar, instala la biblioteca necesaria a través de NuGet o descárgala desde el sitio web oficial:
Install-Package Spire.XLS
Ejemplo de Código:
Una vez instalada la biblioteca, agrega el siguiente código a tu proyecto de C# para convertir por lotes archivos de Excel a archivos de texto:
using Spire.Xls;
using System;
using System.IO;
using System.Text;

namespace ExcelToTXT
{
    class Program
    {
        static void Main(string[] args)
        {
            // Specify the directory containing the Excel files
            string inputDirectory = @"C:\ExcelFiles\";

            // Get all Excel files in the directory
            string[] excelFiles = Directory.GetFiles(inputDirectory, "*.xlsx");

            foreach (var file in excelFiles)
            {
                // Create a Workbook instance
                Workbook workbook = new Workbook();

                // Load the Excel file
                workbook.LoadFromFile(file);

                // Access the first sheet
                Worksheet sheet = workbook.Worksheets[0];

                // Generate output file name based on the input file name
                string outputFileName = Path.Combine(inputDirectory, Path.GetFileNameWithoutExtension(file) + ".txt");

                // Save the worksheet as a comma-delimited text file
                sheet.SaveToFile(outputFileName, ",", Encoding.UTF8);

                Console.WriteLine($"Converted {file} to {outputFileName}");
            }
        }
    }
}
Este script carga múltiples archivos de Excel desde un directorio especificado y convierte la primera hoja de cada archivo en un archivo de texto. Los archivos de salida se guardan con el mismo nombre que la hoja de Excel original pero con una extensión .txt.
Opciones de Personalización del Código:
-
Manejo de Archivos .xls:
Si necesitas procesar archivos .xls en lugar de .xlsx, simplemente modifica el filtro de extensión de archivo:
string[] excelFiles = Directory.GetFiles(inputDirectory, "*.xls"); -
Convertir Todas las Hojas:
Para convertir todas las hojas, usa un bucle para iterar sobre cada hoja de trabajo:
foreach (Worksheet sheet in workbook.Worksheets) { string outputFileName = Path.Combine(inputDirectory, Path.GetFileNameWithoutExtension(file) + "_" + sheet.Name + ".txt"); sheet.SaveToFile(outputFileName, ",", Encoding.UTF8); } -
Cambiar el Delimitador:
El código usa una coma como delimitador. Puedes cambiarlo a otros delimitadores como tabulación o barra vertical:
sheet.SaveToFile(outputFileName, "\t", Encoding.UTF8); // For tab-delimited sheet.SaveToFile(outputFileName, "|", Encoding.UTF8); // For pipe-delimited -
Convertir un Rango de Celdas Específico:
Si solo deseas convertir un rango específico de celdas (por ejemplo, A1:D10), puedes establecer el área de impresión:
sheet.PageSetup.PrintArea = "A1:D10";  // Define the range
sheet.SaveToFile(outputFileName, ",", Encoding.UTF8);  // Convert the range to txt
Cuándo Usar: Este método es ideal para desarrolladores, ingenieros de datos o equipos que necesitan automatizar la conversión de múltiples archivos de Excel en procesos por lotes.
Comparación: ¿Qué Método de Excel a TXT es el Adecuado para Ti?
A continuación se muestra una tabla comparativa que contrasta los cuatro métodos de conversión de Excel a TXT en función de factores como la facilidad de uso, el procesamiento por lotes, las opciones de personalización, la seguridad y los requisitos de habilidad:
| Método | Facilidad de Uso | Procesamiento por Lotes | Personalización | Seguridad | Habilidad Técnica Requerida |
|---|---|---|---|---|---|
| Copiar y Pegar | Fácil | No | Sin personalización | Alta | Baja |
| Función Guardar Como de Excel | Fácil | No | Alta | Alta | Baja |
| Conversores en Línea | Fácil | No | Baja | Baja | Baja |
| Automatización con C# | Moderada | Sí | Excelente | Alta | Alta (se requieren conocimientos de C#) |
Guía Rápida para Elegir el Método de Conversión Correcto
- Para conversión de datos rápida y a pequeña escala → Copiar y Pegar
- Para conversión confiable de una sola hoja → Función Guardar Como de Excel
- Para conversión rápida sin instalación de software → Conversores en Línea
- Para necesidades de conversión masiva o automatización → Automatización con C#
Consejos Prácticos para la Conversión de Excel a Texto
- Haz una Copia de Seguridad de tus Archivos de Excel Originales: Antes de iniciar cualquier conversión, asegúrate de tener una copia de seguridad de tu archivo original para evitar la pérdida de datos críticos.
- Elige el Delimitador Correcto: Asegúrate de elegir el delimitador correcto según el uso previsto. Por ejemplo, usa delimitado por tabulaciones para una mejor legibilidad en editores de texto o delimitado por comas para compatibilidad con herramientas de importación de datos.
- Evita Archivos Grandes con Herramientas en Línea: Muchos conversores en línea tienen límites de tamaño (generalmente 50MB-100MB). Para archivos grandes, considera usar métodos sin conexión o procesamiento por lotes a través de la automatización con C#.
- Verifica los Datos Convertidos: Después de la conversión, siempre abre el archivo de texto y verifica la integridad de los datos, especialmente para conjuntos de datos importantes.
Problemas Comunes y Soluciones
- Los Caracteres Especiales se Muestran Incorrectamente: Usa la codificación Unicode para preservar caracteres especiales como el chino, el árabe u otros alfabetos no latinos. Esto se puede hacer fácilmente al exportar a través de Excel o mediante la conversión automatizada con C#.
- Líneas en Blanco Adicionales en el Archivo TXT: Si aparecen filas en blanco, puedes eliminarlas usando Buscar y Reemplazar en un editor de texto como Notepad++ para eliminar los saltos de línea adicionales.
- Se Muestran Fórmulas en Lugar de Valores: Para evitar esto, copia las celdas y pégalas solo como valores antes de convertir. Esto asegura que los valores calculados (no las fórmulas) se guarden en el archivo TXT.
- No se Convierten Varias Hojas: Si estás guardando manualmente desde Excel, solo se guardará una hoja a la vez. Usa la automatización con C# para convertir varias hojas por lotes.
Preguntas Frecuentes
P1: ¿Puedo convertir Excel a TXT en mi dispositivo móvil?
R1: Sí, herramientas en línea como Cloudxdocs te permiten convertir archivos de Excel en dispositivos móviles. Sin embargo, ten cuidado al subir datos sensibles a sitios web públicos.
P2: ¿Por qué mis datos de Excel se ven corruptos después de la conversión?
R2: Esto suele ser un problema de codificación de caracteres. Cuando trabajes con caracteres que no son ASCII, asegúrate de seleccionar el formato de texto con codificación Unicode para garantizar una conversión adecuada.
P3: ¿Puedo convertir Excel a TXT con delimitadores específicos?
R3: Sí, puedes personalizar el delimitador al convertir Excel a TXT, dependiendo del método o la herramienta que utilices. Por ejemplo, puedes usar la función Guardar Como de Excel para guardar el Excel como CSV (delimitado por comas) y luego cambiar la extensión del archivo a .txt o automatizar el proceso en C# para tener más control sobre los delimitadores.
P4: ¿Cuál es la diferencia entre los formatos de archivo CSV y TXT?
R4: Ambos son formatos basados en texto, pero los archivos CSV separan los datos con comas, lo que los hace ideales para datos tabulares. Los archivos TXT pueden usar una variedad de delimitadores (por ejemplo, tabulaciones, espacios o barras verticales) y a menudo se usan para un almacenamiento de datos más simple o flexible.
P5: ¿Puedo convertir varias hojas a TXT a la vez en Excel?
R5: La función integrada "Guardar Como" de Excel solo convierte la hoja activa. Para convertir varias hojas, necesitas repetir el proceso o automatizar la conversión usando C#.
Palabras Finales
¡Eso es todo lo que necesitas saber sobre la conversión de Excel a TXT! Si tienes alguna pregunta, consejo o truco propio para convertir archivos de Excel, no dudes en compartirlos con nuestra comunidad. ¡Nos encantaría saber de ti y aprender juntos!
Ver También
Excel in TXT umwandeln (4 einfache Methoden)
Inhaltsverzeichnis
- Die Unterschiede zwischen gängigen Textformaten verstehen
- Methode 1: Excel-Daten kopieren und in einen Texteditor einfügen (schnell und einfach)
- Methode 2: Excel als Text mit Microsoft Excel speichern (nativ und zuverlässig)
- Methode 3: Excel in TXT mit kostenlosen Online-Tools konvertieren (keine Software erforderlich)
- Methode 4: Stapelkonvertierung von Excel in TXT mit C# (automatisierter Prozess)
- Vergleich: Welche Methode zur Konvertierung von Excel in TXT ist die richtige für Sie?
- Praktische Tipps für die Konvertierung von Excel in Text
- Häufige Probleme und Lösungen
Excel-Dateien (.xlsx oder .xls) werden häufig zur Organisation und Analyse großer Datenmengen verwendet, können aber schwierig zu teilen oder in Systemen zu verwenden sein, die nur reine Textformate akzeptieren. Das Konvertieren von Excel in TXT erhöht die Kompatibilität und erleichtert das Teilen und die automatisierte Verarbeitung. In diesem Artikel führen wir Sie durch 4 einfache Methoden, mit denen Sie die Konvertierung von Excel in Text leicht durchführen können – egal, ob Sie eine schnelle, manuelle Lösung oder einen automatisierten Stapelprozess suchen.
- Die Unterschiede zwischen gängigen Textformaten verstehen
- Methode 1: Excel-Daten kopieren und in einen Texteditor einfügen (schnell und einfach)
- Methode 2: Excel als Text mit Microsoft Excel speichern (nativ und zuverlässig)
- Methode 3: Excel in TXT mit kostenlosen Online-Tools konvertieren (keine Software erforderlich)
- Methode 4: Stapelkonvertierung von Excel in TXT mit C# (automatisierter Prozess)
- Vergleich: Welche Methode zur Konvertierung von Excel in TXT ist die richtige für Sie?
- Praktische Tipps für die Konvertierung von Excel in Text
- Häufige Probleme und Lösungen
Die Unterschiede zwischen gängigen Textformaten verstehen
Bei der Konvertierung von Excel-Dateien in Text ist die Auswahl des richtigen Textformats entscheidend, um die Datenkompatibilität und -integrität zu gewährleisten. Nachfolgend sind einige gängige Textformate aufgeführt, die für diese Konvertierung verwendet werden:
- Tabulatorgetrennter Text (.txt): Verwendet Tabulatoren (\t) als Trennzeichen und ist für die meisten Windows-Anwendungen geeignet.
- Unicode-Text (.txt): Verwendet Unicode-Kodierung (z. B. UTF-16) und ist ideal für die Verarbeitung mehrsprachiger Daten, insbesondere nicht-lateinischer Zeichen wie Chinesisch und Arabisch.
- CSV (Comma-Separated Values) (.csv): Ein Textformat, das Kommas als Trennzeichen verwendet und häufig für den Datenaustausch zwischen Datenbanken und Tabellenkalkulationen genutzt wird.
Jedes Format hat seine Stärken. Das Verständnis dieser Optionen kann Ihnen helfen, das richtige Format für Ihre Bedürfnisse zu wählen.
Methode 1: Excel-Daten kopieren und in einen Texteditor einfügen (schnell und einfach)
Das Kopieren von Excel-Daten und das Einfügen in einen Texteditor ist eine der einfachsten Möglichkeiten, Excel in TXT zu konvertieren. Diese Methode ist ideal, wenn Sie nur einen bestimmten Bereich von Excel-Zellen in Text umwandeln müssen, nicht ganze Arbeitsblätter.
Schnelle Konvertierungsschritte:
-
Markieren Sie den Datenbereich, den Sie in Ihrer Excel-Tabelle konvertieren möchten.
-
Drücken Sie Strg+C (Windows) oder Cmd+C (Mac) zum Kopieren.
-
Öffnen Sie einen Texteditor (Editor, TextEdit usw.).
-
Drücken Sie Strg+V (Windows) oder Cmd+V (Mac) zum Einfügen.
-
Speichern Sie die Datei als .txt.
Wichtige Hinweise:
- In Texteditoren eingefügte Daten verwenden in der Regel Tabulatoren als Trennzeichen, sodass Spalten durch Tabulatoren getrennt sind.
- Bei großen Datensätzen können je nach Kapazität der Zwischenablage Ihres Systems Formatierungsprobleme oder Kürzungen auftreten. Erwägen Sie bei Bedarf, große Datensätze in kleinere Teile aufzuteilen.
Wann zu verwenden: Am besten für kleine, einmalige Konvertierungen oder wenn Sie nur einen Teil der Tabelle benötigen.
Methode 2: Excel als Text mit Microsoft Excel speichern (nativ und zuverlässig)
Microsoft Excel bietet eine integrierte „Speichern unter“-Funktion, um eine Excel-Datei direkt als Text zu speichern, was zuverlässig und weit verbreitet ist.
Schritt-für-Schritt-Anleitung:
-
Starten Sie Microsoft Excel. Klicken Sie auf Datei > Öffnen, durchsuchen Sie dann Ihre Excel-Datei und wählen Sie sie aus.
-
Navigieren Sie zu dem Blatt, das Sie konvertieren möchten, und klicken Sie auf Datei > Speichern unter.
-
Wählen Sie das bevorzugte Textformat:
- Wählen Sie im Dropdown-Menü Dateityp das gewünschte Text- oder CSV-Format aus, z. B. Text (Tabulatorgetrennt) (.txt), Unicode-Text (.txt) oder CSV (Trennzeichen-getrennt) (.csv) (CSV ist ebenfalls ein reines Textformat).
- Wenn Sie Text (Tabulatorgetrennt) wählen, werden die Daten durch Tabulatoren getrennt; wenn Sie CSV wählen, werden sie durch Kommas getrennt. Für mehrsprachige Dokumente wählen Sie Unicode-Text.
-
Wählen Sie aus, wo Sie die Textdatei speichern möchten, und klicken Sie auf Speichern.
Überlegungen:
- Diese Methode speichert nur das aktive Arbeitsblatt. Wenn Ihre Arbeitsmappe mehrere Blätter hat, wiederholen Sie den Vorgang für jedes einzelne.
- Excel warnt Sie, dass einige Funktionen verloren gehen könnten (z. B. Formatierungen, Formeln). Dies ist zu erwarten, da TXT-Dateien nur reinen Text enthalten.
Wann zu verwenden: Diese Methode ist perfekt für Benutzer, die Excel installiert haben und eine zuverlässige, unkomplizierte Lösung für die Konvertierung einzelner Blätter wünschen.
Das könnte Ihnen auch gefallen: So konvertieren Sie TXT-Dateien schnell in Excel-Tabellen
Methode 3: Excel in TXT mit kostenlosen Online-Tools konvertieren (keine Software erforderlich)
Für Benutzer ohne Excel oder diejenigen, die eine mobilfreundliche Lösung bevorzugen, bieten viele kostenlose Online-Tools die Flexibilität, Excel-Dateien von jedem Gerät mit Internetverbindung in TXT zu konvertieren.
Empfohlene Online-Konverter von Excel in TXT:
- CloudConvert: Unterstützt eine Vielzahl von Dateikonvertierungen, einschließlich Excel in TXT.
- Convertio: Ein benutzerfreundliches, beliebtes Tool zum Konvertieren von XLS/XLSX in TXT.
- Cloudxdocs: Schnell und zuverlässig, unterstützt die Konvertierung von Excel in TXT und mehr.
Schritte zur Online-Konvertierung von Excel in TXT:
-
Gehen Sie zur Website des von Ihnen gewählten Online-Konverters (z. B. Cloudxdocs).
-
Laden Sie die Excel-Datei hoch, die Sie konvertieren möchten, oder ziehen Sie sie per Drag & Drop in den dafür vorgesehenen Bereich.
-
Das Tool verarbeitet und konvertiert Ihre Excel-Datei automatisch.
-
Laden Sie die TXT-Datei auf Ihr Gerät herunter, sobald die Konvertierung abgeschlossen ist.
Sicherheitswarnung:
Seien Sie vorsichtig beim Hochladen von Dateien mit sensiblen oder proprietären Daten auf öffentliche Online-Konverter, da diese Ihre Daten möglicherweise auf Servern von Drittanbietern speichern oder verarbeiten. Verwenden Sie für vertrauliche Geschäftsdaten immer Offline-Methoden oder unternehmenstaugliche Lösungen mit angemessenem Datenschutz.
Wann zu verwenden: Am besten für den persönlichen Gebrauch oder für nicht sensible Daten, die eine schnelle Konvertierung ohne Softwareinstallation erfordern.
Methode 4: Stapelkonvertierung von Excel in TXT mit C# (automatisierter Prozess)
Für Entwickler oder Teams, die mehrere Excel-Dateien auf einmal konvertieren möchten, bietet C# eine effiziente Lösung durch Bibliotheken wie Spire.XLS for .NET. Diese Methode eignet sich gut für Stapelkonvertierungen, Automatisierung und die Integration in größere Datenverarbeitungsworkflows.
Was ist Spire.XLS for .NET?
Spire.XLS for .NET ist eine .NET-Bibliothek zum Erstellen, Ändern und Konvertieren von Excel-XLSX- oder XLS-Dateien in mehrere Formate, einschließlich TXT und PDF – ohne dass Microsoft Excel erforderlich ist.
Installationsanforderungen:
Bevor Sie fortfahren, installieren Sie die erforderliche Bibliothek über NuGet oder laden Sie sie von der offiziellen Website herunter:
Install-Package Spire.XLS
Code-Beispiel:
Sobald die Bibliothek installiert ist, fügen Sie den folgenden Code zu Ihrem C#-Projekt hinzu, um Excel-Dateien stapelweise in Textdateien zu konvertieren:
using Spire.Xls;
using System;
using System.IO;
using System.Text;

namespace ExcelToTXT
{
    class Program
    {
        static void Main(string[] args)
        {
            // Geben Sie das Verzeichnis an, das die Excel-Dateien enthält
            string inputDirectory = @"C:\ExcelFiles\";

            // Holen Sie sich alle Excel-Dateien im Verzeichnis
            string[] excelFiles = Directory.GetFiles(inputDirectory, "*.xlsx");

            foreach (var file in excelFiles)
            {
                // Erstellen Sie eine Workbook-Instanz
                Workbook workbook = new Workbook();

                // Laden Sie die Excel-Datei
                workbook.LoadFromFile(file);

                // Greifen Sie auf das erste Blatt zu
                Worksheet sheet = workbook.Worksheets[0];

                // Generieren Sie den Namen der Ausgabedatei basierend auf dem Namen der Eingabedatei
                string outputFileName = Path.Combine(inputDirectory, Path.GetFileNameWithoutExtension(file) + ".txt");

                // Speichern Sie das Arbeitsblatt als kommagetrennte Textdatei
                sheet.SaveToFile(outputFileName, ",", Encoding.UTF8);

                Console.WriteLine($"Konvertiert {file} zu {outputFileName}");
            }
        }
    }
}
Dieses Skript lädt mehrere Excel-Dateien aus einem angegebenen Verzeichnis und konvertiert das erste Blatt jeder Datei in eine Textdatei. Die Ausgabedateien werden mit demselben Namen wie das ursprüngliche Excel-Blatt, aber mit der Erweiterung .txt gespeichert.
Optionen zur Code-Anpassung:
-
Verarbeitung von .xls-Dateien:
Wenn Sie .xls-Dateien anstelle von .xlsx verarbeiten müssen, ändern Sie einfach den Dateierweiterungsfilter:
string[] excelFiles = Directory.GetFiles(inputDirectory, "*.xls"); -
Konvertieren aller Blätter:
Um alle Blätter zu konvertieren, verwenden Sie eine Schleife, um über jedes Arbeitsblatt zu iterieren:
foreach (Worksheet sheet in workbook.Worksheets) { string outputFileName = Path.Combine(inputDirectory, Path.GetFileNameWithoutExtension(file) + "_" + sheet.Name + ".txt"); sheet.SaveToFile(outputFileName, ",", Encoding.UTF8); } -
Ändern des Trennzeichens:
Der Code verwendet ein Komma als Trennzeichen. Sie können es in andere Trennzeichen wie Tabulator oder Pipe ändern:
sheet.SaveToFile(outputFileName, "\t", Encoding.UTF8); // Für tabulatorgetrennt sheet.SaveToFile(outputFileName, "|", Encoding.UTF8); // Für pipe-getrennt -
Konvertieren eines bestimmten Zellbereichs:
Wenn Sie nur einen bestimmten Zellbereich (z. B. A1:D10) konvertieren möchten, können Sie den Druckbereich festlegen:
sheet.PageSetup.PrintArea = "A1:D10";  // Definieren Sie den Bereich
sheet.SaveToFile(outputFileName, ",", Encoding.UTF8);  // Konvertieren Sie den Bereich in txt
Wann zu verwenden: Diese Methode ist ideal für Entwickler, Dateningenieure oder Teams, die die Konvertierung mehrerer Excel-Dateien in Stapelprozessen automatisieren müssen.
Vergleich: Welche Methode zur Konvertierung von Excel in TXT ist die richtige für Sie?
Nachfolgend finden Sie eine Vergleichstabelle, die die vier Methoden zur Konvertierung von Excel in TXT anhand von Faktoren wie Benutzerfreundlichkeit, Stapelverarbeitung, Anpassungsoptionen, Sicherheit und Qualifikationsanforderungen gegenüberstellt:
| Methode | Benutzerfreundlichkeit | Stapelverarbeitung | Anpassung | Sicherheit | Erforderliche technische Fähigkeiten |
|---|---|---|---|---|---|
| Kopieren & Einfügen | Einfach | Nein | Keine Anpassung | Hoch | Niedrig |
| Excel „Speichern unter“-Funktion | Einfach | Nein | Hoch | Hoch | Niedrig |
| Online-Konverter | Einfach | Nein | Niedrig | Niedrig | Niedrig |
| C#-Automatisierung | Mäßig | Ja | Ausgezeichnet | Hoch | Hoch (C#-Kenntnisse erforderlich) |
Kurzanleitung zur Auswahl der richtigen Konvertierungsmethode
- Für schnelle und kleine Datenkonvertierungen → Kopieren & Einfügen
- Für zuverlässige Konvertierung einzelner Blätter → Excel „Speichern unter“-Funktion
- Für schnelle Konvertierung ohne Softwareinstallation → Online-Konverter
- Für Massenkonvertierung oder Automatisierungsanforderungen → C#-Automatisierung
Praktische Tipps für die Konvertierung von Excel in Text
- Sichern Sie Ihre ursprünglichen Excel-Dateien: Bevor Sie mit einer Konvertierung beginnen, stellen Sie sicher, dass Sie eine Sicherungskopie Ihrer Originaldatei haben, um den Verlust wichtiger Daten zu vermeiden.
- Wählen Sie das richtige Trennzeichen: Stellen Sie sicher, dass Sie das richtige Trennzeichen basierend auf dem beabsichtigten Verwendungszweck auswählen. Verwenden Sie beispielsweise tabulatorgetrennt für eine bessere Lesbarkeit in Texteditoren oder kommagetrennt für die Kompatibilität mit Datenimport-Tools.
- Vermeiden Sie große Dateien bei Online-Tools: Viele Online-Konverter haben Größenbeschränkungen (normalerweise 50 MB-100 MB). Für große Dateien sollten Sie Offline-Methoden oder die Stapelverarbeitung durch C#-Automatisierung in Betracht ziehen.
- Überprüfen Sie die konvertierten Daten: Öffnen Sie nach der Konvertierung immer die Textdatei und überprüfen Sie die Datenintegrität, insbesondere bei wichtigen Datensätzen.
Häufige Probleme und Lösungen
- Sonderzeichen werden falsch angezeigt: Verwenden Sie die Unicode-Kodierung, um Sonderzeichen wie Chinesisch, Arabisch oder andere nicht-lateinische Alphabete zu erhalten. Dies kann einfach beim Exportieren über Excel oder bei der automatisierten C#-Konvertierung erfolgen.
- Zusätzliche leere Zeilen in der TXT-Datei: Wenn leere Zeilen erscheinen, können Sie sie mit Suchen & Ersetzen in einem Texteditor wie Notepad++ entfernen, um zusätzliche Zeilenumbrüche zu löschen.
- Formeln werden anstelle von Werten angezeigt: Um dies zu vermeiden, kopieren Sie die Zellen und fügen Sie sie nur als Werte ein, bevor Sie sie konvertieren. Dadurch wird sichergestellt, dass berechnete Werte (nicht Formeln) in der TXT-Datei gespeichert werden.
- Mehrere Blätter werden nicht konvertiert: Wenn Sie manuell aus Excel speichern, wird jeweils nur ein Blatt gespeichert. Verwenden Sie die C#-Automatisierung, um mehrere Blätter im Stapel zu konvertieren.
Häufig gestellte Fragen
F1: Kann ich Excel auf meinem Mobilgerät in TXT konvertieren?
A1: Ja, Online-Tools wie Cloudxdocs ermöglichen es Ihnen, Excel-Dateien auf mobilen Geräten zu konvertieren. Seien Sie jedoch vorsichtig beim Hochladen sensibler Daten auf öffentliche Websites.
F2: Warum sehen meine Excel-Daten nach der Konvertierung verstümmelt aus?
A2: Dies ist normalerweise ein Problem mit der Zeichenkodierung. Wenn Sie mit Nicht-ASCII-Zeichen arbeiten, stellen Sie sicher, dass Sie das Unicode-Textformat auswählen, um eine ordnungsgemäße Konvertierung zu gewährleisten.
F3: Kann ich Excel mit bestimmten Trennzeichen in TXT konvertieren?
A3: Ja, Sie können das Trennzeichen beim Konvertieren von Excel in TXT anpassen, je nach verwendeter Methode oder Tool. Sie können beispielsweise die „Speichern unter“-Funktion von Excel verwenden, um die Excel-Datei als CSV (kommagetrennt) zu speichern und dann die Dateierweiterung in .txt zu ändern oder den Prozess in C# zu automatisieren, um mehr Kontrolle über die Trennzeichen zu haben.
F4: Was ist der Unterschied zwischen den Dateiformaten CSV und TXT?
A4: Beides sind textbasierte Formate, aber CSV-Dateien trennen Daten mit Kommas, was sie ideal für tabellarische Daten macht. TXT-Dateien können eine Vielzahl von Trennzeichen verwenden (z. B. Tabulatoren, Leerzeichen oder Pipes) und werden oft für eine einfachere oder flexiblere Datenspeicherung verwendet.
F5: Kann ich mehrere Blätter auf einmal in Excel in TXT konvertieren?
A5: Die integrierte „Speichern unter“-Funktion von Excel konvertiert nur das aktive Blatt. Um mehrere Blätter zu konvertieren, müssen Sie entweder den Vorgang wiederholen oder die Konvertierung mit C# automatisieren.
Schlussworte
Das ist alles, was Sie über die Konvertierung von Excel in TXT wissen müssen! Wenn Sie Fragen, Tipps oder eigene Tricks zur Konvertierung von Excel-Dateien haben, können Sie diese gerne mit unserer Community teilen – wir würden uns freuen, von Ihnen zu hören und gemeinsam zu lernen!
Siehe auch
Как конвертировать Excel в TXT (4 простых метода)
Содержание
- Понимание различий между распространенными текстовыми форматами
- Способ 1: Скопируйте данные Excel и вставьте их в текстовый редактор (быстро и просто)
- Способ 2: Сохраните Excel как текст с помощью Microsoft Excel (встроенный и надежный)
- Способ 3: Конвертируйте Excel в TXT с помощью бесплатных онлайн-инструментов (программное обеспечение не требуется)
- Способ 4: Пакетное преобразование Excel в TXT с помощью C# (автоматизированный процесс)
- Сравнение: какой метод преобразования Excel в TXT подходит именно вам
- Практические советы по преобразованию Excel в текст
- Распространенные проблемы и их решения
Файлы Excel (.xlsx или .xls) широко используются для организации и анализа больших наборов данных, но их может быть сложно передавать или использовать в системах, которые принимают только форматы обычного текста. Преобразование Excel в TXT повышает совместимость, упрощая обмен данными и автоматизацию их обработки. В этой статье мы рассмотрим 4 простых метода, которые помогут вам легко выполнить преобразование Excel в текст — независимо от того, ищете ли вы быстрое ручное решение или автоматизированный пакетный процесс.
- Понимание различий между распространенными текстовыми форматами
- Способ 1: Скопируйте данные Excel и вставьте их в текстовый редактор (быстро и просто)
- Способ 2: Сохраните Excel как текст с помощью Microsoft Excel (встроенный и надежный)
- Способ 3: Конвертируйте Excel в TXT с помощью бесплатных онлайн-инструментов (программное обеспечение не требуется)
- Способ 4: Пакетное преобразование Excel в TXT с помощью C# (автоматизированный процесс)
- Сравнение: какой метод преобразования Excel в TXT подходит именно вам
- Практические советы по преобразованию Excel в текст
- Распространенные проблемы и их решения
Понимание различий между распространенными текстовыми форматами
При преобразовании файлов Excel в текст выбор правильного текстового формата имеет решающее значение для обеспечения совместимости и целостности данных. Ниже приведены несколько распространенных текстовых форматов, используемых для этого преобразования:
- Текст с разделителями-табуляторами (.txt): Использует табуляцию (\t) в качестве разделителей, подходит для большинства приложений Windows.
- Текст в кодировке Юникод (.txt): Использует кодировку Юникод (например, UTF-16), идеально подходит для обработки многоязычных данных, особенно нелатинских символов, таких как китайский и арабский.
- CSV (значения, разделенные запятыми) (.csv): Текстовый формат, использующий запятые в качестве разделителей, обычно используется для обмена данными между базами данных и электронными таблицами.
У каждого формата есть свои сильные стороны. Понимание этих вариантов поможет вам выбрать правильный формат для ваших нужд.
Способ 1: Скопируйте данные Excel и вставьте их в текстовый редактор (быстро и просто)
Копирование данных Excel и вставка их в текстовый редактор — один из самых простых способов преобразования Excel в TXT. Этот метод идеален, когда вам нужно преобразовать в текст только определенный диапазон ячеек Excel, а не целые рабочие листы.
Быстрые шаги преобразования:
-
Выделите диапазон данных, который вы хотите преобразовать, в своей электронной таблице Excel.
-
Нажмите Ctrl+C (Windows) или Cmd+C (Mac), чтобы скопировать.
-
Откройте текстовый редактор (Блокнот, TextEdit и т. д.).
-
Нажмите Ctrl+V (Windows) или Cmd+V (Mac), чтобы вставить.
-
Сохраните файл как .txt.
Важные примечания:
- Данные, вставленные в текстовые редакторы, обычно используют табуляцию в качестве разделителей, поэтому столбцы разделяются табуляцией.
- При работе с большими наборами данных могут возникнуть проблемы с форматированием или усечением в зависимости от емкости буфера обмена вашей системы. При необходимости рассмотрите возможность разделения больших наборов данных на более мелкие части.
Когда использовать: Лучше всего подходит для небольших, разовых преобразований или когда вам нужна только часть электронной таблицы.
Способ 2: Сохраните Excel как текст с помощью Microsoft Excel (встроенный и надежный)
Microsoft Excel предлагает встроенную функцию «Сохранить как» для прямого сохранения файла Excel в виде текста, что является надежным и широко используемым методом.
Пошаговое руководство:
-
Запустите Microsoft Excel. Нажмите Файл > Открыть, затем найдите и выберите свой файл Excel.
-
Перейдите к листу, который вы хотите преобразовать, и нажмите Файл > Сохранить как.
-
Выберите предпочтительный текстовый формат:
- В раскрывающемся меню Тип файла выберите желаемый текстовый или CSV-формат, например Текст (с разделителями-табуляторами) (.txt), Текст в кодировке Юникод (.txt) или CSV (с разделителями-запятыми) (.csv) (CSV также является форматом обычного текста).
- Если вы выберете «Текст (с разделителями-табуляторами)», данные будут разделены табуляцией; если вы выберете CSV, они будут разделены запятыми. Для многоязычных документов выберите «Текст в кодировке Юникод».
-
Выберите, куда вы хотите сохранить текстовый файл, и нажмите Сохранить.
Особенности:
- Этот метод сохраняет только активный рабочий лист. Если в вашей книге несколько листов, повторите процесс для каждого из них.
- Excel предупредит вас, что некоторые функции могут быть потеряны (например, форматирование, формулы). Это ожидаемо, так как TXT-файлы содержат только необработанный текст.
Когда использовать: Этот метод идеально подходит для пользователей, у которых установлен Excel и которым требуется надежное и простое решение для преобразования одного листа.
Вам также может понравиться: Как быстро преобразовать TXT-файлы в электронные таблицы Excel
Способ 3: Конвертируйте Excel в TXT с помощью бесплатных онлайн-инструментов (программное обеспечение не требуется)
Для пользователей без Excel или тех, кто предпочитает решение, удобное для мобильных устройств, многие бесплатные онлайн-инструменты предлагают гибкость для преобразования файлов Excel в TXT с любого устройства с подключением к Интернету.
Рекомендуемые онлайн-конвертеры Excel в TXT:
- CloudConvert: Поддерживает широкий спектр преобразований файлов, включая Excel в TXT.
- Convertio: Удобный и популярный инструмент для преобразования XLS/XLSX в TXT.
- Cloudxdocs: Быстрый и надежный, поддерживает преобразование Excel в TXT и многое другое.
Шаги по преобразованию Excel в TXT онлайн:
-
Перейдите на веб-сайт выбранного вами онлайн-конвертера (например, Cloudxdocs).
-
Загрузите файл Excel, который вы хотите преобразовать, или перетащите его в указанную область.
-
Инструмент автоматически обработает и преобразует ваш файл Excel.
-
Загрузите TXT-файл на свое устройство после завершения преобразования.
Предупреждение о безопасности:
Будьте осторожны при загрузке файлов, содержащих конфиденциальные или служебные данные, в общедоступные онлайн-конвертеры, так как они могут хранить или обрабатывать ваши данные на сторонних серверах. Для конфиденциальных бизнес-данных всегда используйте офлайн-методы или решения корпоративного уровня с надлежащей защитой данных.
Когда использовать: Лучше всего подходит для личного использования или для неконфиденциальных данных, которые требуют быстрого преобразования без установки программного обеспечения.
Способ 4: Пакетное преобразование Excel в TXT с помощью C# (автоматизированный процесс)
Для разработчиков или команд, которым необходимо преобразовать несколько файлов Excel одновременно, C# предоставляет эффективное решение с помощью таких библиотек, как Spire.XLS for .NET. Этот метод хорошо подходит для пакетных преобразований, автоматизации и интеграции в более крупные рабочие процессы обработки данных.
Что такое Spire.XLS for .NET?
Spire.XLS for .NET — это библиотека .NET для создания, изменения и преобразования файлов Excel XLSX или XLS в несколько форматов, включая TXT и PDF — без необходимости установки Microsoft Excel.
Требования к установке:
Прежде чем продолжить, установите необходимую библиотеку через NuGet или загрузите ее с официального сайта:
Install-Package Spire.XLS
Пример кода:
После установки библиотеки добавьте следующий код в свой проект C# для пакетного преобразования файлов Excel в текстовые файлы:
using Spire.Xls;
using System;
using System.IO;
using System.Text;

namespace ExcelToTXT
{
    class Program
    {
        static void Main(string[] args)
        {
            // Укажите каталог, содержащий файлы Excel
            string inputDirectory = @"C:\ExcelFiles\";

            // Получить все файлы Excel в каталоге
            string[] excelFiles = Directory.GetFiles(inputDirectory, "*.xlsx");

            foreach (var file in excelFiles)
            {
                // Создать экземпляр Workbook
                Workbook workbook = new Workbook();

                // Загрузить файл Excel
                workbook.LoadFromFile(file);

                // Доступ к первому листу
                Worksheet sheet = workbook.Worksheets[0];

                // Сгенерировать имя выходного файла на основе имени входного файла
                string outputFileName = Path.Combine(inputDirectory, Path.GetFileNameWithoutExtension(file) + ".txt");

                // Сохранить рабочий лист как текстовый файл с разделителями-запятыми
                sheet.SaveToFile(outputFileName, ",", Encoding.UTF8);

                Console.WriteLine($"Преобразован {file} в {outputFileName}");
            }
        }
    }
}
Этот скрипт загружает несколько файлов Excel из указанного каталога и преобразует первый лист каждого файла в текстовый файл. Выходные файлы сохраняются с тем же именем, что и исходный лист Excel, но с расширением .txt.
Параметры настройки кода:
-
Обработка файлов .xls:
Если вам нужно обрабатывать файлы .xls вместо .xlsx, просто измените фильтр расширения файла:
string[] excelFiles = Directory.GetFiles(inputDirectory, "*.xls"); -
Преобразование всех листов:
Чтобы преобразовать все листы, используйте цикл для итерации по каждому рабочему листу:
foreach (Worksheet sheet in workbook.Worksheets) { string outputFileName = Path.Combine(inputDirectory, Path.GetFileNameWithoutExtension(file) + "_" + sheet.Name + ".txt"); sheet.SaveToFile(outputFileName, ",", Encoding.UTF8); } -
Изменение разделителя:
В коде используется запятая в качестве разделителя. Вы можете изменить его на другие разделители, такие как табуляция или вертикальная черта:
sheet.SaveToFile(outputFileName, "\t", Encoding.UTF8); // Для разделения табуляцией sheet.SaveToFile(outputFileName, "|", Encoding.UTF8); // Для разделения вертикальной чертой -
Преобразование определенного диапазона ячеек:
Если вы хотите преобразовать только определенный диапазон ячеек (например, A1:D10), вы можете установить область печати:
sheet.PageSetup.PrintArea = "A1:D10";  // Определить диапазон
sheet.SaveToFile(outputFileName, ",", Encoding.UTF8);  // Преобразовать диапазон в txt
Когда использовать: Этот метод идеален для разработчиков, инженеров данных или команд, которым необходимо автоматизировать преобразование нескольких файлов Excel в пакетных процессах.
Сравнение: какой метод преобразования Excel в TXT подходит именно вам?
Ниже приведена сравнительная таблица, в которой сопоставляются четыре метода преобразования Excel в TXT на основе таких факторов, как простота использования, пакетная обработка, параметры настройки, безопасность и требования к навыкам:
| Метод | Простота использования | Пакетная обработка | Настройка | Безопасность | Требуемый технический навык |
|---|---|---|---|---|---|
| Копирование и вставка | Легко | Нет | Нет настройки | Высокая | Низкий |
| Функция «Сохранить как» в Excel | Легко | Нет | Высокая | Высокая | Низкий |
| Онлайн-конвертеры | Легко | Нет | Низкая | Низкая | Низкий |
| Автоматизация на C# | Умеренно | Да | Отличная | Высокая | Высокий (требуются знания C#) |
Краткое руководство по выбору правильного метода преобразования
- Для быстрого и мелкомасштабного преобразования данных → Копирование и вставка
- Для надежного преобразования одного листа → Функция «Сохранить как» в Excel
- Для быстрого преобразования без установки программного обеспечения → Онлайн-конвертеры
- Для массового преобразования или автоматизации → Автоматизация на C#
Практические советы по преобразованию Excel в текст
- Создайте резервную копию исходных файлов Excel: Перед началом любого преобразования убедитесь, что у вас есть резервная копия исходного файла, чтобы избежать потери важных данных.
- Выберите правильный разделитель: Убедитесь, что вы выбрали правильный разделитель в зависимости от предполагаемого использования. Например, используйте разделение табуляцией для лучшей читаемости в текстовых редакторах или разделение запятыми для совместимости с инструментами импорта данных.
- Избегайте больших файлов при использовании онлайн-инструментов: Многие онлайн-конвертеры имеют ограничения по размеру (обычно 50–100 МБ). Для больших файлов рассмотрите возможность использования офлайн-методов или пакетной обработки с помощью автоматизации на C#.
- Проверьте преобразованные данные: После преобразования всегда открывайте текстовый файл и проверяйте целостность данных, особенно для важных наборов данных.
Распространенные проблемы и их решения
- Специальные символы отображаются некорректно: Используйте кодировку Юникод для сохранения специальных символов, таких как китайский, арабский или другие нелатинские алфавиты. Это можно легко сделать при экспорте через Excel или автоматизированном преобразовании на C#.
- Лишние пустые строки в файле TXT: Если появляются пустые строки, вы можете удалить их с помощью функции «Найти и заменить» в текстовом редакторе, таком как Notepad++, чтобы удалить лишние разрывы строк.
- Отображаются формулы вместо значений: Чтобы избежать этого, скопируйте ячейки и вставьте их только как значения перед преобразованием. Это гарантирует, что в TXT-файле будут сохранены вычисленные значения (а не формулы).
- Несколько листов не преобразуются: Если вы вручную сохраняете из Excel, за один раз будет сохранен только один лист. Используйте автоматизацию на C# для пакетного преобразования нескольких листов.
Часто задаваемые вопросы
В1: Могу ли я преобразовать Excel в TXT на своем мобильном устройстве?
О1: Да, онлайн-инструменты, такие как Cloudxdocs, позволяют преобразовывать файлы Excel на мобильных устройствах. Однако будьте осторожны при загрузке конфиденциальных данных на общедоступные веб-сайты.
В2: Почему мои данные Excel выглядят искаженными после преобразования?
О2: Обычно это проблема с кодировкой символов. При работе с символами, не относящимися к ASCII, убедитесь, что вы выбрали текстовый формат с кодировкой Юникод, чтобы обеспечить правильное преобразование.
В3: Могу ли я преобразовать Excel в TXT с определенными разделителями?
О3: Да, вы можете настроить разделитель при преобразовании Excel в TXT, в зависимости от используемого метода или инструмента. Например, вы можете использовать функцию «Сохранить как» в Excel, чтобы сохранить Excel как CSV (с разделителями-запятыми), а затем изменить расширение файла на .txt или автоматизировать процесс на C# для большего контроля над разделителями.
В4: В чем разница между форматами файлов CSV и TXT?
О4: Оба являются текстовыми форматами, но файлы CSV разделяют данные запятыми, что делает их идеальными для табличных данных. Файлы TXT могут использовать различные разделители (например, табуляцию, пробелы или вертикальные черты) и часто используются для более простого или гибкого хранения данных.
В5: Могу ли я преобразовать несколько листов в TXT одновременно в Excel?
О5: Встроенная функция Excel «Сохранить как» преобразует только активный лист. Чтобы преобразовать несколько листов, вам нужно либо повторить процесс, либо автоматизировать преобразование с помощью C#.
Заключительные слова
Это все, что вам нужно знать о преобразовании Excel в TXT! Если у вас есть какие-либо вопросы, советы или хитрости по преобразованию файлов Excel, не стесняйтесь делиться ими с нашим сообществом — мы будем рады услышать вас и учиться вместе!
Смотрите также
Como inserir um PDF no Word: manter o layout e a editabilidade
Índice
- Entendendo como o Word lida com arquivos PDF
- Método 1: Inserir um PDF como um objeto (anexar sem editar)
- Método 2: Converter o PDF em imagens (preservar o layout exato)
- Método 3: Converter o PDF para Word (torná-lo editável)
- Erros comuns ao inserir PDFs no Word
- Automatizando o processo programaticamente (para desenvolvedores)
- Escolhendo o método certo
- perguntas frequentes
Ao preparar relatórios, contratos, trabalhos acadêmicos ou documentação técnica, pode ser necessário incluir um arquivo PDF dentro de um documento do Microsoft Word. No entanto, “inserir” um PDF pode significar coisas diferentes dependendo do seu objetivo.
Você quer:
- Anexar o PDF original sem modificá-lo?
- Preservar o layout visual exato?
- Converter o PDF em conteúdo editável do Word?
Cada objetivo requer um método diferente. Escolher a abordagem errada pode levar a problemas de formatação, páginas ausentes, distorção do layout ou aumento desnecessário do tamanho do arquivo.
Este guia explica como inserir um PDF no Word usando três abordagens confiáveis — incorporando-o como um objeto, convertendo-o em imagens ou convertendo-o em um arquivo DOCX editável. Abrange tanto os métodos manuais no Microsoft Word quanto a automação programática usando Python.
Navegação Rápida
- Entendendo como o Word lida com arquivos PDF
- Método 1: Inserir um PDF como um objeto (anexar sem editar)
- Método 2: Converter o PDF em imagens (preservar o layout exato)
- Método 3: Converter o PDF para Word (torná-lo editável)
- Erros comuns ao inserir PDFs no Word
- Automatizando o processo programaticamente (para desenvolvedores)
- Escolhendo o método certo
- perguntas frequentes
Entendendo como o Word lida com arquivos PDF
Os documentos do Microsoft Word (DOCX) são baseados em fluxo e armazenados como pacotes XML compactados. Em contraste, os arquivos PDF usam posicionamento fixo para garantir a consistência do layout em todos os dispositivos.
Devido a essa diferença estrutural:
- A incorporação de um PDF o anexa como um objeto OLE binário.
- A conversão de um PDF reconstrói o layout em elementos editáveis.
- A inserção como imagens preserva a aparência, mas remove a capacidade de edição.
O Word usa a tecnologia Vinculação e Incorporação de Objetos (OLE) ao inserir arquivos externos como objetos. Entender esse comportamento ajuda a explicar por que apenas a visualização da primeira página aparece e por que os PDFs incorporados aumentam o tamanho do documento.
Método 1: Inserir um PDF como um objeto (anexar sem editar)
Ideal para: Anexar um arquivo PDF preservando sua estrutura original.
Se você precisar anexar um PDF a um documento do Word — como um apêndice de contrato ou material de apoio — inseri-lo como um objeto é a solução mais apropriada.
Quando inserido dessa forma, o PDF se torna um objeto OLE incorporado. O arquivo inteiro é armazenado dentro do documento do Word e pode ser aberto separadamente clicando duas vezes nele.
Casos de uso típicos
- Contratos e acordos
- Documentação técnica
- Apêndices acadêmicos
- Materiais de referência de apoio
Etapas: Inserir um PDF como um objeto
- Abra seu documento do Word.
- Coloque o cursor onde o PDF deve aparecer.
- Vá para a guia Inserir.
- Clique em Objeto (no grupo Texto).
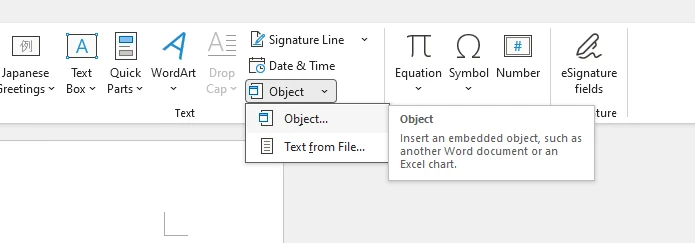
- Selecione Criar do arquivo.
- Clique em Procurar e escolha o arquivo PDF.
- Selecione uma das seguintes opções:
- Exibir como ícone – mostra um ícone de PDF clicável.
- Vincular ao arquivo – cria um link externo em vez de incorporar.
- Deixe ambos desmarcados – incorpora o arquivo e exibe uma visualização (geralmente a primeira página).
- Clique em OK.
O PDF agora está incorporado no documento do Word. Abaixo está um exemplo do objeto PDF inserido:
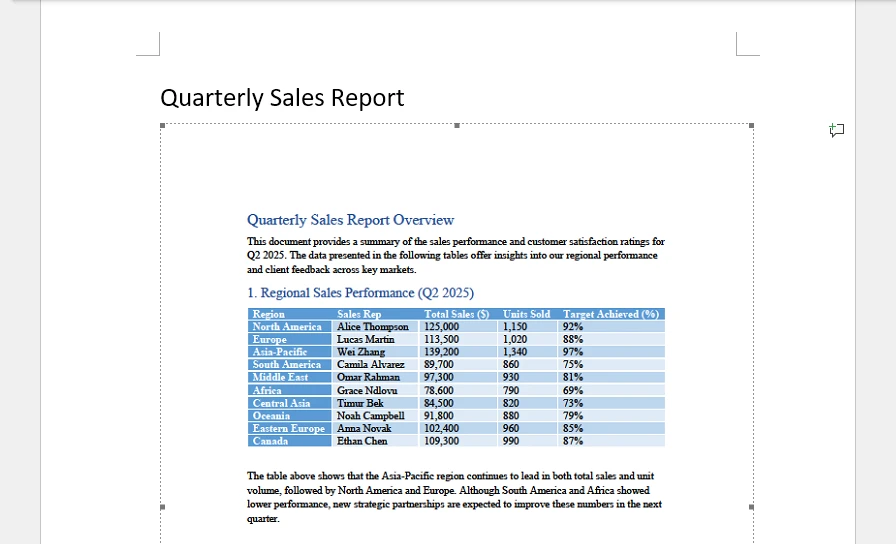
Notas técnicas importantes
- O Word incorpora o PDF inteiro como um único objeto OLE.
- Apenas a primeira página é exibida como uma visualização.
- O conteúdo não pode ser editado diretamente no Word.
- O arquivo incorporado aumenta o tamanho geral do DOCX.
- A renderização da visualização pode depender da instalação de um manipulador de PDF (como o Adobe Acrobat).
Por que apenas a primeira página aparece?
O Word trata o PDF como um objeto incorporado em vez de páginas separadas. A visualização é apenas uma representação visual da primeira página, enquanto o PDF completo permanece anexado internamente.
Se você quiser inserir outros tipos de arquivos (como planilhas do Excel ou apresentações do PowerPoint) como objetos OLE no Word, consulte nosso guia detalhado sobre como inserir anexos em documentos do Word.
Método 2: Converter o PDF em imagens (preservar o layout exato)
Ideal para: Manter a fidelidade visual precisa.
Se a precisão do layout for crítica — por exemplo, em brochuras de marketing, certificados, arquivos digitalizados ou documentos sensíveis ao design — converter cada página do PDF em uma imagem antes de inseri-la no Word costuma ser a abordagem mais segura.
Como as imagens são estáticas, o Word não tenta reconstruir texto, espaçamento ou posicionamento. Isso evita problemas de refluxo de layout que podem ocorrer durante a conversão de PDF para Word.
Como este método funciona
- Converta cada página do PDF em um arquivo de imagem (PNG ou JPEG).
- Insira as imagens no Word em sequência.
- Adicione quebras de página entre as imagens, se necessário.
Como o Word trata o conteúdo como imagens em vez de texto editável, o resultado visual permanece idêntico ao PDF de origem.
As ferramentas comuns de conversão de PDF para imagem incluem:
- Adobe Acrobat
- Microsoft Word
- Conversores online
Se você preferir uma solução online, pode usar um conversor online de PDF para imagem para gerar imagens de página de alta resolução antes de inseri-las no Word.
Configurações de imagem recomendadas
Para manter a clareza e a qualidade de impressão:
- Use 200–300 DPI para documentos de impressão.
- Prefira PNG para páginas com muito texto.
- Use JPEG apenas quando a redução do tamanho do arquivo for uma prioridade.
Vantagens
- Consistência visual exata
- Sem substituição de fonte
- Sem distorção de layout
- Renderização consistente em todas as versões do Word
Limitações
- O conteúdo não é editável
- O tamanho do documento pode aumentar significativamente
- Imagens grandes ou de alta resolução podem afetar o desempenho
Este método é recomendado quando a fidelidade visual é mais importante do que a capacidade de edição.
Método 3: Converter o PDF para Word (torná-lo editável)
Ideal para: Editar ou reutilizar o conteúdo do PDF.
Se o seu objetivo é modificar o conteúdo em vez de anexá-lo, é necessário converter o PDF em um documento editável do Word.
Muitos usuários procuram como importar um PDF para o Word, mas tecnicamente o Word executa um processo de conversão em vez de uma importação direta.
Opção 1: Abrir o PDF diretamente no Word
Versões modernas do Word (2013 e posteriores, incluindo o Microsoft 365) suportam a conversão de PDF integrada.
Etapas:
- Abra o Word.
- Clique em Arquivo → Abrir.
- Selecione o arquivo PDF.
- Confirme o prompt de conversão.
O Word reconstrói o layout do PDF em conteúdo editável.
O que acontece durante a conversão
Como os PDFs usam posicionamento fixo e o Word usa layout baseado em fluxo, a reconstrução pode resultar em:
- Substituições de fonte
- Diferenças de espaçamento
- Reestruturação de tabela
- Refluxo de parágrafo
- Pequenos deslocamentos de alinhamento
Layouts complexos podem exigir correção manual após a conversão.
Opção 2: Usar um conversor dedicado de PDF para Word
Você também pode usar uma ferramenta de conversão de PDF para Word online ou offline para gerar um arquivo DOCX antes de inseri-lo em seu documento.
Se você preferir uma solução baseada em navegador, um conversor online de PDF para Word pode simplificar tarefas de conversão ocasionais ou leves.
Para um guia passo a passo, consulte nosso tutorial completo sobre conversão de PDF para Word.
Erros comuns ao inserir PDFs no Word
Muitos problemas de formatação ocorrem devido à incompreensão de como o Word lida com PDFs:
-
Esperar visualizações de várias páginas ao incorporar – O Word exibe apenas a primeira página de um PDF incorporado como uma visualização. Se você precisar que todas as páginas fiquem visíveis, converta o PDF em imagens ou em um documento editável do Word.
-
Tentar editar PDFs incorporados diretamente – Os PDFs incorporados permanecem como objetos de arquivo separados e não podem ser editados no Word. Para modificar o conteúdo, converta o PDF para o formato Word antes de inseri-lo.
-
Usar imagens de baixa resolução para impressão – A conversão de páginas com baixo DPI pode resultar em uma saída borrada. Use 200–300 DPI para resultados com qualidade de impressão.
-
Ignorar o aumento do tamanho do arquivo após incorporar PDFs grandes – A incorporação armazena o arquivo inteiro dentro do DOCX, o que pode aumentar significativamente o tamanho do documento. Considere vincular ao PDF se o tamanho do arquivo for uma preocupação.
-
Assumir que a conversão de PDF preservará o layout perfeitamente – Formatação complexa, fontes e gráficos podem se deslocar durante a conversão. Use a inserção baseada em imagem se for necessária fidelidade visual exata.
Entender as diferenças entre incorporar, criar imagens e converter ajuda você a escolher o método mais apropriado e evitar correções de formatação desnecessárias.
Automatizando o processo programaticamente (para desenvolvedores)
Em sistemas de relatórios empresariais ou fluxos de trabalho de processamento em lote, a inserção manual é impraticável.
Usando bibliotecas Python como Spire.Doc for Python e Spire.PDF for Python, você pode automatizar:
- Incorporação de PDFs como objetos OLE
- Conversão de páginas PDF em imagens
- Conversão de PDFs em arquivos DOCX editáveis
Instalação
Para automatizar a inserção de PDF ou a conversão de imagem no Word usando Python, você precisa instalar as bibliotecas necessárias. Neste exemplo, usamos Spire.Doc para processamento de documentos do Word e Spire.PDF para manipulação de arquivos PDF.
Certifique-se de que o Python 3.7 ou posterior esteja instalado em seu ambiente. Em seguida, execute os seguintes comandos:
pip install Spire.Doc
pip install Spire.PDF
Após a instalação, você pode importar as bibliotecas em seu script Python e começar a automatizar as tarefas de processamento de documentos.
1. Incorporar um PDF como um objeto OLE
Este método incorpora o arquivo PDF diretamente em um documento do Word como um objeto OLE. O PDF inteiro é armazenado dentro do arquivo DOCX, enquanto uma imagem de visualização é exibida na interface do documento. A imagem de visualização é gerada a partir da primeira página do PDF e usada como a representação visual do objeto incorporado.
from spire.doc import Document, Stream, DocPicture, FileFormat, OleObjectType
from spire.pdf import PdfDocument

document = Document()
section = document.AddSection()

pdf = PdfDocument()
pdf.LoadFromFile("Sample.pdf")

# Convert first page to image for preview
image_stream = pdf.SaveAsImage(0, 300, 300)  # pageIndex, dpiX, dpiY
image_bytes = image_stream.ToArray()

image = DocPicture(document)
image.LoadImage(Stream(image_bytes))

pdf_object = section.AddParagraph().AppendOleObject(
    "Sample.pdf",
    image,
    OleObjectType.AdobeAcrobatDocument
)

pdf_object.Width = 200
pdf_object.Height = 400
pdf_object.DisplayAsIcon = False

document.SaveToFile("Embed_PDF.docx", FileFormat.Docx)
document.Close()
pdf.Close()
Pontos técnicos principais:
- AppendOleObject() incorpora o arquivo PDF completo no documento do Word.
- OleObjectType.AdobeAcrobatDocument especifica o tipo de objeto.
- SaveAsImage(pageIndex, dpiX, dpiY) gera a imagem de visualização exibida no Word.
Valores de DPI mais altos produzem visualizações mais nítidas, mas aumentam o tamanho do arquivo.
Abaixo está uma prévia do documento do Word gerado:
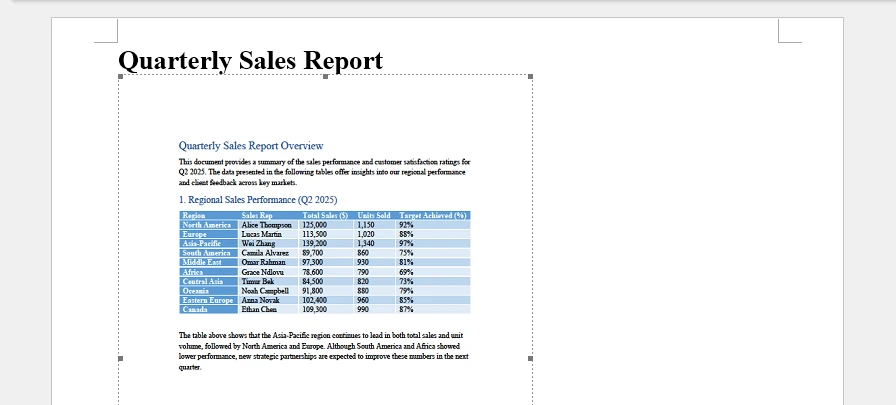
Para um guia mais detalhado sobre como incorporar objetos OLE no Word usando Python, consulte Incorporar objetos OLE no Word com Python.
2. Converter páginas de PDF em imagens e inserir
Esta abordagem converte cada página do PDF em uma imagem e insere as imagens no documento do Word sequencialmente. Ao contrário da incorporação OLE, o próprio arquivo PDF não é armazenado como um anexo — apenas imagens estáticas são inseridas.
from spire.pdf import PdfDocument
from spire.doc import Document, Stream, FileFormat

pdf = PdfDocument()
pdf.LoadFromFile("Sample.pdf")

document = Document()
section = document.AddSection()

for i in range(pdf.Pages.Count):
    image_stream = pdf.SaveAsImage(i, 300, 300)
    paragraph = section.AddParagraph()
    paragraph.AppendPicture(Stream(image_stream.ToArray()))

document.SaveToFile("PDF_As_Images.docx", FileFormat.Docx)
document.Close()
pdf.Close()
Notas técnicas:
- Cada página é convertida usando SaveAsImage().
- As imagens são inseridas usando AppendPicture().
- O arquivo do Word resultante contém apenas imagens, não o arquivo PDF original.
- As configurações de DPI afetam diretamente a clareza e o tamanho do documento.
Abaixo está um exemplo do documento do Word gerado:
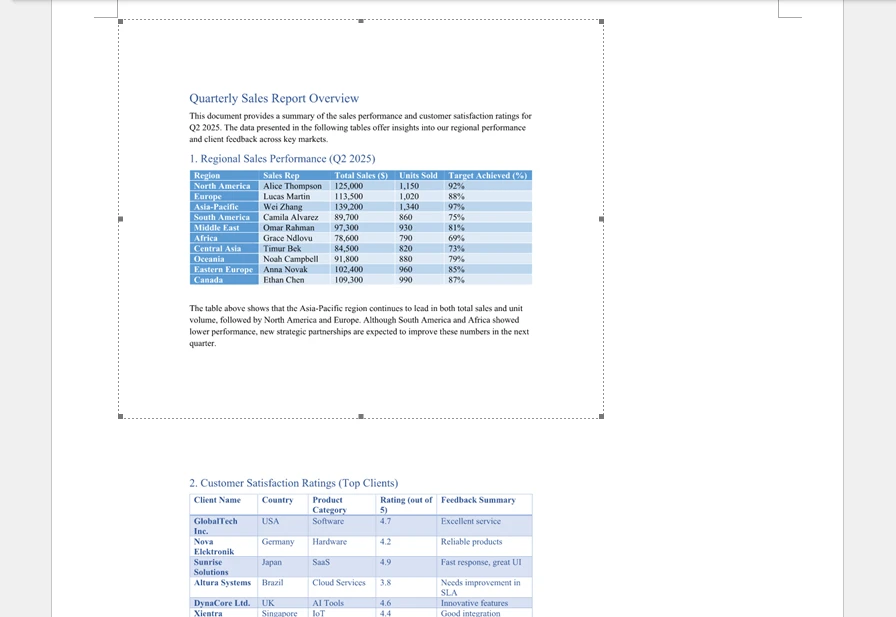
3. Converter PDF para Word editável
Este método converte o PDF em um formato de documento do Word editável (DOCX). Em vez de incorporar ou inserir imagens, o conteúdo do PDF é reconstruído em elementos nativos do Word, como parágrafos, tabelas e imagens.
from spire.pdf import *

pdf = PdfDocument()
pdf.LoadFromFile("Sample.pdf")

pdf.ConvertOptions.SetPdfToDocOptions(True, False)

pdf.SaveToFile("Converted.docx", FileFormat.DOCX)
pdf.Close()
Notas técnicas:
-
SetPdfToDocOptions(usePsMode, useFlowMode) controla a reconstrução do layout:
- usePsMode=True – ativa o Modo PS, que preserva o posicionamento de página fixa com mais precisão.
- useFlowRecognitionMode=False – desativa o Modo de reconhecimento de fluxo, o que significa que o Word não tentará fluir o texto dinamicamente; o layout do conteúdo permanece mais próximo do PDF original.
-
O arquivo de saída é um documento DOCX totalmente editável.
-
Layouts complexos, fontes ou gráficos ainda podem exigir pequenos ajustes manuais após a conversão.
Abaixo está uma prévia do resultado da conversão:
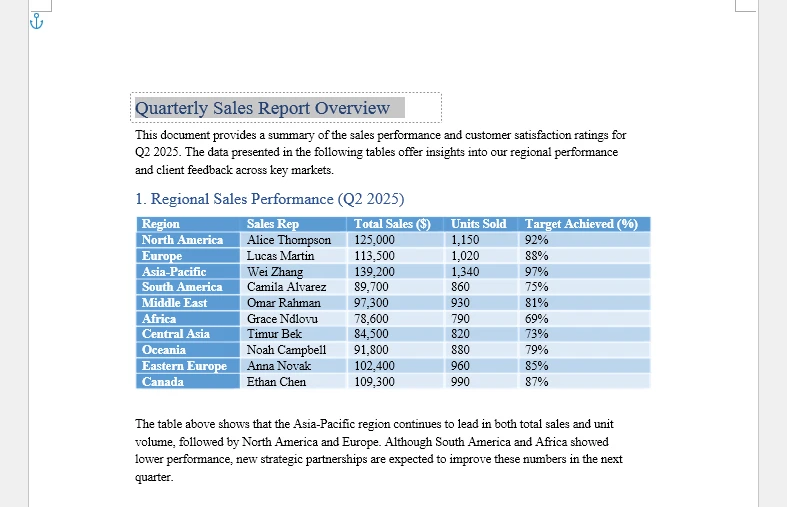
O arquivo DOCX resultante pode então ser aberto, editado ou mesclado em outro documento do Word.
Para mais detalhes sobre a conversão de PDF para Word usando Python, consulte Como converter PDF para Word com Python.
Escolhendo o método certo
| Objetivo | Método recomendado | Principais considerações |
|---|---|---|
| Anexar sem editar | Inserir como objeto | Incorpora o PDF como um objeto OLE; o conteúdo permanece não editável; apenas uma visualização é exibida. |
| Preservar layout exato | Converter para imagens | Insere imagens estáticas de cada página; a fidelidade visual é preservada; o tamanho do arquivo pode aumentar. |
| Editar conteúdo | Converter para Word | Converte PDF para DOCX editável; permite modificações; layouts complexos podem exigir ajustes. |
Selecionar o método correto com base no seu objetivo garante o manuseio eficiente de documentos, evita problemas de formatação e se alinha aos seus requisitos de fluxo de trabalho.
perguntas frequentes
Posso inserir um PDF de várias páginas no Word?
Sim. Ao incorporar como um objeto, o arquivo inteiro é anexado como um item. Ao converter para imagens ou formato Word, cada página aparece separadamente.
Por que a formatação muda após a conversão de um PDF?
Os arquivos PDF armazenam o conteúdo usando coordenadas fixas. Durante a conversão, o Word reconstrói o layout em uma estrutura editável baseada em fluxo, o que pode alterar o espaçamento ou o alinhamento.
Como anexo um PDF a um documento do Word sem editá-lo?
Use Inserir → Objeto → Criar do arquivo para incorporar o arquivo diretamente.
Conclusão
Existem várias maneiras de inserir um PDF no Word, e o melhor método depende inteiramente do resultado pretendido.
A incorporação funciona melhor quando você precisa anexar o arquivo original. A conversão para imagens garante a fidelidade visual. A conversão para o Word permite a edição e a reutilização do conteúdo.
Ao entender como o Word processa arquivos PDF internamente e selecionar a técnica apropriada, você pode evitar surpresas de formatação, controlar o tamanho do documento e criar fluxos de trabalho de documentos mais confiáveis.
Veja também
Word에 PDF 삽입하는 방법: 레이아웃 및 편집 가능성 유지
보고서, 계약서, 학술 논문 또는 기술 문서를 준비할 때 Microsoft Word 문서 안에 PDF 파일을 포함해야 할 수 있습니다. 그러나 PDF를 "삽입"하는 것은 목표에 따라 다른 의미를 가질 수 있습니다.
원하는 작업은 무엇인가요?
- 원본 PDF를 수정하지 않고 첨부하시겠습니까?
- 정확한 시각적 레이아웃을 보존하시겠습니까?
- PDF를 편집 가능한 Word 콘텐츠로 변환하시겠습니까?
각 목표에는 다른 방법이 필요합니다. 잘못된 접근 방식을 선택하면 서식 문제, 페이지 누락, 레이아웃 왜곡 또는 불필요한 파일 크기 증가로 이어질 수 있습니다.
이 가이드에서는 PDF를 개체로 포함하거나, 이미지로 변환하거나, 편집 가능한 DOCX 파일로 변환하는 세 가지 신뢰할 수 있는 접근 방식을 사용하여 Word에 PDF를 삽입하는 방법을 설명합니다. Microsoft Word의 수동 방법과 Python을 사용한 프로그래밍 방식 자동화를 모두 다룹니다.
빠른 탐색
- Word가 PDF 파일을 처리하는 방법 이해하기
- 방법 1: PDF를 개체로 삽입하기 (편집 없이 첨부)
- 방법 2: PDF를 이미지로 변환하기 (정확한 레이아웃 보존)
- 방법 3: PDF를 Word로 변환하기 (편집 가능하게 만들기)
- Word에 PDF를 삽입할 때 흔히 저지르는 실수
- 프로그래밍 방식으로 프로세스 자동화하기 (개발자용)
- 올바른 방법 선택하기
- 자주 묻는 질문
Word가 PDF 파일을 처리하는 방법 이해하기
Microsoft Word 문서(DOCX)는 흐름 기반이며 압축된 XML 패키지로 저장됩니다. 반면 PDF 파일은 고정 위치를 사용하여 장치 간 레이아웃 일관성을 보장합니다.
이러한 구조적 차이 때문에:
- PDF를 포함하면 이진 OLE 개체로 첨부됩니다.
- PDF를 변환하면 레이아웃이 편집 가능한 요소로 재구성됩니다.
- 이미지로 삽입하면 모양은 보존되지만 편집 기능은 제거됩니다.
Word는 외부 파일을 개체로 삽입할 때 개체 연결 및 포함(OLE) 기술을 사용합니다. 이 동작을 이해하면 첫 페이지만 미리보기에 나타나는 이유와 포함된 PDF가 문서 크기를 증가시키는 이유를 설명하는 데 도움이 됩니다.
방법 1: PDF를 개체로 삽입하기 (편집 없이 첨부)
가장 적합한 경우: 원본 구조를 보존하면서 PDF 파일을 첨부할 때.
계약서 부록이나 증빙 자료와 같이 Word 문서에 PDF를 첨부해야 하는 경우 개체로 삽입하는 것이 가장 적절한 해결책입니다.
이 방법으로 삽입하면 PDF는 포함된 OLE 개체가 됩니다. 전체 파일이 Word 문서 내에 저장되며 두 번 클릭하여 별도로 열 수 있습니다.
일반적인 사용 사례
- 계약서 및 합의서
- 기술 문서
- 학술 부록
- 참고 자료
단계: PDF를 개체로 삽입하기
- Word 문서를 엽니다.
- PDF가 나타날 위치에 커서를 놓습니다.
- 삽입 탭으로 이동합니다.
- 개체(텍스트 그룹 내)를 클릭합니다.
- 파일로부터 만들기를 선택합니다.
- 찾아보기를 클릭하고 PDF 파일을 선택합니다.
- 다음 옵션 중 하나를 선택합니다:
- 아이콘으로 표시 – 클릭 가능한 PDF 아이콘을 표시합니다.
- 파일에 연결 – 포함하는 대신 외부적으로 연결합니다.
- 둘 다 선택하지 않음 – 파일을 포함하고 미리보기(일반적으로 첫 페이지)를 표시합니다.
- 확인을 클릭합니다.
이제 PDF가 Word 문서에 포함되었습니다. 아래는 삽입된 PDF 개체의 예입니다:
중요한 기술 참고 사항
- Word는 전체 PDF를 단일 OLE 개체로 포함합니다.
- 첫 페이지만 미리보기로 표시됩니다.
- 콘텐츠는 Word 내에서 직접 편집할 수 없습니다.
- 포함된 파일은 전체 DOCX 크기를 증가시킵니다.
- 미리보기 렌더링은 PDF 핸들러(예: Adobe Acrobat)가 설치되어 있는지 여부에 따라 달라질 수 있습니다.
왜 첫 페이지만 나타날까요?
Word는 PDF를 별도의 페이지가 아닌 하나의 포함된 개체로 취급합니다. 미리보기는 첫 페이지의 시각적 표현일 뿐이며 전체 PDF는 내부적으로 첨부된 상태로 유지됩니다.
Word에서 다른 유형의 파일(예: Excel 시트 또는 PowerPoint 프레젠테이션)을 OLE 개체로 삽입하려면 Word 문서에 첨부 파일 삽입에 대한 자세한 가이드를 참조하십시오.
방법 2: PDF를 이미지로 변환하기 (정확한 레이아웃 보존)
가장 적합한 경우: 정밀한 시각적 충실도를 유지할 때.
마케팅 브로셔, 인증서, 스캔 파일 또는 디자인에 민감한 문서와 같이 레이아웃 정확성이 중요한 경우, 각 PDF 페이지를 이미지로 변환한 후 Word에 삽입하는 것이 종종 가장 안전한 접근 방식입니다.
이미지는 정적이므로 Word는 텍스트, 간격 또는 위치를 재구성하려고 시도하지 않습니다. 이는 PDF에서 Word로 변환하는 동안 발생할 수 있는 레이아웃 리플로우 문제를 방지합니다.
이 방법의 작동 원리
- 각 PDF 페이지를 이미지 파일(PNG 또는 JPEG)로 변환합니다.
- 이미지를 순서대로 Word에 삽입합니다.
- 필요한 경우 이미지 사이에 페이지 나누기를 추가합니다.
Word는 콘텐츠를 편집 가능한 텍스트가 아닌 이미지로 취급하므로 시각적 결과는 원본 PDF와 동일하게 유지됩니다.
일반적인 PDF-이미지 변환 도구는 다음과 같습니다:
- Adobe Acrobat
- Microsoft Word
- 온라인 변환기
온라인 솔루션을 선호하는 경우 온라인 PDF-이미지 변환기를 사용하여 Word에 삽입하기 전에 고해상도 페이지 이미지를 생성할 수 있습니다.
권장 이미지 설정
선명도와 인쇄 품질을 유지하려면:
- 인쇄 문서에는 200–300 DPI를 사용하십시오.
- 텍스트가 많은 페이지에는 PNG를 선호하십시오.
- 파일 크기 축소가 우선 순위일 때만 JPEG를 사용하십시오.
장점
- 정확한 시각적 일관성
- 글꼴 대체 없음
- 레이아웃 왜곡 없음
- Word 버전 간 일관된 렌더링
제한 사항
- 콘텐츠를 편집할 수 없음
- 문서 크기가 크게 증가할 수 있음
- 크거나 고해상도 이미지는 성능에 영향을 미칠 수 있음
이 방법은 편집 가능성보다 시각적 충실도가 더 중요할 때 권장됩니다.
방법 3: PDF를 Word로 변환하기 (편집 가능하게 만들기)
가장 적합한 경우: PDF 콘텐츠를 편집하거나 재사용할 때.
목표가 콘텐츠를 첨부하는 것이 아니라 수정하는 것이라면 PDF를 편집 가능한 Word 문서로 변환해야 합니다.
많은 사용자가 PDF를 Word로 가져오는 방법을 검색하지만, 기술적으로 Word는 직접 가져오기보다는 변환 프로세스를 수행합니다.
옵션 1: Word에서 직접 PDF 열기
최신 버전의 Word(2013 이상, Microsoft 365 포함)는 내장된 PDF 변환을 지원합니다.
단계:
- Word를 엽니다.
- 파일 → 열기를 클릭합니다.
- PDF 파일을 선택합니다.
- 변환 프롬프트를 확인합니다.
Word는 PDF 레이아웃을 편집 가능한 콘텐츠로 재구성합니다.
변환 중 발생하는 일
PDF는 고정 위치를 사용하고 Word는 흐름 기반 레이아웃을 사용하기 때문에 재구성으로 인해 다음과 같은 결과가 발생할 수 있습니다:
- 글꼴 대체
- 간격 차이
- 표 재구성
- 단락 리플로우
- 사소한 정렬 이동
복잡한 레이아웃은 변환 후 수동 수정이 필요할 수 있습니다.
옵션 2: 전용 PDF-Word 변환기 사용
온라인 또는 오프라인 PDF-Word 변환 도구를 사용하여 문서에 삽입하기 전에 DOCX 파일을 생성할 수도 있습니다.
브라우저 기반 솔루션을 선호하는 경우 온라인 PDF-Word 변환기는 가끔 또는 가벼운 변환 작업을 단순화할 수 있습니다.
단계별 가이드는 PDF를 Word로 변환하는 방법에 대한 전체 튜토리얼을 참조하십시오.
Word에 PDF를 삽입할 때 흔히 저지르는 실수
Word가 PDF를 처리하는 방식을 오해하여 많은 서식 문제가 발생합니다:
-
포함 시 여러 페이지 미리보기를 기대하는 경우 – Word는 포함된 PDF의 첫 페이지만 미리보기로 표시합니다. 모든 페이지가 보이게 하려면 PDF를 이미지로 변환하거나 편집 가능한 Word 문서로 변환하십시오.
-
포함된 PDF를 직접 편집하려고 시도하는 경우 – 포함된 PDF는 별도의 파일 개체로 유지되며 Word 내에서 편집할 수 없습니다. 콘텐츠를 수정하려면 삽입하기 전에 PDF를 Word 형식으로 변환하십시오.
-
인쇄용으로 저해상도 이미지를 사용하는 경우 – 낮은 DPI로 페이지를 변환하면 출력이 흐릿해질 수 있습니다. 인쇄 품질 결과를 얻으려면 200–300 DPI를 사용하십시오.
-
큰 PDF를 포함한 후 파일 크기 증가를 무시하는 경우 – 포함하면 전체 파일이 DOCX 내에 저장되어 문서 크기가 크게 증가할 수 있습니다. 파일 크기가 문제인 경우 PDF에 연결하는 것을 고려하십시오.
-
PDF 변환이 레이아웃을 완벽하게 보존할 것이라고 가정하는 경우 – 복잡한 서식, 글꼴 및 그래픽은 변환 중에 이동할 수 있습니다. 정확한 시각적 충실도가 필요한 경우 이미지 기반 삽입을 사용하십시오.
포함, 이미징 및 변환의 차이점을 이해하면 가장 적절한 방법을 선택하고 불필요한 서식 수정을 피하는 데 도움이 됩니다.
프로그래밍 방식으로 프로세스 자동화하기 (개발자용)
엔터프라이즈 보고 시스템이나 배치 처리 워크플로우에서는 수동 삽입이 비실용적입니다.
Spire.Doc for Python 및 Spire.PDF for Python과 같은 Python 라이브러리를 사용하면 다음을 자동화할 수 있습니다:
- PDF를 OLE 개체로 포함하기
- PDF 페이지를 이미지로 변환하기
- PDF를 편집 가능한 DOCX 파일로 변환하기
설치
Python을 사용하여 Word에서 PDF 삽입 또는 이미지 변환을 자동화하려면 필요한 라이브러리를 설치해야 합니다. 이 예에서는 Word 문서 처리를 위해 Spire.Doc을, PDF 파일 처리를 위해 Spire.PDF를 사용합니다.
환경에 Python 3.7 이상이 설치되어 있는지 확인하십시오. 그런 다음 다음 명령을 실행하십시오:
pip install Spire.Doc
pip install Spire.PDF
설치 후 Python 스크립트에서 라이브러리를 가져와 문서 처리 작업을 자동화할 수 있습니다.
1. PDF를 OLE 개체로 포함하기
이 방법은 PDF 파일을 Word 문서에 OLE 개체로 직접 포함합니다. 전체 PDF는 DOCX 파일 내에 저장되고 문서 인터페이스에는 미리보기 이미지가 표시됩니다. 미리보기 이미지는 PDF의 첫 페이지에서 생성되어 포함된 개체의 시각적 표현으로 사용됩니다.
from spire.doc import Document, Stream, DocPicture, FileFormat, OleObjectType
from spire.pdf import PdfDocument

document = Document()
section = document.AddSection()

pdf = PdfDocument()
pdf.LoadFromFile("Sample.pdf")

# 미리보기를 위해 첫 페이지를 이미지로 변환
image_stream = pdf.SaveAsImage(0, 300, 300)  # pageIndex, dpiX, dpiY
image_bytes = image_stream.ToArray()

image = DocPicture(document)
image.LoadImage(Stream(image_bytes))

pdf_object = section.AddParagraph().AppendOleObject(
    "Sample.pdf",
    image,
    OleObjectType.AdobeAcrobatDocument
)

pdf_object.Width = 200
pdf_object.Height = 400
pdf_object.DisplayAsIcon = False

document.SaveToFile("Embed_PDF.docx", FileFormat.Docx)
document.Close()
pdf.Close()
주요 기술 사항:
- AppendOleObject()는 전체 PDF 파일을 Word 문서에 포함합니다.
- OleObjectType.AdobeAcrobatDocument는 개체 유형을 지정합니다.
- SaveAsImage(pageIndex, dpiX, dpiY)는 Word에 표시되는 미리보기 이미지를 생성합니다.
DPI 값이 높을수록 미리보기가 선명해지지만 파일 크기가 증가합니다.
아래는 생성된 Word 문서의 미리보기입니다:
Python을 사용하여 Word에 OLE 개체를 포함하는 방법에 대한 자세한 가이드는 Python으로 Word에 OLE 개체 포함하기를 참조하십시오.
2. PDF 페이지를 이미지로 변환하여 삽입하기
이 접근 방식은 각 PDF 페이지를 이미지로 변환하고 이미지를 순차적으로 Word 문서에 삽입합니다. OLE 포함과 달리 PDF 파일 자체는 첨부 파일로 저장되지 않고 정적 이미지만 삽입됩니다.
from spire.pdf import PdfDocument
from spire.doc import Document, Stream, FileFormat

pdf = PdfDocument()
pdf.LoadFromFile("Sample.pdf")

document = Document()
section = document.AddSection()

for i in range(pdf.Pages.Count):
    image_stream = pdf.SaveAsImage(i, 300, 300)
    paragraph = section.AddParagraph()
    paragraph.AppendPicture(Stream(image_stream.ToArray()))

document.SaveToFile("PDF_As_Images.docx", FileFormat.Docx)
document.Close()
pdf.Close()
기술 참고 사항:
- 각 페이지는 SaveAsImage()를 사용하여 변환됩니다.
- 이미지는 AppendPicture()를 사용하여 삽입됩니다.
- 결과 Word 파일에는 원본 PDF 파일이 아닌 이미지만 포함됩니다.
- DPI 설정은 선명도와 문서 크기에 직접적인 영향을 미칩니다.
아래는 생성된 Word 문서의 예입니다:
3. PDF를 편집 가능한 Word로 변환하기
이 방법은 PDF를 편집 가능한 Word 문서 형식(DOCX)으로 변환합니다. 이미지를 포함하거나 삽입하는 대신 PDF 콘텐츠는 단락, 표, 이미지와 같은 Word 기본 요소로 재구성됩니다.
from spire.pdf import *

pdf = PdfDocument()
pdf.LoadFromFile("Sample.pdf")

pdf.ConvertOptions.SetPdfToDocOptions(True, False)

pdf.SaveToFile("Converted.docx", FileFormat.DOCX)
pdf.Close()
기술 참고 사항:
-
SetPdfToDocOptions(usePsMode, useFlowMode)는 레이아웃 재구성을 제어합니다:
- usePsMode=True – 고정 페이지 위치를 더 정확하게 보존하는 PS 모드를 활성화합니다.
- useFlowRecognitionMode=False – 흐름 인식 모드를 비활성화하여 Word가 텍스트를 동적으로 흐르게 하지 않도록 합니다. 콘텐츠 레이아웃이 원본 PDF에 더 가깝게 유지됩니다.
-
출력 파일은 완전히 편집 가능한 DOCX 문서입니다.
-
복잡한 레이아웃, 글꼴 또는 그래픽은 변환 후 사소한 수동 조정이 필요할 수 있습니다.
아래는 변환 결과의 미리보기입니다:
결과 DOCX 파일은 다른 Word 문서로 열거나, 편집하거나, 병합할 수 있습니다.
Python을 사용하여 PDF를 Word로 변환하는 방법에 대한 자세한 내용은 Python으로 PDF를 Word로 변환하는 방법을 참조하십시오.
올바른 방법 선택하기
| 목표 | 권장 방법 | 주요 고려 사항 |
|---|---|---|
| 편집 없이 첨부 | 개체로 삽입 | PDF를 OLE 개체로 포함합니다. 콘텐츠는 편집할 수 없으며 미리보기만 표시됩니다. |
| 정확한 레이아웃 보존 | 이미지로 변환 | 각 페이지의 정적 이미지를 삽입합니다. 시각적 충실도가 보존되며 파일 크기가 증가할 수 있습니다. |
| 콘텐츠 편집 | Word로 변환 | PDF를 편집 가능한 DOCX로 변환합니다. 수정이 가능하며 복잡한 레이아웃은 조정이 필요할 수 있습니다. |
목표에 따라 올바른 방법을 선택하면 효율적인 문서 처리, 서식 문제 방지 및 워크플로우 요구 사항에 부합할 수 있습니다.
자주 묻는 질문
여러 페이지 PDF를 Word에 삽입할 수 있나요?
예. 개체로 포함할 때 전체 파일이 하나의 항목으로 첨부됩니다. 이미지나 Word 형식으로 변환할 때 각 페이지가 별도로 나타납니다.
PDF를 변환한 후 서식이 변경되는 이유는 무엇인가요?
PDF 파일은 고정된 좌표를 사용하여 콘텐츠를 저장합니다. 변환 중에 Word는 레이아웃을 흐름 기반의 편집 가능한 구조로 재구성하므로 간격이나 정렬이 변경될 수 있습니다.
편집하지 않고 PDF를 Word 문서에 첨부하려면 어떻게 해야 하나요?
삽입 → 개체 → 파일로부터 만들기를 사용하여 파일을 직접 포함하십시오.
결론
Word에 PDF를 삽입하는 방법에는 여러 가지가 있으며, 가장 좋은 방법은 의도한 결과에 따라 전적으로 달라집니다.
원본 파일을 첨부해야 할 때는 포함하는 것이 가장 좋습니다. 이미지로 변환하면 시각적 충실도가 보장됩니다. Word로 변환하면 편집 및 콘텐츠 재사용이 가능합니다.
Word가 PDF 파일을 내부적으로 처리하는 방식을 이해하고 적절한 기술을 선택하면 서식 문제를 피하고 문서 크기를 제어하며 더 신뢰할 수 있는 문서 워크플로우를 구축할 수 있습니다.