How to Convert DOCX to DOC Without Losing Formatting

DOCX is the default file format used by modern versions of Microsoft Word. However, many organizations and legacy systems still rely on the older DOC format for compatibility reasons. As a result, users sometimes need to convert DOCX to DOC to ensure that documents can be opened and edited in older versions of Word or integrated with existing workflows.
Whether you need to convert a single document or process large numbers of files, there are several practical solutions available. In this guide, you will learn how to convert DOCX files to DOC using Microsoft Word, free online tools, and automated Python solutions for batch processing.
1. Why Convert DOCX to DOC?
Although DOCX has been the default Word format since Microsoft Word 2007, the DOC format remains widely used in certain environments. Converting a DOCX file to DOC may be necessary in several scenarios.
1.1 Compatibility with Older Word Versions
Older versions of Microsoft Word—especially Word 2003 and earlier—cannot open DOCX files without compatibility packs. If a recipient uses an older version of Word, saving a document in DOC format ensures it can be opened without additional software.
1.2 Legacy Enterprise Systems
Some enterprise systems, document management platforms, and legacy applications still rely on DOC files. These systems were designed before DOCX became the standard and may only support the older binary format.
1.3 Cross-Organization Compatibility
When sharing documents across different organizations, using DOC format may improve compatibility and reduce formatting issues in older software environments.
For these reasons, many users look for a reliable DOCX to DOC converter or a simple way to perform the conversion manually or automatically.
2. Method 1: Convert DOCX to DOC in Microsoft Word (Most Reliable)
The simplest and most reliable way to convert a DOCX document is to use Microsoft Word itself. Word includes built-in compatibility features that allow you to save DOCX as DOC in just a few steps.
2.1 Step-by-Step Process
Step 1: Open the DOCX File
Launch Microsoft Word and open the DOCX file you want to convert.
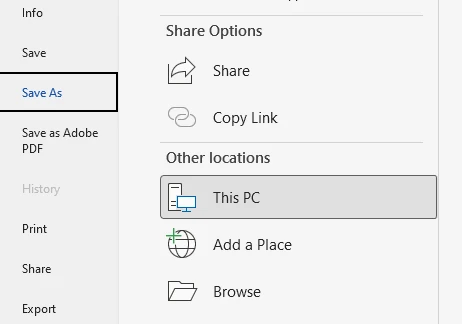
Step 2: Click "File" → "Save As"
In the menu, select File, then choose Save As. This option allows you to export the document in a different format.
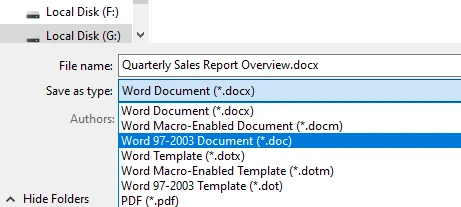
Step 3: Select the DOC Format
In the "Save as type" dropdown list, select:
Word 97–2003 Document (*.doc)
This format corresponds to the legacy DOC file type.
Step 4: Save the File
Choose the location where you want to store the file and click Save. Word will convert the document and create a new DOC version.
2.2 Pros
- Highest conversion accuracy
- Preserves layout, fonts, and formatting
- No internet connection required
- No file size limitations
- Complete privacy (files stay local)
2.3 Cons
- Requires Microsoft Word installation
- Manual process for each file
- Not suitable for batch processing
- Time-consuming for multiple documents
This method is ideal when you only need to convert a few documents and have Microsoft Word installed. Because the conversion happens inside Word, it generally preserves layout, fonts, and formatting with the highest accuracy.
If you need to perform the reverse conversion, you can also learn how to convert DOC files to DOCX files.
3. Method 2: Convert DOCX to DOC Online for Free (Fastest & Easiest)
Another convenient option is to use an online conversion tool. Many websites allow users to change DOCX to DOC online without installing additional software.
3.1 Typical Workflow
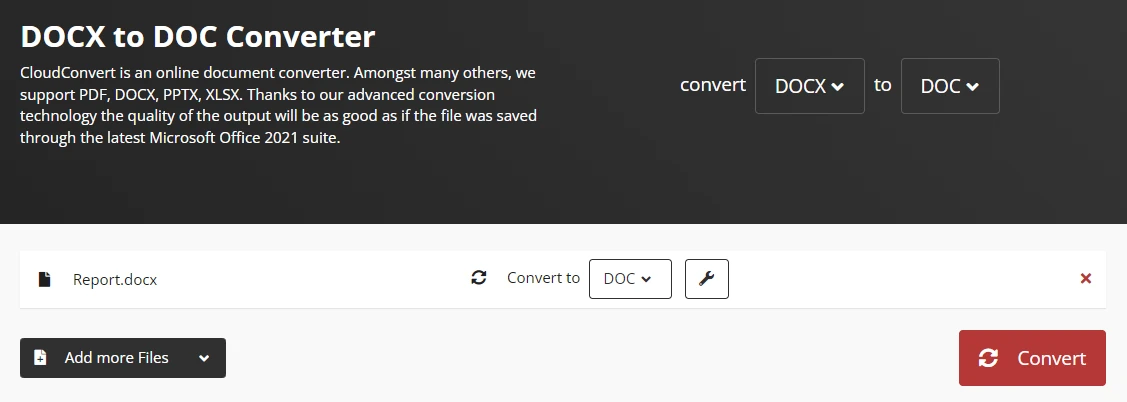
Here is a workflow example for converting a DOCX file to DOC online with CloudConvert:
-
Open the CloudConvert DOCX to DOC converter
-
Select or drag-and-drop to upload your DOCX file
-
Start the conversion process
-
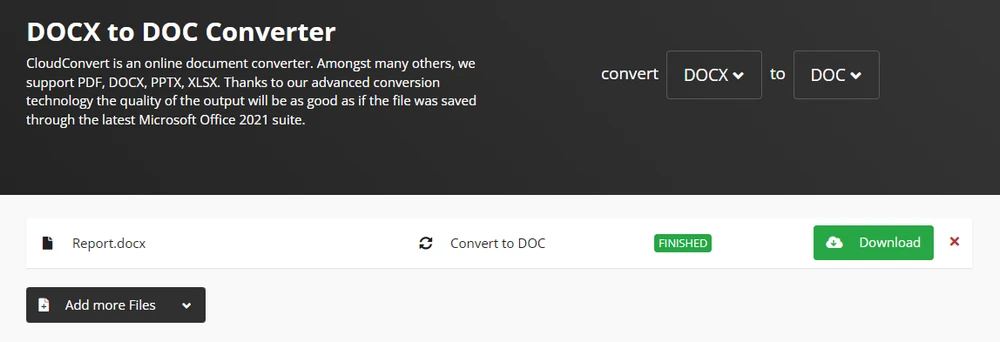
Download the converted file
Many platforms allow you to convert DOCX to DOC free, making them useful for quick and occasional conversions.
3.2 Pros
- No installation required
- Works on any device with internet access
- Very fast conversion
- No software cost
3.3 Cons
- Privacy concerns (files uploaded to cloud)
- File size limits may apply
- Batch conversion often restricted
- Internet connection required
- Sensitive documents may pose security risks
Online converters are particularly helpful if you do not have Microsoft Word installed or if you need to perform a quick format change from a mobile device. However, for these reasons, online tools are best suited for small files or non-confidential documents.
If you need to preserve the visual appearance of a document for sharing or presentation, you can also convert Word documents to images.
4. Method 3: Batch Convert DOCX to DOC Using Python (Bulk Processing)
If you need to convert large numbers of documents, manual methods quickly become impractical. In such cases, automation can significantly improve efficiency.
4.1 Why Use Python for Conversion?
Developers and IT teams often automate document processing workflows using Python. With a Python library such as Spire.Doc for Python, it is possible to programmatically convert Word documents between formats, including DOCX and DOC.
This approach is particularly useful for:
- Batch document processing
- Automated document pipelines
- Server-side document conversion
- Enterprise document management systems
- Integration with existing workflows
4.2 Installing the Required Library
Install Spire.Doc for Python using pip:
pip install spire.doc
4.3 Example: Convert Single DOCX to DOC
The following example demonstrates how to convert a DOCX file into a DOC file using Python.
from spire.doc import *
# Create a document object
document = Document()
# Load the DOCX file
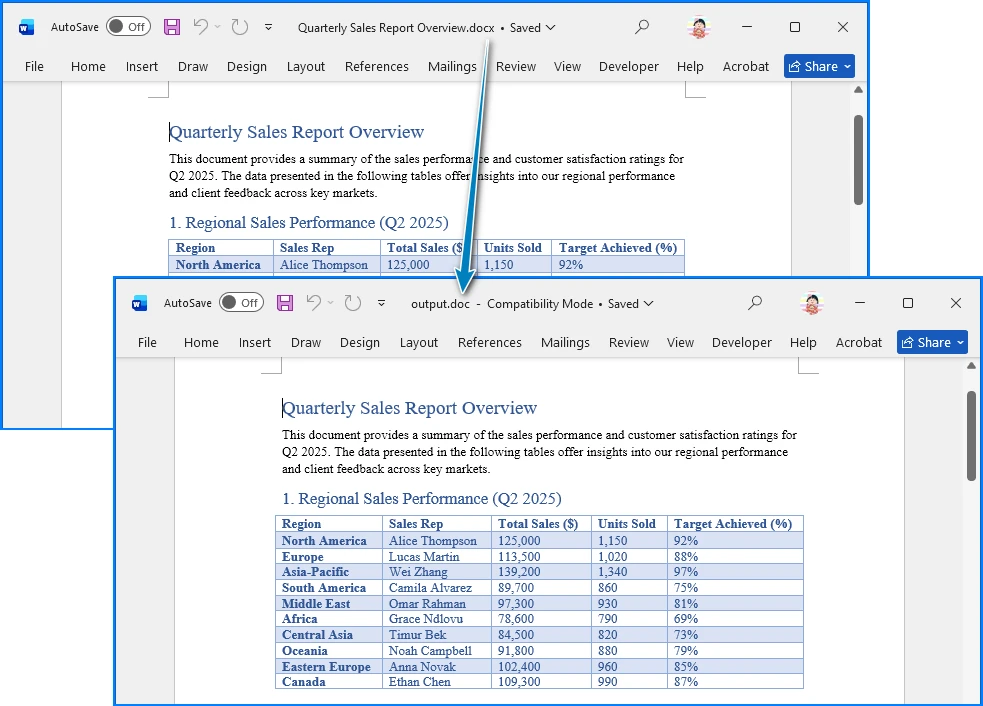
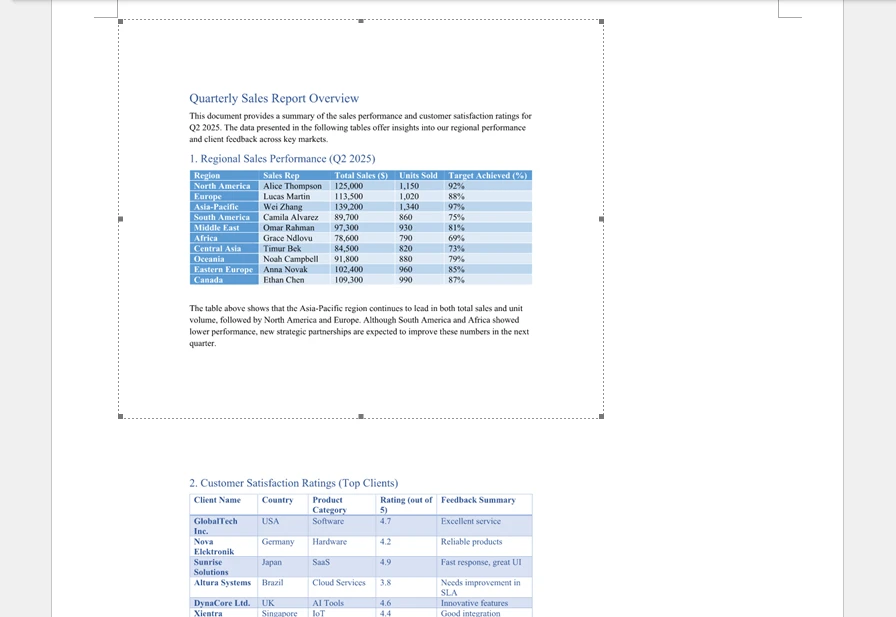
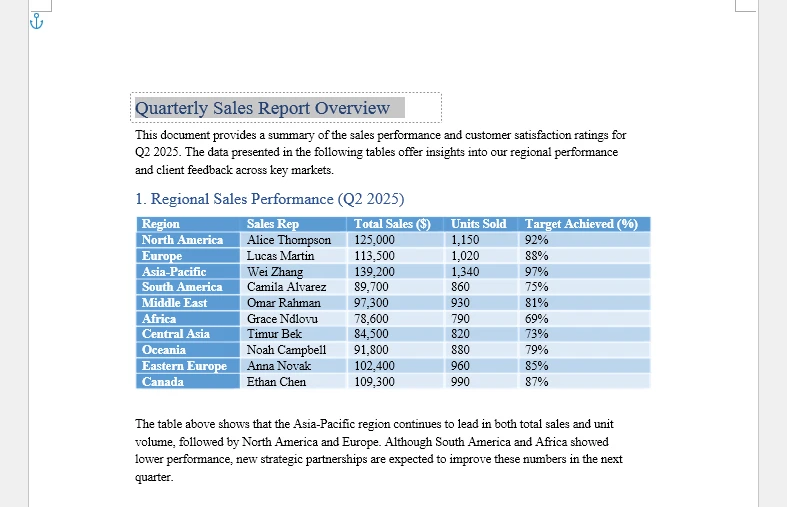
document.LoadFromFile("Quarterly Sales Report Overview.docx")
# Save the document as DOC
document.SaveToFile("output.doc", FileFormat.Doc)
# Close the document
document.Close()
In this example:
- A Document object is created
- The DOCX file is loaded using the LoadFromFile method
- The document is saved in DOC format using the SaveToFile method
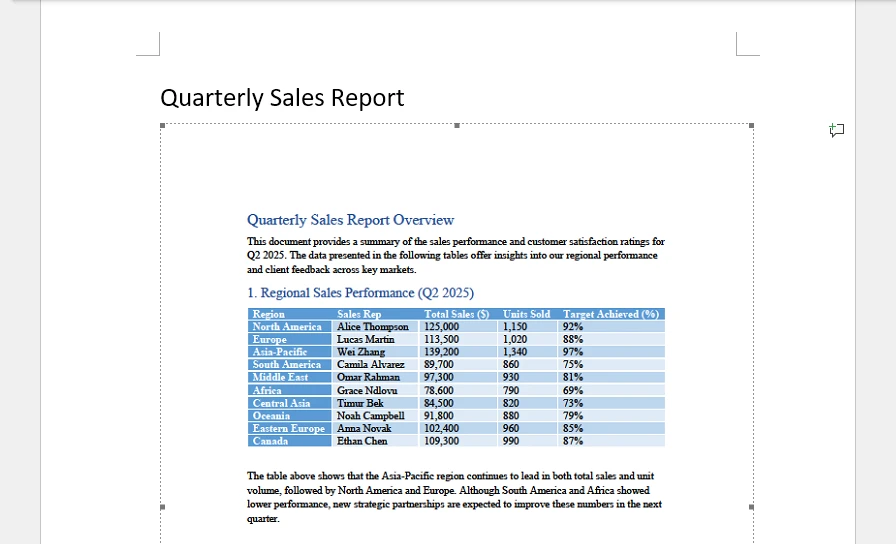
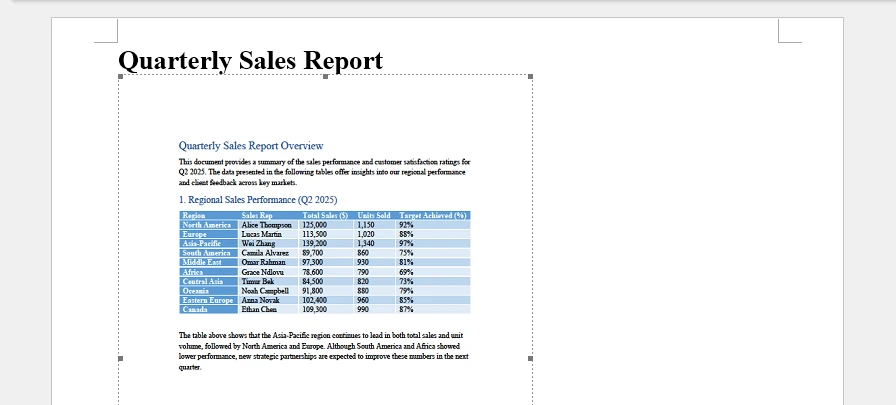
This script converts a single DOCX file into a DOC file while preserving the document structure and formatting. The following image shows the Word document before and after conversion:
4.4 Example: Batch Conversion Script
You can also convert multiple files automatically by scanning a directory and processing each DOCX document in a loop.
from spire.doc import *
import os

# Set input and output directories
input_dir = "input_docs/"
output_dir = "output_docs/"

# Create output directory if it doesn't exist
if not os.path.exists(output_dir):
    os.makedirs(output_dir)

# Loop through all files in input directory
for filename in os.listdir(input_dir):
    if filename.endswith(".docx"):
        # Create document object
        document = Document()

        # Load DOCX file
        input_path = os.path.join(input_dir, filename)
        document.LoadFromFile(input_path)

        # Generate output filename
        output_filename = filename.replace(".docx", ".doc")
        output_path = os.path.join(output_dir, output_filename)

        # Save as DOC
        document.SaveToFile(output_path, FileFormat.Doc)

        # Close document
        document.Close()

        print(f"Converted: {filename} → {output_filename}")
This batch script can:
- Locate all DOCX files in a folder
- Convert each file to DOC
- Save the results to a separate directory
- Provide progress feedback
4.5 Pros
- Automated batch processing
- No manual intervention required
- Consistent conversion quality
- Integrates with existing workflows
- Scalable for large document repositories
4.6 Cons
- Requires Python programming knowledge
- Initial setup time
- May need error handling for edge cases
- Requires library installation
This automation approach is ideal for organizations that regularly process large numbers of documents and need a reliable, scalable solution.
If your goal is consistent formatting across different devices, you can also consider using Python to convert Word documents to PDF.
5. How to Convert DOCX to DOC Without Losing Formatting
One common concern when converting document formats is whether the layout will remain intact. Users often want to convert DOCX to DOC without losing format, especially when documents contain complex elements such as tables, images, or custom fonts.
5.1 Understanding Format Differences
DOCX and DOC use different internal structures. DOCX is based on XML and uses a modern document architecture, while DOC relies on an older binary format. Because of this difference, certain formatting features may behave slightly differently after conversion.
5.2 Tips for Preserving Formatting
To minimize formatting issues, consider the following best practices:
- Use Microsoft Word's built-in Save As feature rather than third-party converters when possible
- Ensure the same fonts are installed on the system performing the conversion
- Check tables, charts, and images after conversion
- Avoid advanced formatting features that are not supported in older Word versions
- Test the conversion with a sample document before processing important files
5.3 When Formatting Issues Occur
If you encounter formatting problems:
- Reopen the DOCX file in Microsoft Word
- Use the native Save As feature instead of online converters
- Verify that all required fonts are installed
- Check for compatibility warnings in Word
- Consider simplifying complex layouts before conversion
In most cases, standard documents convert correctly with little or no visible change when using Microsoft Word's native conversion.
6. Comparison of All Methods
| Method | Accuracy | Speed | Privacy | Batch Support | Best For |
|---|---|---|---|---|---|
| Microsoft Word | ★★★★★ | ★★★★☆ | ★★★★★ | ★☆☆☆☆ | High-quality single file conversion |
| Online Converters | ★★★★☆ | ★★★★★ | ★★☆☆☆ | ★★☆☆☆ | Quick, one-time conversions |
| Python Batch Conversion | ★★★★★ | ★★★★★ | ★★★★★ | ★★★★★ | Large-scale automated workflows |
7. Best Practices for DOCX to DOC Conversion
To ensure the best conversion results, follow these guidelines:
7.1 Before Conversion
- Backup original DOCX files
- Test conversion with a sample document first
- Verify that required fonts are installed
- Check document complexity (tables, images, formatting)
7.2 During Conversion
- Use Microsoft Word's native Save As for highest accuracy
- Avoid online converters for sensitive documents
- Monitor batch conversion processes for errors
- Validate output files after conversion
7.3 After Conversion
- Review converted documents for formatting issues
- Test files in target systems or applications
- Archive original DOCX files if needed
- Document the conversion process for future reference
7.4 Security Considerations
- Never upload confidential documents to online converters
- Use local conversion methods for sensitive content
- Ensure proper access controls on converted files
- Consider encryption for documents containing personal data
8. Frequently Asked Questions
1. Can I convert DOCX to DOC for free?
Yes. You can convert DOCX files to DOC using Microsoft Word's built-in Save As feature or by using free online conversion tools. Many websites allow users to convert DOCX to DOC free, although file size or privacy limitations may apply.
2. Will converting DOCX to DOC affect formatting?
In most cases formatting remains consistent, but some advanced layout features may change slightly because DOC and DOCX use different internal formats. If you need to convert DOCX to DOC without losing format, using Microsoft Word's native conversion feature usually produces the most reliable results.
3. How can I convert multiple DOCX files to DOC at once?
For bulk conversions, automated tools or scripts are often the best option. Python libraries designed for document processing allow developers to convert many files in batch, making them suitable for large document repositories or automated workflows.
4. Which method is best for converting confidential documents?
For confidential or sensitive documents, always use local conversion methods such as Microsoft Word or Python scripts. Avoid online converters that require uploading files to external servers, as this poses privacy and security risks.
5. Can I convert DOCX to DOC without Microsoft Word?
Yes, you can use online converters or Python libraries like Spire.Doc to convert DOCX files to DOC without having Microsoft Word installed. However, using Microsoft Word typically provides the highest conversion accuracy and formatting preservation.
6. What should I do if formatting is lost after conversion?
If formatting is lost after conversion, try the following:
- Reopen the original DOCX file in Microsoft Word
- Use Word's native Save As feature instead of online converters
- Ensure all required fonts are installed
- Simplify complex layouts before conversion
- Check for compatibility warnings in Word before saving
9. Conclusion
Converting DOCX to DOC may be necessary for legacy systems, older Word versions, or compatibility-sensitive environments. Several methods exist depending on your needs.
Microsoft Word provides a reliable manual solution for occasional conversions. Online tools allow quick conversion when installing software isn’t an option, though privacy should be considered. For large-scale or automated workflows, Python-based solutions offer superior efficiency and scalability.
By choosing the method that suits your workflow, you can easily convert DOCX to DOC while maintaining document quality and compatibility—whether for a one-time task or robust batch processing.
See Also
How to Insert Video in PowerPoint: Complete Guide (2026)

Adding video to a presentation is one of the most effective ways to increase engagement. Whether you are creating a training deck, product demo, marketing pitch, or educational material, video can make your slides more dynamic and persuasive.
This complete guide explains reliable methods to insert video in PowerPoint presentations. You will learn manual approaches for local files, online videos, linked files, and highly accurate programmatic solutions. If you need to insert video in PowerPoint, embed video in PowerPoint presentation, or automate the entire process for batch processing, this article provides the practical knowledge and technical insights you need.
1. Why Add Video to PowerPoint Presentations
Before exploring insertion methods, it's important to understand why video integration matters and what challenges you might encounter.
1.1 Benefits of Video in Presentations
Video content provides several advantages:
- Increased engagement – Visual and auditory content captures attention more effectively than static slides
- Complex demonstrations – Show processes, products, or procedures that are difficult to explain in text
- Emotional connection – Video can create stronger emotional impact than images alone
- Professional polish – High-quality video content elevates presentation quality
1.2 Common Challenges
However, inserting video presents several technical challenges:
- File size concerns – Embedded videos can dramatically increase PPT file size
- Format compatibility – Not all video formats work across different PowerPoint versions
- Playback issues – Codec problems can prevent videos from playing correctly
- Portability – Linked videos may break when sharing presentations
Understanding these challenges helps you select the right insertion method for your specific use case.
2. Overview of Reliable Methods
This guide covers four practical ways to insert video into PowerPoint presentations:
- Insert local video file – most common method, works offline
- Embed online video – keeps file size small, requires internet
- Link to external video file – balances size and control
- Programmatic insertion – automation and batch processing
Tip: Most manual methods insert videos into individual slides. If you need to insert videos across multiple presentations or automate the process, the programmatic approach is most efficient.
The most flexible method is using Python automation, which enables batch processing, server-side generation, and integration with business workflows.
3. Method 1: Insert Video from Your Computer (Local File)
The simplest way to insert video in PowerPoint slide is by adding a local video file stored on your computer.
Step-by-Step Instructions
Tip: Make sure your video file is in a supported format before starting. MP4 with H.264 encoding works best.
-
Open your PowerPoint presentation - Launch PowerPoint and open the presentation where you want to add video.
-
Navigate to the target slide - Go to the specific slide where the video should appear.
-
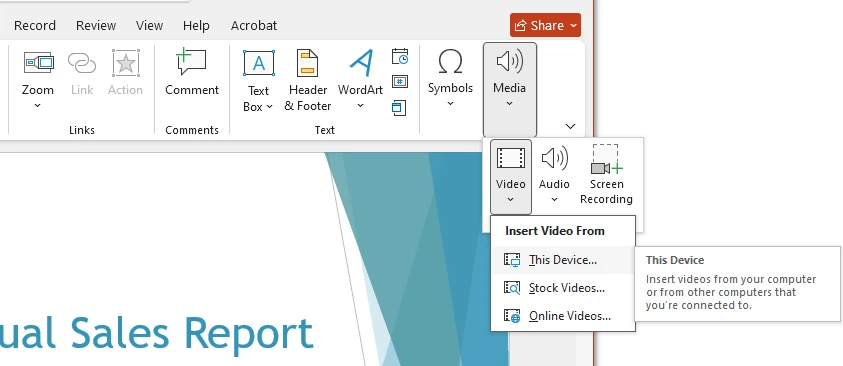
Click the Insert tab - Located in the top menu ribbon.
-
Select Video - In the Media group, click the Video button.
-
Choose This Device - Select "This Device" from the dropdown menu.
-
Select and insert - Browse to your video file, select it, and click Insert.
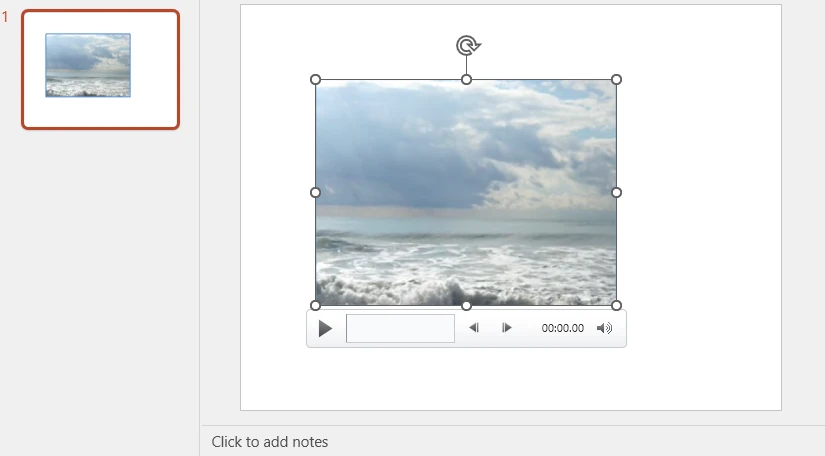
The video will appear on the slide as a media object. You can:
- Resize by dragging the corners
- Reposition by clicking and dragging
- Rotate using the rotation handle
This is the most straightforward way to insert video in PowerPoint slides, and it works entirely offline.
Supported Video Formats
PowerPoint supports several video formats, including:
- MP4 (recommended for compatibility)
- MOV
- M4V
- WEBM
For best results, use MP4 encoded with H.264 video and AAC audio.
You can find the full list of supported media formats in the official Microsoft guide on video and audio formats supported in PowerPoint.
Adjusting Playback Settings
After inserting the video, you can customize playback options:
- Start Automatically or On Click
- Play Full Screen
- Loop Until Stopped
- Trim Video
- Fade In / Fade Out
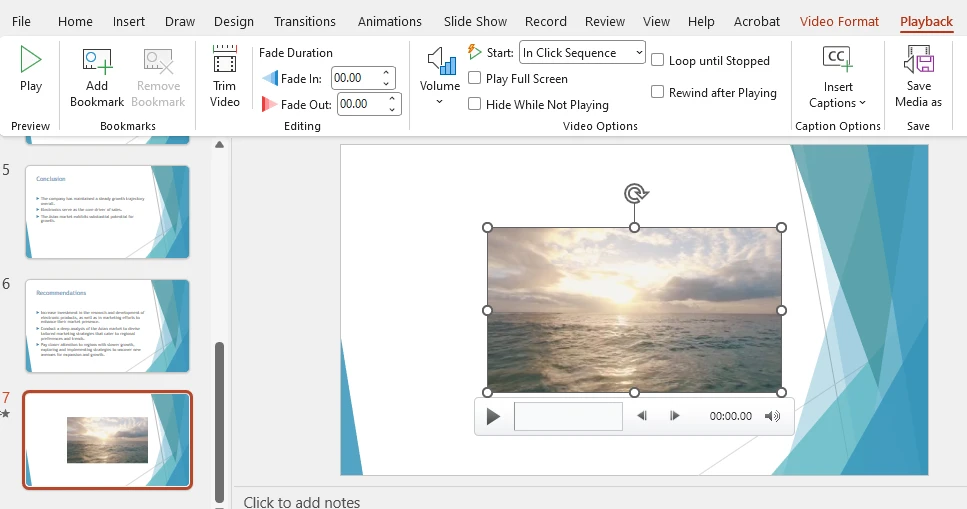
These options are available under the Playback tab once the video is selected.
Advantages and Disadvantages of Local Video Insertion
Advantages
- Easy to use
- Works offline
- Full playback control
Disadvantages
- Increases PPT file size
- May cause sharing issues if the file becomes too large
Local insertion is best for presentations that need to be portable and work offline.
Note: Embedded videos are supported in modern PPTX presentations. If you are working with an older PPT file, consider converting it to PPTX format first. See our guide on how to convert PPT to PPTX.
4. Method 2: Embed Video in PowerPoint Presentation (Online Video)
Another popular approach is to embed video in PowerPoint presentation directly from an online source such as YouTube.
This method keeps your file size small because the video is streamed rather than stored inside the presentation.
How to Embed a YouTube Video
-
Go to the slide where you want the video.
-
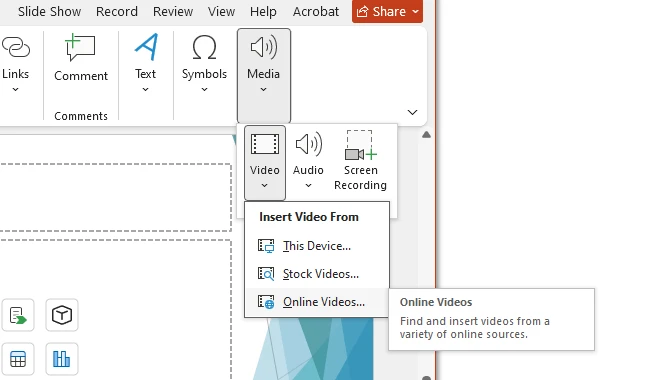
Click Insert → Video → Online Video.
-
Paste the video URL or embed code.
-
Click Insert.
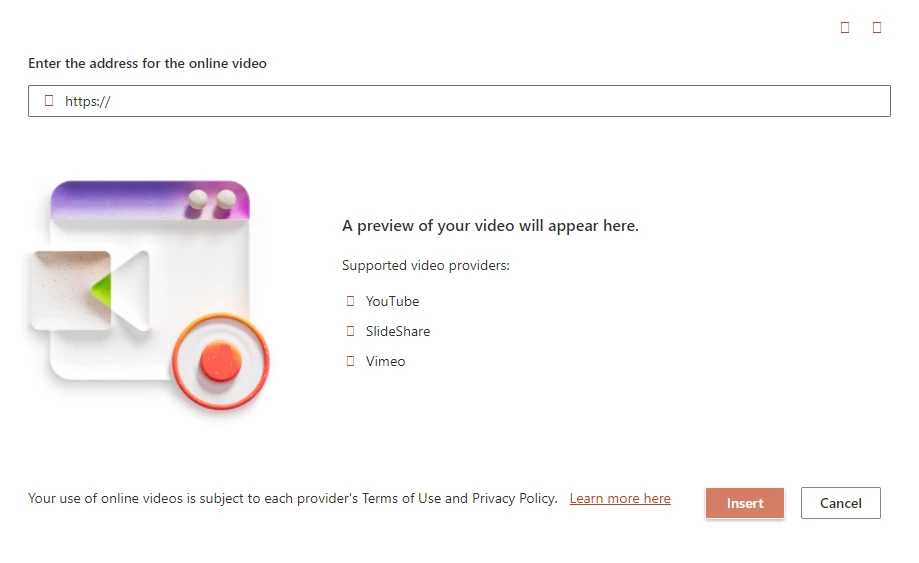
PowerPoint will create an embedded video frame on the slide.
When to Use Embedding
Embedding is ideal when:
- You want to reduce PPT file size
- The video is publicly hosted online
- You need frequently updated content
Limitations of Embedded Videos
However, there are some important considerations:
- Requires an internet connection during presentation
- May not work behind corporate firewalls
- Video could become unavailable if removed online
- Video platforms may require login before playback
If reliability is critical, local insertion may be safer.
5. Method 3: How to Attach a Video in PPT (Link Instead of Embed)
Some users ask how to attach video in PPT rather than fully embedding it.
This method links to an external video file instead of storing it inside the presentation.
Embed vs Attach: What's the Difference?
| Feature | Embed Video | Attach (Link) Video |
|---|---|---|
| Stored inside PPT | Yes | No |
| File size | Larger | Smaller |
| Internet required | No | No (if local) |
| Risk of broken link | No | Yes |
How to Link a Video File
-
Go to Insert → Video → This Device.
-
Select the video file.
-
Click the dropdown arrow next to Insert.
-
Choose Link to File instead of Insert.
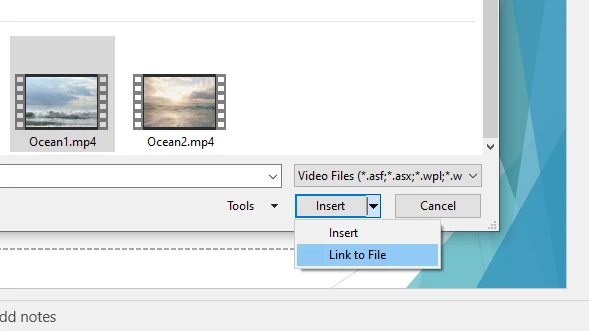
Now the PPT will reference the video externally.
When Linking Makes Sense
- Very large video files
- Shared network storage environments
- Centralized media management
Be careful when sharing the presentation — you must send the video file together.
If you are also adding data visualizations to your slides, you may want to learn how to insert a chart in PowerPoint.
6. Common Problems When Inserting Video into PowerPoint
Even when you know how to add video into PowerPoint presentation, issues can still occur.
Here are some common problems and their solutions:
6.1 Video Not Playing
Often caused by unsupported codecs.
Solution: Convert the video to MP4 (H.264 + AAC).
6.2 File Too Large
Embedding high-resolution videos can dramatically increase PPT size.
Solution: Compress media using File → Info → Compress Media.
6.3 Compatibility Issues (Mac vs Windows)
Some formats behave differently across systems.
Solution: Use MP4 for maximum compatibility.
6.4 Lag During Playback
Large videos or slow hardware can cause stuttering.
Solution: Optimize video resolution or use a linked file.
7. Method 4: Insert Video into PowerPoint Using Python (Automated Solution)
For developers and businesses, Python provides a powerful way to automate PowerPoint creation and video insertion.
Using Spire.Presentation for Python, you can insert videos into slides without requiring Microsoft Office.
Why Use Python for PowerPoint Automation?
- Batch processing of presentations
- Integration with backend systems
- Server-side document generation
- No manual UI interaction
- Repeatable workflows
Install the Library
pip install Spire.Presentation
Quick Example: Insert Video in PowerPoint with Python
If you only need a minimal example, the following code inserts a video into the first slide of a new PowerPoint presentation.
from spire.presentation import *

# Create presentation
presentation = Presentation()

# Add video to first slide
slide = presentation.Slides[0]

video_rect = RectangleF.FromLTRB(100, 100, 500, 400)
slide.Shapes.AppendVideoMedia("demo_video.mp4", video_rect)

# Save presentation
presentation.SaveToFile("video_demo.pptx", FileFormat.Pptx2019)
presentation.Dispose()
This minimal example shows how to create a new PowerPoint presentation and inserts a video into the first slide at the specified position with Python code.
### Advanced Example: Insert or Link Video in PowerPoint Using Python
Below is an enhanced example with error handling and additional options:
from spire.presentation import *
import os
from pathlib import Path


def insert_video_to_powerpoint(video_path, output_path, slide_index=0, position=(100, 100), size=(400, 300),
                               poster_image_path=None, embed_video=True):
    """
    Insert a video into PowerPoint presentation programmatically

    Args:
        video_path: Path to the video file (MP4, MOV, WMV, AVI)
        output_path: Output PowerPoint file path (.pptx)
        slide_index: Slide number (0-based) where video should be inserted
        position: Tuple (x, y) coordinates for video placement
        size: Tuple (width, height) for video dimensions
        poster_image_path: Optional path to poster/thumbnail image for the video
        embed_video: Boolean value indicating whether to embed the video (True)
                     or link to the video file (False)
    """
    try:
        # Validate input file
        if not os.path.exists(video_path):
            raise FileNotFoundError(f"Video file not found: {video_path}")

        # Check file extension
        valid_extensions = {'.mp4', '.mov', '.wmv', '.avi'}
        file_ext = Path(video_path).suffix.lower()
        if file_ext not in valid_extensions:
            print(f"Warning: {file_ext} may not be fully supported. MP4 is recommended.")

        # Create presentation object
        presentation = Presentation()

        # Ensure we have enough slides
        while presentation.Slides.Count <= slide_index:
            presentation.Slides.Append()

        # Get target slide
        slide = presentation.Slides[slide_index]

        # Create rectangle for video position and size
        video_rect = RectangleF.FromLTRB(
            position[0],
            position[1],
            position[0] + size[0],
            position[1] + size[1]
        )

        # Insert video based on embedding mode
        if embed_video:
            # Embed the video into the presentation
            video = slide.Shapes.AppendVideoMedia(video_path, video_rect)
        else:
            # Insert the video as a link (external file reference)
            video = slide.Shapes.AppendVideoMediaLink(video_path, video_rect, False)

        # Set poster image if provided
        if poster_image_path and os.path.exists(poster_image_path):
            video.PictureFill.Picture.Url = poster_image_path

        # Save the presentation
        presentation.SaveToFile(output_path, FileFormat.Pptx2019)
        print(f"Successfully created: {output_path}")
        print(f"   - Video inserted at slide {slide_index + 1}")
        print(f"   - Mode: {'Embedded' if embed_video else 'Linked'}")
        print(f"   - Position: {position}")
        print(f"   - Size: {size}")

        return True

    except Exception as e:
        print(f"Error inserting video: {e}")
        return False

    finally:
        # Clean up resources
        if 'presentation' in locals():
            presentation.Dispose()


# Usage examples
if __name__ == "__main__":

    # Example 1: Basic usage (embed video)
    insert_video_to_powerpoint(
        video_path="presentation_video.mp4",
        output_path="presentation_with_video.pptx"
    )

    # Example 2: Insert linked video
    insert_video_to_powerpoint(
        video_path="demo_video.mp4",
        output_path="linked_video_slide.pptx",
        embed_video=False
    )

    # Example 3: Custom position and size
    insert_video_to_powerpoint(
        video_path="demo_video.mp4",
        output_path="custom_video_slide.pptx",
        slide_index=2,  # Third slide
        position=(150, 100),
        size=(500, 300)
    )

    # Example 4: With poster image
    if os.path.exists("video_thumbnail.png"):
        insert_video_to_powerpoint(
            video_path="demo_video.mp4",
            output_path="video_with_poster.pptx",
            poster_image_path="video_thumbnail.png"
        )

    # Example 5: Batch processing multiple videos
    videos = [
        ("intro.mp4", 0, (100, 100)),
        ("tutorial.mp4", 1, (100, 100)),
        ("conclusion.mp4", 2, (100, 100))
    ]

    for video_file, slide_num, pos in videos:
        if os.path.exists(video_file):
            insert_video_to_powerpoint(
                video_path=video_file,
                output_path=f"batch_output_slide{slide_num}.pptx",
                slide_index=slide_num,
                position=pos
            )
Below is a preview of the generated PowerPoint file 'video_with_poster.pptx' with video insertion:
What This Code Does
This example demonstrates how to programmatically insert a video into a PowerPoint presentation using Python. The script includes several practical features that make it suitable for real-world automation scenarios.
The function performs the following operations:
- Creates a PowerPoint presentation if one does not already exist.
- Automatically adds slides when the specified slide index does not exist.
- Inserts a video into a specific slide using customizable position and size parameters.
- Supports two insertion modes:
- Embedded video – stores the video inside the PPT file.
- Linked video – references the video as an external file to keep the presentation smaller.
- Optionally sets a poster image that appears before the video starts playing.
- Includes error handling to prevent failures when files are missing.
- Saves the generated presentation as a PPTX file.
The provided examples demonstrate several common scenarios:
- Basic video insertion
- Linking a video instead of embedding it
- Customizing video position and size
- Adding a poster image thumbnail
- Batch inserting multiple videos across slides
Advantages of Using Spire.Presentation
- No dependency on Microsoft Office
- Works in server environments
- Supports multimedia elements
- Suitable for enterprise automation
For teams generating large numbers of presentations, this approach provides far greater scalability than manual methods.
If you need to further manage media files using Python, you can also learn how to insert or extract video and audio in PowerPoint presentations.
8. Accuracy Comparison of All Methods
| Method | Ease of Use | File Size | Internet Required | Automation | Best For |
|---|---|---|---|---|---|
| Insert Local Video | Easy | Large | No | No | Portable presentations |
| Embed Online Video | Easy | Small | Yes | No | Internet-connected presentations |
| Attach (Link) Video | Medium | Small | No | No | Large files, shared storage |
| Python Automation | Advanced | Flexible | No | Yes | Business automation workflows |
9. Best Practices for High-Quality Video Insertion
To ensure the best results, follow these best practices:
Video Preparation
- Use MP4 format with H.264 video and AAC audio
- Optimize video resolution (1080p or lower for presentations)
- Compress large videos before embedding
- Test playback on target devices
File Management
- Keep videos in the same folder as your presentation
- Use descriptive filenames
- Maintain backup copies of original video files
- Consider cloud storage for linked videos
Technical Recommendations
- Use programmatic insertion for batch workflows
- Test on both Windows and Mac systems
- Validate video playback before presentations
- Consider audience internet access for embedded videos
10. Frequently Asked Questions
1. How do I insert a video in PowerPoint without increasing file size?
Yes. You can either embed an online video or link to a local file instead of embedding it. Linking keeps the PPT file smaller but requires access to the external file.
2. How do I insert a video into a specific slide?
Simply navigate to the target slide before using Insert → Video. In automation scenarios, you can specify the slide index programmatically.
3. What is the best video format for PowerPoint?
MP4 with H.264 video and AAC audio is the most compatible format across Windows and Mac systems.
4. Why is my video not playing in PowerPoint?
Common reasons include unsupported codecs, corrupted files, or embedding issues. Converting the video to MP4 usually resolves the problem.
5. Can I automatically insert videos into PowerPoint?
Yes. Using Python libraries such as Spire.Presentation, you can programmatically insert videos into PowerPoint slides, making it ideal for batch processing and backend automation.
11. Conclusion
Now you know how to insert video in PowerPoint using multiple approaches:
- Insert a local video file
- Embed video in PowerPoint presentation from online sources
- Attach a linked video file
- Automate video insertion using Python
For individual users creating occasional presentations, PowerPoint's built-in tools are more than sufficient.
However, for developers, businesses, and enterprise workflows that require scalable document generation, automation provides a far more efficient and flexible solution.
Choosing the right method depends entirely on your use case — simplicity for manual editing, or scalability for automated production.
To explore the full capabilities of Spire.Presentation for Python without limitations, you can apply for a free temporary license.
See Also
How to Insert a PDF into Word: Keep Layout and Editability
Table of Contents
- Understanding How Word Handles PDF Files
- Method 1: Insert a PDF as an Object (Attach Without Editing)
- Method 2: Convert the PDF to Images (Preserve Exact Layout)
- Method 3: Convert the PDF to Word (Make It Editable)
- Common Mistakes When Inserting PDFs into Word
- Automating the Process Programmatically (For Developers)
- Choosing the Right Method
- Frequently Asked Questions
When preparing reports, contracts, academic papers, or technical documentation, you may need to include a PDF file inside a Microsoft Word document. However, “inserting” a PDF can mean different things depending on your goal.
Do you want to:
- Attach the original PDF without modifying it?
- Preserve the exact visual layout?
- Convert the PDF into editable Word content?
Each objective requires a different method. Choosing the wrong approach can lead to formatting issues, missing pages, layout distortion, or unnecessary file size growth.
This guide explains how to insert a PDF into Word using three reliable approaches — embedding it as an object, converting it to images, or converting it into an editable DOCX file. It covers both manual methods in Microsoft Word and programmatic automation using Python.
Quick Navigation
- Understanding How Word Handles PDF Files
- Method 1: Insert a PDF as an Object (Attach Without Editing)
- Method 2: Convert the PDF to Images (Preserve Exact Layout)
- Method 3: Convert the PDF to Word (Make It Editable)
- Common Mistakes When Inserting PDFs into Word
- Automating the Process Programmatically (For Developers)
- Choosing the Right Method
- Frequently Asked Questions
Understanding How Word Handles PDF Files
Microsoft Word documents (DOCX) are flow-based and stored as zipped XML packages. In contrast, PDF files use fixed positioning to ensure layout consistency across devices.
Because of this structural difference:
- Embedding a PDF attaches it as a binary OLE object.
- Converting a PDF reconstructs layout into editable elements.
- Inserting as images preserves appearance but removes editability.
Word uses Object Linking and Embedding (OLE) technology when inserting external files as objects. Understanding this behavior helps explain why only the first page preview appears and why embedded PDFs increase document size.
Method 1: Insert a PDF as an Object (Attach Without Editing)
Best for: Attaching a PDF file while preserving its original structure.
If you need to attach a PDF to a Word document — such as a contract appendix or supporting material — inserting it as an object is the most appropriate solution.
When inserted this way, the PDF becomes an embedded OLE object. The entire file is stored inside the Word document and can be opened separately by double-clicking it.
Typical Use Cases
- Contracts and agreements
- Technical documentation
- Academic appendices
- Supporting reference materials
Steps: Insert a PDF as an Object
- Open your Word document.
- Place the cursor where the PDF should appear.
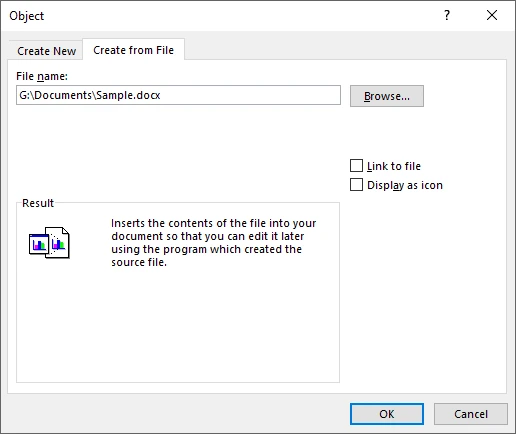
- Go to the Insert tab.
- Click Object (in the Text group).
- Select Create from File.
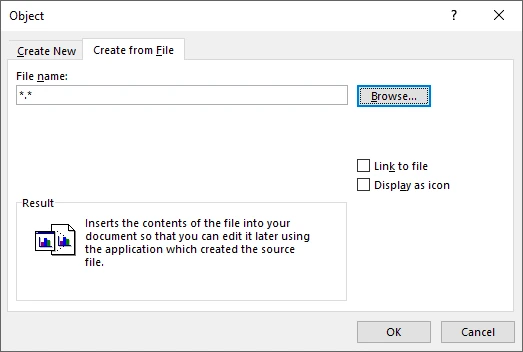
- Click Browse and choose the PDF file.
- Select one of the following options:
- Display as icon – shows a clickable PDF icon.
- Link to file – links externally instead of embedding.
- Leave both unchecked – embeds the file and displays a preview (typically the first page).
- Click OK.
The PDF is now embedded in the Word document. Below is an example of the inserted PDF object:
Important Technical Notes
- Word embeds the entire PDF as a single OLE object.
- Only the first page is displayed as a preview.
- The content cannot be edited directly inside Word.
- The embedded file increases the overall DOCX size.
- Preview rendering may depend on whether a PDF handler (such as Adobe Acrobat) is installed.
Why Does Only the First Page Appear?
Word treats the PDF as one embedded object rather than separate pages. The preview is only a visual representation of the first page, while the complete PDF remains attached internally.
If you want to insert other types of files (such as Excel sheets or PowerPoint presentations) as OLE objects in Word, refer to our detailed guide on inserting attachments into Word documents.
Method 2: Convert the PDF to Images (Preserve Exact Layout)
Best for: Maintaining precise visual fidelity.
If layout accuracy is critical — for example in marketing brochures, certificates, scanned files, or design-sensitive documents — converting each PDF page into an image before inserting it into Word is often the safest approach.
Since images are static, Word does not attempt to reconstruct text, spacing, or positioning. This avoids layout reflow issues that can occur during PDF-to-Word conversion.
How This Method Works
- Convert each PDF page into an image file (PNG or JPEG).
- Insert the images into Word in sequence.
- Add page breaks between images if necessary.
Because Word treats the content as images rather than editable text, the visual result remains identical to the source PDF.
Common PDF-to-image conversion tools include:
- Adobe Acrobat
- Microsoft Word
- Online converters
If you prefer an online solution, you can use an online PDF-to-image converter to generate high-resolution page images before inserting them into Word.
Recommended Image Settings
To maintain clarity and print quality:
- Use 200–300 DPI for print documents.
- Prefer PNG for text-heavy pages.
- Use JPEG only when file size reduction is a priority.
Advantages
- Exact visual consistency
- No font substitution
- No layout distortion
- Consistent rendering across Word versions
Limitations
- Content is not editable
- Document size may increase significantly
- Large or high-resolution images may impact performance
This method is recommended when visual fidelity is more important than editability.
Method 3: Convert the PDF to Word (Make It Editable)
Best for: Editing or reusing PDF content.
If your objective is to modify the content rather than attach it, converting the PDF into an editable Word document is necessary.
Many users search for how to import a PDF into Word, but technically Word performs a conversion process rather than a direct import.
Option 1: Open the PDF Directly in Word
Modern versions of Word (2013 and later, including Microsoft 365) support built-in PDF conversion.
Steps:
- Open Word.
- Click File → Open.
- Select the PDF file.
- Confirm the conversion prompt.
Word reconstructs the PDF layout into editable content.
What Happens During Conversion
Because PDFs use fixed positioning and Word uses flow-based layout, reconstruction may result in:
- Font substitutions
- Spacing differences
- Table restructuring
- Paragraph reflow
- Minor alignment shifts
Complex layouts may require manual correction after conversion.
Option 2: Use a Dedicated PDF-to-Word Converter
You may also use an online or offline PDF-to-Word conversion tool to generate a DOCX file before inserting it into your document.
If you prefer a browser-based solution, an online PDF-to-Word converter can simplify occasional or lightweight conversion tasks.
For a step-by-step guide, see our complete tutorial on PDF to Word conversion.
Common Mistakes When Inserting PDFs into Word
Many formatting issues occur due to misunderstanding how Word handles PDFs:
-
Expecting multi-page previews when embedding – Word displays only the first page of an embedded PDF as a preview. If you need all pages visible, convert the PDF to images or to an editable Word document instead.
-
Attempting to edit embedded PDFs directly – Embedded PDFs remain separate file objects and cannot be edited inside Word. To modify content, convert the PDF to Word format before inserting it.
-
Using low-resolution images for printing – Converting pages at low DPI can result in blurry output. Use 200–300 DPI for print-quality results.
-
Ignoring file size growth after embedding large PDFs – Embedding stores the entire file inside the DOCX, which can significantly increase document size. Consider linking to the PDF if file size is a concern.
-
Assuming PDF conversion will preserve layout perfectly – Complex formatting, fonts, and graphics may shift during conversion. Use image-based insertion if exact visual fidelity is required.
Understanding the differences between embedding, imaging, and converting helps you choose the most appropriate method and avoid unnecessary formatting corrections.
Automating the Process Programmatically (For Developers)
In enterprise reporting systems or batch processing workflows, manual insertion is impractical.
Using Python libraries such as Spire.Doc for Python and Spire.PDF for Python, you can automate:
- Embedding PDFs as OLE objects
- Converting PDF pages to images
- Converting PDFs to editable DOCX files
Installation
To automate PDF insertion or image conversion in Word using Python, you need to install the required libraries. In this example, we use Spire.Doc for Word document processing and Spire.PDF for handling PDF files.
Make sure Python 3.7 or later is installed in your environment. Then run the following commands:
pip install Spire.Doc
pip install Spire.PDF
After installation, you can import the libraries in your Python script and begin automating document processing tasks.
1. Embed a PDF as an OLE Object
This method embeds the PDF file directly into a Word document as an OLE object. The entire PDF is stored inside the DOCX file, while a preview image is displayed in the document interface. The preview image is generated from the first page of the PDF and used as the visual representation of the embedded object.
from spire.doc import Document, Stream, DocPicture, FileFormat, OleObjectType
from spire.pdf import PdfDocument

document = Document()
section = document.AddSection()

pdf = PdfDocument()
pdf.LoadFromFile("Sample.pdf")

# Convert first page to image for preview
image_stream = pdf.SaveAsImage(0, 300, 300)  # pageIndex, dpiX, dpiY
image_bytes = image_stream.ToArray()

image = DocPicture(document)
image.LoadImage(Stream(image_bytes))

pdf_object = section.AddParagraph().AppendOleObject(
    "Sample.pdf",
    image,
    OleObjectType.AdobeAcrobatDocument
)

pdf_object.Width = 200
pdf_object.Height = 400
pdf_object.DisplayAsIcon = False

document.SaveToFile("Embed_PDF.docx", FileFormat.Docx)
document.Close()
pdf.Close()
Key Technical Points:
- AppendOleObject() embeds the full PDF file into the Word document.
- OleObjectType.AdobeAcrobatDocument specifies the object type.
- SaveAsImage(pageIndex, dpiX, dpiY) generates the preview image displayed in Word.
Higher DPI values produce sharper previews but increase file size.
Below is a preview of the generated Word document:
For a more detailed guide on embedding OLE objects into Word using Python, refer to Embed OLE Objects in Word with Python.
2. Convert PDF Pages to Images and Insert
This approach converts each PDF page into an image and inserts the images into the Word document sequentially. Unlike OLE embedding, the PDF file itself is not stored as an attachment — only static images are inserted.
from spire.pdf import PdfDocument
from spire.doc import Document, Stream, FileFormat

pdf = PdfDocument()
pdf.LoadFromFile("Sample.pdf")

document = Document()
section = document.AddSection()

for i in range(pdf.Pages.Count):
    image_stream = pdf.SaveAsImage(i, 300, 300)
    paragraph = section.AddParagraph()
    paragraph.AppendPicture(Stream(image_stream.ToArray()))

document.SaveToFile("PDF_As_Images.docx", FileFormat.Docx)
document.Close()
pdf.Close()
Technical Notes:
- Each page is converted using SaveAsImage().
- Images are inserted using AppendPicture().
- The resulting Word file contains only images, not the original PDF file.
- DPI settings directly affect clarity and document size.
Below is an example of the generated Word document:
3. Convert PDF to Editable Word
This method converts the PDF into an editable Word document format (DOCX). Instead of embedding or inserting images, the PDF content is reconstructed into Word-native elements such as paragraphs, tables, and images.
from spire.pdf import *

pdf = PdfDocument()
pdf.LoadFromFile("Sample.pdf")

pdf.ConvertOptions.SetPdfToDocOptions(True, False)

pdf.SaveToFile("Converted.docx", FileFormat.DOCX)
pdf.Close()
Technical Notes:
-
SetPdfToDocOptions(usePsMode, useFlowMode) controls layout reconstruction:
- usePsMode=True – enables PS Mode, which preserves fixed-page positioning more accurately.
- useFlowRecognitionMode=False – disables Flow Recognition Mode, meaning Word will not attempt to flow text dynamically; content layout stays closer to the original PDF.
-
The output file is a fully editable DOCX document.
-
Complex layouts, fonts, or graphics may still require minor manual adjustments after conversion.
Below is a preview of the conversion result:
The resulting DOCX file can then be opened, edited, or merged into another Word document.
For more details on PDF conversion to Word using Python, refer to How to Convert PDF to Word with Python.
Choosing the Right Method
| Objective | Recommended Method | Key Considerations |
|---|---|---|
| Attach without editing | Insert as Object | Embeds the PDF as an OLE object; content remains uneditable; only a preview is displayed. |
| Preserve exact layout | Convert to Images | Inserts static images of each page; visual fidelity is preserved; file size may increase. |
| Edit content | Convert to Word | Converts PDF to editable DOCX; allows modifications; complex layouts may require adjustments. |
Selecting the correct method based on your goal ensures efficient document handling, prevents formatting issues, and aligns with your workflow requirements.
Frequently Asked Questions
Can I insert a multi-page PDF into Word?
Yes. When embedding as an object, the entire file is attached as one item. When converting to images or Word format, each page appears separately.
Why does formatting change after converting a PDF?
PDF files store content using fixed coordinates. During conversion, Word reconstructs the layout into a flow-based editable structure, which may alter spacing or alignment.
How do I attach a PDF to a Word document without editing it?
Use Insert → Object → Create from File to embed the file directly.
Conclusion
There are multiple ways to insert a PDF into Word, and the best method depends entirely on your intended outcome.
Embedding works best when you need to attach the original file. Converting to images guarantees visual fidelity. Converting to Word enables editing and content reuse.
By understanding how Word processes PDF files internally and selecting the appropriate technique, you can avoid formatting surprises, control document size, and build more reliable document workflows.
See Also
How to Insert Objects in Excel: Embedding and Linking Files
Table of Contents
- What Is an Object in Excel?
- Method 1: How to Insert Object in Excel Manually
- Method 2: Insert Object in Excel Using VBA
- Method 3: Automatically Insert Documents into Excel Using Python
- Embedded vs Linked Objects: How to Decide
- Performance and File Size Best Practices
- FAQs About Inserting Objects in Excel
Excel is widely used for data analysis and reporting, but many workflows depend on supporting documents such as PDFs, Word files, or additional spreadsheets. Instead of managing these files separately, you can insert objects in Excel to keep everything organized within a single workbook.
The Insert Object feature allows you to embed or link external files directly into a worksheet, improving accessibility while reducing document fragmentation. Knowing how to insert an object in Excel is especially valuable when building reports, sharing workbooks, or creating automated document workflows.
This guide explains how to insert objects in Excel using manual steps, VBA, and Python so you can choose the method that best fits your workflow, scalability needs, and technical environment.
Quick Navigation
- What Is an Object in Excel?
- Method 1: How to Insert Object in Excel Manually
- Method 2: Insert Object in Excel Using VBA
- Method 3: Automatically Insert Documents into Excel Using Python
- Embedded vs Linked Objects: How to Decide
- Performance and File Size Best Practices
- FAQs About Inserting Objects in Excel
What Is an Object in Excel?
When you select Insert → Object in Excel, you are using OLE (Object Linking and Embedding) technology. OLE allows one application to display or interact with content created in another application directly inside the workbook.
You can insert a wide range of file types, including:
- PDF files
- Microsoft Word documents
- PowerPoint presentations
- Images
- Other Excel workbooks
- Custom or proprietary file formats
Excel supports two main insertion models:
| Type | Stored in Workbook | Updates Automatically | File Size Impact |
|---|---|---|---|
| Embedded | Yes | No | Larger file |
| Linked | No | Yes (if source changes) | Smaller file |
Embedded Objects
Embedded objects become part of the workbook itself, making it fully self-contained. This is ideal for files that need to travel with the workbook, such as client reports, compliance records, or archived documents. The main trade-off is increased file size.
Linked Objects
Linked objects store only a reference to the original file. Excel can reflect updates to the source document automatically, keeping the workbook size smaller. This is suitable for frequently updated files, large documents, or centrally managed resources. The main risk is that moving or renaming the source file will break the link.
Method 1: How to Insert Object in Excel Manually
For everyday scenarios, manually inserting an object in Microsoft Excel is the fastest and most straightforward approach. It requires no advanced techniques and is especially effective when you only need to attach a few files.
Insert an Object from an Existing File
Follow these steps:
-
Open your Excel workbook.
-
Navigate to the Insert tab.
-
Click Object within the Text group.
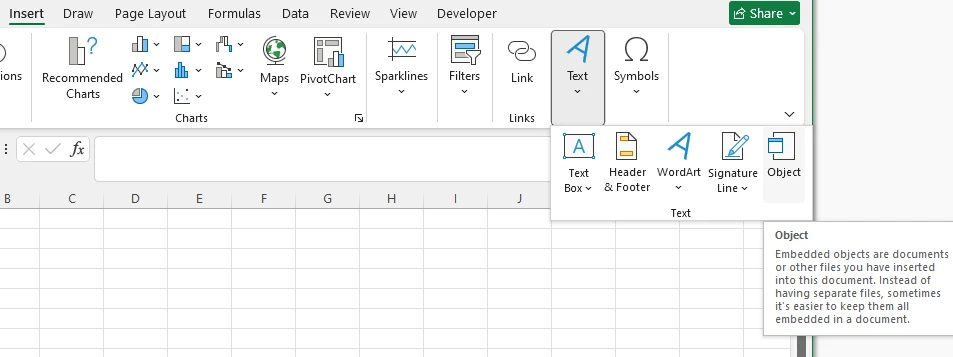
-
Select Create from File.
-
Click Browse and choose your file.
-
Choose one of the following options:
- Link to file — Creates a linked object instead of embedding it.
- Display as icon — Shows an icon rather than a preview of the first page or content.
-
Click OK.
The object will appear inside the worksheet and can be repositioned or resized like a shape.
Tips for Better Usability
When inserting objects in Excel, consider the following best practices to maintain clarity and functionality:
- Use icons for large files or dashboards: Displaying objects as icons keeps worksheets clean and easy to navigate, preventing layout clutter.
- Link large files when possible: Linking instead of embedding helps reduce workbook size and can improve overall performance.
- Maintain stable file paths for linked objects: To avoid broken links, keep linked files in consistent directories rather than moving or renaming them frequently.
- Test embedded objects on macOS: Some Windows-based OLE objects may not render correctly on Mac, so verify shared workbooks across platforms.
- Check editing permissions: Objects may open in read-only mode if file permissions, workbook protection, or compatibility settings restrict editing. Make sure users can access and modify objects as intended.
You may also like: How to Insert Formulas in Excel
Method 2: Insert Object in Excel Using VBA
When insertion becomes repetitive, VBA provides an efficient way to automate the process directly inside Excel.
Where to Run VBA Code
Run the macro from the Visual Basic Editor (VBE) in Microsoft Excel:
-
Open your workbook.
-
Press Alt + F11 to open the Visual Basic Editor.
-
Click Insert → Module.
-
Paste the code below into the module.
-
Press F5 to run the macro, or execute it from the Macros menu.
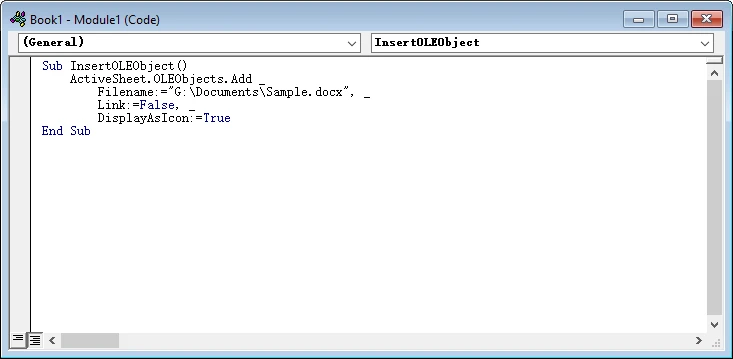
Sub InsertOLEObject()
    ActiveSheet.OLEObjects.Add _
        Filename:="G:\Documents\Sample.docx", _
        Link:=False, _
        DisplayAsIcon:=True
End Sub
Important Parameters
- Filename — Full file path
- Link — True creates a linked object; False embeds it
- DisplayAsIcon — Controls visual appearance
- IconLabel — Optional custom label
When VBA Makes Sense
VBA is a strong fit when automation still centers around Excel.
Consider VBA if you:
- Maintain structured reporting templates
- Need button-driven workflows
- Operate primarily within Microsoft environments
Note: VBA requires Excel to be installed and is not designed for cloud or server-side execution.
Method 3: Automatically Insert Documents into Excel Using Python
For automated workflows or large-scale document generation, Python provides a powerful way to insert OLE objects into Excel without relying on a local installation of Microsoft Excel. This makes it particularly suitable for backend services, reporting pipelines, and cloud-based document systems.
In this example, we’ll embed a Word document into Excel and display a preview of its first page.
Install the Required Libraries
Before running the example, install the necessary libraries:
pip install spire.xls spire.doc
Here we use:
- Spire.XLS for Python — to create the workbook and insert OLE objects
- Spire.Doc for Python — to render the Word document page as an image for preview
Example: Embed a Word Document and Display Its Preview
The following example embeds a Word document into a worksheet and renders its first page as the preview image.
from spire.xls import Workbook, Stream, OleLinkType, OleObjectType
from spire.doc import Document, ImageType

# Create a new workbook
workbook = Workbook()
sheet = workbook.Worksheets.get_Item(0)

# Path to the Word document
word_path = "Sample.docx"

# Load the Word document
doc = Document()
doc.LoadFromFile(word_path)

# Convert the first page to an image
image_stream = doc.SaveImageToStreams(0, ImageType.Bitmap)

# Insert the document and use the image as preview
ole_object = sheet.OleObjects.Add(
    word_path,
    Stream(image_stream.ToArray()),
    OleLinkType.Embed
)

# Configure the object
ole_object.ObjectType = OleObjectType.WordDocument
ole_object.DisplayAsIcon = False
ole_object.Location = sheet.Range.get_Item(2, 2)

# Save the workbook
workbook.SaveToFile("output/ExcelOLE.xlsx")
workbook.Dispose()
doc.Dispose()
Below is a preview of the generated Excel file with an embedded Word document:
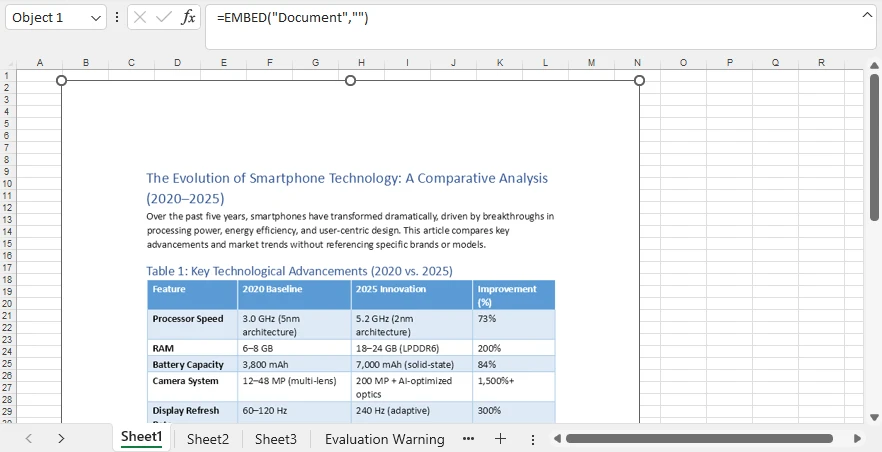
What This Script Does
- Creates an Excel workbook
- Converts the first page of a Word document into an image
- Embeds the file as an OLE object
- Displays a visual preview instead of an icon
- Positions the object at row 2, column 2
All steps run programmatically — no manual interaction required.
Insert More Than Word Documents
OLE objects are not limited to Word files. You can embed a variety of file types directly into a worksheet, including PDFs, PowerPoint presentations, Excel workbooks, OpenDocument files, images, and other attachments. This makes it easy to bundle supporting documents or create audit-ready reports in a single workbook.
You can also customize how the embedded objects appear. For example, the preview image can be generated from the document itself, replaced with a custom thumbnail, or displayed as an icon for a cleaner layout.
To convert different document types to images before insertion, you can refer to these tutorials:
After conversion, pass the image stream when creating the OLE object. This approach gives you flexibility to control object appearance while keeping reports professional and readable.
For a detailed guide on embedding PDF files into Excel using Python, see our dedicated tutorial: How to Insert PDFs into Excel Sheets.
Why This Approach Scales Well
Programmatic insertion provides deeper control than manual workflows or macros. You can precisely define object placement, adjust dimensions, choose between embedding and linking, and dynamically generate preview images.
As a result, Python becomes a strong choice for production-grade document automation where consistency and efficiency matter.
For more technical information on automating the insertion of OLE objects into Excel worksheets, please refer to: How to Insert OLE Objects into Excel Files Using Python.
Embedded vs Linked Objects: How to Decide
Choosing between embedded and linked objects depends on how the workbook will be used and how you manage the source files.
When to Choose Embedded
Select embedded objects if:
- The workbook needs to be portable or shared externally
- Access to external files is restricted
- You want to avoid broken links in automated or batch workflows
Note: Embedding increases workbook size.
When to Choose Linked
Select linked objects if:
- File size needs to remain small
- Source documents are frequently updated
- Files are stored in centralized locations and managed consistently
Caution: Moving or renaming linked files can break the connection, so proper file organization is essential.
Performance and File Size Best Practices
Inserting objects into Excel can impact workbook performance, especially when dealing with large or numerous files. Understanding best practices helps keep your workbooks efficient and responsive.
Manage File Growth
Embedding large documents can quickly increase workbook size to tens or even hundreds of megabytes. To control file growth:
- Compress documents before embedding
- Avoid including non-essential files
- Consider linking large files when portability is not required
Monitor Memory Usage
Creating many workbooks or embedding multiple objects can increase memory consumption. Minimize issues by:
- Releasing resources after saving
- Avoiding oversized files when possible
- Processing workbooks in batches for large-scale automation
Optimize Workbook Loading Speed
Workbooks with many embedded objects may open more slowly. If fast load times are critical, linking objects can help balance performance with functionality, while still maintaining access to the source content.
FAQs About Inserting Objects in Excel
Can I insert a PDF into Excel?
Yes. Use Insert → Object → Create from File to embed a PDF, or automate the process with VBA or Python.
How do I edit an embedded object?
Double-click the object to open it in its native application.
Why isn’t my linked object updating?
Confirm that the original file path has not changed and that the source file is accessible.
Can I insert objects without opening Excel?
Yes. Python libraries allow you to generate Excel files and insert OLE objects without installing Microsoft Excel.
Conclusion
Inserting objects in Excel helps transform a worksheet into a centralized documentation hub. Whether you embed files for portability, link them for efficiency, or automate insertion through VBA or Python, the right method depends on how your workflows operate.
Manual insertion is ideal for quick tasks. VBA streamlines structured Excel processes. Python enables scalable automation for modern data environments.
Selecting the appropriate approach — and following performance best practices — helps ensure your workbooks remain organized, efficient, and easy to maintain.
See Also
How to Export List to Excel in C# Without Excel Interop
Exporting list data to Excel with C# is a common requirement in modern .NET applications. Whether you are building a desktop application, a web system, or a background service, developers often need to convert in-memory collections—especially List<T>—into well-structured Excel files that users can download, analyze, or share.
This tutorial demonstrates how to export a list of objects to Excel in C# without using Excel Interop, using Spire.XLS for .NET. The solution is fully compatible with .NET Core and modern .NET versions, works with typical business data models, and does not require Microsoft Excel to be installed.
Table of Contents
- Why Export a List to Excel in C# Without Interop?
- Export a List of Objects to Excel in C#
- Formatting the Exported Excel Worksheet
- .NET Core and Server-Side Compatibility
- Conclusion
- Frequently Asked Questions
Why Export a List to Excel in C# Without Interop?
Exporting list data to Excel is a practical way to present structured information in a familiar and widely accepted format. In real-world applications, this requirement commonly appears in scenarios such as:
- Generating operational or financial reports
- Allowing users to download query results from web applications
- Sharing structured data with non-technical stakeholders
- Performing offline analysis or audits using Excel
Traditionally, many developers rely on Excel Interop to generate Excel files. While Interop can work in certain desktop environments, it also introduces several limitations:
- Microsoft Excel must be installed on the machine
- It is not recommended for server-side or ASP.NET Core applications
- It adds unnecessary dependencies for simple export tasks
As a result, exporting Excel files without Interop has become the preferred approach for modern .NET applications. Libraries such as Spire.XLS for .NET provide a clean, reliable, and server-friendly way to export a List<T> directly to Excel—without requiring Microsoft Office.
Export a List of Objects to Excel in C#
In most real-world applications, data is stored as a list of business objects rather than simple values. This section focuses on exporting a List<T> that represents a realistic reporting scenario, using a reusable and Interop-free approach.
Prerequisites
Before exporting a list to Excel, make sure Spire.XLS for .NET is installed in your project.
You can install it via NuGet:
Install-Package Spire.XLS
Once installed, you can start exporting List<T> data to Excel without any additional configuration.
Core Export Workflow
The overall process of exporting a list of objects to Excel can be summarized as follows:
- Prepare business-ready data in a
List<T> - Create an Excel workbook and worksheet
- Generate column headers dynamically from object properties
- Write list data into worksheet rows
- Save the Excel file
The following example demonstrates the complete implementation.
Complete Example: Export List to Excel
using Spire.Xls;
using System;
using System.Collections.Generic;
using System.Reflection;

public class OrderReport
{
    public int OrderId { get; set; }
    public string CustomerName { get; set; }
    public DateTime OrderDate { get; set; }
    public decimal TotalAmount { get; set; }
    public string Status { get; set; }
}

class Program
{
    static void Main()
    {
        // Prepare sample business data
        List<OrderReport> orders = new List<OrderReport>
        {
            new OrderReport { OrderId = 1001, CustomerName = "Alice", OrderDate = DateTime.Today.AddDays(-2), TotalAmount = 1200.50m, Status = "Completed" },
            new OrderReport { OrderId = 1002, CustomerName = "Bob", OrderDate = DateTime.Today.AddDays(-1), TotalAmount = 850.00m, Status = "Pending" },
            new OrderReport { OrderId = 1003, CustomerName = "Charlie", OrderDate = DateTime.Today, TotalAmount = 430.75m, Status = "Cancelled" }
        };

        // Create workbook and worksheet
        Workbook workbook = new Workbook();
        Worksheet sheet = workbook.Worksheets[0];

        // Read object properties dynamically
        PropertyInfo[] properties = typeof(OrderReport).GetProperties();

        // Write column headers
        for (int i = 0; i < properties.Length; i++)
        {
            sheet.Range[1, i + 1].Text = properties[i].Name;
        }

        // Write data rows
        for (int row = 0; row < orders.Count; row++)
        {
            for (int col = 0; col < properties.Length; col++)
            {
                object value = properties[col].GetValue(orders[row]);
                sheet.Range[row + 2, col + 1].Value2 = value;
            }
        }

        // Save Excel file
        workbook.SaveToFile("OrderReport.xlsx", ExcelVersion.Version2016);
    }
}
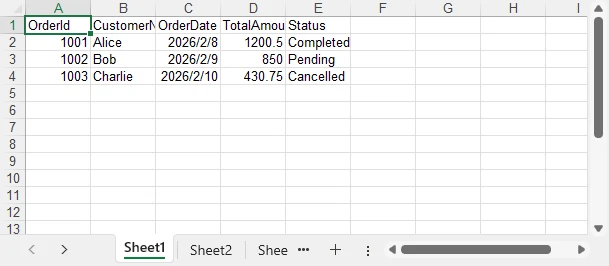
Below is a preview of the generated Excel file:
Technical Notes and Implementation Details
- An Excel file is created by instantiating
Workbook, with the first worksheet accessed viaworkbook.Worksheets[0] - Column headers are generated dynamically using reflection (
Type.GetProperties) to avoid hardcoded mappings - Header cells are written using
Range.Text, ensuring clear string output in the first row - Object values are written row by row using
Range.Value2to preserve native Excel data types - The final Excel document is generated with
Workbook.SaveToFile, without requiring Microsoft Excel or Interop
This pattern is ideal for building reusable export utilities and report-generation modules.
In scenarios where data is retrieved as a DataTable instead of a List, Spire.XLS also provides an efficient export approach. Refer to How to Export a DataTable to Excel in C# for detailed instructions.
Formatting the Exported Excel Worksheet
Beyond basic data export, Spire.XLS for .NET allows you to apply formatting to improve readability and usability of the generated Excel file.
Common formatting tasks include:
- Styling header rows
- Formatting dates and numeric values
- Adjusting column widths automatically
- Highlighting key fields
Example: Apply Basic Formatting
using System.Drawing;

// Format header row
CellStyle headerStyle = workbook.Styles.Add("HeaderStyle");
headerStyle.Font.FontName = "Arial";
headerStyle.Font.Size = 12f;
headerStyle.Font.IsBold = true;
headerStyle.Color = Color.LightGray;  // Set cell background color
headerStyle.HorizontalAlignment = HorizontalAlignType.Center;

sheet.Range[1, 1, 1, sheet.LastColumn].Style = headerStyle;

// Format date and amount columns
sheet.Range[2, 3, orders.Count + 1, 3].NumberFormat = "yyyy-mm-dd";
sheet.Range[2, 4, orders.Count + 1, 4].NumberFormat = "#,##0.00";

// Auto-fit row height and column width
sheet.AllocatedRange.AutoFitRows();
sheet.AllocatedRange.AutoFitColumns();
Below is a preview of the formatted Excel sheet:
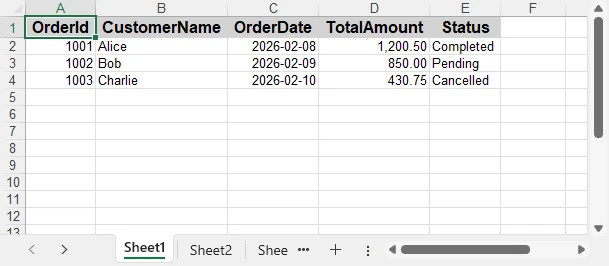
Applying formatting makes the exported Excel file more professional and suitable for direct business use.
For more advanced worksheet formatting—such as styles, merged cells, conditional formatting, and formulas—see How to Create and Format Excel Worksheets in C#.
.NET Core and Server-Side Compatibility
Spire.XLS for .NET is fully compatible with .NET Core and modern .NET versions, making it suitable for:
- ASP.NET Core web applications
- Web APIs
- Cloud and containerized environments
- Background services and scheduled jobs
Because it does not rely on Excel Interop, the export logic is safe to use in server-side and production environments.
If you are working in an ASP.NET Core or Web API project, this guide shows how to generate and format Excel files and return them to the client: Export Excel Files in ASP.NET Core Using C#.
Conclusion
Exporting a list to Excel in C# does not have to rely on Excel Interop. With Spire.XLS for .NET, you can efficiently convert a List<T> into a well-structured and formatted Excel file that works seamlessly across .NET Framework and .NET Core environments.
By adopting an Interop-free approach, you reduce deployment complexity, improve application stability, and gain greater flexibility when exporting business data.
Whether you need to export complex reports or simple lists, Spire.XLS provides a reliable and scalable solution for modern C# applications. For evaluation purposes or to remove trial limitations, a 30-day temporary license is available.
Frequently Asked Questions
Q1. Can this approach export large lists efficiently?
Yes. Spire.XLS for .NET is designed for server-side usage and can handle large List datasets efficiently. For very large exports, batching or streaming strategies can further improve performance.
Q2. Does this solution require Microsoft Excel to be installed?
No. Spire.XLS for .NET works independently of Microsoft Excel and does not rely on Excel Interop, making it suitable for server and cloud environments.
Q3. Can I customize column headers or formats?
Yes. Column headers can be customized manually, and cell formats such as dates, numbers, and styles can be applied programmatically. For advanced formatting scenarios, refer to the C# Excel formatting guide.
Q4. Is this compatible with ASP.NET Core and Web APIs?
Yes. The export logic works seamlessly in ASP.NET Core applications, Web APIs, background services, and other server-side .NET environments.
How to Convert DOCX to XLSX: Easily Turn Word into Excel
Table of Contents
Converting a Word document (DOCX) to an Excel spreadsheet (XLSX) is a common requirement in office automation, data processing, and reporting workflows. Many users want to reuse tables stored in Word files, while others expect a direct document-to-spreadsheet conversion with minimal effort.
However, Word and Excel are designed for very different purposes. Word focuses on free-form document layout, while Excel is built around structured, tabular data. Understanding this difference is key to choosing the right DOCX to XLSX conversion method.
In this guide, you’ll learn how to convert DOCX to XLSX using online tools, desktop solutions, and Python automation, along with the advantages and limitations of each approach.
Quick Navigation
- Can You Really Convert a Word (DOCX) File to Excel (XLSX)?
- Method 1: Convert DOCX to XLSX Online
- Method 2: Convert Word Content to Excel Using Desktop Software
- Method 3: Convert DOCX to XLSX with Python
- Compare DOCX to XLSX Conversion Methods
- Frequently Asked Questions
Can You Really Convert a Word (DOCX) File to Excel (XLSX)?
Before choosing a conversion method, it’s important to clarify what “DOCX-to-XLSX conversion” actually means.
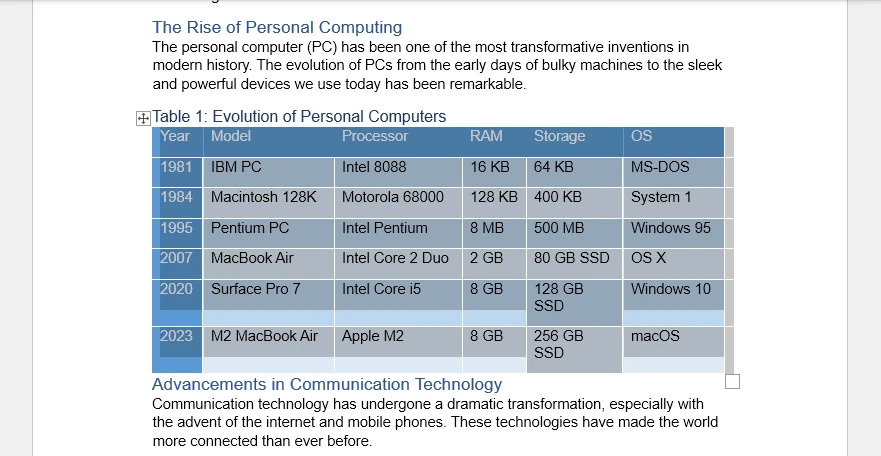
- Word documents may contain paragraphs, images, headings, and tables.
- Excel files are optimized for rows, columns, and structured data.
In practice, DOCX to XLSX conversion works best when the Word document contains tables. Plain text paragraphs and complex layouts do not always translate cleanly into spreadsheet cells.
If your goal is to extract tabular data from Word and reuse it in Excel, conversion is usually reliable. If you expect an entire Word document to appear perfectly in Excel, some formatting loss should be expected. However, you still insert Word text and image paragraphs into Excel.
Method 1: Convert DOCX to XLSX Online
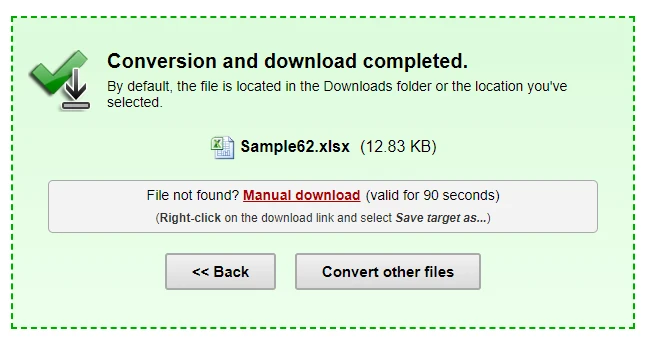
Online tools are often the first choice for users who need a quick, one-time conversion. For example, you can use the Online2PDF DOCX to XLSX converter to convert documents directly in your browser without installing additional software.
A typical workflow looks like this:
-
Open the online DOCX to XLSX converter.
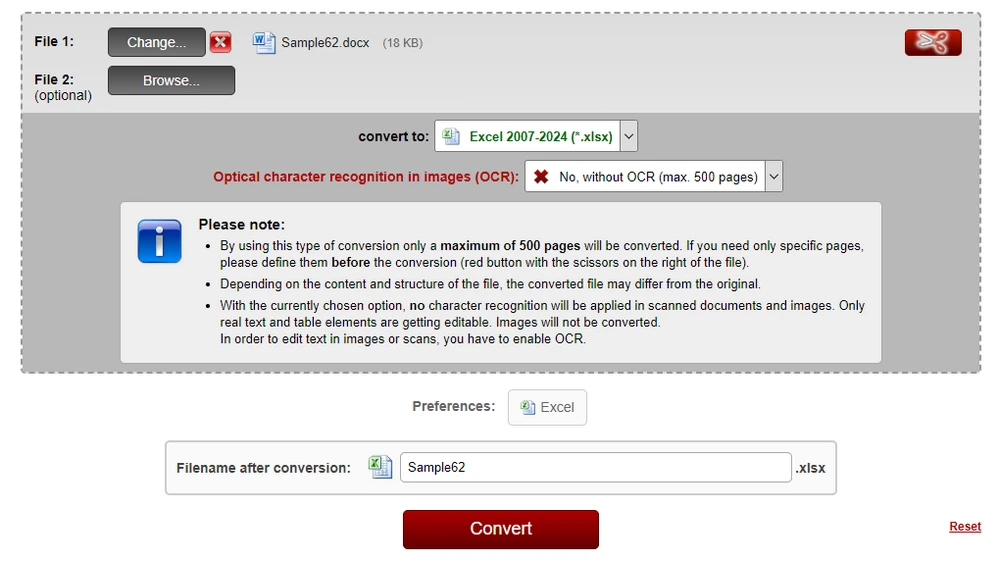
-
Upload your Word (DOCX) file.
-
Start the conversion process.
-
Download the converted Excel (XLSX) file.
Many online converters support DOCX-to-XLSX conversion, making it easy to transform Word documents into editable spreadsheets within seconds.
Pros and Cons of Online DOCX to XLSX Converters
Advantages
- No software installation required
- Easy to use for beginners
- Suitable for small files and occasional tasks
Limitations
- File size and usage limits
- Potential privacy and data security concerns
- Limited control over formatting
- Not suitable for batch or automated processing
Online converters are convenient, but they are best suited for simple, non-sensitive files.
Many online tools support converting Word files into multiple formats. For example, you can also explore how to convert Word to PowerPoint when preparing presentation materials.
Method 2: Convert Word Content to Excel Using Desktop Software
For documents that contain structured or semi-structured data, desktop office software offers a practical way to move content from Word into Excel with a high level of visual control. Common tools include Microsoft Office and LibreOffice, which allow users to copy Word content and paste it directly into Excel spreadsheets.
While these desktop software does not provide a native “DOCX to XLSX export” feature, it can still produce reliable results—especially when Word documents contain tables.
Why Tables Convert More Accurately
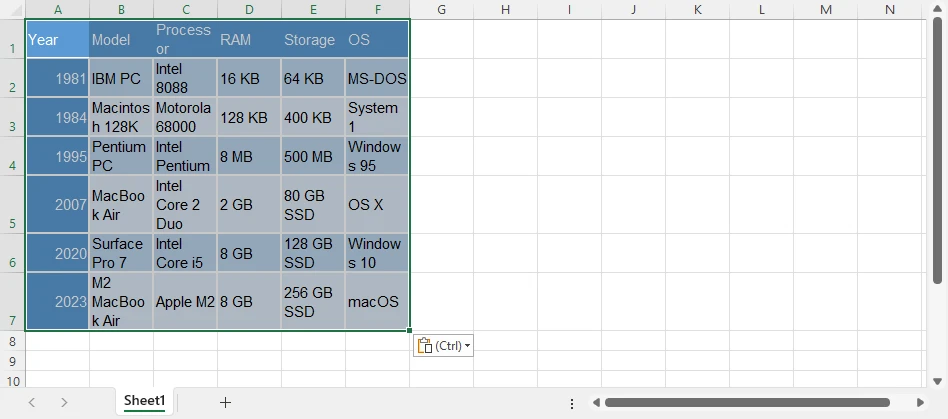
Most successful DOCX to XLSX conversions rely on table-based content. Tables in Word already define rows and columns, which closely align with Excel’s grid-based data model. When pasted into Excel, Word tables usually retain their structure, alignment, and cell boundaries with minimal adjustment.
Non-tabular content can also be transferred. Paragraphs, headings, and lists can be pasted into Excel cells, where each line is placed into individual rows. Although additional formatting may be required, this approach is often sufficient for organizing document content into a spreadsheet format.
Example: Copying Word Content into Excel Using Microsoft Office
Below is a typical workflow using Microsoft Office:
-
Open the DOCX file in Microsoft Word.
-
Select the content you want to transfer:
- Tables only, for best structural accuracy
- Or the entire document, if needed
-
Copy the selection (Ctrl + C).
-
Open Microsoft Excel and select the target worksheet.
-
Paste the content (Ctrl + V) into Excel.
-
Adjust column widths, cell alignment, or text wrapping as needed.
This method works particularly well for Word documents that primarily contain tables, forms, or structured layouts. If your document contains complex tables, you may benefit from learning how to extract tables from Word programmatically for greater accuracy and control.
Limitations of Desktop-Based Conversion
Although desktop tools provide flexibility and visual control, they have several limitations:
- No true DOCX to XLSX export or batch conversion
- Manual steps are required for each document
- Formatting consistency can be difficult to maintain across files
When dealing with multiple documents or recurring conversion tasks, manual desktop workflows can quickly become time-consuming. In such cases, automated or programmatic solutions are usually more efficient.
Method 3: Convert DOCX to XLSX with Python (Ideal for Automated Workflows)
When manual methods become inefficient, Python offers a scalable way to convert Word documents into Excel files. This approach is particularly valuable for developers who need consistent, repeatable results without relying on desktop applications.
Python-based conversion is well suited for:
- Batch processing large numbers of DOCX files
- Automated data pipelines
- Server-side document workflows
- Environments where Microsoft Office is unavailable
Compared with manual exports, scripting provides greater flexibility and significantly reduces repetitive work.
How Python Converts Word Data to Excel
A practical strategy is to extract structured data from Word—especially tables—and write it directly into an Excel workbook. Because tables already organize content into rows and columns, they translate naturally into spreadsheet format while preserving logical structure.
In this example:
- Spire.Doc for Python loads the DOCX file and retrieves table data.
- Spire.XLS for Python creates the Excel workbook and writes the extracted content into worksheets.
Combining these libraries enables a controlled, programmatic conversion process suitable for production environments.
Before using the libraries in your project, make sure you have installed the necessary packages. You can install them via pip:
Step-by-Step: Convert Word Tables to Excel with Python
Below is a typical workflow for converting DOCX tables to XLSX using Python:
-
Load the DOCX file Use Spire.Doc for Python to open the Word document.
-
Extract tables from the document Iterate through the document structure and retrieve table data.
-
Create an Excel workbook Initialize a new workbook using Spire.XLS for Python.
-
Write table data into worksheets Map rows and cells from Word tables into Excel rows and columns.
-
Save the file as XLSX Export the final result as an Excel spreadsheet.
Python Code: Convert DOCX Tables to XLSX
The following example demonstrates how to extract tables from a Word document and export them to an Excel worksheet.
from spire.doc import Document
from spire.xls import Workbook, Color

# Load the Word document
doc = Document()
doc.LoadFromFile("Sample.docx")

# Create a new Excel workbook
workbook = Workbook()
workbook.Worksheets.Clear()

# Iterate through all sections in the Word document
for sec_index in range(len(doc.Sections)):
    section = doc.Sections.get_Item(sec_index)
    # Iterate through all tables in the current section
    for table_index in range(len(section.Tables)):
        table = section.Tables.get_Item(table_index)
        # Create a worksheet for each Word table
        sheet = workbook.Worksheets.Add(f"Table-{table_index + 1}")
        # Iterate through rows in the Word table
        for row_index in range(len(table.Rows)):
            row = table.Rows.get_Item(row_index)
            # Iterate through cells in the current row
            for cell_index in range(len(row.Cells)):
                table_cell = row.Cells.get_Item(cell_index)
                # Collect all paragraph text inside the Word table cell
                cell_data = ""
                for para_index in range(len(table_cell.Paragraphs)):
                    para = table_cell.Paragraphs.get_Item(para_index)
                    cell_data += para.Text + "\n"
                # Write text to the corresponding Excel cell
                cell = sheet.Range.get_Item(row_index + 1, cell_index + 1)
                cell.Value = cell_data
                # Copy the Word table cell background color to Excel
                # Note: Color must be assigned directly to the Style to take effect
                table_cell_color = table_cell.CellFormat.BackColor
                cell.Style.Color = Color.FromRgb(
                    table_cell_color.R,
                    table_cell_color.G,
                    table_cell_color.B
                )
        # Auto-fit columns after writing the table
        sheet.AllocatedRange.AutoFitColumns()

# Save the Excel file
workbook.SaveToFile("WordTableToExcel.xlsx")
Below is a preview of the XLSX file converted from the Word document:
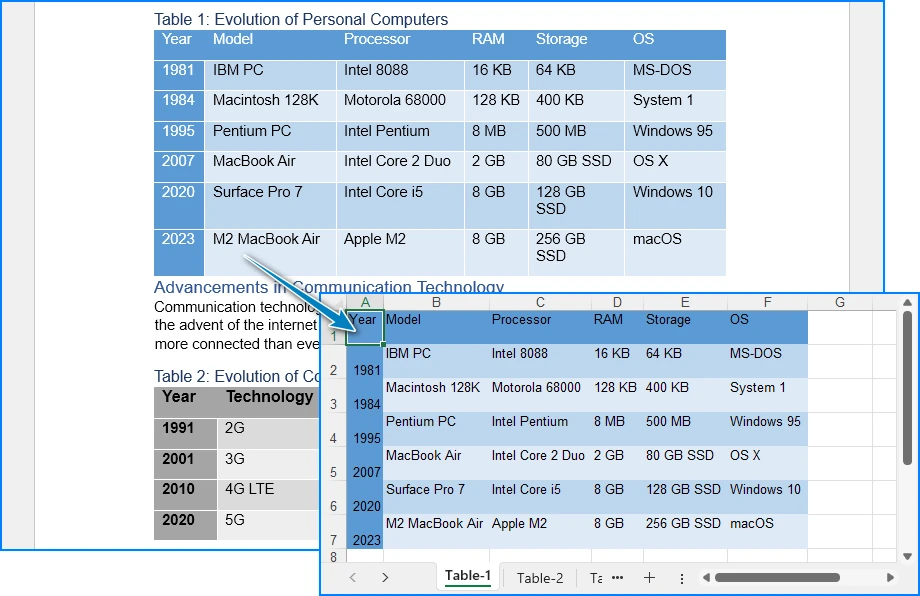
This approach is especially useful for structured documents, reports, and form-based Word files where tables represent the core data.
For more advanced Python techniques, including preserving table formatting and styles during Word-to-Excel conversion, check out our detailed guide on converting Word tables to Excel with Python.
Compare DOCX to XLSX Conversion Methods
Choosing the right method depends on factors such as document volume, automation needs, and data sensitivity. The table below provides a quick overview to help you evaluate each option.
| Method | Best For | Automation Level | Advantages | Limitations |
|---|---|---|---|---|
| Online Converter | One-time tasks | None | Fast and easy | Privacy risks, limited accuracy |
| Desktop Software | Small workloads | Low | Visual control | Time-consuming, not scalable |
| Python Automation | Large workflows | High | Flexible, repeatable | Requires programming |
How to Choose the Right Method
- Use online converters when speed matters and the files are not sensitive.
- Choose desktop software if you prefer manual control for a small number of documents.
- Opt for Python automation when handling large datasets or building repeatable workflows.
For ongoing or business-critical processes, automated solutions typically provide greater long-term efficiency and consistency.
FAQ: DOCX to XLSX Conversion
Can I convert any Word document to Excel?
Most Word files can be converted, but documents with tables or structured data work best. Free-form text and complex layouts may need adjustment after conversion.
Will the formatting stay the same after conversion?
Not always. Word and Excel handle layouts differently, so some spacing, merged cells, or text flow may change. Minor adjustments in Excel are usually needed.
Can I convert only tables from Word to Excel?
Yes. If your Word document contains tables, you can extract just the tables for a more accurate and reliable conversion.
What is the easiest way to convert multiple DOCX files?
For multiple files, automated solutions or batch tools—like Python libraries—can save time and ensure consistent results, especially for large documents.
Conclusion
Converting DOCX to XLSX is not a one-size-fits-all task. While online and desktop tools are useful for simple scenarios, they often fall short when accuracy, scalability, or automation is required.
By understanding the structure of your Word documents and choosing the right conversion approach, you can achieve reliable results. For developers and advanced users, Python offers a powerful and flexible way to convert Word tables into Excel spreadsheets efficiently.
See Also
PDF to Scanned PDF: Convert PDFs into Image-Based Documents
Table of Contents
PDF files are widely used for document exchange, but not all PDFs behave like scanned documents. Many PDFs contain editable text layers, vector graphics, and selectable content, which makes them easy to modify, copy, or reuse.
In real-world scenarios—such as archiving, public distribution, or document finalization—you may want a PDF to look and behave like a scanned file. Converting a PDF to a scanned PDF removes its editable structure and turns each page into an image-based representation.
This guide explains what a scanned PDF is, why you might need one, and how to convert a PDF into a scanned document using online tools or Python automation.
Quick Navigation
- What Is a Scanned PDF?
- Why Convert PDF to Scanned PDF?
- Method 1: Convert PDF to Scanned PDF Using an Online Tool
- Method 2: Convert PDF to Scanned PDF with Python
- PDF vs. Scanned PDF: Key Differences
- Can Scanned PDFs Still Be Edited?
- Frequently Asked Questions
What Is a Scanned PDF?
A scanned PDF is a PDF document in which each page is stored as an image rather than editable text or vector objects. It closely resembles a document created by scanning paper with a physical scanner.
Key characteristics of scanned PDFs include:
- Text is not selectable or editable
- Pages are image-based
- Layout and appearance are visually fixed
- File size is usually larger than text-based PDFs
- Text search is unavailable unless OCR is applied
When you convert a PDF to a scanned PDF, you are essentially flattening its content and removing its internal structure.
Why Convert PDF to Scanned PDF?
Turning a PDF into a scanned document is useful in many situations:
- Prevent casual editing or content reuse
- Prepare documents for archiving
- Distribute finalized reports or notices
- Simulate paper-based workflows
- Standardize document appearance across platforms
Compared with permission-based protection, scanned PDFs rely on structural conversion rather than viewer-enforced rules, making them more resistant to casual modification.
Method 1: Convert PDF to Scanned PDF Using an Online Tool
Online PDF converters are suitable for quick, one-time conversions of non-sensitive documents.
Steps:
-
Open a trusted PDF to scanned PDF converter website (for example, SafePDFKit).
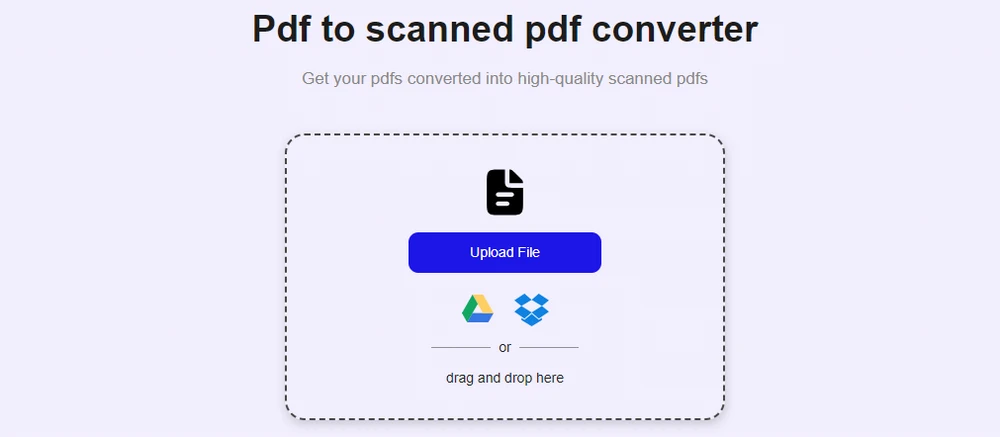
-
Upload the PDF file you want to convert.
-
Configure the settings, such as color mode, noise level, and page rotation.
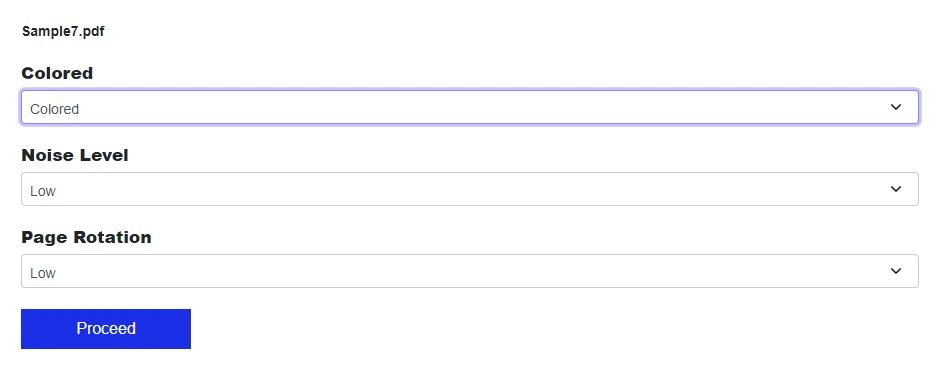
-
Convert and download the scanned PDF.
Best for:
- Occasional conversions
- Public or low-risk documents
- Users who prefer browser-based tools
Note: Avoid uploading confidential files unless the service clearly explains how uploaded documents are handled and deleted.
If you want to restrict editing, copying, or printing via password protection, you can refer to how to encrypt PDFs for a detailed guide.
Method 2: Convert PDF to Scanned PDF with Python
For batch processing or automated workflows, Python offers a reliable way to convert PDFs into scanned, image-based documents.
Libraries such as Spire.PDF for Python allow you to render each PDF page as an image and rebuild a new PDF using those images.
Step 1: Install the library
pip install spire.pdf
You can also download Spire.PDF for Python and add it to your project manually.
Step 2: Convert PDF pages into images and rebuild the PDF
from spire.pdf import *

# Load the original PDF
pdf = PdfDocument()
pdf.LoadFromFile("Sample.pdf")

# Create a new PDF for the scanned output
scanned_pdf = PdfDocument()

# Convert each page to an image
for i in range(pdf.Pages.Count):
    image_stream = pdf.SaveAsImage(i)
    image = PdfImage.FromStream(image_stream)

    page = scanned_pdf.Pages.Add(
        SizeF(float(image.Width), float(image.Height)),
        PdfMargins(0.0, 0.0)
    )
    page.Canvas.DrawImage(
        image,
        RectangleF.FromLTRB(0.0, 0.0, float(image.Width), float(image.Height))
    )

# Save the scanned PDF
scanned_pdf.SaveToFile("ScannedPDF.pdf")

pdf.Dispose()
scanned_pdf.Dispose()
Preview of the converted scanned PDF:
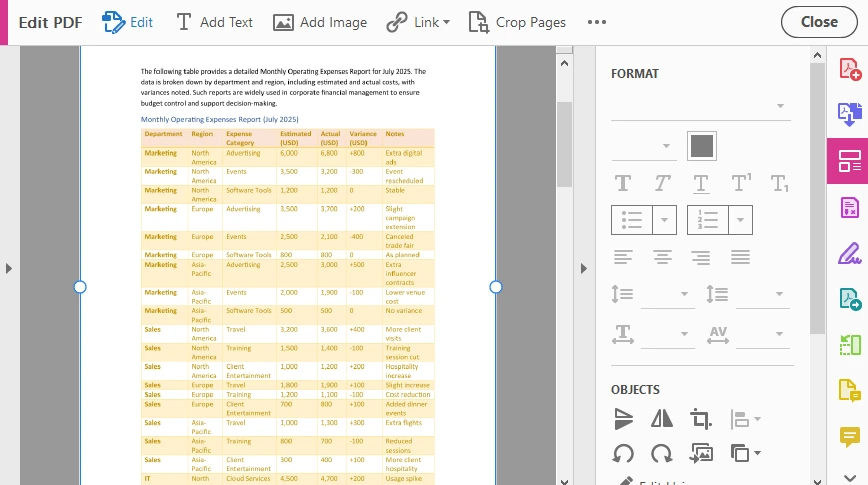
In this scanned PDF, every page is rendered and embedded as a full-page image. This conversion removes the original text layer and document structure, making the content non-editable and non-selectable.
Advantages of programmatic conversion:
- Consistent output quality
- Batch processing support
- No manual intervention
- Easy integration into document pipelines
For more flexible batch workflows, Python also supports converting PDFs directly to images or encrypting PDFs to further reduce the risk of editing and content reuse.
PDF vs. Scanned PDF: Key Differences
| Feature | Standard PDF | Scanned PDF |
|---|---|---|
| Editable text | Yes | No |
| Text selection | Yes | No |
| Searchable content | Yes | No (without OCR) |
| File size | Smaller | Larger |
| Best use case | Editing & reuse | Distribution & archiving |
Quick tip: If users should only view the document—not reuse or modify its content—a scanned PDF is often the better choice.
Can Scanned PDFs Still Be Edited?
Scanned PDFs are significantly harder to edit than standard PDFs, but they are not absolutely uneditable.
- Advanced editors can replace images
- OCR tools can extract text
- Content can be manually retyped
However, for most users and everyday workflows, scanned PDFs effectively discourage editing and content reuse.
Best practice:
- Keep original editable PDFs securely
- Use scanned PDFs for distribution or archiving
- Combine with OCR only if text search is required
Conclusion
Converting a PDF to a scanned PDF is a practical way to turn editable documents into visually fixed, image-based files. By removing the text structure and flattening each page into an image, scanned PDFs are better suited for sharing finalized content and preserving document integrity.
Whether you use an online PDF to scanned PDF converter for quick tasks or Python automation for large-scale workflows, choosing the right approach ensures your documents remain consistent, professional, and resistant to casual modification.
FAQ
Does converting a PDF to a scanned PDF remove searchable text?
Yes. When a PDF is converted into a scanned PDF, each page is stored as an image, so the original text layer is removed. As a result, text cannot be searched or selected unless OCR is applied afterward.
Will converting a PDF to a scanned document increase the file size?
In most cases, yes. Scanned PDFs are image-based, and image data usually requires more storage than text and vector content. The final file size depends on factors such as image resolution and compression settings.
What is the difference between a scanned PDF and exporting a PDF as images?
Exporting a PDF as images produces separate image files, while a scanned PDF embeds those images back into a single PDF document. A scanned PDF preserves the PDF container format, making it easier to share, view, and archive.
Can scanned PDFs completely prevent editing or copying?
Scanned PDFs significantly reduce casual editing and copying because they contain no editable text. However, advanced tools or OCR software can still extract content, so scanned PDFs should be seen as a practical deterrent rather than absolute protection.
Parse Excel Files in Java Easily – Read .XLS and .XLSX Files
Excel files are widely used to store and exchange structured data, such as reports, user-submitted forms, and exported records from other systems. In many Java applications, developers need to open these Excel files and extract the data for further processing.
In Java, parsing an Excel file usually means loading an .xls or .xlsx file, reading worksheets, and converting cell values into Java-friendly formats such as strings, numbers, or dates. This article shows how to parse Excel files in Java step by step using Spire.XLS for Java, with practical examples ranging from basic text reading to data type–aware parsing.
Table of Contents
- Prepare the Environment
- Load and Parse an Excel File in Java
- Read Excel Data as Text (Basic Parsing)
- Parse Excel Cells into Different Data Types
- Common Parsing Scenarios in Real Applications
- Conclusion
- Frequently Asked Questions
Prepare the Environment
Before parsing Excel files, you need to add Spire.XLS for Java to your project. The library supports both .xls and .xlsx formats and does not require Microsoft Excel to be installed.
Add the Dependency
If you are using Maven, add the following dependency to your pom.xml:
<repositories>
    <repository>
        <id>com.e-iceblue</id>
        <name>e-iceblue</name>
        <url>https://repo.e-iceblue.com/nexus/content/groups/public/</url>
    </repository>
</repositories>
<dependencies>
    <dependency>
        <groupId>e-iceblue</groupId>
        <artifactId>spire.xls</artifactId>
        <version>16.6.5</version>
    </dependency>
</dependencies>
Once the dependency is added, you are ready to load and parse Excel files in Java.
If you are not using Maven, you can also download Spire.XLS for Java and add it to your project manually.
Load and Parse an Excel File in Java
The first step when parsing an Excel file is to load it into a Workbook object and access the worksheet you want to read.
import com.spire.xls.*;

public class ParseExcel {
    public static void main(String[] args) {
        Workbook workbook = new Workbook();
        workbook.loadFromFile("data.xlsx");

        Worksheet sheet = workbook.getWorksheets().get(0);
        System.out.println("Worksheet loaded: " + sheet.getName());
    }
}
Preview of the reading result:
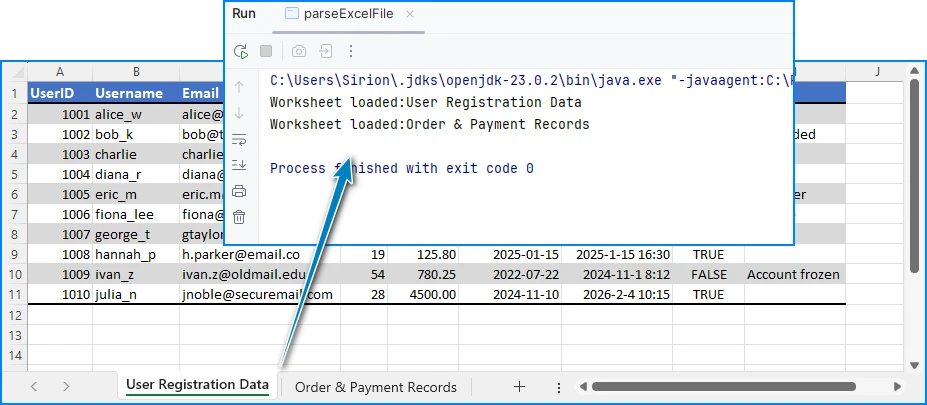
This code works for both .xls and .xlsx files. After loading the worksheet, you can start reading rows and cells.
Read Excel Data as Text (Basic Parsing)
In many cases, developers only need to read Excel data as text, without worrying about specific data types. This approach is simple and suitable for logging, displaying data, or quick imports.
Read All Cells as Strings
for (int i = 1; i <= sheet.getLastRow(); i++) {
    for (int j = 1; j <= sheet.getLastColumn(); j++) {
        String cellText = sheet.getCellRange(i, j).getValue();
        System.out.print(cellText + "\t");
    }
    System.out.println();
}
Preview of the text reading result:
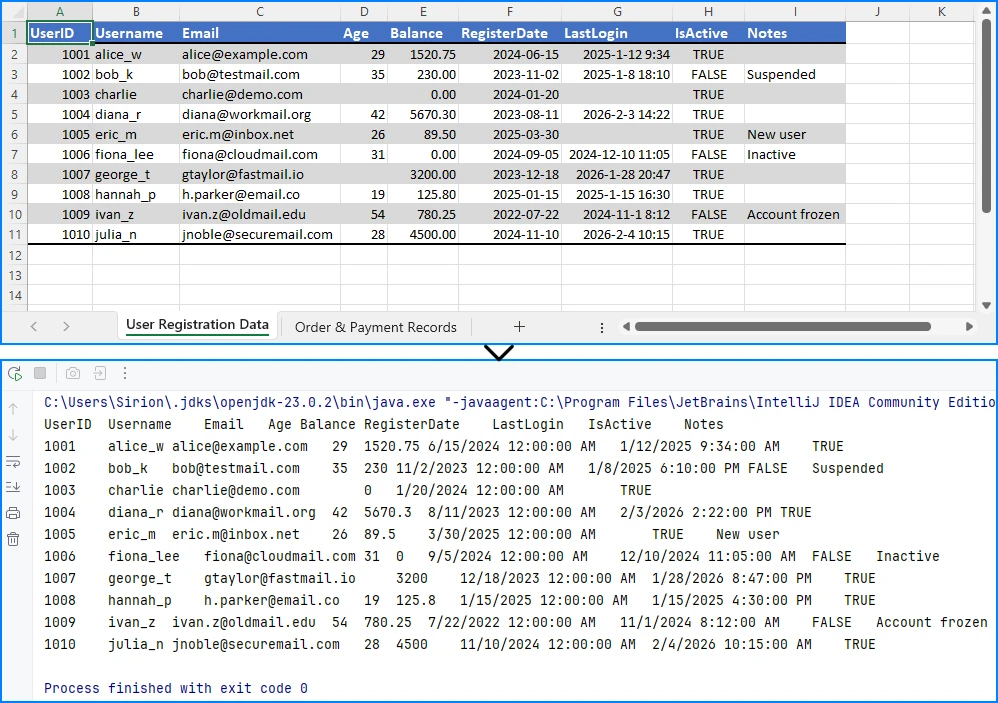
Using getValue() returns the formatted value shown in Excel. This is often the easiest way to read data when precision or data type conversion is not critical.
If your requirement goes beyond reading and involves modifying or editing Excel files, you can refer to a separate guide that demonstrates how to edit Excel documents in Java using Spire.XLS.
Parse Excel Cells into Different Data Types
For data processing, validation, or calculations, reading everything as text is usually not enough. In these cases, you need to parse Excel cell values into proper Java data types.
Parse Numeric Values (int / double / float)
In Excel, many cells are stored internally as numeric values, even if they are displayed as dates, currencies, or percentages. Spire.XLS for Java allows you to read these cells directly using getNumberValue().
CellRange usedRange = sheet.getAllocatedRange();
System.out.println("Raw number values:");
for (int i = usedRange.getRow(); i <= usedRange.getLastRow(); i++) {
    for (int j = usedRange.getColumn(); j <= usedRange.getLastColumn(); j++) {
        CellRange cell = sheet.getRange().get(i, j);
        if (!(Double.isNaN(cell.getNumberValue())))
            {
                System.out.print(cell.getNumberValue() + "\t");
            }
        }
    System.out.println();
}
Below is a preview of the numeric reading result:
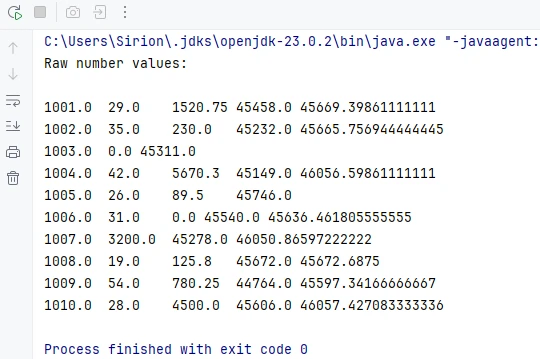
This method returns the underlying numeric value stored in the cell, regardless of the display format applied in Excel.
Convert Numeric Values Based on Application Logic
Once you have the numeric value, you can convert it to the appropriate Java type according to your application requirements.
double numberValue = cell.getNumberValue();

// Convert to int
int intValue = (int) numberValue;

// Convert to float
float floatValue = (float) numberValue;

// Keep as double
double doubleValue = numberValue;
For example, IDs, counters, or quantities are often converted to int, while prices, balances, or measurements are better handled as double or float.
Note: Excel dates are also stored as numeric values. If a cell represents a date or time, it is recommended to read it using date-related APIs instead of treating it as a plain number. This is covered in the next section.
Parse Date and Time Values
In Excel, date and time values are internally stored as numbers, while the display format determines how they appear in the worksheet. Spire.XLS for Java provides the getDateTimeValue() method to read these values directly as Date objects, allowing you to handle date and time data more conveniently in Java.
For example, if a column is designed to store date values, you can read all cells in that range as Date objects:
CellRange usedRange = sheet.getAllocatedRange();
System.out.println("Date values:");

for (int i = 0; i < usedRange.getRowCount(); i++) {
    // Read values from column F (for example, a date column)
    CellRange cell = usedRange.get(String.format("G%d", i + 1));
    java.util.Date date = cell.getDateTimeValue();
    System.out.println(date);
}
Preview of the date reading result from the seventh column:
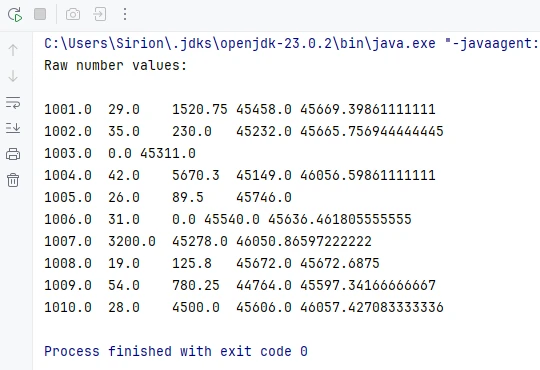
This approach is widely used in real-world applications such as reports, data imports, or spreadsheets with predefined columns.
Because Excel dates are stored as numeric values, getDateTimeValue() converts the numeric value into a Date object and is typically applied to columns that represent date or time information.
Parse Mixed Cell Values in a Practical Way
In real-world Excel files, a single column may contain different kinds of values, such as text, numbers, dates, booleans, or empty cells. When parsing such data in Java, a practical approach is to read cell values using different APIs and select the most appropriate representation based on your business logic.
CellRange cell = sheet.getRange().get(2, 1); // B2

// Formatted text (what is displayed in Excel)
String text = cell.getText();

// Raw string value
String value = cell.getValue();

// Generic underlying value (number, boolean, date, etc.)
Object rawValue = cell.getValue2();

// Formula, if the cell contains one
String formula = cell.getFormula();

// Evaluated result of the formula
String evaluated = cell.getEnvalutedValue();

// Numeric value
double numberValue = cell.getNumberValue();

// Date value (commonly used for columns representing dates or times)
java.util.Date dateValue = cell.getDateTimeValue();

// Boolean value
boolean booleanValue = cell.getBooleanValue();
In practice, many applications use getText() as a safe fallback for display, logging, or export scenarios. For data processing, methods like getNumberValue(), getDateTimeValue(), or getBooleanValue() are typically applied based on the known meaning of each column.
This flexible approach works well for user-generated or loosely structured Excel files and helps avoid incorrect assumptions while keeping the parsing logic simple and robust.
If your primary goal is reading Excel files in Java—for example, extracting cell values for display or reporting—you may also want to refer to a separate guide that focuses specifically on Excel data reading scenarios in Java.
Common Parsing Scenarios in Real Applications
Parse Excel Rows into Java Objects
A common use case is mapping each row in an Excel sheet to a Java object, such as a DTO or entity class.
For example, one row can represent a product or a record, and each column maps to a field in the object. After parsing, you can store the objects in a list for further processing or database insertion.
Read Excel Data into Collections
Another typical scenario is reading Excel data into a List<List
Convert HEIC to PDF: Online, Desktop & Python Automation
Table of Contents
HEIC (High Efficiency Image Container) is the default image format used by Apple devices such as iPhone and iPad. While HEIC offers high image quality with smaller file sizes, it is not universally supported across platforms and applications. This often leads to compatibility issues when sharing, printing, or archiving images.
Converting HEIC files to PDF is a common and effective solution. PDF is a widely accepted format that ensures consistent display across devices and operating systems. In this article, we will explore several ways to convert HEIC to PDF, including free methods and an automated approach using Python code.
Quick Navigation
- What Is a HEIC File and Why Convert HEIC to PDF?
- Method 1: Convert HEIC to PDF Using Online Tools
- Method 2: Convert HEIC to PDF Using Desktop Software
- Method 3: Convert HEIC to PDF Using Python
- How to Choose the Right HEIC to PDF Conversion Method
- Frequently Asked Questions
What Is a HEIC File and Why Convert HEIC to PDF?
HEIC is an image container format based on HEVC (High Efficiency Video Coding). It allows Apple devices to store photos with better compression and high visual quality. However, HEIC files are not natively supported by many Windows applications, web browsers, or document management systems, which can create friction when you try to open or share them.
Typical situations where converting HEIC to PDF becomes useful include:
- Improving compatibility across platforms
- Combining multiple HEIC images into a single document
- Preparing images for printing or submission
- Archiving images in a stable, non-editable format
Because of these limitations, converting HEIC to PDF is often less about preference and more about ensuring accessibility and consistency across different environments.
Method 1: Convert HEIC to PDF Using Online Tools (Free)
Online converters are often the fastest way to convert HEIC to PDF, especially when you need a quick result without installing additional software.
Steps:
-
Open an online HEIC to PDF converter (such as CloudConvert).
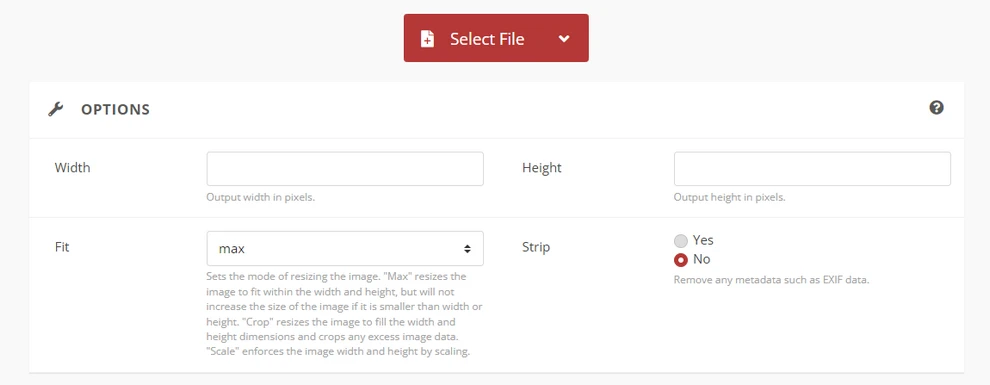
-
Upload your HEIC file.
-
Select PDF as the output format.
-
Download the converted PDF file.
Pros:
- Free and easy to use
- No installation required
Cons:
- File size and batch limits
- Potential privacy and data security concerns
- Limited control over output quality
This method is suitable for one-time or occasional conversions.
For converting other images formats to PDF, you can check How to Convert Images to PDF on Various Platforms.
Method 2: Convert HEIC to PDF Using Desktop Software
Desktop software provides a more stable and private way to convert HEIC to PDF, especially if you frequently work with local files or prefer not to upload images to third-party platforms. Many modern operating systems already include built-in tools that can handle this task without requiring additional downloads.
For example, Microsoft Photos on Windows and macOS Preview allow you to open HEIC files and export or print them as PDF documents. Compared to online tools, desktop solutions typically offer better reliability and fewer file size restrictions.
Steps:
-
Open the HEIC file using a compatible image viewer (e.g., Microsoft Photos).
-
Choose the export or print option.
-
Select PDF as the output format.
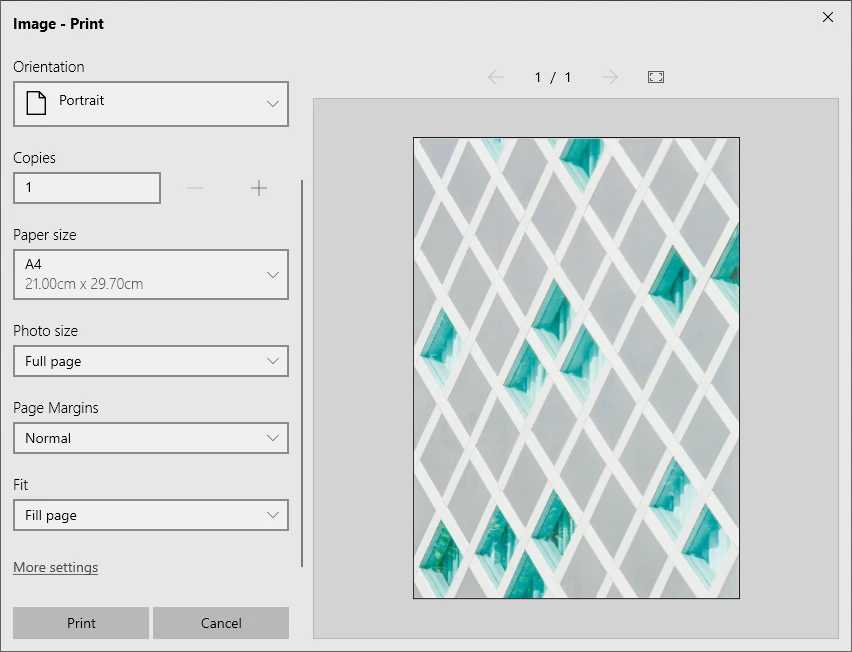
-
Save the PDF file.
Pros:
- Better privacy than online tools
- No coding required
Cons:
- Manual operation
- Inefficient for batch processing
This approach works well for users who need basic conversion with minimal technical effort.
If the result PDF file is too large, you can try compressing the PDF file to avoid transmission and sharing issues.
Method 3: Convert HEIC to PDF Using Python (Recommended for Automation)
If you need to convert HEIC files to PDF regularly, handle large image collections, or integrate conversion into an existing workflow, manual tools can quickly become inefficient. In these scenarios, automation offers a significant advantage.
Python enables you to build a repeatable conversion process that runs with minimal human intervention. Instead of converting images one by one, you can process entire folders, standardize output settings, and integrate the workflow into backend services or data pipelines.
Required Libraries
To implement this solution, you will need:
- pillow – for image processing
- pillow-heif – to enable HEIC image support
- Spire.PDF for Python – to create and manage PDF documents
You can install these libraries using pip:
pip install pillow pillow-heif spire.pdf
This combination allows you to read HEIC images, process them, and generate high-quality PDF files programmatically.
Step-by-Step: Convert HEIC to PDF with Python
Below is a general workflow for converting a HEIC file to PDF using Python:
- Register HEIC support and open the HEIC image with Pillow.
- Convert the image to RGB and save it as JPEG or PNG in memory.
- Create a PDF document and load the image from a byte stream.
- Render the image onto a PDF page and save the PDF file.
Python Example: Convert HEIC to PDF
from spire.pdf import PdfDocument, PdfImage, PointF, Stream, SizeF, PdfMargins
from PIL import Image
import pillow_heif
import io

# Register the HEIF support
pillow_heif.register_heif_opener()

# Open the HEIC image and convert to RGB (HEIC images may be RGBA)
img = Image.open("Image.heic")
img = img.convert("RGB")

# Save the image to JPEG or PNG bytes (for Spire.PDF support)
buffer = io.BytesIO()
img.save(buffer, format="JPEG")  # Or "PNG"
image_bytes = buffer.getvalue()

# Load the image from bytes
stream = Stream(image_bytes)
image = PdfImage.FromStream(stream)

# Create a PDF document
pdf = PdfDocument()

# Set the page size to the image size and margins to 0
# This will make the image fill the page
pdf.PageSettings.Size.Width = image.Width
pdf.PageSettings.Size.Height = image.Height
pdf.PageSettings.Margins.All = 0

# Add a page to the document
page = pdf.AppendPage()

# Draw the image on the page
page.Canvas.DrawImage(image, PointF(0.0, 0.0))

# Save the PDF document
pdf.SaveToFile("output/HEICToPDF.pdf")
pdf.Close()
Below is a preview of the generated PDF file:
This approach supports batch processing and can be extended to merge multiple images into a single PDF. For more advanced image-to-PDF conversions, including other formats and options like page size, margins, and image quality, you can check out our Python guide on converting images to PDF.
How to Choose the Right HEIC to PDF Conversion Method
The best method depends less on technical preference and more on your actual usage scenario. Instead of assuming that one approach fits all situations, consider how often you perform conversions and how much control you need over the output.
Choose an Online Tool if:
- You only need to convert a few files occasionally
- You want the fastest possible solution
- Installing software is not convenient
Online converters are ideal for quick, low-effort tasks. However, they may not be suitable for sensitive images or large batches.
Choose Desktop Software if:
- You prefer working offline
- Privacy is important
- You want a simple, no-code experience
Desktop tools strike a balance between ease of use and reliability. They are often the most practical choice for everyday office workflows.
Choose Python if:
- You regularly convert large numbers of HEIC files
- The process needs to be automated
- You want precise control over layout, resolution, or document structure
- Conversion is part of a larger system or application
While this approach requires some technical knowledge, it becomes significantly more efficient at scale.
Overall, online tools suit quick tasks, desktop software supports everyday workflows, and Python is ideal for automated or large-scale conversions.
Conclusion
Converting HEIC files to PDF is a practical solution for improving compatibility and usability. While free online tools and desktop software are suitable for simple tasks, they often fall short when automation, privacy, or batch processing is required.
For developers and advanced users, converting HEIC to PDF using Python provides the most flexibility. With libraries such as pillow-heif and Spire.PDF for Python, you can build an efficient and professional conversion workflow tailored to your needs.
FAQ: HEIC to PDF Conversion
What are the free ways to convert HEIC to PDF?
Yes, many online tools offer free HEIC to PDF conversion, but they may have limitations on file size or usage.
Will converting HEIC to PDF affect image quality?
Image quality depends on the conversion method. Programmatic solutions allow better control over resolution and compression.
How can I merge multiple HEIC files into one PDF?
Yes. Using a programming approach, multiple HEIC images can be merged into a single PDF document.
Is it possible to convert HEIC to PDF for free with Spire.PDF?
Yes, Free Spire.PDF for Python allows you to convert HEIC files to PDF at no charge.
ODT to PDF Conversion Made Easy: Free Tools & Python
Table of Contents
ODT files (OpenDocument Text) are widely used for creating and editing documents in LibreOffice or Apache OpenOffice. However, sharing or distributing ODT files can be inconvenient, as not all devices or platforms support this format. Converting ODT files to PDF ensures that your document layout, fonts, and formatting remain intact, making it easier to share, print, or archive reliably.
This article guides you through practical methods to convert ODT to PDF, covering online tools, desktop software, and Python-based automation for both occasional and large-scale conversions.
Quick Navigation
- What Is an ODT File and Why Convert It to PDF?
- Convert ODT to PDF Online (Free and Web-Based Tools)
- Convert ODT to PDF Using Desktop Software
- Convert ODT to PDF Programmatically with Python
- Choosing the Right Method for Your Needs
- FAQ
What Is an ODT File and Why Convert It to PDF?
An ODT file is a word processing document based on the OpenDocument standard. It is commonly used in environments that prioritize open formats and cross-platform compatibility. ODT files support rich text, images, tables, and styles, making them suitable for everyday document creation.
However, ODT is not universally supported outside office applications. When documents need to be shared with a wider audience, submitted formally, or archived for long-term use, PDF becomes the more practical choice.
Converting ODT to PDF helps address several common needs:
- Consistent layout: PDFs display the same way on all devices and operating systems.
- Improved compatibility: PDF readers are widely available and require no editing software.
- Document integrity: PDFs reduce the risk of accidental content changes.
- Professional distribution: PDFs are often preferred for reports, contracts, and official documents.
Convert ODT to PDF Online (Free and Web-Based Tools)
Online converters are often the fastest way to convert an ODT file to PDF, especially for users who only need occasional conversions and do not want to install additional software.
Step-by-Step: Convert ODT to PDF Online
- Open a web-based ODT to PDF conversion service in your browser (for example, CloudXDocs ODT to PDF Converter).

- Upload the ODT file from your local device or supported cloud storage.
- Wait while the file is processed and converted on the server.
- Download the resulting PDF file to your computer.
Most online tools follow this simple workflow, making them accessible even to non-technical users.
Advantages of Online Conversion
- No installation or setup required
- Accessible from any modern browser
- Suitable for quick, one-time conversions
- Often available for free with basic usage
Limitations of Online Converters
Online tools typically impose file size limits or daily conversion caps. Uploading documents to third-party servers may also be unsuitable for confidential or sensitive files. In addition, complex formatting—such as custom fonts or advanced layouts—may not always be preserved accurately, and batch conversion is rarely supported.
In cases where editing and collaboration are required, converting ODT files to Word format can be a more practical option than PDF.
Convert ODT to PDF Using Desktop Software
Desktop office applications provide a more controlled environment for converting ODT files to PDF. LibreOffice and Apache OpenOffice both include built-in PDF export functionality.
Step-by-Step: Convert ODT to PDF with LibreOffice or OpenOffice
- Open the ODT file in LibreOffice Writer (or Apache OpenOffice Writer).
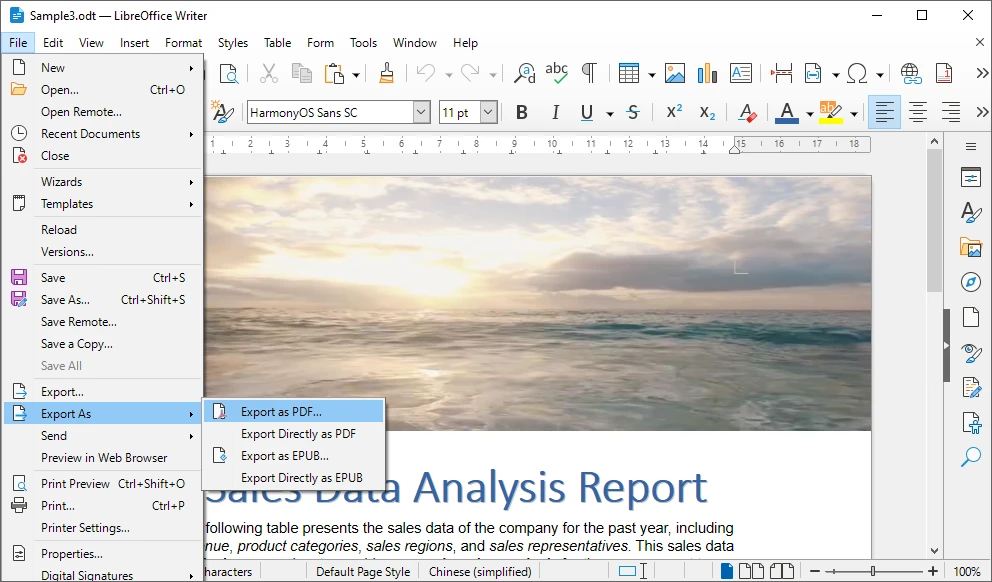
- Review the document to ensure formatting and layout are correct.
- Click File and select Export As PDF.
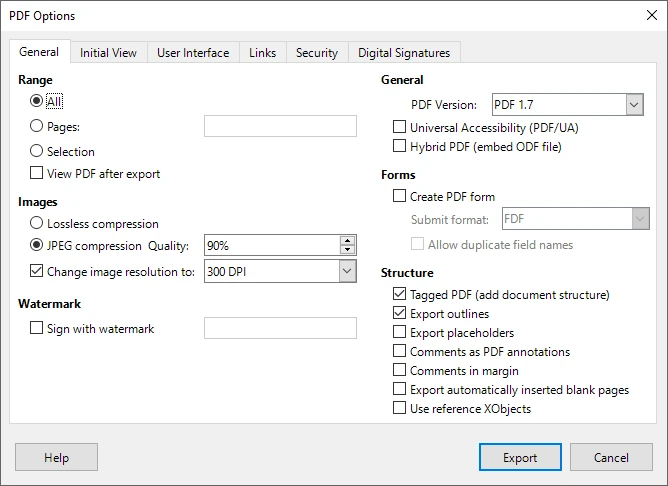
- Configure export options such as image quality, font embedding, or page range.
- Save the exported PDF file to your local system.
This approach gives users greater confidence in the final output, particularly for visually complex documents.
Advantages of Desktop-Based Conversion
- Better preservation of formatting and layout
- No need to upload files to external servers
- Greater control over PDF export settings
- Reliable for documents with tables, images, and styles
Limitations of Manual Conversion
Manual conversion requires user interaction for each document, making it inefficient for high-volume workflows. It is also difficult to automate and unsuitable for server-side or headless environments where no graphical interface is available.
When Online and Manual Methods Are Not Enough
There are many scenarios where online tools and desktop software no longer meet practical requirements. As document volume increases or workflows become more complex, manual conversion quickly turns into a bottleneck.
Typical situations where traditional methods fall short include:
- Converting large numbers of ODT files on a regular basis
- Running conversions automatically on a server or backend system
- Integrating document conversion into an existing application or service
- Ensuring consistent output without user intervention
- Operating in environments without a graphical interface
In these cases, a programmatic approach provides greater reliability, scalability, and control.
Convert ODT to PDF Programmatically with Python
Python is widely used for automation, data processing, and backend development. Using Python to convert ODT files to PDF allows the process to be fully automated and integrated into larger systems.
Why Use Python for ODT to PDF Conversion?
Python enables batch processing, repeatable workflows, and seamless integration with existing applications. Once implemented, conversions can run unattended, ensuring consistent results while reducing manual effort.
Using Spire.Doc for Python
Spire.Doc for Python is a document processing library that supports OpenDocument formats and enables direct conversion from ODT to PDF. It preserves text, images, and layout without relying on Microsoft Word or LibreOffice, making it suitable for server-side and enterprise use.
Installation
Spire.Doc for Python can be installed via pip:
pip install spire-doc
Example: Convert ODT to PDF with Python
from spire.doc import Document, FileFormat

# Create a Document object and load the ODT file
doc = Document()
doc.LoadFromFile("Sample.odt", FileFormat.Odt)

# Save the ODT document as a PDF file
doc.SaveToFile("output/ODTToPDF.pdf", FileFormat.PDF)
doc.Close()
Below is a preview of the PDF file converted from ODT using Python:
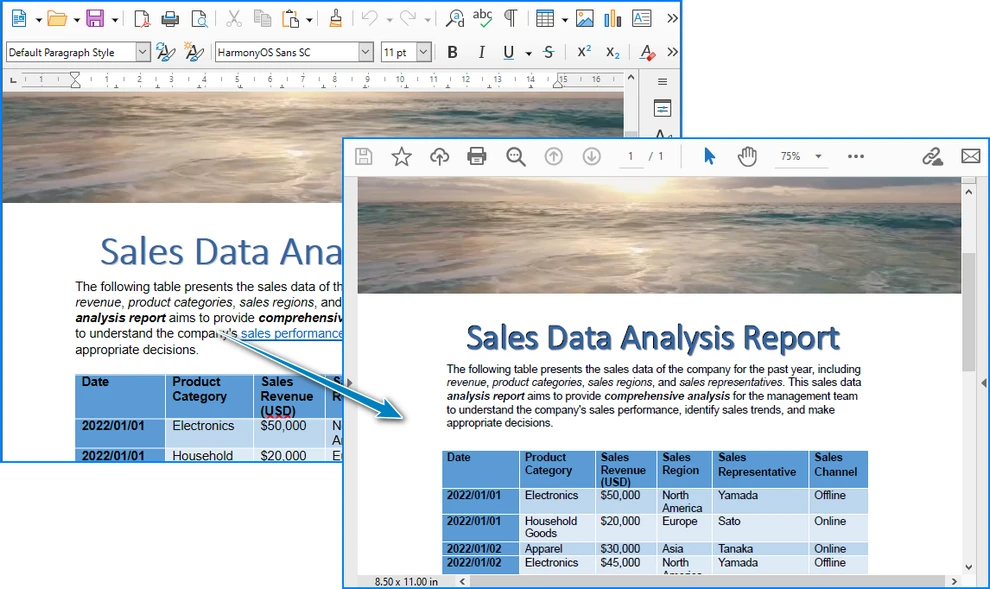
This approach can easily be extended to handle batch conversions or integrated into automated workflows.
After converting the ODT file to PDF, you can further edit the generated PDF using Python, such as adding watermarks, setting metadata, or applying additional security options.
Save ODT as PDF to a Stream (Optional)
In backend or web-based applications, you may want to generate a PDF file in memory without writing it to disk. Spire.Doc for Python allows saving the converted document to a stream.
from spire.doc import Document, FileFormat, Stream

doc = Document()
doc.LoadFromFile("Sample.odt", FileFormat.Odt)

# Save the ODT document to a PDF stream
pdf_stream = Stream()
doc.SaveToStream(pdf_stream, FileFormat.PDF)
doc.Close()

# Get PDF bytes from the stream
pdf_bytes = bytes(pdf_stream.ToArray())
This approach is useful for returning PDF files in web APIs, uploading to cloud storage, or processing documents in memory.
If your workflow requires further processing of PDF files in memory—such as merging documents, adding watermarks, or applying security settings—you may find it helpful to explore techniques for working with PDF documents directly in streams.
Choosing the Right Method for Your Needs
The best way to convert ODT to PDF depends on how often you perform the task and the level of control required.
- Online tools are ideal for quick, occasional conversions when convenience is the priority.
- Desktop software works well for users who need better formatting control and convert files manually.
- Python-based automation is the most suitable option for large-scale processing, backend systems, and enterprise workflows.
Understanding your usage scenario helps ensure you choose a method that balances efficiency, reliability, and maintainability.
FAQs About Converting ODT to PDF
Is it safe to convert ODT to PDF online?
Online converters can be convenient for non-sensitive documents, but they may not be suitable for sensitive documents due to privacy concerns.
Will the document formatting change after conversion?
Simple documents usually convert accurately, while complex layouts may benefit from desktop or programmatic methods.
Can multiple ODT files be converted at once?
Batch conversion is rarely supported by online tools and is inefficient manually. Programmatic solutions handle this more effectively.
Do Python-based conversions require office software?
No. Libraries such as Spire.Doc for Python operate independently of office applications.
Conclusion
Converting ODT files to PDF can be accomplished in several ways, each suited to different needs. Online tools and desktop applications are effective for everyday use, while Python-based automation provides a scalable solution for advanced and high-volume scenarios. By selecting the appropriate method, you can ensure accurate, efficient, and reliable document conversion.