Convertir PDF en HTML : 5 méthodes faciles (Gratuites et par lots)
Les fichiers PDF sont largement utilisés car ils préservent la mise en page et le formatage sur tous les appareils. Cependant, lorsque vous devez publier du contenu en ligne, améliorer la visibilité pour le référencement (SEO) ou intégrer des documents dans un site web, vous devrez convertir un PDF en HTML.
Le HTML est le format natif du web. Transformer un PDF en page web HTML rend le contenu consultable, modifiable et réactif sur tous les appareils.
Dans ce guide, nous vous présenterons 5 méthodes simples et pratiques pour convertir des fichiers PDF en HTML sans altérer la mise en page originale.
- Pourquoi convertir un PDF en HTML
- Comment convertir un PDF en HTML
- Quelle méthode de conversion de PDF en HTML choisir
- Meilleures pratiques et dépannage pour la conversion de PDF en HTML
Pourquoi convertir un PDF en HTML ?
Avant de choisir une méthode, il est utile de comprendre pourquoi la conversion de PDF en HTML est avantageuse :
- Meilleur SEO – Les moteurs de recherche indexent le contenu HTML plus efficacement que les fichiers PDF.
- Intégration web – Le HTML peut être intégré directement dans des sites web ou des plateformes CMS.
- Accessibilité améliorée – Le HTML prend en charge les lecteurs d'écran et les mises en page réactives.
- Réutilisation du contenu – Le HTML facilite la modification et la réutilisation du contenu.
- Compatibilité mobile – Le HTML s'adapte mieux aux différentes tailles d'écran.
Si votre objectif est de publier du contenu en ligne ou d'améliorer sa découvrabilité, la conversion de PDF en page web est souvent la meilleure option.
Comment convertir un PDF en HTML
Il existe plusieurs options pour convertir un PDF en HTML, allant des outils en ligne simples, des logiciels de bureau (comme Adobe Acrobat, Word) et des extensions de navigateur aux techniques avancées utilisant l'automatisation avec Python. Explorons maintenant chaque méthode de conversion en détail.
Méthode 1 : Convertir un PDF en HTML à l'aide d'outils en ligne
Les convertisseurs de PDF en HTML en ligne sont le moyen le plus rapide et le plus simple de convertir gratuitement un PDF en HTML sans installer de logiciel. Ils fonctionnent directement dans votre navigateur web, vous pouvez donc y accéder depuis n'importe quel appareil : Windows, Mac ou même mobile.
Ces outils sont parfaits pour les conversions ponctuelles ou occasionnelles, vous permettant de transformer des PDF en pages web en quelques clics seulement.
Comment convertir un PDF en HTML en ligne :
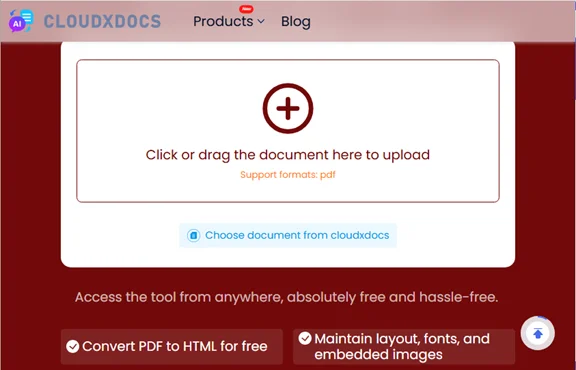
- Ouvrez un convertisseur de PDF en HTML en ligne, tel que Cloudxdocs ou Zamzar.
- Téléchargez votre fichier PDF.
- L'outil traitera et convertira automatiquement votre PDF.
- Téléchargez le fichier HTML une fois la conversion terminée.
Avantages :
- Gratuit et facile à utiliser.
- Aucune installation de logiciel requise.
- Processus de conversion rapide.
Inconvénients :
- Options de personnalisation limitées.
- Peut avoir des limites de taille de fichier.
- Préoccupations de confidentialité lors du téléchargement de documents sensibles.
Conseil : Vérifiez toujours la politique de confidentialité des outils en ligne avant de télécharger votre document. Pour les fichiers confidentiels, envisagez d'utiliser des outils hors ligne comme Adobe Acrobat ou l'automatisation avec Python décrits ci-dessous.
Méthode 2 : Exporter un PDF en HTML avec Adobe Acrobat Pro
Pour les PDF avec des mises en page complexes, des images ou un formatage détaillé, Adobe Acrobat Pro est une solution professionnelle pour convertir un PDF en HTML. Il offre des conversions précises et de haute qualité avec une perte de formatage minimale, ce qui le rend idéal pour les rapports d'entreprise, les livres électroniques ou tout document où la précision est importante.
Adobe Acrobat Pro prend également en charge l'OCR (Reconnaissance Optique de Caractères), vous pouvez donc convertir des PDF numérisés en pages HTML modifiables sans perdre de texte ni de structure. Cela en fait un choix fiable pour les PDF à base de texte et ceux contenant beaucoup d'images.
Comment convertir un PDF en HTML avec Adobe Acrobat Pro :
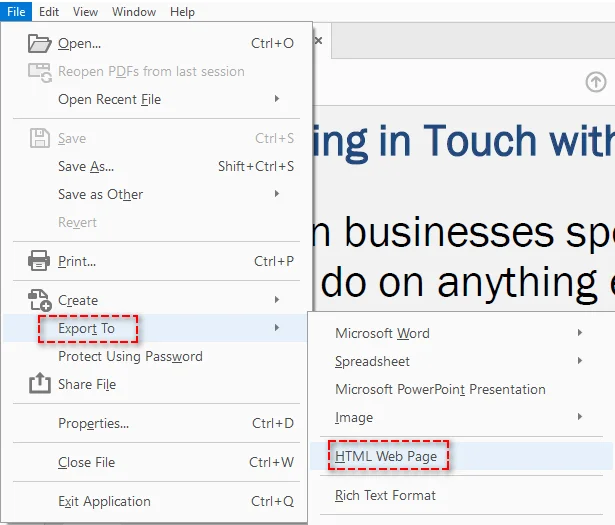
- Lancez Adobe Acrobat Pro et ouvrez votre fichier PDF.
- Allez dans Fichier > Exporter vers > Page Web HTML.
- Personnalisez les paramètres d'exportation (par exemple, inclure les images ou exclure les en-têtes/pieds de page).
- Enregistrez le fichier au format HTML.
Avantages :
- Conversion de haute qualité pour les PDF avec des mises en page complexes, des images et des tableaux.
- Convertit les PDF numérisés à l'aide de l'OCR pour une reconnaissance précise du texte.
- Offre un contrôle précis sur le formatage de sortie.
Inconvénients :
- Outil payant nécessitant un abonnement.
- Non conçu pour les conversions par lots à grande échelle.
Méthode 3 : Convertir un PDF en HTML avec Microsoft Word
Microsoft Word offre un moyen simple et gratuit de convertir un PDF en HTML, en particulier pour les PDF à base de texte. C'est idéal pour les utilisateurs qui travaillent déjà dans Word et ont besoin d'une conversion rapide sans logiciel supplémentaire.
Bien que Word puisse gérer le formatage de base et les images, il peut avoir des difficultés avec les mises en page multi-colonnes, les tableaux ou les PDF très stylisés, il n'est donc pas recommandé pour les conceptions complexes.
Comment convertir un PDF en HTML avec Microsoft Word :
- Ouvrez le fichier PDF dans Microsoft Word (Word convertira automatiquement le PDF en un format modifiable).
- Apportez les ajustements nécessaires au contenu pour vous assurer qu'il s'affiche correctement.
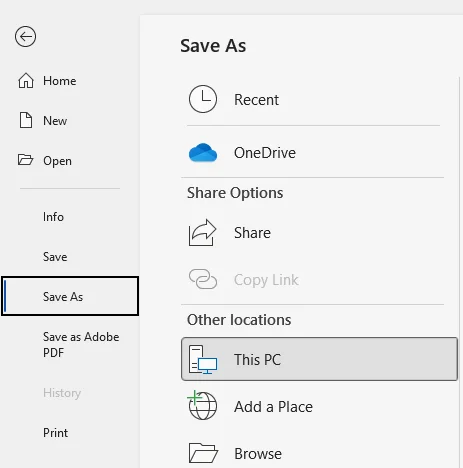
- Allez dans Fichier > Enregistrer sous et sélectionnez Page Web (.htm;.html) comme format de fichier.
- Choisissez un dossier de destination et enregistrez le fichier HTML.
Avantages :
- Gratuit et largement accessible.
- Bon pour les documents PDF de base avec un formatage minimal.
Inconvénients :
- Le formatage peut être perdu, en particulier avec les mises en page complexes ou les images.
- Ne convient pas aux PDF avec des conceptions complexes.
Méthode 4 : Conversion rapide de PDF en HTML avec des extensions de navigateur
Une extension de navigateur est un moyen rapide et pratique de convertir des PDF en HTML directement dans votre navigateur. Elle fonctionne avec des PDF locaux ou ceux liés sur des pages web, sans nécessiter de logiciel supplémentaire. Cette méthode est idéale pour les utilisateurs qui ont besoin de conversions rapides et nomades sans dépendre d'outils en ligne.
Comment utiliser une extension de navigateur pour convertir un PDF en HTML :
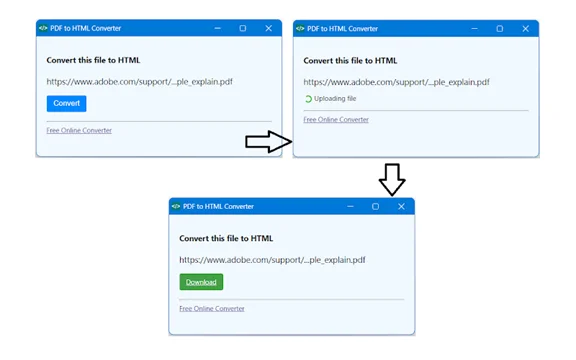
- Recherchez et installez une extension de conversion de PDF en HTML depuis le magasin d'extensions de votre navigateur, comme le PDF to HTML Converter dans le Chrome Web Store.
- Cliquez sur l'extension dans la barre d'outils de votre navigateur, puis téléchargez un PDF local ou laissez l'extension détecter automatiquement les liens PDF sur la page web que vous visitez.
- Suivez les instructions pour convertir votre PDF, attendez la fin du processus, puis téléchargez le fichier HTML.
Avantages :
- Pratique et rapide.
- Facile à utiliser avec une configuration minimale.
Inconvénients :
- Contrôle limité sur la qualité de sortie.
- Peut ne pas prendre en charge les fichiers volumineux ou complexes.
- Dépendant du navigateur que vous utilisez (par exemple, Chrome, Edge, Firefox).
Conseil : Toutes les extensions ne prennent pas en charge la détection automatique des liens PDF, et la qualité de la conversion peut varier. Vérifiez toujours les avis des utilisateurs et les informations du développeur avant d'installer une extension.
Méthode 5 : Conversion par lots de PDF en HTML avec l'automatisation Python
Pour les développeurs ou les utilisateurs en entreprise qui ont besoin de convertir de grands volumes de PDF en HTML, Python offre une solution automatisée et efficace. En utilisant des bibliothèques comme Spire.PDF for Python, vous pouvez convertir par lots des PDF en HTML et d'autres formats tels que Word et Excel, ce qui permet de gagner du temps et d'augmenter la productivité lors du traitement de plusieurs fichiers.
Comment convertir par lots des PDF en HTML avec Python :
- Installez Spire.PDF for Python via pip :
- Créez un script Python pour convertir par lots des PDF d'un dossier spécifié en HTML :
- Exécutez le script pour convertir tous les PDF dans le dossier spécifié. Les fichiers HTML seront enregistrés dans le même répertoire.
pip install Spire.PDF
import os
from spire.pdf import *

# Définir le dossier contenant les fichiers PDF
pdf_folder = '/chemin/vers/dossier_pdf'

# Parcourir chaque fichier PDF dans le dossier
for filename in os.listdir(pdf_folder):
    if filename.endswith('.pdf'):
        file_path = os.path.join(pdf_folder, filename)
        output_path = os.path.join(pdf_folder, f'{filename[:-4]}.html')

        # Initialiser l'objet PdfDocument
        doc = PdfDocument()

        # Charger le fichier PDF
        doc.LoadFromFile(file_path)

        # Convertir et enregistrer le PDF en HTML
        doc.SaveToFile(output_path, FileFormat.HTML)

        # Fermer le document
        doc.Close()
Avantages :
- Convertissez des centaines ou des milliers de PDF avec un seul script.
- Aucune connexion Internet ou téléversement dans le cloud requis ; idéal pour les documents confidentiels ou internes.
- Fonctionne sur Windows, Linux, macOS et les environnements serveur (y compris Docker et les serveurs Linux sans tête).
- S'intègre facilement dans les flux de travail Python
Inconvénients :
- Nécessite des connaissances de base en programmation Python.
- La configuration initiale prend un peu plus de temps que les outils manuels.
Conseil : Vous pouvez ajuster le script pour modifier les paramètres de conversion, comme la gestion des images ou la division des pages. Pour plus de détails, consultez le guide officiel : Convertir un PDF en HTML avec Python.
Quelle méthode de conversion de PDF en HTML choisir
Il n'y a pas une seule meilleure façon de convertir un PDF en HTML. La bonne méthode dépend de la fréquence à laquelle vous convertissez des fichiers, de la complexité de vos documents et de la nécessité d'un traitement par lots.
Voici un bref récapitulatif pour vous aider à décider :
| Scénario | Approche recommandée |
|---|---|
| Convertir un fichier rapidement | Outil de conversion PDF en HTML en ligne |
| Préserver la précision de la mise en page et les images | Adobe Acrobat Pro |
| Convertir un document simple à base de texte | Microsoft Word |
| Convertir directement dans votre navigateur | Extension de navigateur |
| Convertir plusieurs PDF à grande échelle | Automatisation avec Python |
Choisissez la méthode qui correspond à votre flux de travail et rendez vos PDF consultables, réactifs et prêts à être publiés en ligne.
Meilleures pratiques et dépannage pour la conversion de PDF en HTML
Lors de la conversion de PDF en HTML, il est essentiel de suivre les meilleures pratiques et de résoudre les problèmes courants pour un processus fluide et efficace. Ci-dessous, nous mettons en évidence les pratiques clés et les solutions aux défis courants lors de la conversion.
Meilleures pratiques
-
Choisissez le bon outil :
Sélectionnez un outil de conversion fiable pour des résultats précis. Bien que les outils gratuits fonctionnent bien pour les PDF simples, les outils professionnels comme Adobe Acrobat offrent un meilleur contrôle sur le formatage et les documents complexes.
-
Gardez la mise en page simple :
Les PDF avec des mises en page complexes peuvent ne pas bien se convertir en HTML. Pour des résultats plus propres, essayez de simplifier la mise en page dans le document original.
-
Optimisez les images pour le web :
Redimensionnez ou compressez les images avant la conversion pour réduire la taille du fichier et améliorer les temps de chargement des pages. Les images haute résolution peuvent ralentir les performances web.
-
Testez sur différents navigateurs :
Après la conversion, vérifiez le rendu de votre HTML dans plusieurs navigateurs (par exemple, Chrome, Firefox). Cela garantit une présentation et une fonctionnalité cohérentes sur toutes les plateformes.
Dépannage des problèmes courants
-
Mise en page cassée après la conversion :
Les PDF complexes à plusieurs colonnes peuvent ne pas se convertir proprement. Essayez d'exporter avec des options HTML structurées si disponibles.
-
Les images deviennent mal alignées :
Certains convertisseurs extraient les images séparément. Vérifiez les paramètres d'exportation pour intégrer correctement les images.
-
Les PDF numérisés ne se convertissent pas correctement :
Si votre PDF est basé sur des images, utilisez un outil qui prend en charge l'OCR avant de le convertir en HTML.
-
CSS en ligne désordonné :
Certains outils génèrent des styles en ligne lourds. Vous devrez peut-être nettoyer le HTML pour une utilisation en production.
Conclusion
Vous connaissez maintenant les cinq méthodes différentes pour convertir des PDF en HTML, chacune adaptée à des besoins et des scénarios différents. Que vous recherchiez une solution en ligne rapide, un outil de conversion de haute qualité ou un processus par lots plus automatisé, il existe une méthode qui fonctionnera pour vous.
Vous cherchez d'autres tutoriels PDF de haute qualité ? Consultez nos ressources PDF gratuites.
FAQ
Q1 : Quelle est la manière la plus simple de convertir un PDF en HTML ?
R1 : Les outils de conversion en ligne sont la méthode la plus rapide et la plus simple pour convertir un PDF en page web HTML sans aucune installation de logiciel.
Q2 : Puis-je convertir des PDF numérisés en HTML ?
R2 : Oui, Adobe Acrobat Pro peut convertir des PDF numérisés en HTML en utilisant la technologie OCR (Reconnaissance Optique de Caractères), préservant ainsi le texte et la mise en page avec précision.
Q3 : Comment puis-je convertir par lots plusieurs PDF en HTML ?
R3 : L'automatisation avec Python et des bibliothèques comme Spire.PDF vous permet d'effectuer efficacement des conversions par lots de PDF en HTML, ce qui vous fait gagner du temps lors du traitement d'un grand nombre de fichiers.
Q4 : Quelle est la meilleure méthode pour les PDF complexes avec des images et un formatage ?
R4 : Les logiciels de bureau comme Adobe Acrobat fournissent les résultats les plus précis pour les PDF avec des mises en page complexes, des images ou des tableaux, garantissant une perte de formatage minimale lors de la conversion.
Voir aussi
Convertir PDF a HTML: 5 formas fáciles (Opciones gratuitas y por lotes)
Los archivos PDF son ampliamente utilizados porque conservan el diseño y el formato en todos los dispositivos. Sin embargo, cuando necesitas publicar contenido en línea, mejorar la visibilidad SEO o integrar documentos en un sitio web, necesitarás convertir PDF a HTML.
HTML es el formato nativo de la web. Convertir un PDF en una página web HTML hace que el contenido sea buscable, editable y adaptable a todos los dispositivos.
En esta guía, te mostraremos 5 formas fáciles y prácticas de convertir archivos PDF a HTML sin alterar el formato original.
- Por Qué Convertir PDF a HTML
- Cómo Convertir PDF a HTML
- Qué Método de Conversión de PDF a HTML Deberías Elegir
- Mejores Prácticas y Solución de Problemas para la Conversión de PDF a HTML
¿Por Qué Convertir PDF a HTML?
Antes de elegir un método, es útil entender por qué la conversión de PDF a HTML es beneficiosa:
- Mejor SEO – Los motores de búsqueda indexan el contenido HTML de manera más efectiva que los archivos PDF.
- Integración Web – El HTML se puede incrustar directamente en sitios web o plataformas CMS.
- Accesibilidad Mejorada – El HTML es compatible con lectores de pantalla y diseños adaptables.
- Reutilización de Contenido – El HTML facilita la edición y reutilización del contenido.
- Compatibilidad Móvil – El HTML se adapta mejor a diferentes tamaños de pantalla.
Si tu objetivo es publicar contenido en línea o mejorar la visibilidad, convertir PDF a página web suele ser la mejor opción.
Cómo Convertir PDF a HTML
Existen varias opciones para convertir PDF a HTML, desde herramientas en línea sencillas, software de escritorio (como Adobe Acrobat, Word) y extensiones de navegador hasta técnicas avanzadas usando automatización con Python. Ahora, exploremos cada método de conversión en detalle.
Método 1: Convertir PDF a HTML Usando Herramientas en Línea
Los convertidores de PDF a HTML en línea son la forma más rápida y fácil de convertir PDF a HTML de forma gratuita sin instalar ningún software. Funcionan directamente en tu navegador web, por lo que puedes acceder a ellos desde cualquier dispositivo: Windows, Mac o incluso móvil.
Estas herramientas son perfectas para conversiones únicas u ocasionales, permitiéndote convertir PDFs en páginas web con solo unos pocos clics.
Cómo Convertir PDF a HTML en Línea:
- Abre un convertidor de PDF a HTML en línea, como Cloudxdocs o Zamzar.
- Sube tu archivo PDF.
- La herramienta procesará y convertirá automáticamente tu PDF.
- Descarga el archivo HTML una vez que la conversión esté completa.
Ventajas:
- Gratis y fácil de usar.
- No requiere instalación de software.
- Proceso de conversión rápido.
Desventajas:
- Opciones de personalización limitadas.
- Puede tener límites de tamaño de archivo.
- Preocupaciones de privacidad al subir documentos sensibles.
Consejo: Siempre revisa la política de privacidad de las herramientas en línea antes de subir tu documento. Para archivos confidenciales, considera usar herramientas sin conexión como Adobe Acrobat o la automatización con Python que se describe a continuación.
Método 2: Exportar PDF a HTML Usando Adobe Acrobat Pro
Para PDFs con diseños complejos, imágenes o formato detallado, Adobe Acrobat Pro es una solución profesional para convertir PDF a HTML. Ofrece conversiones precisas y de alta calidad con una pérdida mínima de formato, lo que lo hace ideal para informes de negocios, libros electrónicos o cualquier documento donde la precisión es importante.
Adobe Acrobat Pro también admite OCR (Reconocimiento Óptico de Caracteres), por lo que puedes convertir PDFs escaneados en páginas HTML editables sin perder texto ni estructura. Esto lo convierte en una opción confiable tanto para PDFs basados en texto como para aquellos con muchas imágenes.
Cómo Convertir PDF a HTML con Adobe Acrobat Pro:
- Inicia Adobe Acrobat Pro y abre tu archivo PDF.
- Ve a Archivo > Exportar a > Página web HTML.
- Personaliza la configuración de exportación (por ejemplo, incluir imágenes o excluir encabezados/pies de página).
- Guarda el archivo como HTML.
Ventajas:
- Conversión de alta calidad para PDFs con diseños complejos, imágenes y tablas.
- Convierte PDFs escaneados usando OCR para un reconocimiento de texto preciso.
- Ofrece un control preciso sobre el formato de salida.
Desventajas:
- Herramienta de pago que requiere una suscripción.
- No está diseñado para conversiones por lotes a gran escala.
Método 3: Convertir PDF a HTML Usando Microsoft Word
Microsoft Word ofrece una forma gratuita y sencilla de convertir PDF a HTML, especialmente para PDFs basados en texto. Es ideal para usuarios que ya trabajan en Word y necesitan una conversión rápida sin software adicional.
Aunque Word puede manejar formato básico e imágenes, puede tener dificultades con diseños de varias columnas, tablas o PDFs con estilos muy elaborados, por lo que no se recomienda para diseños complejos.
Cómo Convertir PDF a HTML con Microsoft Word:
- Abre el archivo PDF en Microsoft Word (Word convertirá automáticamente el PDF a un formato editable).
- Realiza los ajustes necesarios en el contenido para asegurarte de que se vea correcto.
- Ve a Archivo > Guardar como y selecciona Página web (.htm;.html) como formato de archivo.
- Elige una carpeta de destino y guarda el archivo HTML.
Ventajas:
- Gratuito y ampliamente accesible.
- Bueno para documentos PDF básicos con formato mínimo.
Desventajas:
- El formato puede perderse, especialmente con diseños complejos o imágenes.
- No es adecuado para PDFs con diseños complejos.
Método 4: Conversión Rápida de PDF a HTML con Extensiones de Navegador
Una extensión de navegador es una forma rápida y conveniente de convertir PDFs a HTML directamente en tu navegador. Funciona con PDFs locales o aquellos enlazados en páginas web, sin necesidad de software adicional. Este método es ideal para usuarios que necesitan conversiones rápidas y sobre la marcha sin depender de herramientas en línea.
Cómo Usar una Extensión de Navegador para Convertir PDF a HTML:
- Busca e instala una extensión de PDF a HTML desde la tienda de extensiones de tu navegador, como PDF to HTML Converter en la Chrome Web Store.
- Haz clic en la extensión en la barra de herramientas de tu navegador, luego sube un PDF local o deja que la extensión detecte automáticamente los enlaces a PDF en la página web que visitas.
- Sigue las instrucciones para convertir tu PDF, espera a que termine el proceso y luego descarga el archivo HTML.
Ventajas:
- Conveniente y rápido.
- Fácil de usar con una configuración mínima.
Desventajas:
- Control limitado sobre la calidad de salida.
- Puede que no admita archivos grandes o complejos.
- Depende del navegador que estés usando (por ejemplo, Chrome, Edge, Firefox).
Consejo: No todas las extensiones admiten la detección automática de enlaces a PDF, y la calidad de la conversión puede variar. Siempre revisa las opiniones de los usuarios y la información del desarrollador antes de instalar cualquier extensión.
Método 5: Convertir por Lotes PDF a HTML Usando Automatización con Python
Para desarrolladores o usuarios empresariales que necesitan convertir grandes volúmenes de PDFs a HTML, Python ofrece una solución eficiente y automatizada. Usando bibliotecas como Spire.PDF for Python, puedes convertir por lotes PDF a HTML y otros formatos como Word y Excel, ahorrando tiempo y aumentando la productividad al manejar múltiples archivos.
Cómo Convertir por Lotes PDF a HTML con Python:
- Instala Spire.PDF for Python a través de pip:
- Crea un script de Python para convertir por lotes PDFs de una carpeta específica a HTML:
- Ejecuta el script para convertir todos los PDFs en la carpeta especificada. Los archivos HTML se guardarán en el mismo directorio.
pip install Spire.PDF
import os
from spire.pdf import *

# Define the folder containing PDF files
pdf_folder = '/path/to/pdf_folder'

# Loop through each PDF file in the folder
for filename in os.listdir(pdf_folder):
    if filename.endswith('.pdf'):
        file_path = os.path.join(pdf_folder, filename)
        output_path = os.path.join(pdf_folder, f'{filename[:-4]}.html')

        # Initialize the PdfDocument object
        doc = PdfDocument()

        # Load the PDF file
        doc.LoadFromFile(file_path)

        # Convert and save the PDF as HTML
        doc.SaveToFile(output_path, FileFormat.HTML)

        # Close the document
        doc.Close()
Ventajas:
- Convierte cientos o miles de PDFs con un solo script.
- No se requiere conexión a internet ni subida a la nube; ideal para documentos confidenciales o internos.
- Funciona en Windows, Linux, macOS y entornos de servidor (incluidos Docker y servidores Linux sin cabeza).
- Se integra fácilmente en flujos de trabajo de Python
Desventajas:
- Requiere conocimientos básicos de programación en Python.
- La configuración inicial lleva un poco más de tiempo que las herramientas manuales.
Consejo: Puedes ajustar el script para modificar la configuración de conversión, como el manejo de imágenes o la división de páginas. Para más detalles, consulta la guía oficial: Convertir PDF a HTML Usando Python.
Qué Método de Conversión de PDF a HTML Deberías Elegir
No hay una única forma mejor de convertir PDF a HTML. El método correcto depende de la frecuencia con la que conviertes archivos, la complejidad de tus documentos y si necesitas procesamiento por lotes.
Aquí tienes un resumen rápido para ayudarte a decidir:
| Escenario | Enfoque Recomendado |
|---|---|
| Convertir un archivo rápidamente | Herramienta de PDF a HTML en línea |
| Preservar la precisión del diseño y las imágenes | Adobe Acrobat Pro |
| Convertir un documento simple basado en texto | Microsoft Word |
| Convertir directamente en tu navegador | Extensión de navegador |
| Convertir múltiples PDFs a escala | Automatización con Python |
Elige el método que se ajuste a tu flujo de trabajo y haz que tus PDFs sean buscables, adaptables y listos para publicar en línea.
Mejores Prácticas y Solución de Problemas para la Conversión de PDF a HTML
Al convertir PDF a HTML, seguir las mejores prácticas y abordar los problemas comunes es esencial para un proceso fluido y eficiente. A continuación, destacamos prácticas clave y soluciones a los desafíos comunes durante la conversión.
Mejores Prácticas
-
Elige la Herramienta Adecuada:
Selecciona una herramienta de conversión confiable para obtener resultados precisos. Aunque las herramientas gratuitas funcionan bien para PDFs simples, las herramientas profesionales como Adobe Acrobat ofrecen un mejor control sobre el formato y los documentos complejos.
-
Mantén el Diseño Simple:
Los PDFs con diseños complejos pueden no convertirse bien a HTML. Para obtener resultados más limpios, intenta simplificar el diseño en el documento original.
-
Optimiza las Imágenes para la Web:
Redimensiona o comprime las imágenes antes de la conversión para reducir el tamaño del archivo y mejorar los tiempos de carga de la página. Las imágenes de alta resolución pueden ralentizar el rendimiento web.
-
Prueba en Diferentes Navegadores:
Después de convertir, comprueba cómo se renderiza tu HTML en múltiples navegadores (por ejemplo, Chrome, Firefox). Esto asegura una presentación y funcionalidad consistentes en todas las plataformas.
Solución de Problemas Comunes
-
Diseño Roto Después de la Conversión:
Los PDFs complejos de varias columnas pueden no convertirse limpiamente. Intenta exportar con opciones de HTML estructurado si están disponibles.
-
Las Imágenes se Desalinean:
Algunos convertidores extraen las imágenes por separado. Revisa la configuración de exportación para incrustar las imágenes correctamente.
-
Los PDFs Escaneados no se Convierten Correctamente:
Si tu PDF está basado en imágenes, usa una herramienta que admita OCR antes de convertirlo a HTML.
-
CSS en Línea Desordenado:
Algunas herramientas generan estilos en línea pesados. Es posible que necesites limpiar el HTML para su uso en producción.
Conclusión
A estas alturas, ya has aprendido sobre los cinco métodos diferentes para convertir PDFs a HTML, cada uno adecuado para diferentes necesidades y escenarios. Ya sea que busques una solución rápida en línea, una herramienta de conversión de alta calidad o un proceso por lotes más automatizado, hay un método que funcionará para ti.
¿Buscas más tutoriales de PDF de alta calidad? Echa un vistazo a nuestros recursos gratuitos de PDF.
Preguntas Frecuentes
P1: ¿Cuál es la forma más fácil de convertir un PDF a HTML?
R1: Las herramientas de conversión en línea son el método más rápido y fácil para convertir PDF a Página Web HTML sin necesidad de instalar ningún software.
P2: ¿Puedo convertir PDFs escaneados a HTML?
R2: Sí, Adobe Acrobat Pro puede convertir PDFs escaneados a HTML utilizando la tecnología OCR (Reconocimiento Óptico de Caracteres), conservando el texto y el diseño con precisión.
P3: ¿Cómo puedo convertir por lotes múltiples PDFs a HTML?
R3: La automatización con Python con bibliotecas como Spire.PDF te permite realizar conversiones por lotes de PDF a HTML de manera eficiente, ahorrando tiempo al manejar grandes cantidades de archivos.
P4: ¿Qué método es mejor para PDFs complejos con imágenes y formato?
R4: El software de escritorio como Adobe Acrobat proporciona los resultados más precisos para PDFs con diseños complejos, imágenes o tablas, asegurando una pérdida mínima de formato durante la conversión.
Ver También
PDF in HTML umwandeln: 5 einfache Wege (Kostenlos & Batch-Optionen)
PDF-Dateien sind weit verbreitet, da sie das Layout und die Formatierung auf allen Geräten beibehalten. Wenn Sie jedoch Inhalte online veröffentlichen, die SEO-Sichtbarkeit verbessern oder Dokumente in eine Website integrieren müssen, müssen Sie PDF in HTML umwandeln.
HTML ist das native Format des Webs. Die Umwandlung einer PDF-Datei in eine HTML-Webseite macht den Inhalt durchsuchbar, bearbeitbar und auf allen Geräten responsiv.
In diesem Leitfaden führen wir Sie durch 5 einfache und praktische Möglichkeiten, PDF-Dateien in HTML zu konvertieren, ohne die ursprüngliche Formatierung zu verändern.
- Warum PDF in HTML umwandeln
- Wie man PDF in HTML umwandelt
- Welche PDF-zu-HTML-Methode sollten Sie wählen
- Best Practices und Fehlerbehebung bei der PDF-zu-HTML-Konvertierung
Warum PDF in HTML umwandeln?
Bevor Sie eine Methode wählen, ist es hilfreich zu verstehen, warum die Konvertierung von PDF in HTML nützlich ist:
- Besseres SEO – Suchmaschinen indizieren HTML-Inhalte effektiver als PDF-Dateien.
- Web-Integration – HTML kann direkt in Websites oder CMS-Plattformen eingebettet werden.
- Verbesserte Zugänglichkeit – HTML unterstützt Bildschirmleser und responsive Layouts.
- Wiederverwendung von Inhalten – HTML erleichtert die Bearbeitung und Wiederverwendung von Inhalten.
- Mobile Kompatibilität – HTML passt sich besser an verschiedene Bildschirmgrößen an.
Wenn Ihr Ziel die Veröffentlichung von Inhalten im Internet oder die Verbesserung der Auffindbarkeit ist, ist die Konvertierung von PDF in eine Webseite oft die bessere Option.
Wie man PDF in HTML umwandelt
Es gibt verschiedene Möglichkeiten, PDF in HTML zu konvertieren, von einfachen Online-Tools, Desktop-Software (wie Adobe Acrobat, Word) und Browser-Erweiterungen bis hin zu fortgeschrittenen Techniken mit Python-Automatisierung. Lassen Sie uns nun jede Konvertierungsmethode im Detail untersuchen.
Methode 1: PDF mit Online-Tools in HTML umwandeln
Online-PDF-zu-HTML-Konverter sind der schnellste und einfachste Weg, PDF kostenlos in HTML umzuwandeln, ohne Software zu installieren. Sie funktionieren direkt in Ihrem Webbrowser, sodass Sie von jedem Gerät aus darauf zugreifen können – Windows, Mac oder sogar mobil.
Diese Tools sind perfekt für einmalige oder gelegentliche Konvertierungen und ermöglichen es Ihnen, PDFs mit nur wenigen Klicks in Webseiten umzuwandeln.
Wie man PDF online in HTML umwandelt:
- Öffnen Sie einen Online-PDF-zu-HTML-Konverter wie Cloudxdocs oder Zamzar.
- Laden Sie Ihre PDF-Datei hoch.
- Das Tool verarbeitet und konvertiert Ihre PDF-Datei automatisch.
- Laden Sie die HTML-Datei herunter, sobald die Konvertierung abgeschlossen ist.
Vorteile:
- Kostenlos und einfach zu bedienen.
- Keine Softwareinstallation erforderlich.
- Schneller Konvertierungsprozess.
Nachteile:
- Begrenzte Anpassungsmöglichkeiten.
- Kann Dateigrößenbeschränkungen haben.
- Datenschutzbedenken beim Hochladen sensibler Dokumente.
Tipp: Überprüfen Sie immer die Datenschutzrichtlinien von Online-Tools, bevor Sie Ihr Dokument hochladen. Für vertrauliche Dateien sollten Sie die Verwendung von Offline-Tools wie Adobe Acrobat oder der unten beschriebenen Python-Automatisierung in Betracht ziehen.
Methode 2: PDF mit Adobe Acrobat Pro in HTML exportieren
Für PDFs mit komplexen Layouts, Bildern oder detaillierter Formatierung ist Adobe Acrobat Pro eine professionelle Lösung zur Konvertierung von PDF in HTML. Es liefert qualitativ hochwertige, genaue Konvertierungen mit minimalem Formatierungsverlust und ist somit ideal für Geschäftsberichte, E-Books oder jedes Dokument, bei dem es auf Präzision ankommt.
Adobe Acrobat Pro unterstützt auch OCR (Optical Character Recognition), sodass Sie gescannte PDFs in bearbeitbare HTML-Seiten umwandeln können, ohne Text oder Struktur zu verlieren. Dies macht es zu einer zuverlässigen Wahl für sowohl textbasierte als auch bildlastige PDFs.
Wie man PDF mit Adobe Acrobat Pro in HTML umwandelt:
- Starten Sie Adobe Acrobat Pro und öffnen Sie Ihre PDF-Datei.
- Gehen Sie zu Datei > Exportieren nach > HTML-Webseite.
- Passen Sie die Exporteinstellungen an (z. B. Bilder einschließen oder Kopf-/Fußzeilen ausschließen).
- Speichern Sie die Datei als HTML.
Vorteile:
- Hochwertige Konvertierung für PDFs mit komplexen Layouts, Bildern und Tabellen.
- Konvertiert gescannte PDFs mit OCR für eine genaue Texterkennung.
- Bietet präzise Kontrolle über die Ausgabeformatierung.
Nachteile:
- Kostenpflichtiges Tool, das ein Abonnement erfordert.
- Nicht für umfangreiche Stapelkonvertierungen ausgelegt.
Methode 3: PDF mit Microsoft Word in HTML umwandeln
Microsoft Word bietet eine kostenlose und einfache Möglichkeit, PDF in HTML zu konvertieren, insbesondere für textbasierte PDFs. Es ist ideal für Benutzer, die bereits in Word arbeiten und eine schnelle Konvertierung ohne zusätzliche Software benötigen.
Obwohl Word grundlegende Formatierungen und Bilder verarbeiten kann, kann es bei mehrspaltigen Layouts, Tabellen oder stark gestalteten PDFs Schwierigkeiten haben, daher wird es nicht für komplizierte Designs empfohlen.
Wie man PDF mit Microsoft Word in HTML umwandelt:
- Öffnen Sie die PDF-Datei in Microsoft Word (Word konvertiert die PDF-Datei automatisch in ein bearbeitbares Format).
- Nehmen Sie alle erforderlichen Anpassungen am Inhalt vor, um sicherzustellen, dass er korrekt aussieht.
- Gehen Sie zu Datei > Speichern unter und wählen Sie Webseite(.htm;.html) als Dateiformat.
- Wählen Sie einen Zielordner und speichern Sie die HTML-Datei.
Vorteile:
- Kostenlos und weithin zugänglich.
- Gut für einfache PDF-Dokumente mit minimaler Formatierung.
Nachteile:
- Die Formatierung kann verloren gehen, insbesondere bei komplexen Layouts oder Bildern.
- Nicht für PDFs mit komplizierten Designs geeignet.
Methode 4: Schnelle PDF-zu-HTML-Konvertierung mit Browser-Erweiterungen
Eine Browser-Erweiterung ist eine schnelle und bequeme Möglichkeit, PDFs direkt in Ihrem Browser in HTML zu konvertieren. Sie funktioniert mit lokalen PDFs oder solchen, die auf Webseiten verlinkt sind – keine zusätzliche Software erforderlich. Diese Methode ist ideal für Benutzer, die schnelle Konvertierungen unterwegs benötigen, ohne auf Online-Tools angewiesen zu sein.
Wie man eine Browser-Erweiterung zur Konvertierung von PDF in HTML verwendet:
- Suchen und installieren Sie eine PDF-zu-HTML-Erweiterung aus dem Extension Store Ihres Browsers, wie z. B. den PDF to HTML Converter im Chrome Web Store.
- Klicken Sie auf die Erweiterung in Ihrer Browser-Symbolleiste, laden Sie dann entweder eine lokale PDF-Datei hoch oder lassen Sie die Erweiterung automatisch PDF-Links auf der von Ihnen besuchten Webseite erkennen.
- Folgen Sie den Anweisungen, um Ihre PDF-Datei zu konvertieren, warten Sie, bis der Vorgang abgeschlossen ist, und laden Sie dann die HTML-Datei herunter.
Vorteile:
- Bequem und schnell.
- Einfach zu bedienen mit minimalem Einrichtungsaufwand.
Nachteile:
- Begrenzte Kontrolle über die Ausgabequalität.
- Unterstützt möglicherweise keine großen oder komplexen Dateien.
- Abhängig vom verwendeten Browser (z. B. Chrome, Edge, Firefox).
Tipp: Nicht alle Erweiterungen unterstützen die automatische Erkennung von PDF-Links, und die Konvertierungsqualität kann variieren. Überprüfen Sie immer die Benutzerbewertungen und Entwicklerinformationen, bevor Sie eine Erweiterung installieren.
Methode 5: Stapelkonvertierung von PDF in HTML mit Python-Automatisierung
Für Entwickler oder Unternehmensanwender, die große Mengen von PDFs in HTML konvertieren müssen, bietet Python eine effiziente, automatisierte Lösung. Mit Bibliotheken wie Spire.PDF for Python können Sie PDF-Dateien stapelweise in HTML und andere Formate wie Word und Excel konvertieren – das spart Zeit und steigert die Produktivität bei der Verarbeitung mehrerer Dateien.
Wie man PDF-Dateien stapelweise mit Python in HTML konvertiert:
- Installieren Sie Spire.PDF for Python über pip:
- Erstellen Sie ein Python-Skript, um PDFs aus einem bestimmten Ordner stapelweise in HTML zu konvertieren:
- Führen Sie das Skript aus, um alle PDFs im angegebenen Ordner zu konvertieren. Die HTML-Dateien werden im selben Verzeichnis gespeichert.
pip install Spire.PDF
import os
from spire.pdf import *

# Definieren Sie den Ordner, der PDF-Dateien enthält
pdf_folder = '/pfad/zum/pdf_ordner'

# Durchlaufen Sie jede PDF-Datei im Ordner
for filename in os.listdir(pdf_folder):
    if filename.endswith('.pdf'):
        file_path = os.path.join(pdf_folder, filename)
        output_path = os.path.join(pdf_folder, f'{filename[:-4]}.html')

        # Initialisieren Sie das PdfDocument-Objekt
        doc = PdfDocument()

        # Laden Sie die PDF-Datei
        doc.LoadFromFile(file_path)

        # Konvertieren und speichern Sie die PDF als HTML
        doc.SaveToFile(output_path, FileFormat.HTML)

        # Schließen Sie das Dokument
        doc.Close()
Vorteile:
- Konvertieren Sie Hunderte oder Tausende von PDFs mit einem einzigen Skript.
- Kein Internet oder Cloud-Upload erforderlich; ideal für vertrauliche oder interne Dokumente.
- Läuft auf Windows, Linux, macOS und Serverumgebungen (einschließlich Docker und monitorlosen Linux-Servern).
- Einfach in Python-Workflows einbetten
Nachteile:
- Erfordert grundlegende Python-Programmierkenntnisse.
- Die Ersteinrichtung dauert etwas länger als bei manuellen Werkzeugen.
Tipp: Sie können das Skript anpassen, um die Konvertierungseinstellungen anzupassen, z. B. die Verarbeitung von Bildern oder das Aufteilen von Seiten. Weitere Einzelheiten finden Sie im offiziellen Leitfaden: PDF mit Python in HTML umwandeln.
Welche PDF-zu-HTML-Methode sollten Sie wählen
Es gibt nicht den einen besten Weg, um PDF in HTML zu konvertieren. Die richtige Methode hängt davon ab, wie oft Sie Dateien konvertieren, wie komplex Ihre Dokumente sind und ob Sie eine Stapelverarbeitung benötigen.
Hier ist eine kurze Zusammenfassung, die Ihnen bei der Entscheidung helfen soll:
| Szenario | Empfohlener Ansatz |
|---|---|
| Eine Datei schnell konvertieren | Online-PDF-zu-HTML-Tool |
| Layoutgenauigkeit und Bilder beibehalten | Adobe Acrobat Pro |
| Ein einfaches, textbasiertes Dokument konvertieren | Microsoft Word |
| Direkt im Browser konvertieren | Browser-Erweiterung |
| Mehrere PDFs im großen Stil konvertieren | Python-Automatisierung |
Wählen Sie die Methode, die zu Ihrem Arbeitsablauf passt, und machen Sie Ihre PDFs durchsuchbar, responsiv und bereit für die Online-Veröffentlichung.
Best Practices und Fehlerbehebung bei der PDF-zu-HTML-Konvertierung
Bei der Konvertierung von PDF in HTML sind die Einhaltung von Best Practices und die Behebung häufiger Probleme für einen reibungslosen und effizienten Prozess unerlässlich. Im Folgenden heben wir die wichtigsten Praktiken und Lösungen für häufige Herausforderungen bei der Konvertierung hervor.
Best Practices
-
Wählen Sie das richtige Werkzeug:
Wählen Sie ein zuverlässiges Konvertierungstool für genaue Ergebnisse. Während kostenlose Tools für einfache PDFs gut funktionieren, bieten professionelle Tools wie Adobe Acrobat eine bessere Kontrolle über die Formatierung und komplexe Dokumente.
-
Halten Sie das Layout einfach:
PDFs mit komplexen Layouts lassen sich möglicherweise nicht gut in HTML konvertieren. Für sauberere Ergebnisse versuchen Sie, das Layout im Originaldokument zu vereinfachen.
-
Bilder für das Web optimieren:
Ändern Sie die Größe oder komprimieren Sie Bilder vor der Konvertierung, um die Dateigröße zu reduzieren und die Ladezeiten der Seite zu verbessern. Hochauflösende Bilder können die Web-Performance verlangsamen.
-
Testen Sie in verschiedenen Browsern:
Überprüfen Sie nach der Konvertierung, wie Ihr HTML in mehreren Browsern (z. B. Chrome, Firefox) gerendert wird. Dies gewährleistet eine konsistente Darstellung und Funktionalität auf allen Plattformen.
Fehlerbehebung bei häufigen Problemen
-
Defektes Layout nach der Konvertierung:
Komplexe mehrspaltige PDFs werden möglicherweise nicht sauber konvertiert. Versuchen Sie, mit strukturierten HTML-Optionen zu exportieren, falls verfügbar.
-
Bilder werden falsch ausgerichtet:
Einige Konverter extrahieren Bilder separat. Überprüfen Sie die Exporteinstellungen, um Bilder korrekt einzubetten.
-
Gescannte PDFs werden nicht richtig konvertiert:
Wenn Ihre PDF-Datei bildbasiert ist, verwenden Sie ein Tool, das OCR unterstützt, bevor Sie sie in HTML konvertieren.
-
Unordentliches Inline-CSS:
Einige Tools erzeugen umfangreiche Inline-Stile. Möglicherweise müssen Sie das HTML für den Produktionseinsatz bereinigen.
Fazit
Inzwischen haben Sie die fünf verschiedenen Methoden zur Konvertierung von PDFs in HTML kennengelernt, die jeweils für unterschiedliche Bedürfnisse und Szenarien geeignet sind. Ob Sie eine schnelle Online-Lösung, ein hochwertiges Konvertierungstool oder einen stärker automatisierten Stapelprozess suchen, es gibt eine Methode, die für Sie funktioniert.
Suchen Sie nach weiteren hochwertigen PDF-Tutorials? Schauen Sie sich unsere kostenlosen PDF-Ressourcen an.
FAQs
F1: Was ist der einfachste Weg, eine PDF-Datei in HTML zu konvertieren?
A1: Online-Konvertierungstools sind die schnellste und einfachste Methode, um PDF in eine HTML-Webseite zu konvertieren, ohne dass eine Softwareinstallation erforderlich ist.
F2: Kann ich gescannte PDFs in HTML konvertieren?
A2: Ja, Adobe Acrobat Pro kann gescannte PDFs mit OCR-Technologie (Optical Character Recognition) in HTML konvertieren, wobei Text und Layout genau erhalten bleiben.
F3: Wie kann ich mehrere PDFs stapelweise in HTML konvertieren?
A3: Die Python-Automatisierung mit Bibliotheken wie Spire.PDF ermöglicht es Ihnen, Stapelkonvertierungen von PDF in HTML effizient durchzuführen und so Zeit bei der Verarbeitung großer Dateimengen zu sparen.
F4: Welche Methode eignet sich am besten für komplexe PDFs mit Bildern und Formatierungen?
A4: Desktop-Software wie Adobe Acrobat liefert die genauesten Ergebnisse für PDFs mit komplexen Layouts, Bildern oder Tabellen und gewährleistet einen minimalen Formatierungsverlust bei der Konvertierung.
Siehe auch
Конвертация PDF в HTML: 5 простых способов (Бесплатно и Пакетная обработка)
Файлы PDF широко используются, поскольку они сохраняют макет и форматирование на разных устройствах. Однако, когда вам нужно опубликовать контент в Интернете, улучшить видимость для SEO или интегрировать документы на веб-сайт, вам потребуется конвертировать PDF в HTML.
HTML — это родной формат для веба. Преобразование PDF в веб-страницу HTML делает контент доступным для поиска, редактирования и адаптивным для разных устройств.
В этом руководстве мы рассмотрим 5 простых и практичных способов конвертировать файлы PDF в HTML без изменения исходного форматирования.
- Зачем конвертировать PDF в HTML
- Как конвертировать PDF в HTML
- Какой метод конвертации PDF в HTML выбрать
- Лучшие практики и устранение неполадок при конвертации PDF в HTML
Зачем конвертировать PDF в HTML?
Прежде чем выбрать метод, полезно понять, почему конвертация PDF в HTML полезна:
- Улучшение SEO – Поисковые системы индексируют HTML-контент более эффективно, чем файлы PDF.
- Веб-интеграция – HTML можно встраивать непосредственно в веб-сайты или CMS-платформы.
- Улучшенная доступность – HTML поддерживает программы для чтения с экрана и адаптивные макеты.
- Повторное использование контента – HTML упрощает редактирование и перепрофилирование контента.
- Совместимость с мобильными устройствами – HTML лучше адаптируется к разным размерам экрана.
Если ваша цель — публикация контента в Интернете или улучшение его находимости, конвертация PDF в веб-страницу часто является лучшим вариантом.
Как конвертировать PDF в HTML
Существуют различные варианты конвертации PDF в HTML, от простых онлайн-инструментов, настольного программного обеспечения (например, Adobe Acrobat, Word) и расширений для браузера до продвинутых техник с использованием автоматизации на Python. Теперь давайте подробно рассмотрим каждый метод конвертации.
Метод 1: Конвертация PDF в HTML с помощью онлайн-инструментов
Онлайн-конвертеры PDF в HTML — это самый быстрый и простой способ бесплатно конвертировать PDF в HTML без установки какого-либо программного обеспечения. Они работают прямо в вашем веб-браузере, поэтому вы можете получить к ним доступ с любого устройства — Windows, Mac или даже мобильного.
Эти инструменты идеально подходят для одноразовых или редких конвертаций, позволяя вам превращать PDF-файлы в веб-страницы всего за несколько кликов.
Как конвертировать PDF в HTML онлайн:
- Откройте онлайн-конвертер PDF в HTML, например, Cloudxdocs или Zamzar.
- Загрузите ваш PDF-файл.
- Инструмент автоматически обработает и сконвертирует ваш PDF.
- Скачайте HTML-файл после завершения конвертации.
Плюсы:
- Бесплатно и просто в использовании.
- Не требуется установка программного обеспечения.
- Быстрый процесс конвертации.
Минусы:
- Ограниченные возможности настройки.
- Могут быть ограничения на размер файла.
- Проблемы с конфиденциальностью при загрузке конфиденциальных документов.
Совет: Всегда проверяйте политику конфиденциальности онлайн-инструментов перед загрузкой вашего документа. Для конфиденциальных файлов рассмотрите возможность использования офлайн-инструментов, таких как Adobe Acrobat или автоматизация на Python, описанные ниже.
Метод 2: Экспорт PDF в HTML с помощью Adobe Acrobat Pro
Для PDF-файлов со сложными макетами, изображениями или детальным форматированием Adobe Acrobat Pro является профессиональным решением для конвертации PDF в HTML. Он обеспечивает высококачественные и точные конвертации с минимальной потерей форматирования, что делает его идеальным для деловых отчетов, электронных книг или любого документа, где важна точность.
Adobe Acrobat Pro также поддерживает OCR (оптическое распознавание символов), поэтому вы можете конвертировать отсканированные PDF-файлы в редактируемые HTML-страницы без потери текста или структуры. Это делает его надежным выбором как для текстовых, так и для PDF-файлов с большим количеством изображений.
Как конвертировать PDF в HTML с помощью Adobe Acrobat Pro:
- Запустите Adobe Acrobat Pro и откройте ваш PDF-файл.
- Перейдите в Файл > Экспортировать в > HTML веб-страницу.
- Настройте параметры экспорта (например, включить изображения или исключить верхние/нижние колонтитулы).
- Сохраните файл как HTML.
Плюсы:
- Высококачественная конвертация для PDF-файлов со сложными макетами, изображениями и таблицами.
- Конвертирует отсканированные PDF-файлы с использованием OCR для точного распознавания текста.
- Предлагает точный контроль над форматированием вывода.
Минусы:
- Платный инструмент, требующий подписки.
- Не предназначен для крупномасштабных пакетных конвертаций.
Метод 3: Конвертация PDF в HTML с помощью Microsoft Word
Microsoft Word предлагает бесплатный и простой способ конвертировать PDF в HTML, особенно для текстовых PDF-файлов. Он идеально подходит для пользователей, которые уже работают в Word и нуждаются в быстрой конвертации без дополнительного программного обеспечения.
Хотя Word может обрабатывать базовое форматирование и изображения, он может испытывать трудности с многоколоночными макетами, таблицами или сильно стилизованными PDF-файлами, поэтому он не рекомендуется для сложных дизайнов.
Как конвертировать PDF в HTML с помощью Microsoft Word:
- Откройте PDF-файл в Microsoft Word (Word автоматически преобразует PDF в редактируемый формат).
- Внесите необходимые корректировки в контент, чтобы убедиться, что он выглядит правильно.
- Перейдите в Файл > Сохранить как и выберите Веб-страница (.htm;.html) в качестве формата файла.
- Выберите папку назначения и сохраните HTML-файл.
Плюсы:
- Бесплатно и широко доступно.
- Хорошо подходит для простых PDF-документов с минимальным форматированием.
Минусы:
- Форматирование может быть потеряно, особенно при сложных макетах или изображениях.
- Не подходит для PDF-файлов со сложным дизайном.
Метод 4: Быстрая конвертация PDF в HTML с помощью расширений для браузера
Расширение для браузера — это быстрый и удобный способ конвертировать PDF в HTML прямо в вашем браузере. Оно работает с локальными PDF-файлами или теми, на которые есть ссылки на веб-страницах — не требуется дополнительное программное обеспечение. Этот метод идеально подходит для пользователей, которым нужны быстрые конвертации на ходу без использования онлайн-инструментов.
Как использовать расширение для браузера для конвертации PDF в HTML:
- Найдите и установите расширение для конвертации PDF в HTML из магазина расширений вашего браузера, например, PDF to HTML Converter в Chrome Web Store.
- Нажмите на расширение на панели инструментов вашего браузера, затем либо загрузите локальный PDF-файл, либо позвольте расширению автоматически обнаруживать ссылки на PDF на посещаемой вами веб-странице.
- Следуйте инструкциям для конвертации вашего PDF, дождитесь завершения процесса, а затем загрузите HTML-файл.
Плюсы:
- Удобно и быстро.
- Простота в использовании с минимальной настройкой.
Минусы:
- Ограниченный контроль над качеством вывода.
- Может не поддерживать большие или сложные файлы.
- Зависит от используемого вами браузера (например, Chrome, Edge, Firefox).
Совет: Не все расширения поддерживают автоматическое обнаружение ссылок на PDF, и качество конвертации может варьироваться. Всегда проверяйте отзывы пользователей и информацию от разработчиков перед установкой любого расширения.
Метод 5: Пакетная конвертация PDF в HTML с использованием автоматизации на Python
Для разработчиков или корпоративных пользователей, которым необходимо конвертировать большие объемы PDF-файлов в HTML, Python предоставляет эффективное автоматизированное решение. Используя библиотеки, такие как Spire.PDF for Python, вы можете выполнять пакетную конвертацию PDF в HTML и другие форматы, такие как Word и Excel, экономя время и повышая производительность при работе с несколькими файлами.
Как выполнить пакетную конвертацию PDF в HTML с помощью Python:
- Установите Spire.PDF for Python через pip:
- Создайте скрипт на Python для пакетной конвертации PDF-файлов из указанной папки в HTML:
- Запустите скрипт для конвертации всех PDF-файлов в указанной папке. HTML-файлы будут сохранены в той же директории.
pip install Spire.PDF
import os
from spire.pdf import *

# Определите папку, содержащую PDF-файлы
pdf_folder = '/path/to/pdf_folder'

# Пройдитесь по каждому PDF-файлу в папке
for filename in os.listdir(pdf_folder):
    if filename.endswith('.pdf'):
        file_path = os.path.join(pdf_folder, filename)
        output_path = os.path.join(pdf_folder, f'{filename[:-4]}.html')

        # Инициализируйте объект PdfDocument
        doc = PdfDocument()

        # Загрузите PDF-файл
        doc.LoadFromFile(file_path)

        # Конвертируйте и сохраните PDF как HTML
        doc.SaveToFile(output_path, FileFormat.HTML)

        # Закройте документ
        doc.Close()
Плюсы:
- Конвертируйте сотни или тысячи PDF-файлов с помощью одного скрипта.
- Не требуется интернет или загрузка в облако; идеально для конфиденциальных или внутренних документов.
- Работает на Windows, Linux, macOS и серверных средах (включая Docker и безголовые серверы Linux).
- Легко встраивается в рабочие процессы на Python
Минусы:
- Требуются базовые знания программирования на Python.
- Начальная настройка занимает немного больше времени, чем у ручных инструментов.
Совет: Вы можете настроить скрипт для изменения параметров конвертации, таких как обработка изображений или разделение страниц. Для получения дополнительной информации обратитесь к официальному руководству: Конвертация PDF в HTML с использованием Python.
Какой метод конвертации PDF в HTML выбрать
Не существует единственного лучшего способа конвертировать PDF в HTML. Правильный метод зависит от того, как часто вы конвертируете файлы, насколько сложны ваши документы и нужна ли вам пакетная обработка.
Вот краткий обзор, который поможет вам принять решение:
| Сценарий | Рекомендуемый подход |
|---|---|
| Быстро конвертировать один файл | Онлайн-инструмент для конвертации PDF в HTML |
| Сохранить точность макета и изображений | Adobe Acrobat Pro |
| Конвертировать простой текстовый документ | Microsoft Word |
| Конвертировать прямо в браузере | Расширение для браузера |
| Конвертировать несколько PDF-файлов в большом объеме | Автоматизация на Python |
Выберите метод, который соответствует вашему рабочему процессу, и сделайте ваши PDF-файлы доступными для поиска, адаптивными и готовыми к публикации в Интернете.
Лучшие практики и устранение неполадок при конвертации PDF в HTML
При конвертации PDF в HTML следование лучшим практикам и решение распространенных проблем необходимы для гладкого и эффективного процесса. Ниже мы выделяем ключевые практики и решения для распространенных проблем во время конвертации.
Лучшие практики
-
Выберите правильный инструмент:
Выберите надежный инструмент для конвертации для получения точных результатов. Хотя бесплатные инструменты хорошо работают для простых PDF-файлов, профессиональные инструменты, такие как Adobe Acrobat, предлагают лучший контроль над форматированием и сложными документами.
-
Сохраняйте простой макет:
PDF-файлы со сложными макетами могут плохо конвертироваться в HTML. Для более чистых результатов попробуйте упростить макет в исходном документе.
-
Оптимизируйте изображения для веба:
Измените размер или сожмите изображения перед конвертацией, чтобы уменьшить размер файла и улучшить время загрузки страницы. Изображения с высоким разрешением могут замедлить производительность веба.
-
Тестируйте в разных браузерах:
После конвертации проверьте, как ваш HTML отображается в нескольких браузерах (например, Chrome, Firefox). Это обеспечивает последовательное представление и функциональность на разных платформах.
Устранение распространенных проблем
-
Нарушенный макет после конвертации:
Сложные многоколоночные PDF-файлы могут не конвертироваться чисто. Попробуйте экспортировать со структурированными опциями HTML, если они доступны.
-
Изображения смещаются:
Некоторые конвертеры извлекают изображения отдельно. Проверьте настройки экспорта, чтобы правильно встроить изображения.
-
Отсканированные PDF-файлы не конвертируются должным образом:
Если ваш PDF основан на изображениях, используйте инструмент, поддерживающий OCR, перед конвертацией в HTML.
-
Беспорядочный встроенный CSS:
Некоторые инструменты генерируют тяжелые встроенные стили. Возможно, вам потребуется очистить HTML для использования в продакшене.
Заключение
К настоящему времени вы узнали о пяти различных методах конвертации PDF в HTML, каждый из которых подходит для разных нужд и сценариев. Независимо от того, ищете ли вы быстрое онлайн-решение, высококачественный инструмент для конвертации или более автоматизированный пакетный процесс, найдется метод, который подойдет именно вам.
Ищете больше высококачественных руководств по PDF? Ознакомьтесь с нашими бесплатными ресурсами по PDF.
Часто задаваемые вопросы
В1: Какой самый простой способ конвертировать PDF в HTML?
О1: Онлайн-инструменты для конвертации — это самый быстрый и простой метод для конвертации PDF в веб-страницу HTML без установки какого-либо программного обеспечения.
В2: Могу ли я конвертировать отсканированные PDF-файлы в HTML?
О2: Да, Adobe Acrobat Pro может конвертировать отсканированные PDF-файлы в HTML с использованием технологии OCR (оптическое распознавание символов), точно сохраняя текст и макет.
В3: Как я могу выполнить пакетную конвертацию нескольких PDF-файлов в HTML?
О3: Автоматизация на Python с использованием библиотек, таких как Spire.PDF, позволяет эффективно выполнять пакетную конвертацию PDF в HTML, экономя время при работе с большим количеством файлов.
В4: Какой метод лучше всего подходит для сложных PDF-файлов с изображениями и форматированием?
О4: Настольное программное обеспечение, такое как Adobe Acrobat, обеспечивает наиболее точные результаты для PDF-файлов со сложными макетами, изображениями или таблицами, обеспечивая минимальную потерю форматирования во время конвертации.
Смотрите также
Remover linhas em branco no Word rapidamente: Manual e VBA/Python
Índice
- O que "Linhas em Branco" Realmente Significam no Microsoft Word?
- Método 1. Remover Parágrafos em Branco Usando Localizar e Substituir
- Método 2. Remover Parágrafos Contendo Apenas Espaços
- Método 3. Remover Quebras de Linha Manuais (Linhas em Branco com Shift + Enter)
- Método 4. Remover Todas as Linhas em Branco Usando uma Macro VBA
- Método 5. Remover Linhas em Branco Programaticamente Usando Spire.Doc
- Comparação dos Cinco Métodos
- Melhores Práticas para Evitar Linhas em Branco em Documentos Futuros
- Conclusão
- Perguntas Frequentes
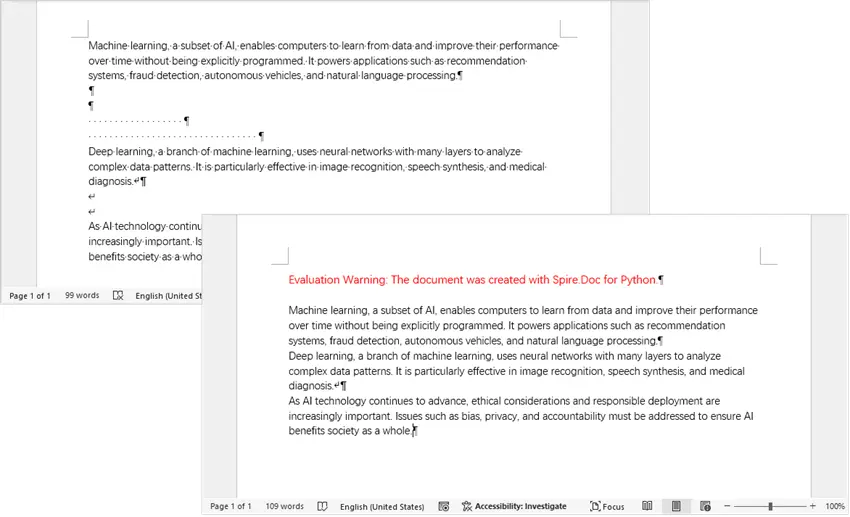
Linhas em branco são um dos problemas de formatação mais comuns em documentos do Microsoft Word. Elas frequentemente aparecem após copiar conteúdo de sites, converter PDFs para Word, importar arquivos Markdown/HTML ou gerar documentos programaticamente. Embora possam parecer inofensivas, linhas em branco excessivas podem quebrar o layout do documento, afetar a paginação e causar problemas em fluxos de trabalho de automação.
Este guia explica o que "linhas em branco" realmente significam no Word e apresenta cinco métodos práticos para removê-las — desde correções manuais rápidas usando Localizar e Substituir até a limpeza automatizada com VBA e Spire.Doc for Python.
Navegação Rápida
- Método 1. Remover Parágrafos em Branco Usando Localizar e Substituir
- Método 2. Remover Parágrafos Contendo Apenas Espaços
- Método 3. Remover Quebras de Linha Manuais (Linhas em Branco com Shift + Enter)
- Método 4. Remover Todas as Linhas em Branco Usando uma Macro VBA
- Método 5. Remover Linhas em Branco Programaticamente Usando Spire.Doc for Python
O que "Linhas em Branco" Realmente Significam no Microsoft Word?
No Microsoft Word, “linhas em branco” não é um termo técnico estrito — é mais uma descrição visual/de layout. Dependendo do contexto, pode se referir a algumas coisas diferentes:
| Tipo | Símbolo no Word | Criado Por | Significado Estrutural | Causas Comuns |
|---|---|---|---|---|
| Parágrafo em Branco | ¶ | Pressionar Enter | Parágrafo vazio sem texto | Edição manual, hábitos de formatação |
| Parágrafo Contendo Apenas Espaços | ¶ + ··· | Espaço + Enter | Parágrafo com espaços em branco invisíveis | Conteúdo colado, tentativas de alinhamento |
| Quebra de Linha Manual | ↓ / ↵ | Shift + Enter | Nova linha dentro do mesmo parágrafo | Conversão de PDF, cópia da web, importação de HTML |
Para ver esses símbolos, ative Mostrar/Ocultar ¶ na guia Página Inicial ou pressione Ctrl + Shift + 8.
Método 1. Remover Parágrafos em Branco Usando Localizar e Substituir
Parágrafos em branco são a fonte mais comum de linhas vazias visíveis em documentos do Word. Eles geralmente ocorrem quando os usuários pressionam Enter várias vezes para adicionar espaçamento. Antes de passar para métodos de limpeza mais avançados, é melhor eliminar esses parágrafos vazios estruturais usando a ferramenta Localizar e Substituir integrada do Word. Esta abordagem manual rápida é ideal para documentos que exigem apenas uma limpeza básica de formatação.
Passos para Remover Parágrafos em Branco
- Abra seu documento do Word.
- Pressione Ctrl + H para abrir a caixa de diálogo Localizar e Substituir.
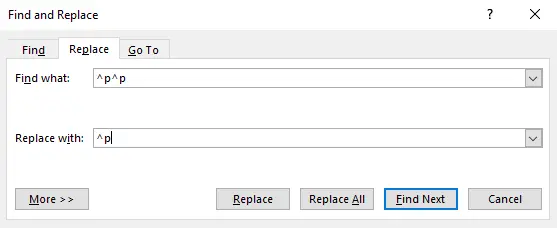
- Na caixa Localizar, digite ^p^p (isso procura por marcas de parágrafo duplas).
- Na caixa Substituir por, digite ^p (isso substitui marcas de parágrafo duplas por uma única).
- Clique em Substituir Tudo para remover os parágrafos em branco extras.
- Repita até que o Word diga 0 substituições.
O que Acontece a Seguir
Depois de remover os parágrafos verdadeiramente em branco, algumas linhas vazias ainda podem permanecer porque contêm espaços ocultos ou quebras de linha manuais. O próximo método foca na remoção de parágrafos que parecem vazios, mas na verdade contêm caracteres de espaço em branco.
Método 2. Remover Parágrafos Contendo Apenas Espaços
Alguns parágrafos parecem em branco, mas contêm espaços invisíveis, tabulações ou caracteres não imprimíveis. Esses parágrafos são frequentemente introduzidos quando o conteúdo é colado de páginas da web ou PDFs. Como o Método 1 remove apenas parágrafos completamente vazios, esta etapa visa parágrafos que contêm apenas espaços em branco usando pesquisas com curingas.
Passos para Remover Parágrafos Apenas com Espaços em Branco
- Abra seu documento do Word.
- Pressione Ctrl + H para abrir a caixa de diálogo Localizar e Substituir.
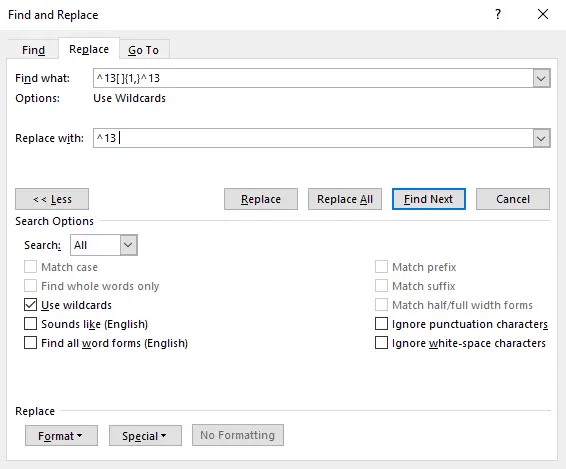
- Clique em Mais >> e marque a caixa para Usar curingas.
- Na caixa Localizar, insira o padrão ^13[ ]{1,}^13 (isso procura por um parágrafo seguido por um ou mais espaços e outro parágrafo).
- Na caixa Substituir por, insira ^13 (isso substitui o padrão encontrado por um único parágrafo).
- Clique em Substituir Tudo — pode ser necessário clicar várias vezes até que a contagem de substituições mostre 0.
Aprenda técnicas de pesquisa com curingas: Curingas do Word para Pesquisa Avançada
O que Acontece a Seguir
Neste estágio, a maioria dos parágrafos vazios desapareceu. No entanto, algumas linhas em branco ainda podem aparecer devido a quebras de linha manuais inseridas com Shift + Enter, que se comportam de maneira diferente dos parágrafos reais. O próximo método aborda essas quebras de linha estruturais.
Método 3. Remover Quebras de Linha Manuais (Linhas em Branco com Shift + Enter)
Quebras de linha manuais criam novas linhas visuais sem iniciar um novo parágrafo. Elas são comumente introduzidas ao copiar texto de e-mails, páginas HTML ou conversões de PDF. Mesmo após limpar parágrafos e espaços em branco, essas quebras ainda podem criar lacunas que parecem linhas em branco.
Passos para Remover Quebras de Linha Manuais
- Abra seu documento do Word.
- Pressione Ctrl + H para abrir a caixa de diálogo Localizar e Substituir.
- Na caixa Localizar, digite ^l (isso procura por quebras de linha).
- Deixe a caixa Substituir por em branco.
- Clique em Substituir Tudo até que o Word relate zero substituições.
O que Acontece a Seguir
Após concluir os três primeiros métodos manuais, a estrutura do seu documento deve estar significativamente mais limpa. Se você precisar repetir essa limpeza com frequência ou processar muitos documentos, a automação se torna mais eficiente. O próximo método introduz uma macro VBA que realiza uma limpeza completa automaticamente.
Método 4. Remover Todas as Linhas em Branco Usando uma Macro VBA
Quando você precisa limpar vários documentos ou deseja uma solução de um clique dentro do Word, uma macro VBA pode automatizar todo o processo. Este método remove parágrafos vazios, parágrafos apenas com espaços em branco e quebras de linha manuais em uma única execução.
Passos para Criar e Executar a Macro
- Abra seu documento do Word.
- Pressione Alt + F11 para abrir o Editor VBA.
- Clique em Inserir → Módulo.
- Cole o seguinte código VBA na janela do módulo.
- Pressione F5 para executar a macro ou feche o editor e execute-a a partir de Exibir → Macros.
Código VBA:
Sub RemoveAllEmptyLines_Simple()
    ' Delete empty paragraphs
    Dim para As Paragraph
    For Each para In ActiveDocument.Paragraphs
        If Len(Trim(para.Range.Text)) <= 1 Then
            para.Range.Delete
        End If
    Next para

    ' Delete empty manual line breaks (find and replace method)
    With ActiveDocument.Range.Find
        .ClearFormatting
        .Text = "[ ] @^l"
        .Replacement.Text = ""
        .MatchWildcards = True
        .Wrap = wdFindContinue
        .Execute Replace:=wdReplaceAll
    End With

    ' Delete remaining isolated manual line breaks
    With ActiveDocument.Range.Find
        .ClearFormatting
        .Text = "^l"
        .Replacement.Text = ""
        .MatchWildcards = False
        .Wrap = wdFindContinue
        .Execute Replace:=wdReplaceAll
    End With
End Sub
Referência do Microsoft VBA: Introdução ao VBA no Word
Transição para o Próximo Método
Embora as macros VBA sejam poderosas dentro do próprio Word, elas ainda exigem execução manual e acesso ao aplicativo Word. Para desenvolvedores ou pipelines de automação, uma solução programática oferece maior flexibilidade — o que nos leva ao método final usando Spire.Doc for Python.
Método 5. Remover Linhas em Branco Programaticamente Usando Spire.Doc for Python
Para automação em larga escala ou processamento no lado do servidor, Spire.Doc for Python permite analisar e limpar a estrutura do documento diretamente através do código. Este método é ideal para desenvolvedores que precisam processar vários arquivos automaticamente sem abrir o Word.
Passo 1. Instale a Biblioteca
pip install spire.doc
Passo 2. Crie um Script Python
- Abra seu IDE ou editor Python preferido.
- Crie um novo arquivo Python (por exemplo, remove_blank_lines.py).
- Cole o seguinte código no arquivo.
Passo 3. Execute o Script
Exemplo de Código:
from spire.doc import *
from spire.doc.common import *

# Load Word document
doc = Document()
doc.LoadFromFile("Input.docx")

# Get first section
section = doc.Sections[0]

# -----------------------------
# Step 1. Remove manual line breaks
# -----------------------------
for p_index in range(section.Paragraphs.Count):
    paragraph = section.Paragraphs[p_index]

    # Traverse child objects backward
    for i in range(paragraph.ChildObjects.Count - 1, -1, -1):
        obj = paragraph.ChildObjects[i]

        if obj.DocumentObjectType == DocumentObjectType.Break:
            try:
                if hasattr(obj, 'BreakType') and obj.BreakType == BreakType.LineBreak:
                    paragraph.ChildObjects.RemoveAt(i)
            except:
                # If BreakType cannot be accessed, assume line break
                paragraph.ChildObjects.RemoveAt(i)

# -----------------------------
# Step 2. Remove blank paragraphs
# -----------------------------
for i in range(section.Paragraphs.Count - 1, -1, -1):
    paragraph = section.Paragraphs[i]

    has_non_text_content = False

    # Check for non-text content (images, tables, fields, etc.)
    for j in range(paragraph.ChildObjects.Count):
        obj = paragraph.ChildObjects[j]
        if obj.DocumentObjectType != DocumentObjectType.TextRange:
            has_non_text_content = True
            break

    # Remove paragraphs that are empty or whitespace-only
    if not has_non_text_content and (paragraph.Text == "" or paragraph.Text.isspace()):
        section.Paragraphs.RemoveAt(i)

# Save document
doc.SaveToFile("RemoveBlankLines.docx", FileFormat.Docx2019)
doc.Dispose()
Saída:
Com a automação implementada, agora você pode lidar com linhas em branco em escala e integrar a limpeza de documentos diretamente em seus pipelines de processamento. Além de remover parágrafos vazios e quebras de linha manuais, o Spire.Doc for Python oferece um conjunto abrangente de recursos de manipulação de documentos.
Você pode criar documentos do Word do zero, modificar arquivos existentes, ajustar a formatação, inserir tabelas ou imagens e até mesmo exportar documentos para outros formatos como PDF ou HTML. Isso o torna ideal para construir fluxos de trabalho de automação de documentos de ponta a ponta, garantindo que seu conteúdo esteja limpo, consistente e pronto para processamento posterior.
Comparação dos Cinco Métodos
| Método | Nível de Habilidade | Automação | Ideal Para | Processamento em Lote |
|---|---|---|---|---|
| Localizar e Substituir (Parágrafos em Branco) | Iniciante | Não | Limpeza manual rápida | Não |
| Localizar e Substituir (Apenas Espaços) | Iniciante | Não | Conteúdo importado ou colado | Não |
| Localizar e Substituir (Quebras de Linha) | Iniciante | Não | Normalização de conteúdo PDF/web | Não |
| Macro VBA | Intermediário | Sim | Tarefas repetidas | Sim |
| Spire.Doc for Python | Avançado | Completa | Automação em larga escala | Sim |
Melhores Práticas para Evitar Linhas em Branco em Documentos Futuros
- Use o espaçamento de parágrafo em vez de pressionar Enter várias vezes.
- Evite inserir vários espaços para alinhamento visual.
- Normalize o conteúdo importado imediatamente após colar.
- Converta quebras de linha manuais em parágrafos reais o mais cedo possível.
- Valide a estrutura do documento antes dos fluxos de trabalho de automação.
Conclusão
Para remover linhas em branco no Word, primeiro identifique se elas vêm de parágrafos vazios, parágrafos apenas com espaços em branco ou quebras de linha manuais. Escolher o método certo ajuda a limpar documentos de forma eficiente sem afetar o layout ou a estrutura. Este guia cobriu cinco abordagens práticas — desde técnicas rápidas de Localizar e Substituir até soluções automatizadas usando VBA e Spire.Doc for Python.
Para edições rápidas, as ferramentas integradas do Word funcionam bem. Para tarefas repetidas ou processamento em lote, a automação com VBA ou Spire.Doc for Python ajuda a otimizar a limpeza e a integrar a formatação de documentos em fluxos de trabalho maiores.
Perguntas Frequentes
P1. Por que aparecem linhas em branco após a conversão de PDFs para o Word?
Os conversores de PDF geralmente inserem quebras de linha manuais em vez de parágrafos reais, que parecem linhas em branco.
P2. Qual é a diferença entre Enter e Shift + Enter?
Enter cria um novo parágrafo (¶), enquanto Shift + Enter insere uma quebra de linha manual (↓/↵) dentro do mesmo parágrafo.
P3. Como posso ver as estruturas ocultas de linhas em branco?
Ative as marcas de formatação usando Ctrl + Shift + 8.
P4. A remoção de linhas em branco afetará o layout do documento?
Pode alterar o espaçamento ou a paginação, portanto, revise a formatação após a limpeza.
P5. Qual método é o melhor para grandes lotes de arquivos?
Métodos de automação como macros VBA ou Spire.Doc for Python são ideais para processamento em lote.
Você Também Pode se Interessar Por
Word에서 빈 줄 빠르게 제거하기: 수동 및 VBA/Python
빈 줄은 Microsoft Word 문서에서 가장 일반적인 서식 문제 중 하나입니다. 웹사이트에서 콘텐츠를 복사하거나, PDF를 Word로 변환하거나, Markdown/HTML 파일을 가져오거나, 프로그래밍 방식으로 문서를 생성한 후에 종종 나타납니다. 무해해 보일 수 있지만 과도한 빈 줄은 문서 레이아웃을 깨뜨리고, 페이지 매김에 영향을 미치며, 자동화 워크플로에서 문제를 일으킬 수 있습니다.
이 가이드에서는 Word에서 "빈 줄"이 실제로 무엇을 의미하는지 설명하고, 찾기 및 바꾸기를 사용한 빠른 수동 수정부터 VBA 및 Spire.Doc for Python을 사용한 자동화된 정리에 이르기까지 이를 제거하는 다섯 가지 실용적인 방법을 안내합니다.
빠른 탐색
- 방법 1. 찾기 및 바꾸기를 사용하여 빈 단락 제거
- 방법 2. 공백만 포함된 단락 제거
- 방법 3. 수동 줄 바꿈 제거 (Shift + Enter 빈 줄)
- 방법 4. VBA 매크로를 사용하여 모든 빈 줄 제거
- 방법 5. Spire.Doc for Python을 사용하여 프로그래밍 방식으로 빈 줄 제거
Microsoft Word에서 "빈 줄"은 실제로 무엇을 의미합니까?
Microsoft Word에서 "빈 줄"은 엄격한 기술 용어가 아니라 시각적/레이아웃 설명에 가깝습니다. 문맥에 따라 몇 가지 다른 것을 참조할 수 있습니다.
| 유형 | Word의 기호 | 작성자 | 구조적 의미 | 일반적인 원인 |
|---|---|---|---|---|
| 빈 단락 | ¶ | Enter 키 누르기 | 텍스트가 없는 빈 단락 | 수동 편집, 서식 습관 |
| 공백만 포함하는 단락 | ¶ + ··· | 스페이스 + Enter | 보이지 않는 공백이 있는 단락 | 붙여넣은 콘텐츠, 정렬 시도 |
| 수동 줄 바꿈 | ↓ / ↵ | Shift + Enter | 같은 단락 내의 새 줄 | PDF 변환, 웹 복사, HTML 가져오기 |
이 기호를 보려면 홈 탭에서 단락 기호 표시/숨기기(¶)를 활성화하거나 Ctrl + Shift + 8을 누릅니다.
방법 1. 찾기 및 바꾸기를 사용하여 빈 단락 제거
빈 단락은 Word 문서에서 보이는 빈 줄의 가장 일반적인 원인입니다. 일반적으로 사용자가 간격을 추가하기 위해 Enter 키를 여러 번 누를 때 발생합니다. 더 고급 정리 방법으로 넘어가기 전에 Word에 내장된 찾기 및 바꾸기 도구를 사용하여 이러한 구조적 빈 단락을 제거하는 것이 가장 좋습니다. 이 빠른 수동 접근 방식은 기본 서식 정리만 필요한 문서에 이상적입니다.
빈 단락을 제거하는 단계
- Word 문서를 엽니다.
- Ctrl + H를 눌러 찾기 및 바꾸기 대화 상자를 엽니다.
- 찾을 내용 상자에 ^p^p를 입력합니다(이중 단락 기호를 검색합니다).
- 바꿀 내용 상자에 ^p를 입력합니다(이중 단락 기호를 단일 단락 기호로 바꿉니다).
- 모두 바꾸기를 클릭하여 추가 빈 단락을 제거합니다.
- Word에서 0개의 항목이 바뀌었다고 표시될 때까지 반복합니다.
다음에 일어나는 일
실제 빈 단락을 제거한 후에도 숨겨진 공백이나 수동 줄 바꿈이 포함되어 있기 때문에 일부 빈 줄이 남아 있을 수 있습니다. 다음 방법은 비어 있는 것처럼 보이지만 실제로는 공백 문자를 포함하는 단락을 제거하는 데 중점을 둡니다.
방법 2. 공백만 포함된 단락 제거
일부 단락은 비어 있는 것처럼 보이지만 보이지 않는 공백, 탭 또는 인쇄되지 않는 문자를 포함합니다. 이러한 단락은 웹 페이지나 PDF에서 콘텐츠를 붙여넣을 때 종종 발생합니다. 방법 1은 완전히 비어 있는 단락만 제거하므로 이 단계에서는 와일드카드 검색을 사용하여 공백만 있는 단락을 대상으로 합니다.
공백만 있는 단락을 제거하는 단계
- Word 문서를 엽니다.
- Ctrl + H를 눌러 찾기 및 바꾸기 대화 상자를 엽니다.
- 자세히 >>를 클릭하고 와일드카드 사용 확인란을 선택합니다.
- 찾을 내용 상자에 ^13[ ]{1,}^13 패턴을 입력합니다(단락 뒤에 하나 이상의 공백과 다른 단락이 오는 것을 검색합니다).
- 바꿀 내용 상자에 ^13을 입력합니다(찾은 패턴을 단일 단락으로 바꿉니다).
- 모두 바꾸기를 클릭합니다. 바뀐 횟수가 0으로 표시될 때까지 여러 번 클릭해야 할 수 있습니다.
와일드카드 검색 기술 배우기: 고급 검색을 위한 Word 와일드카드
다음에 일어나는 일
이 단계에서는 대부분의 빈 단락이 사라집니다. 그러나 Shift + Enter로 삽입된 수동 줄 바꿈으로 인해 일부 빈 줄이 여전히 나타날 수 있으며, 이는 실제 단락과 다르게 동작합니다. 다음 방법은 이러한 구조적 줄 바꿈을 해결합니다.
방법 3. 수동 줄 바꿈 제거 (Shift + Enter 빈 줄)
수동 줄 바꿈은 새 단락을 시작하지 않고 새 시각적 줄을 만듭니다. 이메일, HTML 페이지 또는 PDF 변환에서 텍스트를 복사할 때 일반적으로 발생합니다. 단락과 공백을 정리한 후에도 이러한 줄 바꿈은 여전히 빈 줄처럼 보이는 간격을 만들 수 있습니다.
수동 줄 바꿈을 제거하는 단계
- Word 문서를 엽니다.
- Ctrl + H를 눌러 찾기 및 바꾸기 대화 상자를 엽니다.
- 찾을 내용 상자에 ^l을 입력합니다(줄 바꿈을 검색합니다).
- 바꿀 내용 상자를 비워 둡니다.
- Word에서 바뀐 항목이 없다고 보고할 때까지 모두 바꾸기를 클릭합니다.
다음에 일어나는 일
처음 세 가지 수동 방법을 완료하면 문서 구조가 훨씬 더 깔끔해집니다. 이 정리를 자주 반복하거나 많은 문서를 처리해야 하는 경우 자동화가 더 효율적입니다. 다음 방법은 전체 정리를 자동으로 수행하는 VBA 매크로를 소개합니다.
방법 4. VBA 매크로를 사용하여 모든 빈 줄 제거
여러 문서를 정리해야 하거나 Word 내에서 원클릭 솔루션을 원할 때 VBA 매크로를 사용하면 전체 프로세스를 자동화할 수 있습니다. 이 방법은 한 번의 실행으로 빈 단락, 공백만 있는 단락 및 수동 줄 바꿈을 제거합니다.
매크로 생성 및 실행 단계
- Word 문서를 엽니다.
- Alt + F11을 눌러 VBA 편집기를 엽니다.
- 삽입 → 모듈을 클릭합니다.
- 다음 VBA 코드를 모듈 창에 붙여넣습니다.
- F5 키를 눌러 매크로를 실행하거나 편집기를 닫고 보기 → 매크로에서 실행합니다.
VBA 코드:
Sub RemoveAllEmptyLines_Simple()
    ' Delete empty paragraphs
    Dim para As Paragraph
    For Each para In ActiveDocument.Paragraphs
        If Len(Trim(para.Range.Text)) <= 1 Then
            para.Range.Delete
        End If
    Next para

    ' Delete empty manual line breaks (find and replace method)
    With ActiveDocument.Range.Find
        .ClearFormatting
        .Text = "[ ] @^l"
        .Replacement.Text = ""
        .MatchWildcards = True
        .Wrap = wdFindContinue
        .Execute Replace:=wdReplaceAll
    End With

    ' Delete remaining isolated manual line breaks
    With ActiveDocument.Range.Find
        .ClearFormatting
        .Text = "^l"
        .Replacement.Text = ""
        .MatchWildcards = False
        .Wrap = wdFindContinue
        .Execute Replace:=wdReplaceAll
    End With
End Sub
Microsoft VBA 참조: Word에서 VBA 시작하기
다음 방법으로 전환
VBA 매크로는 Word 자체 내에서 강력하지만 여전히 수동 실행 및 Word 응용 프로그램에 대한 액세스가 필요합니다. 개발자나 자동화 파이프라인의 경우 프로그래밍 방식 솔루션이 더 큰 유연성을 제공하므로 Spire.Doc for Python을 사용하는 마지막 방법으로 이어집니다.
방법 5. Spire.Doc for Python을 사용하여 프로그래밍 방식으로 빈 줄 제거
대규모 자동화 또는 서버 측 처리의 경우 Spire.Doc for Python을 사용하면 코드를 통해 직접 문서 구조를 분석하고 정리할 수 있습니다. 이 방법은 Word를 열지 않고 여러 파일을 자동으로 처리해야 하는 개발자에게 이상적입니다.
1단계. 라이브러리 설치
pip install spire.doc
2단계. Python 스크립트 만들기
- 선호하는 Python IDE 또는 편집기를 엽니다.
- 새 Python 파일(예: remove_blank_lines.py)을 만듭니다.
- 다음 코드를 파일에 붙여넣습니다.
3단계. 스크립트 실행
코드 예제:
from spire.doc import *
from spire.doc.common import *

# Load Word document
doc = Document()
doc.LoadFromFile("Input.docx")

# Get first section
section = doc.Sections[0]

# -----------------------------
# Step 1. Remove manual line breaks
# -----------------------------
for p_index in range(section.Paragraphs.Count):
    paragraph = section.Paragraphs[p_index]

    # Traverse child objects backward
    for i in range(paragraph.ChildObjects.Count - 1, -1, -1):
        obj = paragraph.ChildObjects[i]

        if obj.DocumentObjectType == DocumentObjectType.Break:
            try:
                if hasattr(obj, 'BreakType') and obj.BreakType == BreakType.LineBreak:
                    paragraph.ChildObjects.RemoveAt(i)
            except:
                # If BreakType cannot be accessed, assume line break
                paragraph.ChildObjects.RemoveAt(i)

# -----------------------------
# Step 2. Remove blank paragraphs
# -----------------------------
for i in range(section.Paragraphs.Count - 1, -1, -1):
    paragraph = section.Paragraphs[i]

    has_non_text_content = False

    # Check for non-text content (images, tables, fields, etc.)
    for j in range(paragraph.ChildObjects.Count):
        obj = paragraph.ChildObjects[j]
        if obj.DocumentObjectType != DocumentObjectType.TextRange:
            has_non_text_content = True
            break

    # Remove paragraphs that are empty or whitespace-only
    if not has_non_text_content and (paragraph.Text == "" or paragraph.Text.isspace()):
        section.Paragraphs.RemoveAt(i)

# Save document
doc.SaveToFile("RemoveBlankLines.docx", FileFormat.Docx2019)
doc.Dispose()
출력:
자동화가 구현되면 이제 대규모로 빈 줄을 처리하고 문서 정리를 처리 파이프라인에 직접 통합할 수 있습니다. 빈 단락과 수동 줄 바꿈을 제거하는 것 외에도 Spire.Doc for Python은 포괄적인 문서 조작 기능 세트를 제공합니다.
처음부터 Word 문서를 만들고, 기존 파일을 수정하고, 서식을 조정하고, 표나 이미지를 삽입하고, 문서를 PDF 또는 HTML과 같은 다른 형식으로 내보낼 수도 있습니다. 따라서 콘텐츠를 깨끗하고 일관성 있게 유지하고 추가 처리를 위해 준비하면서 종단 간 문서 자동화 워크플로를 구축하는 데 이상적입니다.
다섯 가지 방법 비교
| 방법 | 기술 수준 | 자동화 | 최적 대상 | 일괄 처리 |
|---|---|---|---|---|
| 찾기 및 바꾸기 (빈 단락) | 초급 | 아니요 | 빠른 수동 정리 | 아니요 |
| 찾기 및 바꾸기 (공백만) | 초급 | 아니요 | 가져오거나 붙여넣은 콘텐츠 | 아니요 |
| 찾기 및 바꾸기 (줄 바꿈) | 초급 | 아니요 | PDF/웹 콘텐츠 정규화 | 아니요 |
| VBA 매크로 | 중급 | 예 | 반복 작업 | 예 |
| Spire.Doc for Python | 고급 | 전체 | 대규모 자동화 | 예 |
향후 문서에서 빈 줄을 피하기 위한 모범 사례
- 여러 번 Enter 키를 누르는 대신 단락 간격을 사용합니다.
- 시각적 정렬을 위해 여러 공백을 삽입하지 마십시오.
- 붙여넣은 후 즉시 가져온 콘텐츠를 정규화합니다.
- 수동 줄 바꿈을 일찍 실제 단락으로 변환합니다.
- 자동화 워크플로 전에 문서 구조를 확인합니다.
결론
Word에서 빈 줄을 제거하려면 먼저 빈 단락, 공백만 있는 단락 또는 수동 줄 바꿈에서 비롯되었는지 확인합니다. 올바른 방법을 선택하면 레이아웃이나 구조에 영향을 주지 않고 문서를 효율적으로 정리하는 데 도움이 됩니다. 이 가이드에서는 빠른 찾기 및 바꾸기 기술부터 VBA 및 Spire.Doc for Python을 사용한 자동화된 솔루션에 이르기까지 다섯 가지 실용적인 접근 방식을 다루었습니다.
빠른 편집의 경우 Word에 내장된 도구가 잘 작동합니다. 반복적인 작업이나 일괄 처리의 경우 VBA 또는 Spire.Doc for Python을 사용한 자동화를 통해 정리를 간소화하고 문서 서식을 더 큰 워크플로에 통합할 수 있습니다.
자주 묻는 질문
Q1. PDF를 Word로 변환한 후 빈 줄이 나타나는 이유는 무엇입니까?
PDF 변환기는 종종 실제 단락 대신 수동 줄 바꿈을 삽입하여 빈 줄처럼 보입니다.
Q2. Enter와 Shift + Enter의 차이점은 무엇입니까?
Enter는 새 단락(¶)을 만들고 Shift + Enter는 같은 단락 내에 수동 줄 바꿈(↓/↵)을 삽입합니다.
Q3. 숨겨진 빈 줄 구조를 어떻게 볼 수 있습니까?
Ctrl + Shift + 8을 사용하여 서식 기호를 활성화합니다.
Q4. 빈 줄을 제거하면 문서 레이아웃에 영향을 줍니까?
간격이나 페이지 매김이 변경될 수 있으므로 정리 후 서식을 검토하십시오.
Q5. 대량의 파일에 가장 적합한 방법은 무엇입니까?
VBA 매크로 또는 Spire.Doc for Python과 같은 자동화 방법은 일괄 처리에 이상적입니다.
관심 있을 만한 다른 문서
Rimuovere velocemente le righe vuote in Word: Manuale e VBA/Python
Indice
- Cosa significano veramente le "righe vuote" in Microsoft Word?
- Metodo 1. Rimuovere i paragrafi vuoti usando Trova e sostituisci
- Metodo 2. Rimuovere i paragrafi che contengono solo spazi
- Metodo 3. Rimuovere le interruzioni di riga manuali (righe vuote con Maiusc + Invio)
- Metodo 4. Rimuovere tutte le righe vuote usando una macro VBA
- Metodo 5. Rimuovere le righe vuote programmaticamente usando Spire.Doc
- Confronto dei cinque metodi
- Migliori pratiche per evitare righe vuote nei documenti futuri
- Conclusione
- Domande frequenti
Le righe vuote sono uno dei problemi di formattazione più comuni nei documenti di Microsoft Word. Spesso compaiono dopo aver copiato contenuti da siti web, convertito PDF in Word, importato file Markdown/HTML o generato documenti programmaticamente. Sebbene possano sembrare innocue, le righe vuote eccessive possono compromettere il layout del documento, influire sull'impaginazione e causare problemi nei flussi di lavoro di automazione.
Questa guida spiega cosa significano veramente le "righe vuote" in Word e illustra cinque metodi pratici per rimuoverle, dalle rapide correzioni manuali con Trova e sostituisci alla pulizia automatizzata con VBA e Spire.Doc for Python.
Navigazione rapida
- Metodo 1. Rimuovere i paragrafi vuoti usando Trova e sostituisci
- Metodo 2. Rimuovere i paragrafi che contengono solo spazi
- Metodo 3. Rimuovere le interruzioni di riga manuali (righe vuote con Maiusc + Invio)
- Metodo 4. Rimuovere tutte le righe vuote usando una macro VBA
- Metodo 5. Rimuovere le righe vuote programmaticamente usando Spire.Doc for Python
Cosa significano veramente le "righe vuote" in Microsoft Word?
In Microsoft Word, "righe vuote" non è un termine tecnico rigoroso, ma piuttosto una descrizione visiva/di layout. A seconda del contesto, può riferirsi a diverse cose:
| Tipo | Simbolo in Word | Creato da | Significato strutturale | Cause comuni |
|---|---|---|---|---|
| Paragrafo vuoto | ¶ | Premere Invio | Paragrafo vuoto senza testo | Modifica manuale, abitudini di formattazione |
| Paragrafo contenente solo spazi | ¶ + ··· | Spazio + Invio | Paragrafo con spazi bianchi invisibili | Contenuto incollato, tentativi di allineamento |
| Interruzione di riga manuale | ↓ / ↵ | Maiusc + Invio | Nuova riga all'interno dello stesso paragrafo | Conversione PDF, copia da web, importazione HTML |
Per vedere questi simboli, abilita Mostra/Nascondi ¶ dalla scheda Home o premi Ctrl + Maiusc + 8.
Metodo 1. Rimuovere i paragrafi vuoti usando Trova e sostituisci
I paragrafi vuoti sono la fonte più comune di righe vuote visibili nei documenti di Word. Di solito si verificano quando gli utenti premono Invio più volte per aggiungere spaziatura. Prima di passare a metodi di pulizia più avanzati, è meglio eliminare questi paragrafi vuoti strutturali utilizzando lo strumento Trova e sostituisci integrato di Word. Questo approccio manuale rapido è ideale per i documenti che richiedono solo una pulizia di formattazione di base.
Passaggi per rimuovere i paragrafi vuoti
- Apri il tuo documento Word.
- Premi Ctrl + H per aprire la finestra di dialogo Trova e sostituisci.
- Nella casella Trova, inserisci ^p^p (cerca i segni di paragrafo doppi).
- Nella casella Sostituisci con, inserisci ^p (sostituisce i segni di paragrafo doppi con uno singolo).
- Fai clic su Sostituisci tutto per rimuovere i paragrafi vuoti extra.
- Ripeti finché Word non indica 0 sostituzioni.
Cosa succede dopo
Dopo aver rimosso i veri paragrafi vuoti, alcune righe vuote potrebbero rimanere perché contengono spazi nascosti o interruzioni di riga manuali. Il metodo successivo si concentra sulla rimozione dei paragrafi che sembrano vuoti ma in realtà contengono caratteri di spaziatura.
Metodo 2. Rimuovere i paragrafi che contengono solo spazi
Alcuni paragrafi sembrano vuoti ma contengono spazi invisibili, tabulazioni o caratteri non stampabili. Questi paragrafi vengono spesso introdotti quando il contenuto viene incollato da pagine web o PDF. Poiché il Metodo 1 rimuove solo i paragrafi completamente vuoti, questo passaggio si rivolge ai paragrafi contenenti solo spazi bianchi utilizzando ricerche con caratteri jolly.
Passaggi per rimuovere i paragrafi contenenti solo spazi bianchi
- Apri il tuo documento Word.
- Premi Ctrl + H per aprire la finestra di dialogo Trova e sostituisci.
- Fai clic su Altro >> e seleziona la casella Usa caratteri jolly.
- Nella casella Trova, inserisci il modello ^13[ ]{1,}^13 (cerca un paragrafo seguito da uno o più spazi e un altro paragrafo).
- Nella casella Sostituisci con, inserisci ^13 (sostituisce il modello trovato con un singolo paragrafo).
- Fai clic su Sostituisci tutto — potrebbe essere necessario fare clic più volte finché il conteggio delle sostituzioni non mostra 0.
Impara le tecniche di ricerca con caratteri jolly: Caratteri jolly di Word per la ricerca avanzata
Cosa succede dopo
A questo punto, la maggior parte dei paragrafi vuoti è stata eliminata. Tuttavia, alcune righe vuote potrebbero ancora apparire a causa di interruzioni di riga manuali inserite con Maiusc + Invio, che si comportano in modo diverso dai paragrafi reali. Il metodo successivo affronta queste interruzioni di riga strutturali.
Metodo 3. Rimuovere le interruzioni di riga manuali (righe vuote con Maiusc + Invio)
Le interruzioni di riga manuali creano nuove righe visive senza iniziare un nuovo paragrafo. Sono comunemente introdotte quando si copia testo da e-mail, pagine HTML o conversioni PDF. Anche dopo aver pulito paragrafi e spazi bianchi, queste interruzioni possono ancora creare spazi che sembrano righe vuote.
Passaggi per rimuovere le interruzioni di riga manuali
- Apri il tuo documento Word.
- Premi Ctrl + H per aprire la finestra di dialogo Trova e sostituisci.
- Nella casella Trova, inserisci ^l (cerca le interruzioni di riga).
- Lascia vuota la casella Sostituisci con.
- Fai clic su Sostituisci tutto finché Word non segnala zero sostituzioni.
Cosa succede dopo
Dopo aver completato i primi tre metodi manuali, la struttura del tuo documento dovrebbe essere notevolmente più pulita. Se hai bisogno di ripetere questa pulizia frequentemente o di elaborare molti documenti, l'automazione diventa più efficiente. Il metodo successivo introduce una macro VBA che esegue una pulizia completa automaticamente.
Metodo 4. Rimuovere tutte le righe vuote usando una macro VBA
Quando hai bisogno di pulire più documenti o desideri una soluzione con un solo clic all'interno di Word, una macro VBA può automatizzare l'intero processo. Questo metodo rimuove i paragrafi vuoti, i paragrafi contenenti solo spazi bianchi e le interruzioni di riga manuali in un'unica esecuzione.
Passaggi per creare ed eseguire la macro
- Apri il tuo documento Word.
- Premi Alt + F11 per aprire l'Editor VBA.
- Fai clic su Inserisci → Modulo.
- Incolla il seguente codice VBA nella finestra del modulo.
- Premi F5 per eseguire la macro o chiudi l'editor ed eseguila da Visualizza → Macro.
Codice VBA:
Sub RemoveAllEmptyLines_Simple()
    ' Elimina i paragrafi vuoti
    Dim para As Paragraph
    For Each para In ActiveDocument.Paragraphs
        If Len(Trim(para.Range.Text)) <= 1 Then
            para.Range.Delete
        End If
    Next para

    ' Elimina le interruzioni di riga manuali vuote (metodo trova e sostituisci)
    With ActiveDocument.Range.Find
        .ClearFormatting
        .Text = "[ ] @^l"
        .Replacement.Text = ""
        .MatchWildcards = True
        .Wrap = wdFindContinue
        .Execute Replace:=wdReplaceAll
    End With

    ' Elimina le interruzioni di riga manuali isolate rimanenti
    With ActiveDocument.Range.Find
        .ClearFormatting
        .Text = "^l"
        .Replacement.Text = ""
        .MatchWildcards = False
        .Wrap = wdFindContinue
        .Execute Replace:=wdReplaceAll
    End With
End Sub
Riferimento Microsoft VBA: Guida introduttiva a VBA in Word
Passaggio al metodo successivo
Sebbene le macro VBA siano potenti all'interno di Word stesso, richiedono comunque l'esecuzione manuale e l'accesso all'applicazione Word. Per gli sviluppatori o le pipeline di automazione, una soluzione programmatica offre una maggiore flessibilità, il che ci porta al metodo finale che utilizza Spire.Doc for Python.
Metodo 5. Rimuovere le righe vuote programmaticamente usando Spire.Doc for Python
Per l'automazione su larga scala o l'elaborazione lato server, Spire.Doc for Python ti consente di analizzare e pulire la struttura del documento direttamente tramite codice. Questo metodo è ideale per gli sviluppatori che devono elaborare più file automaticamente senza aprire Word.
Passaggio 1. Installa la libreria
pip install spire.doc
Passaggio 2. Crea uno script Python
- Apri il tuo IDE o editor Python preferito.
- Crea un nuovo file Python (ad es. remove_blank_lines.py).
- Incolla il seguente codice nel file.
Passaggio 3. Esegui lo script
Esempio di codice:
from spire.doc import *
from spire.doc.common import *

# Carica documento Word
doc = Document()
doc.LoadFromFile("Input.docx")

# Ottieni la prima sezione
section = doc.Sections[0]

# -----------------------------
# Passaggio 1. Rimuovi le interruzioni di riga manuali
# -----------------------------
for p_index in range(section.Paragraphs.Count):
    paragraph = section.Paragraphs[p_index]

    # Attraversa gli oggetti figli all'indietro
    for i in range(paragraph.ChildObjects.Count - 1, -1, -1):
        obj = paragraph.ChildObjects[i]

        if obj.DocumentObjectType == DocumentObjectType.Break:
            try:
                if hasattr(obj, 'BreakType') and obj.BreakType == BreakType.LineBreak:
                    paragraph.ChildObjects.RemoveAt(i)
            except:
                # Se non è possibile accedere a BreakType, si presume un'interruzione di riga
                paragraph.ChildObjects.RemoveAt(i)

# -----------------------------
# Passaggio 2. Rimuovi i paragrafi vuoti
# -----------------------------
for i in range(section.Paragraphs.Count - 1, -1, -1):
    paragraph = section.Paragraphs[i]

    has_non_text_content = False

    # Controlla la presenza di contenuti non testuali (immagini, tabelle, campi, ecc.)
    for j in range(paragraph.ChildObjects.Count):
        obj = paragraph.ChildObjects[j]
        if obj.DocumentObjectType != DocumentObjectType.TextRange:
            has_non_text_content = True
            break

    # Rimuovi i paragrafi vuoti o contenenti solo spazi bianchi
    if not has_non_text_content and (paragraph.Text == "" or paragraph.Text.isspace()):
        section.Paragraphs.RemoveAt(i)

# Salva documento
doc.SaveToFile("RemoveBlankLines.docx", FileFormat.Docx2019)
doc.Dispose()
Output:
Con l'automazione in atto, ora puoi gestire le righe vuote su larga scala e integrare la pulizia dei documenti direttamente nelle tue pipeline di elaborazione. Oltre a rimuovere i paragrafi vuoti e le interruzioni di riga manuali, Spire.Doc for Python offre un set completo di funzionalità di manipolazione dei documenti.
Puoi creare documenti Word da zero, modificare file esistenti, regolare la formattazione, inserire tabelle o immagini e persino esportare documenti in altri formati come PDF o HTML. Questo lo rende ideale per la creazione di flussi di lavoro di automazione dei documenti end-to-end, garantendo al contempo che i tuoi contenuti siano puliti, coerenti e pronti per ulteriori elaborazioni.
Confronto dei cinque metodi
| Metodo | Livello di abilità | Automazione | Ideale per | Elaborazione batch |
|---|---|---|---|---|
| Trova e sostituisci (paragrafi vuoti) | Principiante | No | Pulizia manuale rapida | No |
| Trova e sostituisci (solo spazi) | Principiante | No | Contenuto importato o incollato | No |
| Trova e sostituisci (interruzioni di riga) | Principiante | No | Normalizzazione del contenuto PDF/web | No |
| Macro VBA | Intermedio | Sì | Attività ripetute | Sì |
| Spire.Doc for Python | Avanzato | Completa | Automazione su larga scala | Sì |
Migliori pratiche per evitare righe vuote nei documenti futuri
- Usa la spaziatura del paragrafo invece di premere Invio più volte.
- Evita di inserire più spazi per l'allineamento visivo.
- Normalizza il contenuto importato subito dopo averlo incollato.
- Converti le interruzioni di riga manuali in paragrafi reali in anticipo.
- Convalida la struttura del documento prima dei flussi di lavoro di automazione.
Conclusione
Per rimuovere le righe vuote in Word, identifica innanzitutto se provengono da paragrafi vuoti, paragrafi contenenti solo spazi bianchi o interruzioni di riga manuali. La scelta del metodo giusto ti aiuta a pulire i documenti in modo efficiente senza influire sul layout o sulla struttura. Questa guida ha trattato cinque approcci pratici, dalle rapide tecniche di Trova e sostituisci alle soluzioni automatizzate che utilizzano VBA e Spire.Doc for Python.
Per modifiche rapide, gli strumenti integrati di Word funzionano bene. Per attività ripetute o elaborazione batch, l'automazione con VBA o Spire.Doc for Python aiuta a semplificare la pulizia e a integrare la formattazione dei documenti in flussi di lavoro più ampi.
Domande frequenti
D1. Perché compaiono righe vuote dopo la conversione di PDF in Word?
I convertitori di PDF spesso inseriscono interruzioni di riga manuali invece di paragrafi reali, che appaiono come righe vuote.
D2. Qual è la differenza tra Invio e Maiusc + Invio?
Invio crea un nuovo paragrafo (¶), mentre Maiusc + Invio inserisce un'interruzione di riga manuale (↓/↵) all'interno dello stesso paragrafo.
D3. Come posso vedere le strutture nascoste delle righe vuote?
Abilita i segni di formattazione usando Ctrl + Maiusc + 8.
D4. La rimozione delle righe vuote influirà sul layout del documento?
Potrebbe modificare la spaziatura o l'impaginazione, quindi controlla la formattazione dopo la pulizia.
D5. Quale metodo è migliore per grandi lotti di file?
I metodi di automazione come le macro VBA o Spire.Doc for Python sono ideali per l'elaborazione batch.
Potrebbe interessarti anche
Supprimer rapidement les lignes vides dans Word : Manuel et VBA/Python
Table des matières
- Que signifient réellement les « lignes vides » dans Microsoft Word ?
- Méthode 1. Supprimer les paragraphes vides à l'aide de Rechercher et remplacer
- Méthode 2. Supprimer les paragraphes ne contenant que des espaces
- Méthode 3. Supprimer les sauts de ligne manuels (Maj + Entrée lignes vides)
- Méthode 4. Supprimer toutes les lignes vides à l'aide d'une macro VBA
- Méthode 5. Supprimer les lignes vides par programme à l'aide de Spire.Doc
- Comparaison des cinq méthodes
- Meilleures pratiques pour éviter les lignes vides dans les futurs documents
- Conclusion
- FAQ
Les lignes vides sont l'un des problèmes de mise en forme les plus courants dans les documents Microsoft Word. Elles apparaissent souvent après avoir copié du contenu de sites Web, converti des PDF en Word, importé des fichiers Markdown/HTML ou généré des documents par programme. Bien qu'elles puissent paraître inoffensives, des lignes vides excessives peuvent perturber la mise en page du document, affecter la pagination et causer des problèmes dans les flux de travail d'automatisation.
Ce guide explique ce que signifient réellement les « lignes vides » dans Word et présente cinq méthodes pratiques pour les supprimer — des corrections manuelles rapides à l'aide de Rechercher et remplacer au nettoyage automatisé avec VBA et Spire.Doc for Python.
Navigation rapide
- Méthode 1. Supprimer les paragraphes vides à l'aide de Rechercher et remplacer
- Méthode 2. Supprimer les paragraphes ne contenant que des espaces
- Méthode 3. Supprimer les sauts de ligne manuels (Maj + Entrée lignes vides)
- Méthode 4. Supprimer toutes les lignes vides à l'aide d'une macro VBA
- Méthode 5. Supprimer les lignes vides par programme à l'aide de Spire.Doc for Python
Que signifient réellement les « lignes vides » dans Microsoft Word ?
Dans Microsoft Word, « lignes vides » n'est pas un terme technique strict — c'est plutôt une description visuelle/de mise en page. Selon le contexte, cela peut faire référence à plusieurs choses différentes :
| Type | Symbole dans Word | Créé par | Signification structurelle | Causes courantes |
|---|---|---|---|---|
| Paragraphe vide | ¶ | Appuyez sur Entrée | Paragraphe vide sans texte | Édition manuelle, habitudes de mise en forme |
| Paragraphe ne contenant que des espaces | ¶ + ··· | Espace + Entrée | Paragraphe avec des espaces invisibles | Contenu collé, tentatives d'alignement |
| Saut de ligne manuel | ↓ / ↵ | Maj + Entrée | Nouvelle ligne dans le même paragraphe | Conversion PDF, copie Web, importation HTML |
Pour voir ces symboles, activez Afficher/Masquer ¶ dans l'onglet Accueil ou appuyez sur Ctrl + Maj + 8.
Méthode 1. Supprimer les paragraphes vides à l'aide de Rechercher et remplacer
Les paragraphes vides sont la source la plus courante de lignes vides visibles dans les documents Word. Ils se produisent généralement lorsque les utilisateurs appuient plusieurs fois sur Entrée pour ajouter de l'espacement. Avant de passer à des méthodes de nettoyage plus avancées, il est préférable d'éliminer ces paragraphes vides structurels à l'aide de l'outil Rechercher et remplacer intégré de Word. Cette approche manuelle rapide est idéale pour les documents qui ne nécessitent qu'un nettoyage de base de la mise en forme.
Étapes pour supprimer les paragraphes vides
- Ouvrez votre document Word.
- Appuyez sur Ctrl + H pour ouvrir la boîte de dialogue Rechercher et remplacer.
- Dans la zone Rechercher, saisissez ^p^p (cela recherche les doubles marques de paragraphe).
- Dans la zone Remplacer par, saisissez ^p (cela remplace les doubles marques de paragraphe par une seule).
- Cliquez sur Remplacer tout pour supprimer les paragraphes vides supplémentaires.
- Répétez jusqu'à ce que Word indique 0 remplacement.
Que se passe-t-il ensuite
Après avoir supprimé les vrais paragraphes vides, certaines lignes vides peuvent encore subsister car elles contiennent des espaces cachés ou des sauts de ligne manuels. La méthode suivante se concentre sur la suppression des paragraphes qui semblent vides mais contiennent en réalité des caractères d'espacement.
Méthode 2. Supprimer les paragraphes ne contenant que des espaces
Certains paragraphes semblent vides mais contiennent des espaces invisibles, des tabulations ou des caractères non imprimables. Ces paragraphes sont souvent introduits lorsque du contenu est collé à partir de pages Web ou de PDF. Étant donné que la méthode 1 ne supprime que les paragraphes complètement vides, cette étape cible les paragraphes contenant uniquement des espaces à l'aide de recherches avec des caractères génériques.
Étapes pour supprimer les paragraphes contenant uniquement des espaces
- Ouvrez votre document Word.
- Appuyez sur Ctrl + H pour ouvrir la boîte de dialogue Rechercher et remplacer.
- Cliquez sur Plus >> et cochez la case pour Utiliser les caractères génériques.
- Dans la zone Rechercher, saisissez le modèle ^13[ ]{1,}^13 (cela recherche un paragraphe suivi d'un ou plusieurs espaces et d'un autre paragraphe).
- Dans la zone Remplacer par, saisissez ^13 (cela remplace le modèle trouvé par un seul paragraphe).
- Cliquez sur Remplacer tout — vous devrez peut-être cliquer plusieurs fois jusqu'à ce que le nombre de remplacements affiche 0.
Apprenez les techniques de recherche avec des caractères génériques : Caractères génériques Word pour la recherche avancée
Que se passe-t-il ensuite
À ce stade, la plupart des paragraphes vides ont disparu. Cependant, certaines lignes vides peuvent encore apparaître en raison de sauts de ligne manuels insérés avec Maj + Entrée, qui se comportent différemment des vrais paragraphes. La méthode suivante traite de ces sauts de ligne structurels.
Méthode 3. Supprimer les sauts de ligne manuels (Maj + Entrée lignes vides)
Les sauts de ligne manuels créent de nouvelles lignes visuelles sans commencer un nouveau paragraphe. Ils sont couramment introduits lors de la copie de texte à partir d'e-mails, de pages HTML ou de conversions PDF. Même après avoir nettoyé les paragraphes et les espaces, ces sauts peuvent encore créer des espaces qui ressemblent à des lignes vides.
Étapes pour supprimer les sauts de ligne manuels
- Ouvrez votre document Word.
- Appuyez sur Ctrl + H pour ouvrir la boîte de dialogue Rechercher et remplacer.
- Dans la zone Rechercher, saisissez ^l (cela recherche les sauts de ligne).
- Laissez la zone Remplacer par vide.
- Cliquez sur Remplacer tout jusqu'à ce que Word signale zéro remplacement.
Que se passe-t-il ensuite
Après avoir terminé les trois premières méthodes manuelles, la structure de votre document devrait être beaucoup plus propre. Si vous devez répéter ce nettoyage fréquemment ou traiter de nombreux documents, l'automatisation devient plus efficace. La méthode suivante présente une macro VBA qui effectue un nettoyage complet automatiquement.
Méthode 4. Supprimer toutes les lignes vides à l'aide d'une macro VBA
Lorsque vous devez nettoyer plusieurs documents ou que vous souhaitez une solution en un clic dans Word, une macro VBA peut automatiser l'ensemble du processus. Cette méthode supprime les paragraphes vides, les paragraphes contenant uniquement des espaces et les sauts de ligne manuels en une seule exécution.
Étapes pour créer et exécuter la macro
- Ouvrez votre document Word.
- Appuyez sur Alt + F11 pour ouvrir l'éditeur VBA.
- Cliquez sur Insertion → Module.
- Collez le code VBA suivant dans la fenêtre du module.
- Appuyez sur F5 pour exécuter la macro ou fermez l'éditeur et exécutez-la à partir de Affichage → Macros.
Code VBA :
Sub RemoveAllEmptyLines_Simple()
    ' Delete empty paragraphs
    Dim para As Paragraph
    For Each para In ActiveDocument.Paragraphs
        If Len(Trim(para.Range.Text)) <= 1 Then
            para.Range.Delete
        End If
    Next para

    ' Delete empty manual line breaks (find and replace method)
    With ActiveDocument.Range.Find
        .ClearFormatting
        .Text = "[ ] @^l"
        .Replacement.Text = ""
        .MatchWildcards = True
        .Wrap = wdFindContinue
        .Execute Replace:=wdReplaceAll
    End With

    ' Delete remaining isolated manual line breaks
    With ActiveDocument.Range.Find
        .ClearFormatting
        .Text = "^l"
        .Replacement.Text = ""
        .MatchWildcards = False
        .Wrap = wdFindContinue
        .Execute Replace:=wdReplaceAll
    End With
End Sub
Référence Microsoft VBA : Démarrer avec VBA dans Word
Transition vers la méthode suivante
Bien que les macros VBA soient puissantes dans Word lui-même, elles nécessitent toujours une exécution manuelle et un accès à l'application Word. Pour les développeurs ou les pipelines d'automatisation, une solution programmatique offre une plus grande flexibilité — ce qui nous amène à la méthode finale utilisant Spire.Doc for Python.
Méthode 5. Supprimer les lignes vides par programme à l'aide de Spire.Doc for Python
Pour l'automatisation à grande échelle ou le traitement côté serveur, Spire.Doc for Python vous permet d'analyser et de nettoyer la structure des documents directement via le code. Cette méthode est idéale pour les développeurs qui ont besoin de traiter plusieurs fichiers automatiquement sans ouvrir Word.
Étape 1. Installer la bibliothèque
pip install spire.doc
Étape 2. Créer un script Python
- Ouvrez votre IDE ou éditeur Python préféré.
- Créez un nouveau fichier Python (par exemple, remove_blank_lines.py).
- Collez le code suivant dans le fichier.
Étape 3. Exécuter le script
Exemple de code :
from spire.doc import *
from spire.doc.common import *

# Load Word document
doc = Document()
doc.LoadFromFile("Input.docx")

# Get first section
section = doc.Sections[0]

# -----------------------------
# Step 1. Remove manual line breaks
# -----------------------------
for p_index in range(section.Paragraphs.Count):
    paragraph = section.Paragraphs[p_index]

    # Traverse child objects backward
    for i in range(paragraph.ChildObjects.Count - 1, -1, -1):
        obj = paragraph.ChildObjects[i]

        if obj.DocumentObjectType == DocumentObjectType.Break:
            try:
                if hasattr(obj, 'BreakType') and obj.BreakType == BreakType.LineBreak:
                    paragraph.ChildObjects.RemoveAt(i)
            except:
                # If BreakType cannot be accessed, assume line break
                paragraph.ChildObjects.RemoveAt(i)

# -----------------------------
# Step 2. Remove blank paragraphs
# -----------------------------
for i in range(section.Paragraphs.Count - 1, -1, -1):
    paragraph = section.Paragraphs[i]

    has_non_text_content = False

    # Check for non-text content (images, tables, fields, etc.)
    for j in range(paragraph.ChildObjects.Count):
        obj = paragraph.ChildObjects[j]
        if obj.DocumentObjectType != DocumentObjectType.TextRange:
            has_non_text_content = True
            break

    # Remove paragraphs that are empty or whitespace-only
    if not has_non_text_content and (paragraph.Text == "" or paragraph.Text.isspace()):
        section.Paragraphs.RemoveAt(i)

# Save document
doc.SaveToFile("RemoveBlankLines.docx", FileFormat.Docx2019)
doc.Dispose()
Sortie :
Avec l'automatisation en place, vous pouvez désormais gérer les lignes vides à grande échelle et intégrer le nettoyage des documents directement dans vos pipelines de traitement. Au-delà de la suppression des paragraphes vides et des sauts de ligne manuels, Spire.Doc for Python offre un ensemble complet de fonctionnalités de manipulation de documents.
Vous pouvez créer des documents Word à partir de zéro, modifier des fichiers existants, ajuster la mise en forme, insérer des tableaux ou des images, et même exporter des documents vers d'autres formats tels que PDF ou HTML. Cela le rend idéal pour créer des flux de travail d'automatisation de documents de bout en bout tout en garantissant que votre contenu est propre, cohérent et prêt pour un traitement ultérieur.
Comparaison des cinq méthodes
| Méthode | Niveau de compétence | Automatisation | Idéal pour | Traitement par lots |
|---|---|---|---|---|
| Rechercher et remplacer (paragraphes vides) | Débutant | Non | Nettoyage manuel rapide | Non |
| Rechercher et remplacer (espaces uniquement) | Débutant | Non | Contenu importé ou collé | Non |
| Rechercher et remplacer (sauts de ligne) | Débutant | Non | Normalisation du contenu PDF/Web | Non |
| Macro VBA | Intermédiaire | Oui | Tâches répétées | Oui |
| Spire.Doc for Python | Avancé | Complet | Automatisation à grande échelle | Oui |
Meilleures pratiques pour éviter les lignes vides dans les futurs documents
- Utilisez l'espacement des paragraphes au lieu d'appuyer plusieurs fois sur Entrée.
- Évitez d'insérer plusieurs espaces pour l'alignement visuel.
- Normalisez le contenu importé immédiatement après l'avoir collé.
- Convertissez les sauts de ligne manuels en vrais paragraphes tôt.
- Validez la structure du document avant les flux de travail d'automatisation.
Conclusion
Pour supprimer les lignes vides dans Word, identifiez d'abord si elles proviennent de paragraphes vides, de paragraphes contenant uniquement des espaces ou de sauts de ligne manuels. Le choix de la bonne méthode vous aide à nettoyer efficacement les documents sans affecter la mise en page ou la structure. Ce guide a couvert cinq approches pratiques — des techniques rapides de recherche et de remplacement aux solutions automatisées utilisant VBA et Spire.Doc for Python.
Pour des modifications rapides, les outils intégrés de Word fonctionnent bien. Pour les tâches répétées ou le traitement par lots, l'automatisation avec VBA ou Spire.Doc for Python permet de rationaliser le nettoyage et d'intégrer la mise en forme des documents dans des flux de travail plus importants.
FAQ
Q1. Pourquoi des lignes vides apparaissent-elles après la conversion de PDF en Word ?
Les convertisseurs PDF insèrent souvent des sauts de ligne manuels au lieu de vrais paragraphes, qui ressemblent à des lignes vides.
Q2. Quelle est la différence entre Entrée et Maj + Entrée ?
Entrée crée un nouveau paragraphe (¶), tandis que Maj + Entrée insère un saut de ligne manuel (↓/↵) dans le même paragraphe.
Q3. Comment puis-je voir les structures de lignes vides cachées ?
Activez les marques de mise en forme en utilisant Ctrl + Maj + 8.
Q4. La suppression des lignes vides affectera-t-elle la mise en page du document ?
Cela peut modifier l'espacement ou la pagination, alors vérifiez la mise en forme après le nettoyage.
Q5. Quelle est la meilleure méthode pour de grands lots de fichiers ?
Les méthodes d'automatisation comme les macros VBA ou Spire.Doc for Python sont idéales pour le traitement par lots.
Vous pourriez aussi être intéressé par
Eliminar líneas en blanco en Word rápidamente: Manual y VBA/Python
Tabla de Contenidos
- ¿Qué Significan Realmente las "Líneas en Blanco" en Microsoft Word?
- Método 1. Eliminar Párrafos en Blanco Usando Buscar y Reemplazar
- Método 2. Eliminar Párrafos que Contienen Solo Espacios
- Método 3. Eliminar Saltos de Línea Manuales (Líneas en Blanco con Shift + Enter)
- Método 4. Eliminar Todas las Líneas en Blanco Usando una Macro de VBA
- Método 5. Eliminar Líneas en Blanco Programáticamente Usando Spire.Doc
- Comparación de los Cinco Métodos
- Mejores Prácticas para Evitar Líneas en Blanco en Futuros Documentos
- Conclusión
- Preguntas Frecuentes
Las líneas en blanco son uno de los problemas de formato más comunes en los documentos de Microsoft Word. A menudo aparecen después de copiar contenido de sitios web, convertir archivos PDF a Word, importar archivos Markdown/HTML o generar documentos programáticamente. Aunque parezcan inofensivas, las líneas en blanco excesivas pueden romper el diseño del documento, afectar la paginación y causar problemas en los flujos de trabajo de automatización.
Esta guía explica qué significan realmente las "líneas en blanco" en Word y detalla cinco métodos prácticos para eliminarlas, desde soluciones manuales rápidas usando Buscar y Reemplazar hasta la limpieza automatizada con VBA y Spire.Doc for Python.
Navegación Rápida
- Método 1. Eliminar Párrafos en Blanco Usando Buscar y Reemplazar
- Método 2. Eliminar Párrafos que Contienen Solo Espacios
- Método 3. Eliminar Saltos de Línea Manuales (Líneas en Blanco con Shift + Enter)
- Método 4. Eliminar Todas las Líneas en Blanco Usando una Macro de VBA
- Método 5. Eliminar Líneas en Blanco Programáticamente Usando Spire.Doc for Python
¿Qué Significan Realmente las "Líneas en Blanco" en Microsoft Word?
En Microsoft Word, "líneas en blanco" no es un término técnico estricto, es más bien una descripción visual/de diseño. Dependiendo del contexto, puede referirse a varias cosas diferentes:
| Tipo | Símbolo en Word | Creado Por | Significado Estructural | Causas Comunes |
|---|---|---|---|---|
| Párrafo en Blanco | ¶ | Presionar Enter | Párrafo vacío sin texto | Edición manual, hábitos de formato |
| Párrafo que Contiene Solo Espacios | ¶ + ··· | Espacio + Enter | Párrafo con espacios en blanco invisibles | Contenido pegado, intentos de alineación |
| Salto de Línea Manual | ↓ / ↵ | Shift + Enter | Nueva línea dentro del mismo párrafo | Conversión de PDF, copia web, importación de HTML |
Para ver estos símbolos, active Mostrar/Ocultar ¶ desde la pestaña Inicio o presione Ctrl + Shift + 8.
Método 1. Eliminar Párrafos en Blanco Usando Buscar y Reemplazar
Los párrafos en blanco son la fuente más común de líneas vacías visibles en los documentos de Word. Generalmente ocurren cuando los usuarios presionan Enter varias veces para agregar espaciado. Antes de pasar a métodos de limpieza más avanzados, es mejor eliminar estos párrafos vacíos estructurales utilizando la herramienta integrada de Buscar y Reemplazar de Word. Este enfoque manual rápido es ideal para documentos que solo requieren una limpieza de formato básica.
Pasos para Eliminar Párrafos en Blanco
- Abra su documento de Word.
- Presione Ctrl + H para abrir el cuadro de diálogo Buscar y Reemplazar.
- En el cuadro Buscar, ingrese ^p^p (esto busca marcas de párrafo dobles).
- En el cuadro Reemplazar con, ingrese ^p (esto reemplaza las marcas de párrafo dobles por una sola).
- Haga clic en Reemplazar todo para eliminar los párrafos en blanco adicionales.
- Repita hasta que Word indique 0 reemplazos.
Qué Sucede a Continuación
Después de eliminar los párrafos verdaderamente en blanco, es posible que aún queden algunas líneas vacías porque contienen espacios ocultos o saltos de línea manuales. El siguiente método se enfoca en eliminar párrafos que parecen vacíos pero que en realidad contienen caracteres de espacio en blanco.
Método 2. Eliminar Párrafos que Contienen Solo Espacios
Algunos párrafos parecen en blanco pero contienen espacios invisibles, tabulaciones o caracteres no imprimibles. Estos párrafos a menudo se introducen cuando se pega contenido de páginas web o archivos PDF. Dado que el Método 1 solo elimina párrafos completamente vacíos, este paso se enfoca en los párrafos que solo contienen espacios en blanco mediante búsquedas con comodines.
Pasos para Eliminar Párrafos que Solo Contienen Espacios en Blanco
- Abra su documento de Word.
- Presione Ctrl + H para abrir el cuadro de diálogo Buscar y Reemplazar.
- Haga clic en Más >> y marque la casilla Usar caracteres comodíns.
- En el cuadro Buscar, ingrese el patrón ^13[ ]{1,}^13 (esto busca un párrafo seguido de uno o más espacios y otro párrafo).
- En el cuadro Reemplazar con, ingrese ^13 (esto reemplaza el patrón encontrado con un solo párrafo).
- Haga clic en Reemplazar todo — es posible que deba hacer clic varias veces hasta que el recuento de reemplazos muestre 0.
Aprenda técnicas de búsqueda con comodines: Comodines de Word para Búsqueda Avanzada
Qué Sucede a Continuación
En esta etapa, la mayoría de los párrafos vacíos han desaparecido. Sin embargo, algunas líneas en blanco aún pueden aparecer debido a saltos de línea manuales insertados con Shift + Enter, que se comportan de manera diferente a los párrafos reales. El siguiente método aborda esos saltos de línea estructurales.
Método 3. Eliminar Saltos de Línea Manuales (Líneas en Blanco con Shift + Enter)
Los saltos de línea manuales crean nuevas líneas visuales sin iniciar un nuevo párrafo. Se introducen comúnmente al copiar texto de correos electrónicos, páginas HTML o conversiones de PDF. Incluso después de limpiar párrafos y espacios en blanco, estos saltos aún pueden crear espacios que parecen líneas en blanco.
Pasos para Eliminar Saltos de Línea Manuales
- Abra su documento de Word.
- Presione Ctrl + H para abrir el cuadro de diálogo Buscar y Reemplazar.
- En el cuadro Buscar, ingrese ^l (esto busca saltos de línea).
- Deje vacío el cuadro Reemplazar con.
- Haga clic en Reemplazar todo hasta que Word informe cero reemplazos.
Qué Sucede a Continuación
Después de completar los tres primeros métodos manuales, la estructura de su documento debería estar significativamente más limpia. Si necesita repetir esta limpieza con frecuencia o procesar muchos documentos, la automatización se vuelve más eficiente. El siguiente método introduce una macro de VBA que realiza una limpieza completa automáticamente.
Método 4. Eliminar Todas las Líneas en Blanco Usando una Macro de VBA
Cuando necesita limpiar varios documentos o desea una solución de un solo clic dentro de Word, una macro de VBA puede automatizar todo el proceso. Este método elimina párrafos vacíos, párrafos que solo contienen espacios en blanco y saltos de línea manuales en una sola ejecución.
Pasos para Crear y Ejecutar la Macro
- Abra su documento de Word.
- Presione Alt + F11 para abrir el Editor de VBA.
- Haga clic en Insertar → Módulo.
- Pegue el siguiente código VBA en la ventana del módulo.
- Presione F5 para ejecutar la macro o cierre el editor y ejecútela desde Vista → Macros.
Código VBA:
Sub RemoveAllEmptyLines_Simple()
    ' Delete empty paragraphs
    Dim para As Paragraph
    For Each para In ActiveDocument.Paragraphs
        If Len(Trim(para.Range.Text)) <= 1 Then
            para.Range.Delete
        End If
    Next para

    ' Delete empty manual line breaks (find and replace method)
    With ActiveDocument.Range.Find
        .ClearFormatting
        .Text = "[ ] @^l"
        .Replacement.Text = ""
        .MatchWildcards = True
        .Wrap = wdFindContinue
        .Execute Replace:=wdReplaceAll
    End With

    ' Delete remaining isolated manual line breaks
    With ActiveDocument.Range.Find
        .ClearFormatting
        .Text = "^l"
        .Replacement.Text = ""
        .MatchWildcards = False
        .Wrap = wdFindContinue
        .Execute Replace:=wdReplaceAll
    End With
End Sub
Referencia de Microsoft VBA: Introducción a VBA en Word
Transición al Siguiente Método
Si bien las macros de VBA son potentes dentro de Word, todavía requieren ejecución manual y acceso a la aplicación de Word. Para los desarrolladores o las canalizaciones de automatización, una solución programática ofrece una mayor flexibilidad, lo que nos lleva al método final utilizando Spire.Doc for Python.
Método 5. Eliminar Líneas en Blanco Programáticamente Usando Spire.Doc for Python
Para la automatización a gran escala o el procesamiento del lado del servidor, Spire.Doc for Python le permite analizar y limpiar la estructura del documento directamente a través del código. Este método es ideal para desarrolladores que necesitan procesar múltiples archivos automáticamente sin abrir Word.
Paso 1. Instalar la Biblioteca
pip install spire.doc
Paso 2. Crear un Script de Python
- Abra su IDE o editor de Python preferido.
- Cree un nuevo archivo de Python (p. ej., remove_blank_lines.py).
- Pegue el siguiente código en el archivo.
Paso 3. Ejecutar el Script
Ejemplo de Código:
from spire.doc import *
from spire.doc.common import *

# Load Word document
doc = Document()
doc.LoadFromFile("Input.docx")

# Get first section
section = doc.Sections[0]

# -----------------------------
# Step 1. Remove manual line breaks
# -----------------------------
for p_index in range(section.Paragraphs.Count):
    paragraph = section.Paragraphs[p_index]

    # Traverse child objects backward
    for i in range(paragraph.ChildObjects.Count - 1, -1, -1):
        obj = paragraph.ChildObjects[i]

        if obj.DocumentObjectType == DocumentObjectType.Break:
            try:
                if hasattr(obj, 'BreakType') and obj.BreakType == BreakType.LineBreak:
                    paragraph.ChildObjects.RemoveAt(i)
            except:
                # If BreakType cannot be accessed, assume line break
                paragraph.ChildObjects.RemoveAt(i)

# -----------------------------
# Step 2. Remove blank paragraphs
# -----------------------------
for i in range(section.Paragraphs.Count - 1, -1, -1):
    paragraph = section.Paragraphs[i]

    has_non_text_content = False

    # Check for non-text content (images, tables, fields, etc.)
    for j in range(paragraph.ChildObjects.Count):
        obj = paragraph.ChildObjects[j]
        if obj.DocumentObjectType != DocumentObjectType.TextRange:
            has_non_text_content = True
            break

    # Remove paragraphs that are empty or whitespace-only
    if not has_non_text_content and (paragraph.Text == "" or paragraph.Text.isspace()):
        section.Paragraphs.RemoveAt(i)

# Save document
doc.SaveToFile("RemoveBlankLines.docx", FileFormat.Docx2019)
doc.Dispose()
Salida:
Con la automatización implementada, ahora puede manejar líneas en blanco a escala e integrar la limpieza de documentos directamente en sus canalizaciones de procesamiento. Más allá de eliminar párrafos vacíos y saltos de línea manuales, Spire.Doc for Python proporciona un conjunto completo de capacidades de manipulación de documentos.
Puede crear documentos de Word desde cero, modificar archivos existentes, ajustar el formato, insertar tablas o imágenes e incluso exportar documentos a otros formatos como PDF o HTML. Esto lo hace ideal para construir flujos de trabajo de automatización de documentos de extremo a extremo, al tiempo que garantiza que su contenido esté limpio, sea coherente y esté listo para su posterior procesamiento.
Comparación de los Cinco Métodos
| Método | Nivel de Habilidad | Automatización | Ideal Para | Procesamiento por Lotes |
|---|---|---|---|---|
| Buscar y Reemplazar (Párrafos en Blanco) | Principiante | No | Limpieza manual rápida | No |
| Buscar y Reemplazar (Solo Espacios) | Principiante | No | Contenido importado o pegado | No |
| Buscar y Reemplazar (Saltos de Línea) | Principiante | No | Normalización de contenido PDF/web | No |
| Macro VBA | Intermedio | Sí | Tareas repetitivas | Sí |
| Spire.Doc for Python | Avanzado | Completa | Automatización a gran escala | Sí |
Mejores Prácticas para Evitar Líneas en Blanco en Futuros Documentos
- Use el espaciado de párrafo en lugar de presionar Enter varias veces.
- Evite insertar múltiples espacios para la alineación visual.
- Normalice el contenido importado inmediatamente después de pegarlo.
- Convierta los saltos de línea manuales en párrafos reales de forma temprana.
- Valide la estructura del documento antes de los flujos de trabajo de automatización.
Conclusión
Para eliminar las líneas en blanco en Word, primero identifique si provienen de párrafos vacíos, párrafos que solo contienen espacios en blanco o saltos de línea manuales. Elegir el método correcto le ayuda a limpiar documentos de manera eficiente sin afectar el diseño o la estructura. Esta guía cubrió cinco enfoques prácticos, desde técnicas rápidas de Buscar y Reemplazar hasta soluciones automatizadas usando VBA y Spire.Doc for Python.
Para ediciones rápidas, las herramientas integradas de Word funcionan bien. Para tareas repetitivas o procesamiento por lotes, la automatización con VBA o Spire.Doc for Python ayuda a optimizar la limpieza e integrar el formato de documentos en flujos de trabajo más grandes.
Preguntas Frecuentes
P1. ¿Por qué aparecen líneas en blanco después de convertir archivos PDF a Word?
Los convertidores de PDF a menudo insertan saltos de línea manuales en lugar de párrafos reales, que parecen líneas en blanco.
P2. ¿Cuál es la diferencia entre Enter y Shift + Enter?
Enter crea un nuevo párrafo (¶), mientras que Shift + Enter inserta un salto de línea manual (↓/↵) dentro del mismo párrafo.
P3. ¿Cómo puedo ver las estructuras ocultas de las líneas en blanco?
Active las marcas de formato usando Ctrl + Shift + 8.
P4. ¿La eliminación de líneas en blanco afectará el diseño del documento?
Puede cambiar el espaciado o la paginación, así que revise el formato después de la limpieza.
P5. ¿Qué método es mejor para grandes lotes de archivos?
Los métodos de automatización como las macros de VBA o Spire.Doc for Python son ideales para el procesamiento por lotes.
También le Puede Interesar
Leere Zeilen in Word schnell entfernen: Manuell & VBA/Python
Inhaltsverzeichnis
- Was bedeuten „leere Zeilen“ wirklich in Microsoft Word?
- Methode 1. Leere Absätze mit Suchen und Ersetzen entfernen
- Methode 2. Absätze entfernen, die nur Leerzeichen enthalten
- Methode 3. Manuelle Zeilenumbrüche entfernen (Umschalttaste + Eingabetaste für leere Zeilen)
- Methode 4. Alle leeren Zeilen mit einem VBA-Makro entfernen
- Methode 5. Leere Zeilen programmgesteuert mit Spire.Doc entfernen
- Vergleich der fünf Methoden
- Bewährte Verfahren zur Vermeidung von leeren Zeilen in zukünftigen Dokumenten
- Fazit
- FAQs
Leere Zeilen sind eines der häufigsten Formatierungsprobleme in Microsoft Word-Dokumenten. Sie treten oft auf, nachdem Inhalte von Websites kopiert, PDFs in Word konvertiert, Markdown/HTML-Dateien importiert oder Dokumente programmgesteuert generiert wurden. Obwohl sie harmlos aussehen mögen, können übermäßige leere Zeilen das Dokumentenlayout stören, die Paginierung beeinträchtigen und Probleme in Automatisierungsworkflows verursachen.
Dieser Leitfaden erklärt, was „leere Zeilen“ wirklich bedeuten in Word und führt durch fünf praktische Methoden, um sie zu entfernen – von schnellen manuellen Korrekturen mit Suchen & Ersetzen bis hin zur automatisierten Bereinigung mit VBA und Spire.Doc for Python.
Schnellnavigation
- Methode 1. Leere Absätze mit Suchen und Ersetzen entfernen
- Methode 2. Absätze entfernen, die nur Leerzeichen enthalten
- Methode 3. Manuelle Zeilenumbrüche entfernen (Umschalttaste + Eingabetaste für leere Zeilen)
- Methode 4. Alle leeren Zeilen mit einem VBA-Makro entfernen
- Methode 5. Leere Zeilen programmgesteuert mit Spire.Doc for Python entfernen
Was bedeuten „leere Zeilen“ wirklich in Microsoft Word?
In Microsoft Word ist „leere Zeilen“ kein streng technischer Begriff – es ist eher eine visuelle/layoutbezogene Beschreibung. Je nach Kontext kann es sich auf verschiedene Dinge beziehen:
| Typ | Symbol in Word | Erstellt durch | Strukturelle Bedeutung | Häufige Ursachen |
|---|---|---|---|---|
| Leerer Absatz | ¶ | Eingabetaste drücken | Leerer Absatz ohne Text | Manuelle Bearbeitung, Formatierungsgewohnheiten |
| Absatz, der nur Leerzeichen enthält | ¶ + ··· | Leertaste + Eingabetaste | Absatz mit unsichtbaren Leerräumen | Eingefügter Inhalt, Ausrichtungsversuche |
| Manueller Zeilenumbruch | ↓ / ↵ | Umschalttaste + Eingabetaste | Neue Zeile innerhalb desselben Absatzes | PDF-Konvertierung, Web-Kopie, HTML-Import |
Um diese Symbole zu sehen, aktivieren Sie Alles anzeigen ¶ auf der Registerkarte Start oder drücken Sie Strg + Umschalt + 8.
Methode 1. Leere Absätze mit Suchen und Ersetzen entfernen
Leere Absätze sind die häufigste Ursache für sichtbare leere Zeilen in Word-Dokumenten. Sie entstehen normalerweise, wenn Benutzer mehrmals die Eingabetaste drücken, um Abstand hinzuzufügen. Bevor Sie zu fortgeschritteneren Bereinigungsmethoden übergehen, ist es am besten, diese strukturellen leeren Absätze mit dem integrierten Suchen-und-Ersetzen-Tool von Word zu beseitigen. Dieser schnelle manuelle Ansatz ist ideal für Dokumente, die nur eine grundlegende Formatierungsbereinigung erfordern.
Schritte zum Entfernen leerer Absätze
- Öffnen Sie Ihr Word-Dokument.
- Drücken Sie Strg + H, um das Dialogfeld Suchen und Ersetzen zu öffnen.
- Geben Sie im Feld Suchen nach ^p^p ein (dies sucht nach doppelten Absatzmarken).
- Geben Sie im Feld Ersetzen durch ^p ein (dies ersetzt doppelte Absatzmarken durch eine einzelne).
- Klicken Sie auf Alle ersetzen, um die zusätzlichen leeren Absätze zu entfernen.
- Wiederholen Sie den Vorgang, bis Word 0 Ersetzungen meldet.
Was als Nächstes passiert
Nach dem Entfernen echter leerer Absätze können einige leere Zeilen immer noch verbleiben, da sie versteckte Leerzeichen oder manuelle Zeilenumbrüche enthalten. Die nächste Methode konzentriert sich auf das Entfernen von Absätzen, die leer erscheinen, aber tatsächlich Leerraumzeichen enthalten.
Methode 2. Absätze entfernen, die nur Leerzeichen enthalten
Einige Absätze sehen leer aus, enthalten aber unsichtbare Leerzeichen, Tabulatoren oder nicht druckbare Zeichen. Diese Absätze werden oft eingefügt, wenn Inhalte von Webseiten oder PDFs eingefügt werden. Da Methode 1 nur vollständig leere Absätze entfernt, zielt dieser Schritt auf Absätze ab, die nur aus Leerraum bestehen, und verwendet dazu die Wildcard-Suche.
Schritte zum Entfernen von Absätzen, die nur aus Leerraum bestehen
- Öffnen Sie Ihr Word-Dokument.
- Drücken Sie Strg + H, um das Dialogfeld Suchen und Ersetzen zu öffnen.
- Klicken Sie auf Mehr >> und aktivieren Sie das Kontrollkästchen für Platzhalter verwenden.
- Geben Sie im Feld Suchen nach das Muster ^13[ ]{1,}^13 ein (dies sucht nach einem Absatz, gefolgt von einem oder mehreren Leerzeichen und einem weiteren Absatz).
- Geben Sie im Feld Ersetzen durch ^13 ein (dies ersetzt das gefundene Muster durch einen einzelnen Absatz).
- Klicken Sie auf Alle ersetzen – möglicherweise müssen Sie mehrmals klicken, bis die Ersetzungsanzahl 0 anzeigt.
Lernen Sie Wildcard-Suchtechniken: Word-Platzhalter für die erweiterte Suche
Was als Nächstes passiert
In diesem Stadium sind die meisten leeren Absätze verschwunden. Es können jedoch immer noch einige leere Zeilen aufgrund von manuellen Zeilenumbrüchen erscheinen, die mit Umschalt + Eingabe eingefügt wurden und sich anders verhalten als echte Absätze. Die nächste Methode befasst sich mit diesen strukturellen Zeilenumbrüchen.
Methode 3. Manuelle Zeilenumbrüche entfernen (Umschalttaste + Eingabetaste für leere Zeilen)
Manuelle Zeilenumbrüche erzeugen neue visuelle Zeilen, ohne einen neuen Absatz zu beginnen. Sie werden häufig beim Kopieren von Text aus E-Mails, HTML-Seiten oder PDF-Konvertierungen eingefügt. Selbst nach der Bereinigung von Absätzen und Leerräumen können diese Umbrüche immer noch Lücken erzeugen, die wie leere Zeilen aussehen.
Schritte zum Entfernen manueller Zeilenumbrüche
- Öffnen Sie Ihr Word-Dokument.
- Drücken Sie Strg + H, um das Dialogfeld Suchen und Ersetzen zu öffnen.
- Geben Sie im Feld Suchen nach ^l ein (dies sucht nach Zeilenumbrüchen).
- Lassen Sie das Feld Ersetzen durch leer.
- Klicken Sie auf Alle ersetzen, bis Word null Ersetzungen meldet.
Was als Nächstes passiert
Nach Abschluss der ersten drei manuellen Methoden sollte die Struktur Ihres Dokuments erheblich sauberer sein. Wenn Sie diese Bereinigung häufig wiederholen oder viele Dokumente verarbeiten müssen, wird die Automatisierung effizienter. Die nächste Methode stellt ein VBA-Makro vor, das eine vollständige Bereinigung automatisch durchführt.
Methode 4. Alle leeren Zeilen mit einem VBA-Makro entfernen
Wenn Sie mehrere Dokumente bereinigen müssen oder eine Ein-Klick-Lösung in Word wünschen, kann ein VBA-Makro den gesamten Prozess automatisieren. Diese Methode entfernt leere Absätze, nur aus Leerraum bestehende Absätze und manuelle Zeilenumbrüche in einer einzigen Ausführung.
Schritte zum Erstellen und Ausführen des Makros
- Öffnen Sie Ihr Word-Dokument.
- Drücken Sie Alt + F11, um den VBA-Editor zu öffnen.
- Klicken Sie auf Einfügen → Modul.
- Fügen Sie den folgenden VBA-Code in das Modulfenster ein.
- Drücken Sie F5, um das Makro auszuführen, oder schließen Sie den Editor und führen Sie es über Ansicht → Makros aus.
VBA-Code:
Sub RemoveAllEmptyLines_Simple()
    ' Leere Absätze löschen
    Dim para As Paragraph
    For Each para In ActiveDocument.Paragraphs
        If Len(Trim(para.Range.Text)) <= 1 Then
            para.Range.Delete
        End If
    Next para

    ' Leere manuelle Zeilenumbrüche löschen (Suchen-und-Ersetzen-Methode)
    With ActiveDocument.Range.Find
        .ClearFormatting
        .Text = "[ ] @^l"
        .Replacement.Text = ""
        .MatchWildcards = True
        .Wrap = wdFindContinue
        .Execute Replace:=wdReplaceAll
    End With

    ' Verbleibende isolierte manuelle Zeilenumbrüche löschen
    With ActiveDocument.Range.Find
        .ClearFormatting
        .Text = "^l"
        .Replacement.Text = ""
        .MatchWildcards = False
        .Wrap = wdFindContinue
        .Execute Replace:=wdReplaceAll
    End With
End Sub
Microsoft VBA-Referenz: Erste Schritte mit VBA in Office
Übergang zur nächsten Methode
Obwohl VBA-Makros innerhalb von Word selbst leistungsstark sind, erfordern sie immer noch eine manuelle Ausführung und den Zugriff auf die Word-Anwendung. Für Entwickler oder Automatisierungspipelines bietet eine programmgesteuerte Lösung eine größere Flexibilität – was uns zur letzten Methode mit Spire.Doc for Python führt.
Methode 5. Leere Zeilen programmgesteuert mit Spire.Doc for Python entfernen
Für die groß angelegte Automatisierung oder serverseitige Verarbeitung ermöglicht Spire.Doc for Python die Analyse und Bereinigung der Dokumentenstruktur direkt über Code. Diese Methode ist ideal für Entwickler, die mehrere Dateien automatisch verarbeiten müssen, ohne Word zu öffnen.
Schritt 1. Installieren Sie die Bibliothek
pip install spire.doc
Schritt 2. Erstellen Sie ein Python-Skript
- Öffnen Sie Ihre bevorzugte Python-IDE oder Ihren Editor.
- Erstellen Sie eine neue Python-Datei (z. B. remove_blank_lines.py).
- Fügen Sie den folgenden Code in die Datei ein.
Schritt 3. Führen Sie das Skript aus
Codebeispiel:
from spire.doc import *
from spire.doc.common import *

# Word-Dokument laden
doc = Document()
doc.LoadFromFile("Input.docx")

# Ersten Abschnitt abrufen
section = doc.Sections[0]

# -----------------------------
# Schritt 1. Manuelle Zeilenumbrüche entfernen
# -----------------------------
for p_index in range(section.Paragraphs.Count):
    paragraph = section.Paragraphs[p_index]

    # Untergeordnete Objekte rückwärts durchlaufen
    for i in range(paragraph.ChildObjects.Count - 1, -1, -1):
        obj = paragraph.ChildObjects[i]

        if obj.DocumentObjectType == DocumentObjectType.Break:
            try:
                if hasattr(obj, 'BreakType') and obj.BreakType == BreakType.LineBreak:
                    paragraph.ChildObjects.RemoveAt(i)
            except:
                # Wenn auf BreakType nicht zugegriffen werden kann, wird ein Zeilenumbruch angenommen
                paragraph.ChildObjects.RemoveAt(i)

# -----------------------------
# Schritt 2. Leere Absätze entfernen
# -----------------------------
for i in range(section.Paragraphs.Count - 1, -1, -1):
    paragraph = section.Paragraphs[i]

    has_non_text_content = False

    # Auf nicht-textuellen Inhalt prüfen (Bilder, Tabellen, Felder usw.)
    for j in range(paragraph.ChildObjects.Count):
        obj = paragraph.ChildObjects[j]
        if obj.DocumentObjectType != DocumentObjectType.TextRange:
            has_non_text_content = True
            break

    # Absätze entfernen, die leer sind oder nur aus Leerraum bestehen
    if not has_non_text_content and (paragraph.Text == "" or paragraph.Text.isspace()):
        section.Paragraphs.RemoveAt(i)

# Dokument speichern
doc.SaveToFile("RemoveBlankLines.docx", FileFormat.Docx2019)
doc.Dispose()
Ausgabe:
Mit der Automatisierung können Sie nun leere Zeilen in großem Maßstab behandeln und die Dokumentenbereinigung direkt in Ihre Verarbeitungspipelines integrieren. Über das Entfernen leerer Absätze und manueller Zeilenumbrüche hinaus bietet Spire.Doc for Python eine umfassende Reihe von Funktionen zur Dokumentenmanipulation.
Sie können Word-Dokumente von Grund auf neu erstellen, vorhandene Dateien ändern, die Formatierung anpassen, Tabellen oder Bilder einfügen und sogar Dokumente in andere Formate wie PDF oder HTML exportieren. Dies macht es ideal für den Aufbau von End-to-End-Dokumentenautomatisierungsworkflows, während sichergestellt wird, dass Ihr Inhalt sauber, konsistent und für die weitere Verarbeitung bereit ist.
Vergleich der fünf Methoden
| Methode | Fähigkeitslevel | Automatisierung | Am besten für | Stapelverarbeitung |
|---|---|---|---|---|
| Suchen & Ersetzen (Leere Absätze) | Anfänger | Nein | Schnelle manuelle Bereinigung | Nein |
| Suchen & Ersetzen (Nur Leerzeichen) | Anfänger | Nein | Importierter oder eingefügter Inhalt | Nein |
| Suchen & Ersetzen (Zeilenumbrüche) | Anfänger | Nein | Normalisierung von PDF/Web-Inhalten | Nein |
| VBA-Makro | Mittelstufe | Ja | Wiederholte Aufgaben | Ja |
| Spire.Doc for Python | Fortgeschritten | Vollständig | Groß angelegte Automatisierung | Ja |
Bewährte Verfahren zur Vermeidung von leeren Zeilen in zukünftigen Dokumenten
- Verwenden Sie Absatzabstände anstelle von mehrfachem Drücken der Eingabetaste.
- Vermeiden Sie das Einfügen mehrerer Leerzeichen zur visuellen Ausrichtung.
- Normalisieren Sie importierte Inhalte sofort nach dem Einfügen.
- Wandeln Sie manuelle Zeilenumbrüche frühzeitig in echte Absätze um.
- Validieren Sie die Dokumentenstruktur vor Automatisierungsworkflows.
Fazit
Um leere Zeilen in Word zu entfernen, identifizieren Sie zunächst, ob sie von leeren Absätzen, nur aus Leerraum bestehenden Absätzen oder manuellen Zeilenumbrüchen stammen. Die Wahl der richtigen Methode hilft Ihnen, Dokumente effizient zu bereinigen, ohne das Layout oder die Struktur zu beeinträchtigen. Dieser Leitfaden behandelte fünf praktische Ansätze – von schnellen Suchen-&-Ersetzen-Techniken bis hin zu automatisierten Lösungen mit VBA und Spire.Doc for Python.
Für schnelle Bearbeitungen funktionieren die integrierten Tools von Word gut. Für wiederholte Aufgaben oder die Stapelverarbeitung hilft die Automatisierung mit VBA oder Spire.Doc for Python, die Bereinigung zu optimieren und die Dokumentenformatierung in größere Arbeitsabläufe zu integrieren.
FAQs
F1. Warum erscheinen nach der Konvertierung von PDFs in Word leere Zeilen?
PDF-Konverter fügen oft manuelle Zeilenumbrüche anstelle von echten Absätzen ein, die wie leere Zeilen aussehen.
F2. Was ist der Unterschied zwischen Eingabetaste und Umschalt + Eingabetaste?
Die Eingabetaste erstellt einen neuen Absatz (¶), während Umschalt + Eingabetaste einen manuellen Zeilenumbruch (↓/↵) innerhalb desselben Absatzes einfügt.
F3. Wie kann ich versteckte Strukturen von leeren Zeilen sehen?
Aktivieren Sie Formatierungszeichen mit Strg + Umschalt + 8.
F4. Wird das Entfernen von leeren Zeilen das Dokumentenlayout beeinflussen?
Es kann den Abstand oder die Paginierung ändern, daher überprüfen Sie die Formatierung nach der Bereinigung.
F5. Welche Methode ist am besten für große Mengen von Dateien geeignet?
Automatisierungsmethoden wie VBA-Makros oder Spire.Doc for Python sind ideal für die Stapelverarbeitung.